
Functional Instructions
Page 17
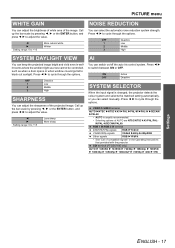
...HNTSC HNTSC 4.43 HPAL HPAL-M HPAL-N HSECAM HPAL60 • AUTO is changed, the projector detects the colour system and selects the matched setting automatically, or you can keep the ... usually recommended. • Selecting options of AUTO are NTSC/NTSC 4.43/PAL/PAL- SDI terminal (PT-DZ6710E only) AUTO H 1080⁄60i H 1035⁄60i H 720⁄60p H 1080⁄...H 576i Settings ENGLISH - 17 OFF 1 2 3 Deactive Low Middle High SYSTEM DAYLIGHT VIEW You can select manually. Press I H to +15 Less sharp More sharp AI You can select the automatic noise reduction system strength...
...HNTSC HNTSC 4.43 HPAL HPAL-M HPAL-N HSECAM HPAL60 • AUTO is changed, the projector detects the colour system and selects the matched setting automatically, or you can keep the ... usually recommended. • Selecting options of AUTO are NTSC/NTSC 4.43/PAL/PAL- SDI terminal (PT-DZ6710E only) AUTO H 1080⁄60i H 1035⁄60i H 720⁄60p H 1080⁄...H 576i Settings ENGLISH - 17 OFF 1 2 3 Deactive Low Middle High SYSTEM DAYLIGHT VIEW You can select manually. Press I H to +15 Less sharp More sharp AI You can select the automatic noise reduction system strength...
Functional Instructions
Page 23
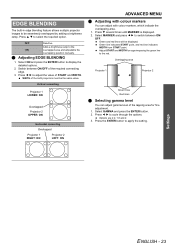
...overlapped area and adjustable the overlapping position manually. Q Adjusting EDGE BLENDING 1. Press I H to cycle through the options. OFF Deactive Adds a brightness ramp to select the required option. Overlapping area Projector 1 Projector 2 Green lines Red lines Q Selecting...and red lines will be the same value. WIDTH of the both projectors must be displayed. Vertical connecting Projector 1 LOWER: ON Overlapped Projector 2 UPPER: ON Horizontal connecting Overlapped Projector 1 RIGHT: ON Projector 2 LEFT: ON ADVANCED MENU Q Adjusting with colour markers, which...
...overlapped area and adjustable the overlapping position manually. Q Adjusting EDGE BLENDING 1. Press I H to cycle through the options. OFF Deactive Adds a brightness ramp to select the required option. Overlapping area Projector 1 Projector 2 Green lines Red lines Q Selecting...and red lines will be the same value. WIDTH of the both projectors must be displayed. Vertical connecting Projector 1 LOWER: ON Overlapped Projector 2 UPPER: ON Horizontal connecting Overlapped Projector 1 RIGHT: ON Projector 2 LEFT: ON ADVANCED MENU Q Adjusting with colour markers, which...
Functional Instructions
Page 37
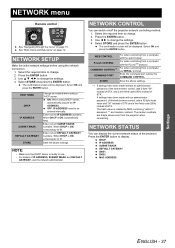
... before using DHCP server, automatically acquire an IP ADDRESS. Enter correct IP ADDRESS numbers. When DHCP is ON, unnecessary to be entered manually. Save the above settings. *1. Use I H to change the settings. 4. If settings have been made with the web browser. ..."admin1:", password, ":" and random numbers. Press the ENTER button. 3. The confirmation screen will be displayed. For when controlling from the projector when connecting. DHCP IP ADDRESS SUBNET MASK DEFAULT GATEWAY DNS1 DNS2 MAC ADDRESS Settings ENGLISH - 37 Select the required item to change . ...
... before using DHCP server, automatically acquire an IP ADDRESS. Enter correct IP ADDRESS numbers. When DHCP is ON, unnecessary to be entered manually. Save the above settings. *1. Use I H to change the settings. 4. If settings have been made with the web browser. ..."admin1:", password, ":" and random numbers. Press the ENTER button. 3. The confirmation screen will be displayed. For when controlling from the projector when connecting. DHCP IP ADDRESS SUBNET MASK DEFAULT GATEWAY DNS1 DNS2 MAC ADDRESS Settings ENGLISH - 37 Select the required item to change . ...


