
User Guide
Page 2
...information about the printer...17 Printer configurations...18 Selecting a location for the printer...20 Basic functions of the scanner...21 Understanding the ADF and scanner glass...22 Understanding the printer control panel...23 Understanding the home screen...24 Using the touch-screen buttons...25... Additional printer setup 29 Installing internal options...29 Available internal options...29 Accessing the system board to set up ...
...information about the printer...17 Printer configurations...18 Selecting a location for the printer...20 Basic functions of the scanner...21 Understanding the ADF and scanner glass...22 Understanding the printer control panel...23 Understanding the home screen...24 Using the touch-screen buttons...25... Additional printer setup 29 Installing internal options...29 Available internal options...29 Accessing the system board to set up ...
User Guide
Page 31
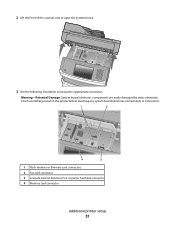
Touch something metal on the printer before touching any system board electronic components or connectors. 1 Flash memory or firmware card connectors 2 Fax card connector 3 Lexmark Internal Solutions Port or printer hard disk connector 4 Memory card connector Additional printer setup 31 Warning-Potential Damage: System board electronic components are easily damaged by static electricity. 2 Lift the front of the scanner unit to open the system board. 3 Use the following illustration to locate the appropriate connector.
Touch something metal on the printer before touching any system board electronic components or connectors. 1 Flash memory or firmware card connectors 2 Fax card connector 3 Lexmark Internal Solutions Port or printer hard disk connector 4 Memory card connector Additional printer setup 31 Warning-Potential Damage: System board electronic components are easily damaged by static electricity. 2 Lift the front of the scanner unit to open the system board. 3 Use the following illustration to locate the appropriate connector.

User Guide
Page 33
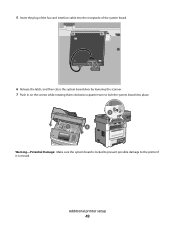
... latched vertical position and are secure against the card. 6 Release the system board access latch, and then close the system board door by lowering the scanner. 7 Push in the connector. 1 Notches 2 Ridges 5 Push the memory card straight into the connector until it is locked to prevent possible damage to lock the... memory card with the ridges in on the screws while rotating them clockwise a quarter turn to the printer if it clicks into place. Additional printer setup 33
... latched vertical position and are secure against the card. 6 Release the system board access latch, and then close the system board door by lowering the scanner. 7 Push in the connector. 1 Notches 2 Ridges 5 Push the memory card straight into the connector until it is locked to prevent possible damage to lock the... memory card with the ridges in on the screws while rotating them clockwise a quarter turn to the printer if it clicks into place. Additional printer setup 33

User Guide
Page 35
Notes: • The entire length of the connector on the system board. 1 Plastic pins 2 Metal pins 4 Push the card firmly into place. Additional printer setup 35 3 Holding the card by its sides, align the plastic pins on the card with the holes on the card must touch and be flush against the system board. • Be careful not to damage the connectors. 5 Release the latch, and then close the system board door by lowering the scanner.
Notes: • The entire length of the connector on the system board. 1 Plastic pins 2 Metal pins 4 Push the card firmly into place. Additional printer setup 35 3 Holding the card by its sides, align the plastic pins on the card with the holes on the card must touch and be flush against the system board. • Be careful not to damage the connectors. 5 Release the latch, and then close the system board door by lowering the scanner.

User Guide
Page 42
Additional printer setup 42 For more information, see "Installing a printer hard disk" on page 43. 13 Release the latch, and then close the system board door by lowering the scanner. 14 Push in on the screws while rotating them clockwise a quarter turn to the ISP. 12 If a printer hard disk was previously installed, then attach the printer hard disk to lock the system board into place. Warning-Potential Damage: Make sure the system board is locked to prevent possible damage to the printer if it is moved.
Additional printer setup 42 For more information, see "Installing a printer hard disk" on page 43. 13 Release the latch, and then close the system board door by lowering the scanner. 14 Push in on the screws while rotating them clockwise a quarter turn to the ISP. 12 If a printer hard disk was previously installed, then attach the printer hard disk to lock the system board into place. Warning-Potential Damage: Make sure the system board is locked to prevent possible damage to the printer if it is moved.

User Guide
Page 46
b Attach the two provided screws to secure the printer hard disk mounting bracket. c Insert the plug of the printer hard disk interface cable into the receptacle of the system board. Additional printer setup 46 Note: The plugs and receptacles are color coded. 4 Release the latch, and then close the system board door by lowering the scanner.
b Attach the two provided screws to secure the printer hard disk mounting bracket. c Insert the plug of the printer hard disk interface cable into the receptacle of the system board. Additional printer setup 46 Note: The plugs and receptacles are color coded. 4 Release the latch, and then close the system board door by lowering the scanner.
User Guide
Page 49
Additional printer setup 49 5 Insert the plug of the fax card interface cable into the receptacle of the system board. 6 Release the latch, and then close the system board door by lowering the scanner. 7 Push in on the screws while rotating them clockwise a quarter turn to the printer if it is moved. Warning-Potential Damage: Make sure the system board is locked to prevent possible damage to lock the system board into place.
Additional printer setup 49 5 Insert the plug of the fax card interface cable into the receptacle of the system board. 6 Release the latch, and then close the system board door by lowering the scanner. 7 Push in on the screws while rotating them clockwise a quarter turn to the printer if it is moved. Warning-Potential Damage: Make sure the system board is locked to prevent possible damage to lock the system board into place.
User Guide
Page 116
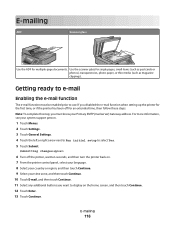
E-mailing 116 Use the scanner glass for multiple-page documents. For more information, see your system support person. 1 Touch Menus. 2 Touch Settings. 3 Touch General Settings. 4 Touch the left or right arrow next to Run initial setup to use. Submitting changes appears. 6 Turn off for the first ...language. 8 Select your country or region, and then touch Continue. 9 Select your Primary SMTP (mail server) Gateway address. E-mailing ADF Scanner glass Use the ADF for single pages, small items (such as postcards or photos), transparencies, photo paper, or thin media (such as magazine ...
E-mailing 116 Use the scanner glass for multiple-page documents. For more information, see your system support person. 1 Touch Menus. 2 Touch Settings. 3 Touch General Settings. 4 Touch the left or right arrow next to Run initial setup to use. Submitting changes appears. 6 Turn off for the first ...language. 8 Select your country or region, and then touch Continue. 9 Select your Primary SMTP (mail server) Gateway address. E-mailing ADF Scanner glass Use the ADF for single pages, small items (such as postcards or photos), transparencies, photo paper, or thin media (such as magazine ...
User Guide
Page 135
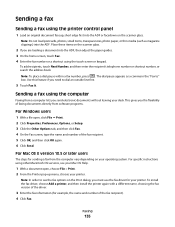
Note: In order to see your Mac OS Help. 1 With a document open , click File Print. 2 Click Properties, Preferences, Options, or Setup. 3 Click the Other Options tab, and then click Fax. 4 On the Fax screen, type the name and number of the fax recipient). 4 Click Fax...again. 6 Click Send. Sending a fax using the printer control panel 1 Load an original document faceup, short edge first into the ADF or facedown on the scanner glass. 2 If you are loading a document into the ADF. Sending a fax Sending a fax using the computer Faxing from a computer lets you send electronic ...
Note: In order to see your Mac OS Help. 1 With a document open , click File Print. 2 Click Properties, Preferences, Options, or Setup. 3 Click the Other Options tab, and then click Fax. 4 On the Fax screen, type the name and number of the fax recipient). 4 Click Fax...again. 6 Click Send. Sending a fax using the printer control panel 1 Load an original document faceup, short edge first into the ADF or facedown on the scanner glass. 2 If you are loading a document into the ADF. Sending a fax Sending a fax using the computer Faxing from a computer lets you send electronic ...
User Guide
Page 136
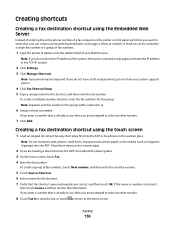
... TCP/IP section. 2 Click Settings. 3 Click Manage Shortcuts. Place these items on the scanner glass. 2 If you are correct, and then touch OK. To create a group of the printer, then print a network setup page and locate the IP address in use , then you do not know the IP address... shortcuts Creating a fax destination shortcut using the touch screen 1 Load an original document faceup, short edge first into the ADF or facedown on the scanner glass. If you enter a number that is incorrect, then touch Cancel, and then reenter the information. Note: A password may be created to the...
... TCP/IP section. 2 Click Settings. 3 Click Manage Shortcuts. Place these items on the scanner glass. 2 If you are correct, and then touch OK. To create a group of the printer, then print a network setup page and locate the IP address in use , then you do not know the IP address... shortcuts Creating a fax destination shortcut using the touch screen 1 Load an original document faceup, short edge first into the ADF or facedown on the scanner glass. If you enter a number that is incorrect, then touch Cancel, and then reenter the information. Note: A password may be created to the...
User Guide
Page 145
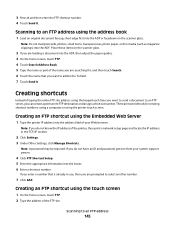
Note: If you are loading a document into the ADF or facedown on the scanner glass. Note: A password may be required. Creating shortcuts Instead of the printer, then print a network setup page and locate the IP address in use, then you are two methods for , and then touch Search. 6 Touch the name that... items, transparencies, photo paper, or thin media (such as magazine clippings) into the address field of the FTP site. Place these items on the scanner glass. 2 If you do not have an ID and password, get one from your Web browser. Creating an FTP shortcut using the keypad each time...
Note: If you are loading a document into the ADF or facedown on the scanner glass. Note: A password may be required. Creating shortcuts Instead of the printer, then print a network setup page and locate the IP address in use, then you are two methods for , and then touch Search. 6 Touch the name that... items, transparencies, photo paper, or thin media (such as magazine clippings) into the address field of the FTP site. Place these items on the scanner glass. 2 If you do not have an ID and password, get one from your Web browser. Creating an FTP shortcut using the keypad each time...
User Guide
Page 149
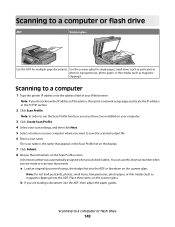
... shortcut number when you want to a computer 1 Type the printer IP address into the address field of the printer, then print a network setup page and locate the IP address in the Scan Profile list on the display. 7 Click Submit. 8 Review the instructions on your computer where...Click Create Scan Profile. 4 Select your scan settings, and then click Next. 5 Select a location on the Scan Profile screen. Place these items on the scanner glass. Scanning to save the scanned output file. 6 Enter a scan name. Note: Do not load postcards, photos, small items, transparencies, photo paper, or...
... shortcut number when you want to a computer 1 Type the printer IP address into the address field of the printer, then print a network setup page and locate the IP address in the Scan Profile list on the display. 7 Click Submit. 8 Review the instructions on your computer where...Click Create Scan Profile. 4 Select your scan settings, and then click Next. 5 Select a location on the Scan Profile screen. Place these items on the scanner glass. Scanning to save the scanned output file. 6 Enter a scan name. Note: Do not load postcards, photos, small items, transparencies, photo paper, or...
User Guide
Page 150
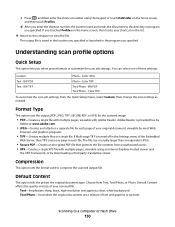
...-Used when the original documents are a mixture of your shortcut on the home screen, and then touch Profiles. Understanding scan profile options Quick Setup This option lets you specified. c Press # , and then enter the shortcut number using an Internet Explorer-hosted viewer and the .NET Framework...standalone viewer Compression This option sets the format used to compress the scanned output file. d After you enter the shortcut number, the scanner scans and sends the document to the directory or program you select preset formats or customize the scan job settings. You can select one...
...-Used when the original documents are a mixture of your shortcut on the home screen, and then touch Profiles. Understanding scan profile options Quick Setup This option lets you specified. c Press # , and then enter the shortcut number using an Internet Explorer-hosted viewer and the .NET Framework...standalone viewer Compression This option sets the format used to compress the scanned output file. d After you enter the shortcut number, the scanner scans and sends the document to the directory or program you select preset formats or customize the scan job settings. You can select one...
User Guide
Page 271
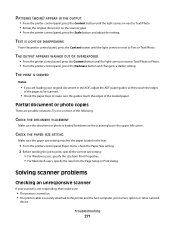
... Print Properties. • For Macintosh users, specify the size from the Page Setup or Print dialog. THE PRINT IS SKEWED Notes: • If you are possible solutions. Solving scanner problems Checking an unresponsive scanner If your original document in the upper left corner. PATTERNS (MOIRÉ) APPEAR... control panel, press the Content button until the light comes on next to Text/Photo. • Rotate the original document on the scanner glass. • From the printer control panel, press the Scale button and adjust the setting. Troubleshooting 271 Partial document or photo copies...
... Print Properties. • For Macintosh users, specify the size from the Page Setup or Print dialog. THE PRINT IS SKEWED Notes: • If you are possible solutions. Solving scanner problems Checking an unresponsive scanner If your original document in the upper left corner. PATTERNS (MOIRÉ) APPEAR... control panel, press the Content button until the light comes on next to Text/Photo. • Rotate the original document on the scanner glass. • From the printer control panel, press the Scale button and adjust the setting. Troubleshooting 271 Partial document or photo copies...

User Guide
Page 273
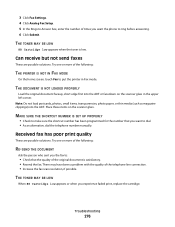
... 273 Try one or more of the following : CHECK THE DISPLAY FOR ERROR MESSAGES Clear any error messages. Cannot scan from the Page Setup or Print dialog. Solving fax problems Caller ID is not shown Contact your telecommunications company to verify that your telephone line is securely connected to... document or photo is satisfactory. CHECK THE QUALITY OF THE ORIGINAL DOCUMENT Make sure the quality of the original document is loaded facedown on the scanner glass in the tray: 1 From the printer control panel Paper menu, check the Paper Size setting. 2 Before sending the job to print, ...
... 273 Try one or more of the following : CHECK THE DISPLAY FOR ERROR MESSAGES Clear any error messages. Cannot scan from the Page Setup or Print dialog. Solving fax problems Caller ID is not shown Contact your telecommunications company to verify that your telephone line is securely connected to... document or photo is satisfactory. CHECK THE QUALITY OF THE ORIGINAL DOCUMENT Make sure the quality of the original document is loaded facedown on the scanner glass in the tray: 1 From the printer control panel Paper menu, check the Paper Size setting. 2 Before sending the job to print, ...
User Guide
Page 276
...load postcards, photos, small items, transparencies, photo paper, or thin media (such as magazine clippings) into the ADF or facedown on the scanner glass. MAKE SURE THE SHORTCUT NUMBER IS SET UP PROPERLY • Check to make sure the shortcut number has been programmed for the number... line connection. • Increase the fax scan resolution, if possible. Troubleshooting 276 Place these items on the scanner glass in Fax mode. 3 Click Fax Settings. 4 Click Analog Fax Setup. 5 In the Rings to Answer box, enter the number of times you experience faded print, replace the cartridge...
...load postcards, photos, small items, transparencies, photo paper, or thin media (such as magazine clippings) into the ADF or facedown on the scanner glass. MAKE SURE THE SHORTCUT NUMBER IS SET UP PROPERLY • Check to make sure the shortcut number has been programmed for the number... line connection. • Increase the fax scan resolution, if possible. Troubleshooting 276 Place these items on the scanner glass in Fax mode. 3 Click Fax Settings. 4 Click Analog Fax Setup. 5 In the Rings to Answer box, enter the number of times you experience faded print, replace the cartridge...
User Guide
Page 311
... shortcuts using the Embedded Web Server 117 creating shortcuts using the touch screen 118 e-mail setup 116 setting up e-mail function 117 using shortcut numbers 118 using the address book 119 using the scanner glass (flatbed) 106 Custom Names menu 161 custom paper type assigning 88 Custom Scan Sizes... menu 188 copy troubleshooting copier does not respond 269 partial document or photo copies 271 poor copy quality 270 poor scanned image quality 272 scanner unit does not close 269 copying adding a date and time stamp 111 adding an overlay message 112 adjusting quality 108 canceling a copy ...
... shortcuts using the Embedded Web Server 117 creating shortcuts using the touch screen 118 e-mail setup 116 setting up e-mail function 117 using shortcut numbers 118 using the address book 119 using the scanner glass (flatbed) 106 Custom Names menu 161 custom paper type assigning 88 Custom Scan Sizes... menu 188 copy troubleshooting copier does not respond 269 partial document or photo copies 271 poor copy quality 270 poor scanned image quality 272 scanner unit does not close 269 copying adding a date and time stamp 111 adding an overlay message 112 adjusting quality 108 canceling a copy ...
User Guide
Page 315
...Change: Load Tray 256 Queued for sending 256 Remove originals from the scanner ADF 256 Remove packaging material, check 256 Remove paper from Windows 96 installing printer software 53 menu settings page 52 network setup page 53 print quality test pages 103 two-sided (duplex) 96 printing... 220 Queued for sending 256 Quiet Mode 75 R recycled paper using 91 recycling 294 Lexmark packaging 74 Lexmark products 74 toner cartridges 75 WEEE statement 294 reducing a copy 108 Remove originals from the scanner ADF 256 Index 315 Remove packaging material, check 256 Remove paper from standard output bin...
...Change: Load Tray 256 Queued for sending 256 Remove originals from the scanner ADF 256 Remove packaging material, check 256 Remove paper from Windows 96 installing printer software 53 menu settings page 52 network setup page 53 print quality test pages 103 two-sided (duplex) 96 printing... 220 Queued for sending 256 Quiet Mode 75 R recycled paper using 91 recycling 294 Lexmark packaging 74 Lexmark products 74 toner cartridges 75 WEEE statement 294 reducing a copy 108 Remove originals from the scanner ADF 256 Index 315 Remove packaging material, check 256 Remove paper from standard output bin...

User Guide
Page 316
... have jagged edges 281 clipped images 282 ghost images 282 gray background 282 poor transparency quality 289 Contact system administrator. 257 SMTP Setup menu 166 Some held jobs do not print 267 incorrect characters print 268 incorrect margins 283 jammed page does not reprint 280 job... 88 tray unlinking 88 trays linking 87, 88 loading 78 unlinking 87, 88 troubleshooting checking an unresponsive printer 252 checking an unresponsive scanner 271 contacting Customer Support 290 solving basic printer problems 252 Index 316 troubleshooting, copy copier does not respond 269 partial document or photo...
... have jagged edges 281 clipped images 282 ghost images 282 gray background 282 poor transparency quality 289 Contact system administrator. 257 SMTP Setup menu 166 Some held jobs do not print 267 incorrect characters print 268 incorrect margins 283 jammed page does not reprint 280 job... 88 tray unlinking 88 trays linking 87, 88 loading 78 unlinking 87, 88 troubleshooting checking an unresponsive printer 252 checking an unresponsive scanner 271 contacting Customer Support 290 solving basic printer problems 252 Index 316 troubleshooting, copy copier does not respond 269 partial document or photo...
User Guide
Page 317
...273 partial document or photo scans 273 scan was not successful 272 scanner unit does not close 269 scanning takes too long or freezes the computer 272 U Universal Paper Size setting 77 Universal Setup menu 162 unlinking trays 87 Unsupported disk 258 Unsupported USB device, please...from Macintosh computer 100 printing from Windows 100 viewing reports 237 W Web site finding 17 Windows wireless network installation 56 wired network setup using Macintosh 63 using Windows 63 Wireless menu 169 wireless network configuration information 55 installation, using Macintosh 59 installation, using Windows ...
...273 partial document or photo scans 273 scan was not successful 272 scanner unit does not close 269 scanning takes too long or freezes the computer 272 U Universal Paper Size setting 77 Universal Setup menu 162 unlinking trays 87 Unsupported disk 258 Unsupported USB device, please...from Macintosh computer 100 printing from Windows 100 viewing reports 237 W Web site finding 17 Windows wireless network installation 56 wired network setup using Macintosh 63 using Windows 63 Wireless menu 169 wireless network configuration information 55 installation, using Macintosh 59 installation, using Windows ...


