User's Guide
Page 5
... Using the Embedded Web Server...254 Checking the device status...254 Setting up e-mail alerts...254 Viewing reports...255 Restoring the factory default settings...255 Troubleshooting 256 The indicator light is blinking...256 Solving basic printer problems...256 Understanding printer messages...257 Clearing jams...266 Solving printing problems...280 Solving copy...
... Using the Embedded Web Server...254 Checking the device status...254 Setting up e-mail alerts...254 Viewing reports...255 Restoring the factory default settings...255 Troubleshooting 256 The indicator light is blinking...256 Solving basic printer problems...256 Understanding printer messages...257 Clearing jams...266 Solving printing problems...280 Solving copy...
User's Guide
Page 9
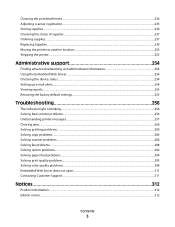
...setup instructions: • Connecting the printer • Installing the printer software Additional setup and instructions for and maintaining the printer • Troubleshooting and solving problems Help using the printer software Find it will be delighted to view context-sensitive information. Windows or Mac Help-Open a... printer software program or application, and then click Help. For updates, check our Web site at www.lexmark.com/publications/. Learning about the printer What are the reason we do what we want to perform basic tasks. To get back ...
...setup instructions: • Connecting the printer • Installing the printer software Additional setup and instructions for and maintaining the printer • Troubleshooting and solving problems Help using the printer software Find it will be delighted to view context-sensitive information. Windows or Mac Help-Open a... printer software program or application, and then click Help. For updates, check our Web site at www.lexmark.com/publications/. Learning about the printer What are the reason we do what we want to perform basic tasks. To get back ...

User's Guide
Page 10
...the printed warranty that came with your product to lift it here Lexmark Support Web site-support.lexmark.com Note: Select your region, and then select your printer. The latest supplemental information, updates, and technical support: • Troubleshooting hints and tips • Frequently asked questions • Documentation ... receipt and the back of the printer), and have it ready when you contact support so that came with this printer, or at support.lexmark.com. • Rest of the ASHRAE 62 standard. • Provide a flat, sturdy, and stable surface. • Keep the printer...
...the printed warranty that came with your product to lift it here Lexmark Support Web site-support.lexmark.com Note: Select your region, and then select your printer. The latest supplemental information, updates, and technical support: • Troubleshooting hints and tips • Frequently asked questions • Documentation ... receipt and the back of the printer), and have it ready when you contact support so that came with this printer, or at support.lexmark.com. • Rest of the ASHRAE 62 standard. • Provide a flat, sturdy, and stable surface. • Keep the printer...
User's Guide
Page 256
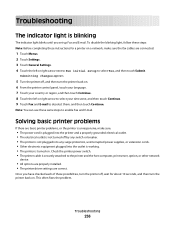
...your time zone, and then touch Continue. 9 Touch Fax and E-mail to deselect them, and then touch Continue. This often fixes the problem. Troubleshooting 256 Submitting changes appears. 5 Turn the printer off by any switch or breaker. • The printer is not plugged into any surge protectors, ...fax cables are correct. Note: You can use these same steps to enable Fax and E-mail. Once you set up Fax and E-mail. Troubleshooting The indicator light is blinking The indicator light blinks until you have checked each of these possibilities, turn the printer off, wait for a ...
...your time zone, and then touch Continue. 9 Touch Fax and E-mail to deselect them, and then touch Continue. This often fixes the problem. Troubleshooting 256 Submitting changes appears. 5 Turn the printer off by any switch or breaker. • The printer is not plugged into any surge protectors, ...fax cables are correct. Note: You can use these same steps to enable Fax and E-mail. Once you set up Fax and E-mail. Troubleshooting The indicator light is blinking The indicator light blinks until you have checked each of these possibilities, turn the printer off, wait for a ...

User's Guide
Page 257
... size and type are loaded in the tray, and this size and type are specified in the tray, the job is a paper size or type. Troubleshooting 257 Understanding printer messages Change to is a tray or feeder, and is not continued. • Touch Cancel job to cancel the current job. This may...
... size and type are loaded in the tray, and this size and type are specified in the tray, the job is a paper size or type. Troubleshooting 257 Understanding printer messages Change to is a tray or feeder, and is not continued. • Touch Cancel job to cancel the current job. This may...

User's Guide
Page 258
.... Try one or more of the following: • Load the specified paper in Fax Server mode, but the Fax Server setup has not been completed. Troubleshooting 258 If the message appears again, contact your system support person. Sending and receiving faxes is disabled until fax is configured properly. Try one or...
.... Try one or more of the following: • Load the specified paper in Fax Server mode, but the Fax Server setup has not been completed. Troubleshooting 258 If the message appears again, contact your system support person. Sending and receiving faxes is disabled until fax is configured properly. Try one or...

User's Guide
Page 259
... feeder with the correct paper type and size, then it prints from the default source. • Cancel the current job. Restore Held Jobs? Try one . Troubleshooting 259
... feeder with the correct paper type and size, then it prints from the default source. • Cancel the current job. Restore Held Jobs? Try one . Troubleshooting 259

User's Guide
Page 260
Troubleshooting 260 Touch Continue to clear the message. 38 Memory full Try one or more of the following: • Touch Continue to activate the link buffer ... MP Feeder Size is set to Universal, make sure the paper is large enough for the data being printed. • Cancel the current print job. 35 Insufficient memory to support Resource Save feature Try one or more of the following: • Touch Continue to disable Resource Save and continue printing. •...
Troubleshooting 260 Touch Continue to clear the message. 38 Memory full Try one or more of the following: • Touch Continue to activate the link buffer ... MP Feeder Size is set to Universal, make sure the paper is large enough for the data being printed. • Cancel the current print job. 35 Insufficient memory to support Resource Save feature Try one or more of the following: • Touch Continue to disable Resource Save and continue printing. •...

User's Guide
Page 261
.... • Turn the printer off and then back on to reset the printer. • Upgrade (flash) the network firmware in the printer or print server. Troubleshooting 261 Try one or more of the following: • Touch Continue to continue printing. • Turn the printer off and then back on to reset...
.... • Turn the printer off and then back on to reset the printer. • Upgrade (flash) the network firmware in the printer or print server. Troubleshooting 261 Try one or more of the following: • Touch Continue to continue printing. • Turn the printer off and then back on to reset...

User's Guide
Page 262
The printer discards any data received through the parallel port. • Make sure the Parallel Buffer menu item is not set to clear the message. Troubleshooting 262 55 Unsupported option in slot is a slot on . 56 Parallel port disabled is the number of the parallel port. The printer discards any data ...
The printer discards any data received through the parallel port. • Make sure the Parallel Buffer menu item is not set to clear the message. Troubleshooting 262 55 Unsupported option in slot is a slot on . 56 Parallel port disabled is the number of the parallel port. The printer discards any data ...
User's Guide
Page 263
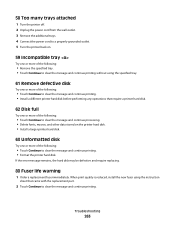
If the error message remains, the hard disk may be defective and require replacing. 80 Fuser life warning 1 Order a replacement fuser immediately. Troubleshooting 263 58 Too many trays attached 1 Turn the printer off. 2 Unplug the power cord from the wall outlet. 3 Remove the additional trays. 4 Connect the power ...
If the error message remains, the hard disk may be defective and require replacing. 80 Fuser life warning 1 Order a replacement fuser immediately. Troubleshooting 263 58 Too many trays attached 1 Turn the printer off. 2 Unplug the power cord from the wall outlet. 3 Remove the additional trays. 4 Connect the power ...
User's Guide
Page 264
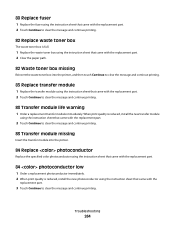
Troubleshooting 264 When print quality is reduced, install the new transfer module using the instruction sheet that came with the replacement part. 2 Touch Continue to clear ...
Troubleshooting 264 When print quality is reduced, install the new transfer module using the instruction sheet that came with the replacement part. 2 Touch Continue to clear ...
User's Guide
Page 265
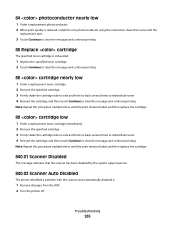
Troubleshooting 265 84 photoconductor nearly low 1 Order a replacement photoconductor. 2 When print quality is reduced, install the new photoconductor using the instruction sheet that the scanner has ...
Troubleshooting 265 84 photoconductor nearly low 1 Order a replacement photoconductor. 2 When print quality is reduced, install the new photoconductor using the instruction sheet that the scanner has ...
User's Guide
Page 266
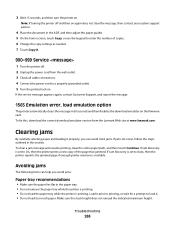
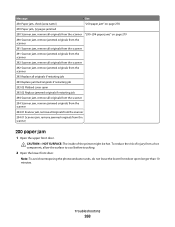
... the wall outlet. 3 Check all cable connections. 4 Connect the power cord to enter the number of the page that jammed. If Jam Recovery is available. Troubleshooting 266 If Jam Recovery is set to Auto, then the printer reprints the jammed page if enough printer memory is set to load it properly...; Do not load the paper tray while the printer is printing. Note: If turning the printer off . 2 Unplug the power cord from the Lexmark Web site at www.lexmark.com. Make sure the stack height does not exceed the indicated maximum height. Load it prior to printing, or wait for a prompt to...
... the wall outlet. 3 Check all cable connections. 4 Connect the power cord to enter the number of the page that jammed. If Jam Recovery is available. Troubleshooting 266 If Jam Recovery is set to Auto, then the printer reprints the jammed page if enough printer memory is set to load it properly...; Do not load the paper tray while the printer is printing. Note: If turning the printer off . 2 Unplug the power cord from the Lexmark Web site at www.lexmark.com. Make sure the stack height does not exceed the indicated maximum height. Load it prior to printing, or wait for a prompt to...
User's Guide
Page 267
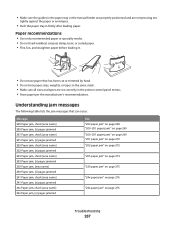
... 272 "203 paper jam" on page 274 "230 paper jam" on page 275 "24x paper jam" on page 276 "24x paper jam" on page 276 Troubleshooting 267 Understanding jam messages The following table lists the jam messages that has been cut or trimmed by hand. • Do not mix paper sizes...
... 272 "203 paper jam" on page 274 "230 paper jam" on page 275 "24x paper jam" on page 276 "24x paper jam" on page 276 Troubleshooting 267 Understanding jam messages The following table lists the jam messages that has been cut or trimmed by hand. • Do not mix paper sizes...
User's Guide
Page 268
... Replace jammed originals if restarting job 293.02 Flatbed cover open longer than 10 minutes. To reduce the risk of the printer might be hot. Troubleshooting 268 Message See 250 Paper jam, check [area name] "250 paper jam" on page 278 250 Paper jam, [x] pages jammed 290 Scanner jam, remove all...
... Replace jammed originals if restarting job 293.02 Flatbed cover open longer than 10 minutes. To reduce the risk of the printer might be hot. Troubleshooting 268 Message See 250 Paper jam, check [area name] "250 paper jam" on page 278 250 Paper jam, [x] pages jammed 290 Scanner jam, remove all...

User's Guide
Page 269
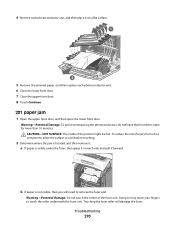
... cartridge area. To reduce the risk of the printer might be hot. Note: You may need to cool before touching. 2 Open the lower front door. Troubleshooting 269 Note: Make sure all paper fragments are removed. 4 Close the lower front door. 5 Close the upper front door. 6 Touch Continue. 200-201 paper jams...
... cartridge area. To reduce the risk of the printer might be hot. Note: You may need to cool before touching. 2 Open the lower front door. Troubleshooting 269 Note: Make sure all paper fragments are removed. 4 Close the lower front door. 5 Close the upper front door. 6 Touch Continue. 200-201 paper jams...
User's Guide
Page 270
CAUTION-HOT SURFACE: The inside of the fuser unit. Troubleshooting 270 b If paper is not visible, then you will damage the fuser. Touching the fuser roller will need to cool before touching. 2 Determine where the ...
CAUTION-HOT SURFACE: The inside of the fuser unit. Troubleshooting 270 b If paper is not visible, then you will damage the fuser. Touching the fuser roller will need to cool before touching. 2 Determine where the ...

User's Guide
Page 271
1 Turn the screws on the fuser to the left to loosen them. 2 Lift the handholds on each side of the fuser, and then pull forward to remove it. 3 Remove the jammed paper. 4 Align the fuser unit using the handholds on each side, and then place it back into the printer. 5 Turn the screws to the right to fasten the fuser securely. 3 Close the lower front door, and then close the upper front door. 4 Touch Continue. Troubleshooting 271
1 Turn the screws on the fuser to the left to loosen them. 2 Lift the handholds on each side of the fuser, and then pull forward to remove it. 3 Remove the jammed paper. 4 Align the fuser unit using the handholds on each side, and then place it back into the printer. 5 Turn the screws to the right to fasten the fuser securely. 3 Close the lower front door, and then close the upper front door. 4 Touch Continue. Troubleshooting 271
User's Guide
Page 272
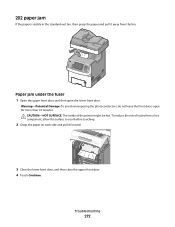
CAUTION-HOT SURFACE: The inside of injury from the bin. To reduce the risk of the printer might be hot. Troubleshooting 272 Paper jam under the fuser 1 Open the upper front door, and then open for more than 10 minutes. 202 paper jam If the paper ...
CAUTION-HOT SURFACE: The inside of injury from the bin. To reduce the risk of the printer might be hot. Troubleshooting 272 Paper jam under the fuser 1 Open the upper front door, and then open for more than 10 minutes. 202 paper jam If the paper ...


