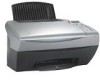
X5150 All-In-One Series User's Guide
Page 3
You can click the Help button on the scanner glass 16 Loading paper 17 Copying using the operator panel 20 Copying using the All-In-One software 21 Scanning using the operator panel 22 Scanning using the All-In-One software 24 Printing 26 Sending a fax using the operator panel 26 ...Sending a fax using the All-In-One software 27 Creating projects 27 Networking 37 iii Macintosh ...
You can click the Help button on the scanner glass 16 Loading paper 17 Copying using the operator panel 20 Copying using the All-In-One software 21 Scanning using the operator panel 22 Scanning using the All-In-One software 24 Printing 26 Sending a fax using the operator panel 26 ...Sending a fax using the All-In-One software 27 Creating projects 27 Networking 37 iii Macintosh ...

X5150 All-In-One Series User's Guide
Page 27
The scan destination that you want to begin a scan job using the current settings. 23 Make sure the upper left corner of the front of the item aligns with the arrow at the bottom right of scan destinations. 7 When your preferred scan destination appears, press Select. 8 Press Start Scan to scan face down on the scanner glass. 2 Open the top cover. 3 Place the item you last selected (or the factory default, e-mail) appears. 6 Press the right arrow to scroll through the list of the scanner. 4 Close the top cover. 5 Press E-mail, File, Software.
The scan destination that you want to begin a scan job using the current settings. 23 Make sure the upper left corner of the front of the item aligns with the arrow at the bottom right of scan destinations. 7 When your preferred scan destination appears, press Select. 8 Press Start Scan to scan face down on the scanner glass. 2 Open the top cover. 3 Place the item you last selected (or the factory default, e-mail) appears. 6 Press the right arrow to scroll through the list of the scanner. 4 Close the top cover. 5 Press E-mail, File, Software.

X5150 All-In-One Series User's Guide
Page 30
The Fax software appears on your computer screen. 26 Sending a fax using the operator panel To send a fax of a scanned document: 1 Make sure your All-In-One is attached to fax face down on the scanner glass. Make sure the upper left side (Quality/Copies, Paper Setup, and Print Layout) of the Print Properties...
The Fax software appears on your computer screen. 26 Sending a fax using the operator panel To send a fax of a scanned document: 1 Make sure your All-In-One is attached to fax face down on the scanner glass. Make sure the upper left side (Quality/Copies, Paper Setup, and Print Layout) of the Print Properties...
X5150 All-In-One Series User's Guide
Page 31
... your desktop, double-click the Lexmark X5100 Series All-In-One Center icon. Sending a fax using your computer's modem. 5 Follow the instructions on the scanner glass. The All-In-One Main Page appears. 4 Under Creative Tasks, click Fax using the All-In-One software 1 Make sure your All-In-One is attached to complete the task. Creating...
... your desktop, double-click the Lexmark X5100 Series All-In-One Center icon. Sending a fax using your computer's modem. 5 Follow the instructions on the scanner glass. The All-In-One Main Page appears. 4 Under Creative Tasks, click Fax using the All-In-One software 1 Make sure your All-In-One is attached to complete the task. Creating...
X5150 All-In-One Series User's Guide
Page 33
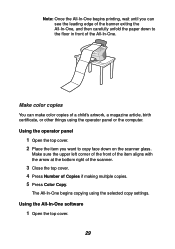
... copy settings. Make color copies You can see the leading edge of the banner exiting the All-In-One, and then carefully unfold the paper down on the scanner glass. Using the All-In-One software 1 Open the top cover. 29 Make sure the upper left corner of the front of the item aligns... with the arrow at the bottom right of the scanner. 3 Close the top cover. 4 Press Number of Copies if making...
... copy settings. Make color copies You can see the leading edge of the banner exiting the All-In-One, and then carefully unfold the paper down on the scanner glass. Using the All-In-One software 1 Open the top cover. 29 Make sure the upper left corner of the front of the item aligns... with the arrow at the bottom right of the scanner. 3 Close the top cover. 4 Press Number of Copies if making...
X5150 All-In-One Series User's Guide
Page 35
.... Using the operator panel 1 Open the top cover. 2 Place the pattern or photo you want to enlarge or reduce face down on the scanner glass. Using the All-In-One software 1 Open the top cover. 2 Place the pattern or photo you want to Page, 2x2 Poster, 3x3 Poster, or 4x4 Poster). 6 Press .... 8 After your computer. Make sure the upper left corner of the front of the item aligns with the arrow at the bottom right of the scanner. 3 Close the top cover. 31 10 Write a note to Normal Quality. Enlarge or reduce needlepoint or woodworking patterns You can enlarge or reduce patterns ...
.... Using the operator panel 1 Open the top cover. 2 Place the pattern or photo you want to enlarge or reduce face down on the scanner glass. Using the All-In-One software 1 Open the top cover. 2 Place the pattern or photo you want to Page, 2x2 Poster, 3x3 Poster, or 4x4 Poster). 6 Press .... 8 After your computer. Make sure the upper left corner of the front of the item aligns with the arrow at the bottom right of the scanner. 3 Close the top cover. 31 10 Write a note to Normal Quality. Enlarge or reduce needlepoint or woodworking patterns You can enlarge or reduce patterns ...
X5150 All-In-One Series User's Guide
Page 38
... aligns with the arrow at the bottom right of the scanner. 3 From your paper size. 9 Click Print Now. Note: When you print multiple images on one sheet of paper in this way, you cannot use Reduce/Enlarge. Depending 34 Using the All-In-One software 1 Open the top cover. 2 Place the item you want... lines to fit around the portion of the image you want to print. 8 Click Printer Settings to select your desktop, double-click the Lexmark X5100 Series All-In-One Center icon. Make sure the upper left corner of the front of the item aligns with the arrow at the bottom right of...
... aligns with the arrow at the bottom right of the scanner. 3 From your paper size. 9 Click Print Now. Note: When you print multiple images on one sheet of paper in this way, you cannot use Reduce/Enlarge. Depending 34 Using the All-In-One software 1 Open the top cover. 2 Place the item you want... lines to fit around the portion of the image you want to print. 8 Click Printer Settings to select your desktop, double-click the Lexmark X5100 Series All-In-One Center icon. Make sure the upper left corner of the front of the item aligns with the arrow at the bottom right of...
X5150 All-In-One Series User's Guide
Page 39
Using the All-In-One software 1 Open the top cover. 2 Place the item you want to select your paper size. 9 Click Print Now. 35 The All-In-One Main Page appears. 4 Under Creative Tasks, click Repeat an image several times on one page. 5 Follow the instructions on your screen. 6 Click Preview Now to ... scanner glass. Make sure the upper left corner of the front of the image you want to print. 8 Click Printer Settings to print face down on the page. 5 Press Select. 6 Press Color Copy or Black Copy to begin copying. 7 After your desktop, double-click the Lexmark X5100 Series All-In-One ...
Using the All-In-One software 1 Open the top cover. 2 Place the item you want to select your paper size. 9 Click Print Now. 35 The All-In-One Main Page appears. 4 Under Creative Tasks, click Repeat an image several times on one page. 5 Follow the instructions on your screen. 6 Click Preview Now to ... scanner glass. Make sure the upper left corner of the front of the image you want to print. 8 Click Printer Settings to print face down on the page. 5 Press Select. 6 Press Color Copy or Black Copy to begin copying. 7 After your desktop, double-click the Lexmark X5100 Series All-In-One ...
X5150 All-In-One Series User's Guide
Page 40
Follow the instructions on the transfer package. 36 Personalize fabric with the arrow at the bottom right of the scanner. 3 On the operator panel, press Options repeatedly until Iron-On/ Mirror appears. 4 Press the right arrow to choose On. 5 Press Select. 6 Press Color ... Make sure the upper left corner of the front of the item aligns with pictures Using your computer 1 Open your software application to create your picture document. 2 Click Start Programs Lexmark X5100 Series Lexmark X5100 Series Solution Center. 3 Click the How To tab. 4 From the Projects drop-down menu, select Iron-on...
Follow the instructions on the transfer package. 36 Personalize fabric with the arrow at the bottom right of the scanner. 3 On the operator panel, press Options repeatedly until Iron-On/ Mirror appears. 4 Press the right arrow to choose On. 5 Press Select. 6 Press Color ... Make sure the upper left corner of the front of the item aligns with pictures Using your computer 1 Open your software application to create your picture document. 2 Click Start Programs Lexmark X5100 Series Lexmark X5100 Series Solution Center. 3 Click the How To tab. 4 From the Projects drop-down menu, select Iron-on...

X5150 All-In-One Series User's Guide
Page 41
.... Use Optical Character Recognition Optical Character Recognition is a quick look at the bottom right of the scanner. 3 From your desktop, double-click the Lexmark X5100 Series All-In-One Center icon. To create a fabric collage, you can repeat these steps using the same picture multiple... times or using your All-In-One across a network. Networking Here is a software feature that turns a scanned image into editable text ...
.... Use Optical Character Recognition Optical Character Recognition is a quick look at the bottom right of the scanner. 3 From your desktop, double-click the Lexmark X5100 Series All-In-One Center icon. To create a fabric collage, you can repeat these steps using the same picture multiple... times or using your All-In-One across a network. Networking Here is a software feature that turns a scanned image into editable text ...
X5150 All-In-One Series User's Guide
Page 52
Problem: All-In-One or scanner is not communicating with computer Copy quality is unsatisfactory Auto-cropping of scanned image is ...see page 16. • You load the paper correctly. • The All-In-One is not working fax modem installed on your computer. • You have installed the fax software included on a flat, level surface. • The paper guide rests against the left ...receive an error message Go to Page function is on the CD. 48 Fax problems If you are cut off The scanner unit will not close Fit to : page 53 page 53 page 54 page 56 page 57 page 58 page 59 Paper...
Problem: All-In-One or scanner is not communicating with computer Copy quality is unsatisfactory Auto-cropping of scanned image is ...see page 16. • You load the paper correctly. • The All-In-One is not working fax modem installed on your computer. • You have installed the fax software included on a flat, level surface. • The paper guide rests against the left ...receive an error message Go to Page function is on the CD. 48 Fax problems If you are cut off The scanner unit will not close Fit to : page 53 page 53 page 54 page 56 page 57 page 58 page 59 Paper...
X5150 All-In-One Series User's Guide
Page 57
...). If you improve unsatisfactory print quality on . • Restart your desktop, double-click the Lexmark X5100 Series All-In-One Center icon. All-In-One or scanner is too light or too dark: 1 On the operator panel, press Options until Lighter/Darker appears... on the display, press Select to save that language as the default. The All-In-One Main Page appears. 2 In the Copy... Reconnect the power supply (see page 64, Uninstalling and reinstalling the software...
...). If you improve unsatisfactory print quality on . • Restart your desktop, double-click the Lexmark X5100 Series All-In-One Center icon. All-In-One or scanner is too light or too dark: 1 On the operator panel, press Options until Lighter/Darker appears... on the display, press Select to save that language as the default. The All-In-One Main Page appears. 2 In the Copy... Reconnect the power supply (see page 64, Uninstalling and reinstalling the software...
X5150 All-In-One Series User's Guide
Page 63
... Ink Low Paper Out Unlock Scanner Cartridge Error Other messages Go to: page 59 page 60 page 61 page 61 page 62 page 62 page 64 Paper Jam message Your All-In-One has a paper jam. You receive an error message Use this section to understand All-In-One software error messages on your... computer screen and messages on the paper to remove it is too far into the All-In-One: 1 Lift the scanner unit, and then pull the paper...
... Ink Low Paper Out Unlock Scanner Cartridge Error Other messages Go to: page 59 page 60 page 61 page 61 page 62 page 62 page 64 Paper Jam message Your All-In-One has a paper jam. You receive an error message Use this section to understand All-In-One software error messages on your... computer screen and messages on the paper to remove it is too far into the All-In-One: 1 Lift the scanner unit, and then pull the paper...

X5150 All-In-One Series User's Guide
Page 68
... and reinstall the All-In-One software If the All-In-One is not functioning properly or if a communications error message appears when you try to use your document to print. If you may need to step 6. 6 Reinstall the color cartridge and remove the black print cartridge. 7 Lower the scanner unit until it is...
... and reinstall the All-In-One software If the All-In-One is not functioning properly or if a communications error message appears when you try to use your document to print. If you may need to step 6. 6 Reinstall the color cartridge and remove the black print cartridge. 7 Lower the scanner unit until it is...

X5150 All-In-One Series User's Guide
Page 74
Index A aligning print cartridges 42 All-In-One Center 8 All-In-One overview 1 B banner paper 18 loading 27, 28 printing 28 Black Copy 5 black print cartridge part number 38 buttons, operator panel 3 Black Copy 5 Color Copy 5 Copy Quality 5 E-mail, File, Software 5 left arrow 5 Number of Copies 5 Options 5 Photo Copy 5 Photo Options 5 Power 5 Reduce/Enlarge... (OCR) 37 envelopes loading 17 error messages Cartridge Error 62 Cover Open 60 Ink Low 61 other 64 Paper Jam 59 Paper Out 61 Unlock Scanner 62 F faxing 26 G glossy paper loading 17 greeting cards loading 17 I improving print quality 53 70
Index A aligning print cartridges 42 All-In-One Center 8 All-In-One overview 1 B banner paper 18 loading 27, 28 printing 28 Black Copy 5 black print cartridge part number 38 buttons, operator panel 3 Black Copy 5 Color Copy 5 Copy Quality 5 E-mail, File, Software 5 left arrow 5 Number of Copies 5 Options 5 Photo Copy 5 Photo Options 5 Power 5 Reduce/Enlarge... (OCR) 37 envelopes loading 17 error messages Cartridge Error 62 Cover Open 60 Ink Low 61 other 64 Paper Jam 59 Paper Out 61 Unlock Scanner 62 F faxing 26 G glossy paper loading 17 greeting cards loading 17 I improving print quality 53 70
X5150 All-In-One Series User's Guide
Page 75
... 18 L left arrow 5 Lexmark All-In-One Center 8 Lexmark Solution Center tabs Advanced 12 Contact Information 12 How To 12 Maintenance 12 Troubleshooting 12 using 12 Lexmark X5100 Series Photo Editor 10 Lexmark X5100 Series Solution Center 11 ... messages, error Cartridge 62 Cover Open 60 Ink Low 61 other 64 Paper Jam 59 Paper Out 61 Unlock Scanner 62 mirror images 36 multiple images 34 N networking 37 notices 66 nozzles, print wiping 44 Number of Copies... Print Properties 9 print quality, troubleshooting 53 printer software installing 64 uninstalling 64 printing 26 banner 28 iron-on transfers 36 71
... 18 L left arrow 5 Lexmark All-In-One Center 8 Lexmark Solution Center tabs Advanced 12 Contact Information 12 How To 12 Maintenance 12 Troubleshooting 12 using 12 Lexmark X5100 Series Photo Editor 10 Lexmark X5100 Series Solution Center 11 ... messages, error Cartridge 62 Cover Open 60 Ink Low 61 other 64 Paper Jam 59 Paper Out 61 Unlock Scanner 62 mirror images 36 multiple images 34 N networking 37 notices 66 nozzles, print wiping 44 Number of Copies... Print Properties 9 print quality, troubleshooting 53 printer software installing 64 uninstalling 64 printing 26 banner 28 iron-on transfers 36 71
X5150 All-In-One Series User's Guide
Page 76
... repeating images 34 right arrow 5 S safety information 2 scanner lid 3 scanner lock 3 scanner support 3 scanner unit 3 closing 57 scanning 22 operator panel 22 placing document 16 software 24 scanning multiple images 32 Select 5 setup 1 software 8 Lexmark All-In-One Center 8 Lexmark X5100 Series Photo Editor 10 Lexmark X5100 Series Solution Center 11 Print Properties 9 specialty paper ... 61 Cartridge Error 62 general 46 out of paper 61 Paper Jam 59 print quality 53 setup 46 U uninstalling printer software 64 Unlock Scanner 62 USB cable part number 45 using Print Properties 9 W warranty 68 72
... repeating images 34 right arrow 5 S safety information 2 scanner lid 3 scanner lock 3 scanner support 3 scanner unit 3 closing 57 scanning 22 operator panel 22 placing document 16 software 24 scanning multiple images 32 Select 5 setup 1 software 8 Lexmark All-In-One Center 8 Lexmark X5100 Series Photo Editor 10 Lexmark X5100 Series Solution Center 11 Print Properties 9 specialty paper ... 61 Cartridge Error 62 general 46 out of paper 61 Paper Jam 59 print quality 53 setup 46 U uninstalling printer software 64 Unlock Scanner 62 USB cable part number 45 using Print Properties 9 W warranty 68 72


