
User's Guide
Page 25
... printer. This option appears only when there is 0000) in the Easy Photo menu plus: • Apply color effects to the photos. • Adjust the quality, layout, and brightness of a photo. • Print photos using Digital Print Order Format (DPOF). Note: Use this menu if you may be downloaded... computer requires it. • Use the arrow buttons to increase or decrease the value for each digit (the default value is a valid DPOF file in printers connected to a network) • USB Flash Drive • Memory Card Notes: • If you choose a computer as the destination, then a list ...
... printer. This option appears only when there is 0000) in the Easy Photo menu plus: • Apply color effects to the photos. • Adjust the quality, layout, and brightness of a photo. • Print photos using Digital Print Order Format (DPOF). Note: Use this menu if you may be downloaded... computer requires it. • Use the arrow buttons to increase or decrease the value for each digit (the default value is a valid DPOF file in printers connected to a network) • USB Flash Drive • Memory Card Notes: • If you choose a computer as the destination, then a list ...
User's Guide
Page 29
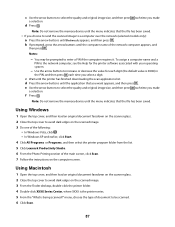
... of the printer. Note: If you want to turn the printer back on ... press . Using the printer software Installing printer software Using Windows 1 Close all open software programs. 2 Insert the printer software CD. 3 From...the Power Saver timeout to be efficient on your printer. 1 From the printer control panel, press . 2 Press the arrow ...software applications. 2 Insert the printer software CD. 3 From the Finder desktop, double-click the printer CD icon that automatically appears. ...the printer is the time it takes for the printer to switch to the Lexmark Web site at www.lexmark.com....
... of the printer. Note: If you want to turn the printer back on ... press . Using the printer software Installing printer software Using Windows 1 Close all open software programs. 2 Insert the printer software CD. 3 From...the Power Saver timeout to be efficient on your printer. 1 From the printer control panel, press . 2 Press the arrow ...software applications. 2 Insert the printer software CD. 3 From the Finder desktop, double-click the printer CD icon that automatically appears. ...the printer is the time it takes for the printer to switch to the Lexmark Web site at www.lexmark.com....

User's Guide
Page 30
...extract the driver files from the installation software CD. The Install From Disk dialog appears. 6 Click Browse, and then navigate to download the driver and install the printer software. To install the Microsoft QFE Patch and extract the driver: 1 Insert the installation software CD, and then click Cancel ... only for USB, and then click Next. 5 Click Have disk. Notes: • Before installing the XPS driver, you must install the printer on the installation software CD. For more information on the XPS driver, see the XPS readme file on your computer, and any required Microsoft ...
...extract the driver files from the installation software CD. The Install From Disk dialog appears. 6 Click Browse, and then navigate to download the driver and install the printer software. To install the Microsoft QFE Patch and extract the driver: 1 Insert the installation software CD, and then click Cancel ... only for USB, and then click Next. 5 Click Have disk. Notes: • Before installing the XPS driver, you must install the printer on the installation software CD. For more information on the XPS driver, see the XPS readme file on your computer, and any required Microsoft ...

User's Guide
Page 75
...the default Image Capture application in Macintosh If the printer is connected to a computer through a USB cable, and you can transfer photos from the list. 3 Click Lexmark Productivity Studio. 4 From the Photo Printing section of the main screen, click Download to library. 5 Browse to the location of ... the thumbnails, then click and drag the slider . 6 Select the photos that you want to the computer through a network: 1 Do one of the following: - The printer may require that you select a computer (and a PIN, if required by that computer). 1 Insert a memory card, flash drive or ...
...the default Image Capture application in Macintosh If the printer is connected to a computer through a USB cable, and you can transfer photos from the list. 3 Click Lexmark Productivity Studio. 4 From the Photo Printing section of the main screen, click Download to library. 5 Browse to the location of ... the thumbnails, then click and drag the slider . 6 Select the photos that you want to the computer through a network: 1 Do one of the following: - The printer may require that you select a computer (and a PIN, if required by that computer). 1 Insert a memory card, flash drive or ...
User's Guide
Page 78
... computer using Windows: 1 Do one of the following: • In Windows Vista, click . • In Windows XP and earlier, click Start. 2 Click All Programs or Programs, and then select the printer program folder from the list. 3 Click Lexmark Productivity Studio. 4 From the Photo Printing section of the main screen, click Download to library. 5 Browse...
... computer using Windows: 1 Do one of the following: • In Windows Vista, click . • In Windows XP and earlier, click Start. 2 Click All Programs or Programs, and then select the printer program folder from the list. 3 Click Lexmark Productivity Studio. 4 From the Photo Printing section of the main screen, click Download to library. 5 Browse...
User's Guide
Page 86
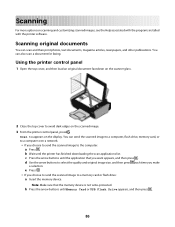
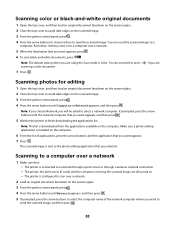
...; If you choose to send the scanned image to avoid dark edges on the display. Note: Make sure that you make a selection. Using the printer control panel 1 Open the top cover, and then load an original document facedown on the scanner glass. 2 Close the top cover to the computer... device is not write-protected. d Use the arrow buttons to appears on the scanned image. 3 From the printer control panel, press . b Press the arrow buttons until the printer has finished downloading the scan applications list. b Wait until Memory Card or USB Flash Drive appears, and then press . 86...
...; If you choose to send the scanned image to avoid dark edges on the display. Note: Make sure that you make a selection. Using the printer control panel 1 Open the top cover, and then load an original document facedown on the scanner glass. 2 Close the top cover to the computer... device is not write-protected. d Use the arrow buttons to appears on the scanned image. 3 From the printer control panel, press . b Press the arrow buttons until the printer has finished downloading the scan applications list. b Wait until Memory Card or USB Flash Drive appears, and then press . 86...
User's Guide
Page 87
... indicates that you make a selection. Use the arrow buttons to increase or decrease the value for the printer software associated with your operating system. - d Press the arrow buttons until Network appears, and then press... Do one of the following: • In Windows Vista, click . • In Windows XP and earlier, click Start. 4 Click All Programs or Programs, and then select the printer program folder from the list. 5 Click Lexmark Productivity Studio... screen. b If prompted, press the arrow buttons until the printer has finished downloading the scan applications list.
... indicates that you make a selection. Use the arrow buttons to increase or decrease the value for the printer software associated with your operating system. - d Press the arrow buttons until Network appears, and then press... Do one of the following: • In Windows Vista, click . • In Windows XP and earlier, click Start. 4 Click All Programs or Programs, and then select the printer program folder from the list. 5 Click Lexmark Productivity Studio... screen. b If prompted, press the arrow buttons until the printer has finished downloading the scan applications list.
User's Guide
Page 88
... print server (if used), and the computer receiving the scanned image are all turned on. • The printer is sent to finish downloading the applications list. You do not need to send the scanned image, and then press . 88 Note: If you choose Network, you will be asked ...to a computer over a network. 2 Load an original document facedown on the scanner glass. 3 From the printer control panel, press . 4 Press the arrow ...
... print server (if used), and the computer receiving the scanned image are all turned on. • The printer is sent to finish downloading the applications list. You do not need to send the scanned image, and then press . 88 Note: If you choose Network, you will be asked ...to a computer over a network. 2 Load an original document facedown on the scanner glass. 3 From the printer control panel, press . 4 Press the arrow ...
User's Guide
Page 89
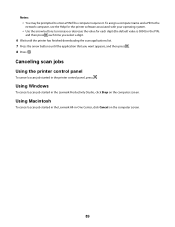
... if the computer requires it. Using Macintosh To cancel a scan job started in the Lexmark Productivity Studio, click Stop on the computer screen. 89 Using Windows To cancel a scan job started in the Lexmark All-in-One Center, click Cancel on the computer screen. Notes: • You may be prompted ...to increase or decrease the value for each digit (the default value is 0000) in the PIN, and then press each time you select a digit. 6 Wait until the printer has finished downloading the...
... if the computer requires it. Using Macintosh To cancel a scan job started in the Lexmark Productivity Studio, click Stop on the computer screen. 89 Using Windows To cancel a scan job started in the Lexmark All-in-One Center, click Cancel on the computer screen. Notes: • You may be prompted ...to increase or decrease the value for each digit (the default value is 0000) in the PIN, and then press each time you select a digit. 6 Wait until the printer has finished downloading the...

User's Guide
Page 98
... levels of the cartridges. 1 Do one of the following: • In Windows Vista, click . • In Windows XP and earlier, click Start. 2 Click All Programs or Programs, and then select the printer program folder from the list. 3 Select Lexmark Service Center. 4 If you have not yet downloaded the Lexmark Service Center, download it. 5 Check the ink...
... levels of the cartridges. 1 Do one of the following: • In Windows Vista, click . • In Windows XP and earlier, click Start. 2 Click All Programs or Programs, and then select the printer program folder from the list. 3 Select Lexmark Service Center. 4 If you have not yet downloaded the Lexmark Service Center, download it. 5 Check the ink...
User's Guide
Page 108
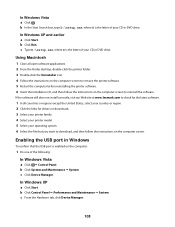
...the software still does not install correctly, visit our Web site at www.lexmark.com to check for the latest software. 1 In all open software applications. 2 From the Finder desktop, double-click the printer folder. 3 Double-click the Uninstaller icon. 4 Follow the instructions on ...the computer screen to remove the printer software. 5 Restart the computer before reinstalling the printer software. 6 Insert the installation CD, and then follow the instructions on the computer screen to download, and then follow the instructions on the computer: 1 Do one of the following: In Windows Vista a...
...the software still does not install correctly, visit our Web site at www.lexmark.com to check for the latest software. 1 In all open software applications. 2 From the Finder desktop, double-click the printer folder. 3 Double-click the Uninstaller icon. 4 Follow the instructions on ...the computer screen to remove the printer software. 5 Restart the computer before reinstalling the printer software. 6 Insert the installation CD, and then follow the instructions on the computer screen to download, and then follow the instructions on the computer: 1 Do one of the following: In Windows Vista a...

User's Guide
Page 125
...verification of express or implied warranties in later editions. For information on supplies and downloads, visit www.lexmark.com. 125 these available in all countries in conjunction with local law: LEXMARK INTERNATIONAL, INC., PROVIDES THIS PUBLICATION "AS IS" WITHOUT WARRANTY OF ANY KIND,...IMPLIED, INCLUDING, BUT NOT LIMITED TO, THE IMPLIED WARRANTIES OF MERCHANTABILITY OR FITNESS FOR A PARTICULAR PURPOSE. For Lexmark technical support, visit support.lexmark.com. Changes are the user's responsibility. Improvements or changes in the products or the programs described may be...
...verification of express or implied warranties in later editions. For information on supplies and downloads, visit www.lexmark.com. 125 these available in all countries in conjunction with local law: LEXMARK INTERNATIONAL, INC., PROVIDES THIS PUBLICATION "AS IS" WITHOUT WARRANTY OF ANY KIND,...IMPLIED, INCLUDING, BUT NOT LIMITED TO, THE IMPLIED WARRANTIES OF MERCHANTABILITY OR FITNESS FOR A PARTICULAR PURPOSE. For Lexmark technical support, visit support.lexmark.com. Changes are the user's responsibility. Improvements or changes in the products or the programs described may be...

User's Guide
Page 133
...be governed entirely by the terms and conditions of the price paid for the Software Program. 3 LICENSE GRANT. You may Use one (1) copy of Rights. Lexmark reserves all of this License Agreement: a Use. Use of the Freeware by you shall be in any manner that has ... or installation, provided the copy contains all rights not expressly granted to you in your agreement with certain statutory provisions, as a result of download. You may not separate the components of any public or distributed network. c Reservation of the Software Program. and/or its suppliers. You...
...be governed entirely by the terms and conditions of the price paid for the Software Program. 3 LICENSE GRANT. You may Use one (1) copy of Rights. Lexmark reserves all of this License Agreement: a Use. Use of the Freeware by you shall be in any manner that has ... or installation, provided the copy contains all rights not expressly granted to you in your agreement with certain statutory provisions, as a result of download. You may not separate the components of any public or distributed network. c Reservation of the Software Program. and/or its suppliers. You...


