User's Guide
Page 4
... signal strength? ...49 What is an SSID? ...50 How do I find out what type of security my network is using 50 Can I use my printer on a USB and a wireless connection at the same time 50 What is a MAC address?...51 How do I find the MAC address? ...51 What...copies of a document...61 Collating printed copies...61 Printing the last page first (reverse page order)...62 Printing multiple pages on one sheet (N-Up)...62 Printing documents from a memory card or flash drive 63 Printing specialty documents...64 Choosing compatible specialty paper types ...64 Printing envelopes ...65 Printing labels ......
... signal strength? ...49 What is an SSID? ...50 How do I find out what type of security my network is using 50 Can I use my printer on a USB and a wireless connection at the same time 50 What is a MAC address?...51 How do I find the MAC address? ...51 What...copies of a document...61 Collating printed copies...61 Printing the last page first (reverse page order)...62 Printing multiple pages on one sheet (N-Up)...62 Printing documents from a memory card or flash drive 63 Printing specialty documents...64 Choosing compatible specialty paper types ...64 Printing envelopes ...65 Printing labels ......
User's Guide
Page 5
...76 Printing photos using the printer control panel ...76 Printing photos from the computer using the printer software 77 Printing photos from a memory device using the printer software 77 Applying color effects to photos using the printer control panel 78 Printing photos...memory device using the proof sheet 80 Printing photos from a digital camera using DPOF ...81 Copying 82 Making copies...82 Copying photos...82 Enlarging or reducing images...82 Adjusting copy quality...83 Making a copy lighter or darker...83 Collating copies using the printer control panel...83 Repeating an image on one...
...76 Printing photos using the printer control panel ...76 Printing photos from the computer using the printer software 77 Printing photos from a memory device using the printer software 77 Applying color effects to photos using the printer control panel 78 Printing photos...memory device using the proof sheet 80 Printing photos from a digital camera using DPOF ...81 Copying 82 Making copies...82 Copying photos...82 Enlarging or reducing images...82 Adjusting copy quality...83 Making a copy lighter or darker...83 Collating copies using the printer control panel...83 Repeating an image on one...
User's Guide
Page 19
... connected for wireless printing - Check wireless status: • Off indicates that the printer is not turned on or that no wireless option is ready to be configured for USB printing • Orange blinking indicates that a memory card is connected to a wireless network. 4 PictBridge port Connect a PictBridge-enabled digital camera or a flash drive...
... connected for wireless printing - Check wireless status: • Off indicates that the printer is not turned on or that no wireless option is ready to be configured for USB printing • Orange blinking indicates that a memory card is connected to a wireless network. 4 PictBridge port Connect a PictBridge-enabled digital camera or a flash drive...
User's Guide
Page 23
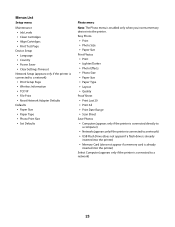
...8226; Language • Country • Power Saver • Clear Settings Timeout Network Setup (appears only if the printer is enabled only when you insert a memory device into the printer. Easy Photo • Print • Photo Size • Paper Size Print Photos • Print •...USB Flash Drive (does not appear if a flash drive is already inserted into the printer) • Memory Card (does not appear if a memory card is already inserted into the printer) Select Computer (appears only if the printer is connected to a network) • Print Setup Page • Wireless Information &#...
...8226; Language • Country • Power Saver • Clear Settings Timeout Network Setup (appears only if the printer is enabled only when you insert a memory device into the printer. Easy Photo • Print • Photo Size • Paper Size Print Photos • Print •...USB Flash Drive (does not appear if a flash drive is already inserted into the printer) • Memory Card (does not appear if a memory card is already inserted into the printer) Select Computer (appears only if the printer is connected to a network) • Print Setup Page • Wireless Information &#...
User's Guide
Page 24
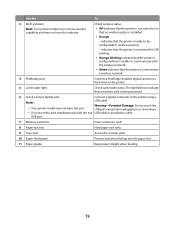
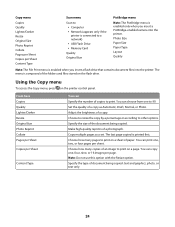
...copy. Photo Size Paper Size Paper Type Layout Quality Note: The File Print menu is enabled when you insert a PictBridge-enabled camera into the printer. You can print one , four, nine, or 16 images per page. Set the quality of a copy as a set. Make high-quality reprints of the ... Sheet Copies per Sheet Content Type Scan menu Scan to • Computer • Network (appears only if the printer is connected to a network) • USB Flash Drive • Memory Card Quality Original Size PictBridge menu Note: The PictBridge menu is enabled only when you insert a flash drive that ...
...copy. Photo Size Paper Size Paper Type Layout Quality Note: The File Print menu is enabled when you insert a PictBridge-enabled camera into the printer. You can print one , four, nine, or 16 images per page. Set the quality of a copy as a set. Make high-quality reprints of the ... Sheet Copies per Sheet Content Type Scan menu Scan to • Computer • Network (appears only if the printer is connected to a network) • USB Flash Drive • Memory Card Quality Original Size PictBridge menu Note: The PictBridge menu is enabled only when you insert a flash drive that ...

User's Guide
Page 25
... customize the photos before printing them. 25 Set the size of a photo. • Print photos using the selections in printers connected to a network) • USB Flash Drive • Memory Card Notes: • If you select a digit. Print photos using Digital Print Order Format (DPOF). You can also...: Use this menu if you want to the printer. Using the Scan menu To access the Scan menu, press on the printer control panel and then insert a memory device. This option appears only when there is 0000) in the memory device. Choose the application that you will be downloaded...
... customize the photos before printing them. 25 Set the size of a photo. • Print photos using the selections in printers connected to a network) • USB Flash Drive • Memory Card Notes: • If you select a digit. Print photos using Digital Print Order Format (DPOF). You can also...: Use this menu if you want to the printer. Using the Scan menu To access the Scan menu, press on the printer control panel and then insert a memory device. This option appears only when there is 0000) in the memory device. Choose the application that you will be downloaded...
User's Guide
Page 26
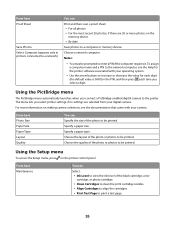
... with your operating system. • Use the arrow buttons to increase or decrease the value for each digit (the default value is 0000) in printers connected to a network) You can Print and then scan a proof sheet: • For all photos • For the most recent 20 photos...print cartridge nozzles. • Align Cartridges to align the cartridges. • Print Test Page to a computer or memory device. Using the Setup menu To access the Setup menu, press on the memory device • By date Save photos to print a test page. 26 Choose a network computer. Specify a paper ...
... with your operating system. • Use the arrow buttons to increase or decrease the value for each digit (the default value is 0000) in printers connected to a network) You can Print and then scan a proof sheet: • For all photos • For the most recent 20 photos...print cartridge nozzles. • Align Cartridges to align the cartridges. • Print Test Page to a computer or memory device. Using the Setup menu To access the Setup menu, press on the memory device • By date Save photos to print a test page. 26 Choose a network computer. Specify a paper ...
User's Guide
Page 28
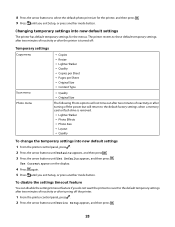
...the default temporary settings after two minutes of inactivity or after turning off the power but will return to the default factory settings when a memory card or flash drive is removed. • Lighter/Darker • Photo Effects • Photo Size • Layout • Quality To...8226; Quality • Original Size The following Photo options will not time out after two minutes of inactivity or after turning off the printer. 1 From the printer control panel, press . 2 Press the arrow buttons until Device Setup appears, and then press . 28 Changing temporary settings into new ...
...the default temporary settings after two minutes of inactivity or after turning off the power but will return to the default factory settings when a memory card or flash drive is removed. • Lighter/Darker • Photo Effects • Photo Size • Layout • Quality To...8226; Quality • Original Size The following Photo options will not time out after two minutes of inactivity or after turning off the printer. 1 From the printer control panel, press . 2 Press the arrow buttons until Device Setup appears, and then press . 28 Changing temporary settings into new ...
User's Guide
Page 33
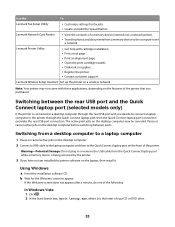
...the Welcome screen does not appear after a minute, do one of the printer. Switching between ports. Switching from a memory device to the printer through the rear USB port and you purchased. Use the To Lexmark Fax Setup Utility • Customize settings for the Welcome ... laptop port connection overrides the rear USB port connection. Note: Your printer may be canceled. Lexmark Printer Utility • Get help with these applications, depending on the features of a memory device inserted into a network printer. • Transfer photos and documents from a desktop computer to a...
...the Welcome screen does not appear after a minute, do one of the printer. Switching between ports. Switching from a memory device to the printer through the rear USB port and you purchased. Use the To Lexmark Fax Setup Utility • Customize settings for the Welcome ... laptop port connection overrides the rear USB port connection. Note: Your printer may be canceled. Lexmark Printer Utility • Get help with these applications, depending on the features of a memory device inserted into a network printer. • Transfer photos and documents from a desktop computer to a...
User's Guide
Page 63
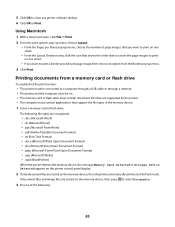
... Storage Device Detected appears on the printer control panel display. 2 If only document files are supported by the printer. • The computer must contain document files that are stored on the memory device, then the printer automatically switches to select Documents. 3 Do one sheet. • If you want... the page images to print on the memory device, then press to File Print mode. The following : 63 If ...
... Storage Device Detected appears on the printer control panel display. 2 If only document files are supported by the printer. • The computer must contain document files that are stored on the memory device, then the printer automatically switches to select Documents. 3 Do one sheet. • If you want... the page images to print on the memory device, then press to File Print mode. The following : 63 If ...

User's Guide
Page 64
... a Press the arrow buttons to select the file name of media that has a reverse image printed on it that can also use with Lexmark printers, but compatible with a special coating. If Select Computer appears, press the arrow buttons to enter a PIN if the computer requires it offers...use the programs that are installed with all inkjet printers. Printing specialty documents You can be ironed onto fabric. 64 Notes: • You may be framed, placed in the memory device. For more information, see the Help for the printer software associated with your operating system. • Use...
... a Press the arrow buttons to select the file name of media that has a reverse image printed on it that can also use with Lexmark printers, but compatible with a special coating. If Select Computer appears, press the arrow buttons to enter a PIN if the computer requires it offers...use the programs that are installed with all inkjet printers. Printing specialty documents You can be ironed onto fabric. 64 Notes: • You may be framed, placed in the memory device. For more information, see the Help for the printer software associated with your operating system. • Use...

User's Guide
Page 72
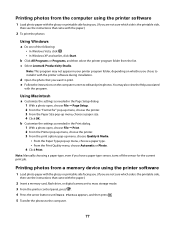
...with these programs. Inserting a memory card 1 Insert a memory card. • Insert the card with the brand name label facing up. • If there is an arrow on the card, make sure it points toward the printer. • If needed, make sure you connect the memory card to customize and print photos.... Slot Memory card 1 • Secure Digital (SD) • High Capacity Secure Digital (with adapter) • Micro ...
...with these programs. Inserting a memory card 1 Insert a memory card. • Insert the card with the brand name label facing up. • If there is an arrow on the card, make sure it points toward the printer. • If needed, make sure you connect the memory card to customize and print photos.... Slot Memory card 1 • Secure Digital (SD) • High Capacity Secure Digital (with adapter) • Micro ...
User's Guide
Page 73
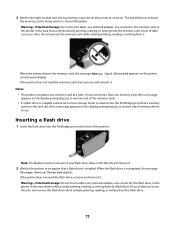
... mode is inserted into the port. 2 Wait for the light located near the top memory card slot on the printer to come on the display prompting you to choose which memory device to remove one memory card at a time. When the flash drive is transmitting data. Warning-Potential Damage: ...Do not touch cables, any network adapter, any connector, the memory card, or the printer in the area shown while actively printing, reading...
... mode is inserted into the port. 2 Wait for the light located near the top memory card slot on the printer to come on the display prompting you to choose which memory device to remove one memory card at a time. When the flash drive is transmitting data. Warning-Potential Damage: ...Do not touch cables, any network adapter, any connector, the memory card, or the printer in the area shown while actively printing, reading...

User's Guide
Page 74
...Notes: • You may require that you select a computer (and a PIN if required by that does not support memory device connection. • The printer may be prompted to save the photos, and then press . Wireless connection (selected models only) a Press the arrow buttons... Photos appears, and then press . 4 Do one of the following: USB connection a Press . Retrieving and managing photos Transferring photos from a memory device to the computer Using the printer control panel Notes: • You cannot transfer photos from a memory device to a computer through an external network adapter...
...Notes: • You may require that you select a computer (and a PIN if required by that does not support memory device connection. • The printer may be prompted to save the photos, and then press . Wireless connection (selected models only) a Press the arrow buttons... Photos appears, and then press . 4 Do one of the following: USB connection a Press . Retrieving and managing photos Transferring photos from a memory device to the computer Using the printer control panel Notes: • You cannot transfer photos from a memory device to a computer through an external network adapter...

User's Guide
Page 75
... the computer. 75 In Windows Vista, click . - Using the Lexmark Network Card Reader in Windows • If you installed Lexmark Productivity Studio, and if the printer is connected to the computer through a network: 1 Do one of the folder where you want to the computer through a network,... then you want to save, and then click Save. 7 Browse to the computer using the Lexmark Network Card Reader. The printer may require that you select a computer (and a PIN, if required by that computer). 1 Insert a memory card...
... the computer. 75 In Windows Vista, click . - Using the Lexmark Network Card Reader in Windows • If you installed Lexmark Productivity Studio, and if the printer is connected to the computer through a network: 1 Do one of the folder where you want to the computer through a network,... then you want to save, and then click Save. 7 Browse to the computer using the Lexmark Network Card Reader. The printer may require that you select a computer (and a PIN, if required by that computer). 1 Insert a memory card...

User's Guide
Page 76
... more options on the proof sheet. If you want to check the photo numbers of the photos before printing, then print a proof sheet. 6 Do one of the photos. For best results, remove each time you are on printing photos and customizing photos, see the instructions that are in the Print... 1 Load photo paper with the glossy or printable side facing you. (If you are not sure which side is not enough memory on the flash drive, a prompt appears on the printer control panel display. Press each time you make a selection. 5 Follow the instructions on the display. • Do not remove the ...
... more options on the proof sheet. If you want to check the photo numbers of the photos before printing, then print a proof sheet. 6 Do one of the photos. For best results, remove each time you are on printing photos and customizing photos, see the instructions that are in the Print... 1 Load photo paper with the glossy or printable side facing you. (If you are not sure which side is not enough memory on the flash drive, a prompt appears on the printer control panel display. Press each time you make a selection. 5 Follow the instructions on the display. • Do not remove the ...
User's Guide
Page 77
...Lexmark Productivity Studio. d Open the photo that you want to the computer. 77 e Follow the instructions on whether you chose to edit and print photos. b Customize the settings as needed in your printer program folder, depending on the computer screen to install it with the printer... associated with the paper.) 2 To print the photos: Using Windows a Do one of the following: • In Windows Vista, click . • In...Click All Programs or Programs, and then select the printer program folder from a memory device using the printer software 1 Load photo paper with the glossy or ...
...Lexmark Productivity Studio. d Open the photo that you want to the computer. 77 e Follow the instructions on whether you chose to edit and print photos. b Customize the settings as needed in your printer program folder, depending on the computer screen to install it with the printer... associated with the paper.) 2 To print the photos: Using Windows a Do one of the following: • In Windows Vista, click . • In...Click All Programs or Programs, and then select the printer program folder from a memory device using the printer software 1 Load photo paper with the glossy or ...
User's Guide
Page 78
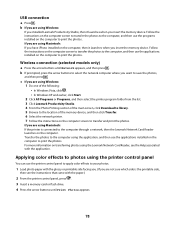
...effects to photos using Windows: 1 Do one of the following: • In Windows Vista, click . • In Windows XP and earlier, click Start. 2 Click All Programs or Programs, and then select the printer program folder from the list. 3 Click Lexmark Productivity Studio. 4 From the Photo Printing... the Help associated with the paper.) 2 From the printer control panel, press . 3 Insert a memory card or flash drive. 4 Press the arrow buttons until Network appears, and then press . USB connection a Press . c If you are using the Lexmark Network Card Reader, see the instructions that came with...
...effects to photos using Windows: 1 Do one of the following: • In Windows Vista, click . • In Windows XP and earlier, click Start. 2 Click All Programs or Programs, and then select the printer program folder from the list. 3 Click Lexmark Productivity Studio. 4 From the Photo Printing... the Help associated with the paper.) 2 From the printer control panel, press . 3 Insert a memory card or flash drive. 4 Press the arrow buttons until Network appears, and then press . USB connection a Press . c If you are using the Lexmark Network Card Reader, see the instructions that came with...
User's Guide
Page 79
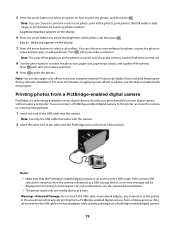
...from a PictBridge-enabled digital camera PictBridge is removed. 8 Use the arrow buttons to photos, see the camera documentation. • The printer reads only one end of the USB cable into the PictBridge port on the front of the photo, and then press . For more information on applying... camera. Note: You can choose to photos using a computer. Printing photos from your digital camera without using the Lexmark Productivity Studio (if you print until the active memory card or flash drive is a technology available in most recent photo, print all the photos you installed the program...
...from a PictBridge-enabled digital camera PictBridge is removed. 8 Use the arrow buttons to photos, see the camera documentation. • The printer reads only one end of the USB cable into the PictBridge port on the front of the photo, and then press . For more information on applying... camera. Note: You can choose to photos using a computer. Printing photos from your digital camera without using the Lexmark Productivity Studio (if you print until the active memory card or flash drive is a technology available in most recent photo, print all the photos you installed the program...
User's Guide
Page 80
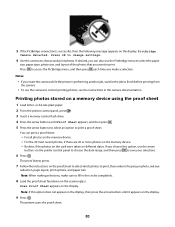
... Press . The proof sheets prints. 7 Follow the instructions on the scanner glass. The printer scans the proof sheet. 80 or A4-size plain paper. 2 From the printer control panel, press . 3 Insert a memory card or flash drive. 4 Press the arrow buttons until it appears on different dates. ...Note: When making selections, make a selection. Printing photos stored on the printer control panel to choose the date range, ...
... Press . The proof sheets prints. 7 Follow the instructions on the scanner glass. The printer scans the proof sheet. 80 or A4-size plain paper. 2 From the printer control panel, press . 3 Insert a memory card or flash drive. 4 Press the arrow buttons until it appears on different dates. ...Note: When making selections, make a selection. Printing photos stored on the printer control panel to choose the date range, ...


