Quick Reference
Page 2
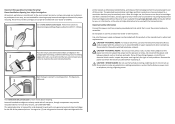
...cord from the electrical outlet before inspecting it. CAUTION-POTENTIAL INJURY: To reduce risk of the patented printer. Bags usually arrive within 7-10 days. The patented Lexmark inkjet cartridges and their contents terminates, and you , or a third party, as furniture and walls. Do... switched telephone network. Place the empty Lexmark-branded inkjet cartridge(s) in our easy, no-cost method for returning empty Lexmark cartridges to a properly grounded electrical outlet that cartridges are licensed subject to work with the licensed printer. We will insure that is preaddressed....
...cord from the electrical outlet before inspecting it. CAUTION-POTENTIAL INJURY: To reduce risk of the patented printer. Bags usually arrive within 7-10 days. The patented Lexmark inkjet cartridges and their contents terminates, and you , or a third party, as furniture and walls. Do... switched telephone network. Place the empty Lexmark-branded inkjet cartridge(s) in our easy, no-cost method for returning empty Lexmark cartridges to a properly grounded electrical outlet that cartridges are licensed subject to work with the licensed printer. We will insure that is preaddressed....
User's Guide
Page 31
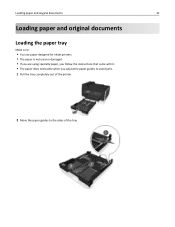
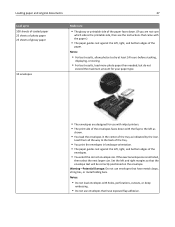
Loading paper and original documents 31 Loading paper and original documents Loading the paper tray Make sure: • You use paper designed for inkjet printers. • The paper is not used or damaged. • If you are using specialty paper, you follow the instructions that came with it. • The paper does not buckle when you adjust the paper guides to avoid jams. 1 Pull the tray completely out of the printer. 2 Move the paper guides to the sides of the tray.
Loading paper and original documents 31 Loading paper and original documents Loading the paper tray Make sure: • You use paper designed for inkjet printers. • The paper is not used or damaged. • If you are using specialty paper, you follow the instructions that came with it. • The paper does not buckle when you adjust the paper guides to avoid jams. 1 Pull the tray completely out of the printer. 2 Move the paper guides to the sides of the tray.
User's Guide
Page 36
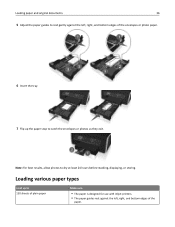
Note: For best results, allow photos to dry at least 24 hours before stacking, displaying, or storing. Loading various paper types Load up the paper stop to catch the envelopes or photos as they exit. Loading paper and original documents 36 5 Adjust the paper guides to rest gently against the left, right, and bottom edges of the envelopes or photo paper. 6 Insert the tray. 7 Flip up to 150 sheets of plain paper Make sure • The paper is designed for use with inkjet printers. • The paper guides rest against the left, right, and bottom edges of the paper.
Note: For best results, allow photos to dry at least 24 hours before stacking, displaying, or storing. Loading various paper types Load up the paper stop to catch the envelopes or photos as they exit. Loading paper and original documents 36 5 Adjust the paper guides to rest gently against the left, right, and bottom edges of the envelopes or photo paper. 6 Insert the tray. 7 Flip up to 150 sheets of plain paper Make sure • The paper is designed for use with inkjet printers. • The paper guides rest against the left, right, and bottom edges of the paper.
User's Guide
Page 37
... of glossy paper 10 envelopes Make sure • The glossy or printable side of the paper faces down. (If you are designed for use with inkjet printers. • The print side of the envelopes faces down with the flap to the left as indicated by the icon. Notes: • For best results...
... of glossy paper 10 envelopes Make sure • The glossy or printable side of the paper faces down. (If you are designed for use with inkjet printers. • The print side of the envelopes faces down with the flap to the left as indicated by the icon. Notes: • For best results...


