Network Scan Drivers
Page 5
Introduction to the network scan driver The network scan driver provides a SANE (Scanner Access Now Easy) interface to allow scanning from the Drivers & Downloads list. Installing on your operating system, or see the the Web site for a complete ... adapters are running on Fedora, Linpus Linux, SUSE Linux, Linux openSUSE, Red Hat Enterprise Linux, or Red Flag Linux 1 Download the driver: a Go to www.lexmark.com. d Select network-scan-linux-glibc2-x86.rpm, and then download it to your server. • Your computer is properly configured to the network scan...
Introduction to the network scan driver The network scan driver provides a SANE (Scanner Access Now Easy) interface to allow scanning from the Drivers & Downloads list. Installing on your operating system, or see the the Web site for a complete ... adapters are running on Fedora, Linpus Linux, SUSE Linux, Linux openSUSE, Red Hat Enterprise Linux, or Red Flag Linux 1 Download the driver: a Go to www.lexmark.com. d Select network-scan-linux-glibc2-x86.rpm, and then download it to your server. • Your computer is properly configured to the network scan...
Network Scan Drivers
Page 6
c Select the Linux distribution running on the scanner glass. 4 From the printer control panel, select your computer. d Select network-scan-linux-glibc2-x86.deb, and then download it to www.lexmark.com. For more information, see the printer User's Guide. Press Enter. In Debian GNU/Linux or Linspire ...Linpus Linux, SUSE Linux, Linux openSUSE, Red Hat Enterprise Linux, or Red Flag Linux Open a terminal window, and then type rpm -e lexmark-network-scan. Press Enter. Checking if the network scan driver is installed Make sure the network scan driver is installed and added to the...
c Select the Linux distribution running on the scanner glass. 4 From the printer control panel, select your computer. d Select network-scan-linux-glibc2-x86.deb, and then download it to www.lexmark.com. For more information, see the printer User's Guide. Press Enter. In Debian GNU/Linux or Linspire ...Linpus Linux, SUSE Linux, Linux openSUSE, Red Hat Enterprise Linux, or Red Flag Linux Open a terminal window, and then type rpm -e lexmark-network-scan. Press Enter. Checking if the network scan driver is installed Make sure the network scan driver is installed and added to the...
Network Scan Drivers
Page 7
... Scan > Select Source. 2 From the "Device Used" menu, select your printer. 3 If necessary, select other scan settings. 5 From the "Network:scanner" dialog, click Scan. 6 Place your document in the Automatic Document Feeder (ADF) or on selecting a scan job from the printer control panel, see ... User's Guide. Press Enter. 2 From the "device detection" dialog, navigate to: Available devices > select your printer > OK 3 From the "Network:scanner" dialog, click Window > Show standard options. 4 If necessary, adjust other options, and then click OK. 4 From the application toolbar, do either of...
... Scan > Select Source. 2 From the "Device Used" menu, select your printer. 3 If necessary, select other scan settings. 5 From the "Network:scanner" dialog, click Scan. 6 Place your document in the Automatic Document Feeder (ADF) or on selecting a scan job from the printer control panel, see ... User's Guide. Press Enter. 2 From the "device detection" dialog, navigate to: Available devices > select your printer > OK 3 From the "Network:scanner" dialog, click Window > Show standard options. 4 If necessary, adjust other options, and then click OK. 4 From the application toolbar, do either of...
Network Scan Drivers
Page 8
... Place your document in that came with your scan job. Note: Make sure the GIMP plug-in the Automatic Document Feeder (ADF) or on the scanner glass. 3 From the printer control panel, select your scan job. Using scanimage 1 Open a terminal window, and then type scanimage -b --source="Multiple...4 From the dialog, if necessary, adjust other scan settings, and then click Scan. 5 Place your document in the ADF, the printer scans from the scanner glass. Note: If an Assertion 'c->xlib.lock' failed error occurs when using a terminal window 1 Open a terminal window, and then type scanimage -d [...
... Place your document in that came with your scan job. Note: Make sure the GIMP plug-in the Automatic Document Feeder (ADF) or on the scanner glass. 3 From the printer control panel, select your scan job. Using scanimage 1 Open a terminal window, and then type scanimage -b --source="Multiple...4 From the dialog, if necessary, adjust other scan settings, and then click Scan. 5 Place your document in the ADF, the printer scans from the scanner glass. Note: If an Assertion 'c->xlib.lock' failed error occurs when using a terminal window 1 Open a terminal window, and then type scanimage -d [...
Network Scan Drivers
Page 9
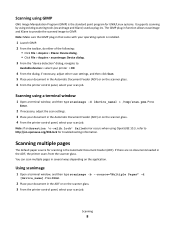
Press Enter. 2 Place your document in the ADF, then only the number of pages specified are displayed on the scanner glass. 6 From the printer control panel, select your document are scanned. Using OpenOffice.org Note: You may use Writer, Calc, Impress, or Draw only. 1 From ... Source. 7 From the printer control panel, select your scan job. 8 Repeat step 6 until all the pages of pages placed in the ADF or on the scanner glass. 3 From the printer control panel, select your computer. If you specify a number that is smaller than the number of your scan job. You have...
Press Enter. 2 Place your document in the ADF, then only the number of pages specified are displayed on the scanner glass. 6 From the printer control panel, select your document are scanned. Using OpenOffice.org Note: You may use Writer, Calc, Impress, or Draw only. 1 From ... Source. 7 From the printer control panel, select your scan job. 8 Repeat step 6 until all the pages of pages placed in the ADF or on the scanner glass. 3 From the printer control panel, select your computer. If you specify a number that is smaller than the number of your scan job. You have...
Network Scan Drivers
Page 10
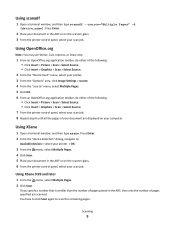
... Writer, Calc, Impress, or Draw only. 1 From an OpenOffice.org application toolbar, do either of the page in the ADF. • The duplex scanner and ADF are displayed on the application. Using XSane versions earlier than .99 1 From the toolbar, navigate to: Preferences > Setup > select Enhancement tab ..., select your scan job. 5 Repeat step 2 until all the pages of a page Notes: • Make sure that your printer has a duplex scanner and an Automatic Document Feeder (ADF). • Make sure you place your document in several ways depending on your computer. Press Enter. 2 Place your...
... Writer, Calc, Impress, or Draw only. 1 From an OpenOffice.org application toolbar, do either of the page in the ADF. • The duplex scanner and ADF are displayed on the application. Using XSane versions earlier than .99 1 From the toolbar, navigate to: Preferences > Setup > select Enhancement tab ..., select your scan job. 5 Repeat step 2 until all the pages of a page Notes: • Make sure that your printer has a duplex scanner and an Automatic Document Feeder (ADF). • Make sure you place your document in several ways depending on your computer. Press Enter. 2 Place your...
Network Scan Drivers
Page 11
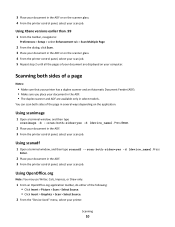
... "source" menu, select Multiple Pages. 5 From the "Options" area, navigate to: Image Settings > scan-both-sides 6 Select the scan-both sides checkbox. 6 From the "Network:scanner" dialog, click Scan. 7 Place your document in the ADF. 10 From the printer control panel, select your scan job. 11 Repeat step 8.
... "source" menu, select Multiple Pages. 5 From the "Options" area, navigate to: Image Settings > scan-both-sides 6 Select the scan-both sides checkbox. 6 From the "Network:scanner" dialog, click Scan. 7 Place your document in the ADF. 10 From the printer control panel, select your scan job. 11 Repeat step 8.

Network Scan Drivers
Page 12
... scan resolution. Perform a duplex scan. Scan both sides or scan-both-sides Notes: • Make sure that the printer has a duplex scanner and an Automatic Document Feeder (ADF). • Make sure to : Device Used > select your document in the ADF. • The duplex...only. 1 From an OpenOffice.org application toolbar, do either of the following to : Available devices > select your printer > OK 3 From the "Network:scanner" main dialog, do either of the following : - To Select Select the document type. or scan-resolution Resolutions for all the printers are displayed as ...
... scan resolution. Perform a duplex scan. Scan both sides or scan-both-sides Notes: • Make sure that the printer has a duplex scanner and an Automatic Document Feeder (ADF). • Make sure to : Device Used > select your document in the ADF. • The duplex...only. 1 From an OpenOffice.org application toolbar, do either of the following to : Available devices > select your printer > OK 3 From the "Network:scanner" main dialog, do either of the following : - To Select Select the document type. or scan-resolution Resolutions for all the printers are displayed as ...
Network Scan Drivers
Page 13
... example, to initiate scanning of the document. Select orientation or Orientation or brightness Note: The icon is a command-line-only application that uses the first scanner found on the XSane main dialog. Produce a mirror image of a legal-size document, type scanimage original-size=Legal > /tmp/image.pxm in TIFF or PXM...
... example, to initiate scanning of the document. Select orientation or Orientation or brightness Note: The icon is a command-line-only application that uses the first scanner found on the XSane main dialog. Produce a mirror image of a legal-size document, type scanimage original-size=Legal > /tmp/image.pxm in TIFF or PXM...
Network Scan Drivers
Page 16
... values if the option is not supported. no yes -4-+4 portrait landscape 1-9 0-5 Single Page Multiple Pages no yes Notes: • Make sure your printer has a duplex scanner and an Automatic Document Feeder (ADF). • Make sure to place your document in the ADF. • The duplex...
... values if the option is not supported. no yes -4-+4 portrait landscape 1-9 0-5 Single Page Multiple Pages no yes Notes: • Make sure your printer has a duplex scanner and an Automatic Document Feeder (ADF). • Make sure to place your document in the ADF. • The duplex...
Network Scan Drivers
Page 19
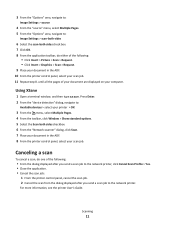
Press Enter. SANE does not recognize the network scan driver SANE-compliant applications such XSane and scanadf access the scanner through SANE. If using scanadf Type scanadf --source="Multiple Pages" -d [device_name]. If using XSane 1 From the menu, select Multiple Pages. 2 Click Scan. Troubleshooting 19 If ...
Press Enter. SANE does not recognize the network scan driver SANE-compliant applications such XSane and scanadf access the scanner through SANE. If using scanadf Type scanadf --source="Multiple Pages" -d [device_name]. If using XSane 1 From the menu, select Multiple Pages. 2 Click Scan. Troubleshooting 19 If ...
Quick Reference
Page 1
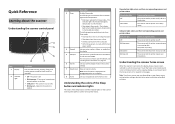
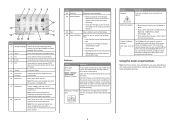
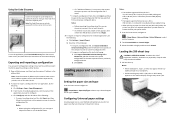
... turned on your home screen customization settings, administrative setup, and active embedded solutions. 1 Quick Reference Learning about the scanner Understanding the scanner control panel Item 1 Display 2 Indicator light Description Lets you navigate back to the home screen Understanding the colors of ... screen, referred to initiate an action such as status and error messages • Off-The power is off. • Blinking green-The scanner is printing. The following are in Sleep mode-The indicator light is illuminated solid green, Sleep button is on the display 5 USB port...
... turned on your home screen customization settings, administrative setup, and active embedded solutions. 1 Quick Reference Learning about the scanner Understanding the scanner control panel Item 1 Display 2 Indicator light Description Lets you navigate back to the home screen Understanding the colors of ... screen, referred to initiate an action such as status and error messages • Off-The power is off. • Blinking green-The scanner is printing. The following are in Sleep mode-The indicator light is illuminated solid green, Sleep button is on the display 5 USB port...
Quick Reference
Page 2
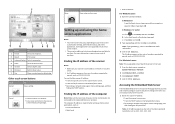
... light blinks. 2 Feature Warning Description If an error condition occurs, then this function, and not from any of the underlined words to return to the scanner. 12 3 4 5 6 14 7 13 8 12 11 10 9 Touch To 1 Change Language Launch the Change Language pop‑up or down. 7 Forms... and Favorites Quickly find and print frequently used online forms. 8 Menu icon Access the scanner menus. Touch any other application. 10 USB Drive View, select, print, scan, or e‑mail photos and documents from this icon appears. ...
... light blinks. 2 Feature Warning Description If an error condition occurs, then this function, and not from any of the underlined words to return to the scanner. 12 3 4 5 6 14 7 13 8 12 11 10 9 Touch To 1 Change Language Launch the Change Language pop‑up or down. 7 Forms... and Favorites Quickly find and print frequently used online forms. 8 Menu icon Access the scanner menus. Touch any other application. 10 USB Drive View, select, print, scan, or e‑mail photos and documents from this icon appears. ...
Quick Reference
Page 3
...123.123.123.123. Touch Reset To Reset values on your printer and computer are not physically near the scanner. 1 Obtain the scanner IP address: • From the scanner home screen • From the TCP/IP section in select printer models. • There may vary, depending...Select a lower value. 7 Tips Open a context-sensitive Help dialog. Other touch-screen buttons Touch Accept To Save a setting. Finding the IP address of the scanner Notes: • Make sure your point of purchase. Touch To 1 Arrows View a list of options. 2 Copy It Print a copy. 3 Advanced Options Select...
...123.123.123.123. Touch Reset To Reset values on your printer and computer are not physically near the scanner. 1 Obtain the scanner IP address: • From the scanner home screen • From the TCP/IP section in select printer models. • There may vary, depending...Select a lower value. 7 Tips Open a context-sensitive Help dialog. Other touch-screen buttons Touch Accept To Save a setting. Finding the IP address of the scanner Notes: • Make sure your point of purchase. Touch To 1 Arrows View a list of options. 2 Copy It Print a copy. 3 Advanced Options Select...
Quick Reference
Page 4
...4 For more information on accessing the Embedded Web Server, see "Setting up Scan to Computer" on page 3. • Make sure the scanner has access rights to multiple destinations. Scan to Sharepoint Securely scan documents to a File Transfer Protocol (FTP) server. For detailed information on ... check boxes to a network shared folder. Use To Forms and Favorites Quickly find and print frequently used online forms directly from the scanner home screen. For more information, see "Scanning to an e‑mail address. Before you must have permission to access the network ...
...4 For more information on accessing the Embedded Web Server, see "Setting up Scan to Computer" on page 3. • Make sure the scanner has access rights to multiple destinations. Scan to Sharepoint Securely scan documents to a File Transfer Protocol (FTP) server. For detailed information on ... check boxes to a network shared folder. Use To Forms and Favorites Quickly find and print frequently used online forms directly from the scanner home screen. For more information, see "Scanning to an e‑mail address. Before you must have permission to access the network ...

Quick Reference
Page 5
...address of the following: • Click Set up to 30 unique folder destinations. To use sharing, security, and firewall settings to allow the scanner at least a write access. To use the application, touch MyShortcut, and then follow the instructions. Notes: • See the mouse‑over... destination is printed. Note: Make sure there is 100% (full size). • Resolution setting-Adjust the quality of the computer" on the scanner home screen. The IP address appears as four sets of numbers separated by periods, such as 123.123.123.123. 2 Click Settings > Apps...
...address of the following: • Click Set up to 30 unique folder destinations. To use sharing, security, and firewall settings to allow the scanner at least a write access. To use the application, touch MyShortcut, and then follow the instructions. Notes: • See the mouse‑over... destination is printed. Note: Make sure there is 100% (full size). • Resolution setting-Adjust the quality of the computer" on the scanner home screen. The IP address appears as four sets of numbers separated by periods, such as 123.123.123.123. 2 Click Settings > Apps...
Quick Reference
Page 6
...8226; Password-Type the default password to connect to the destination. • Authentication Type-Select how users are not physically near the network scanner. Configuring e‑mail setting • Default e-mail address-Specify the destination e‑mail address for Content if you can scan and ... tray-Select the default tray to be used for black and white. • Print Borders-Select the check box to Sharepoint on the scanner home screen, and then follow the instructions. Adding a profile From the Configure page, click Add. Select Best for the scanned card. ...
...8226; Password-Type the default password to connect to the destination. • Authentication Type-Select how users are not physically near the network scanner. Configuring e‑mail setting • Default e-mail address-Specify the destination e‑mail address for Content if you can scan and ... tray-Select the default tray to be used for black and white. • Print Borders-Select the check box to Sharepoint on the scanner home screen, and then follow the instructions. Adding a profile From the Configure page, click Add. Select Best for the scanned card. ...
Quick Reference
Page 7
.... 3 To export or import a configuration for one ‑sided and two‑sided printing. • When printing on the scanner display. Note: View the scanner IP address on the scanner display. Before importing the configuration file, you want to : > Paper Menu > Universal Setup > Units of Measure > select a...occurs, then repeat the export process until needed. 1 Pull out the tray. Keep all other devices. 1 Open a Web browser, and then type the scanner IP address in the printer menus. 7 Notes: • The smallest supported Universal size is 70 x 127 mm (2.76 x 5 inches) for one...
.... 3 To export or import a configuration for one ‑sided and two‑sided printing. • When printing on the scanner display. Note: View the scanner IP address on the scanner display. Before importing the configuration file, you want to : > Paper Menu > Universal Setup > Units of Measure > select a...occurs, then repeat the export process until needed. 1 Pull out the tray. Keep all other devices. 1 Open a Web browser, and then type the scanner IP address in the printer menus. 7 Notes: • The smallest supported Universal size is 70 x 127 mm (2.76 x 5 inches) for one...
Quick Reference
Page 11
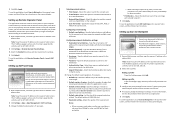
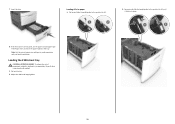
... and length guides. b Squeeze and slide the length guide to the position for A5. 1 LGLOFCFOLLITOR A4 A5 2 LGLOFCFOLLITOR A4 A5 LGLOFCFOLILOTR A4 A5 8 From the scanner control panel, set the paper size and paper type in the Paper menu to avoid paper jams and print quality problems. Loading the 2100‑...
... and length guides. b Squeeze and slide the length guide to the position for A5. 1 LGLOFCFOLLITOR A4 A5 2 LGLOFCFOLLITOR A4 A5 LGLOFCFOLILOTR A4 A5 8 From the scanner control panel, set the paper size and paper type in the Paper menu to avoid paper jams and print quality problems. Loading the 2100‑...
Quick Reference
Page 14
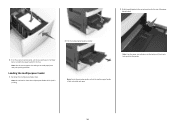
... a job is fully extended and open. EXECB5 A4 A5 LTR EXECB5 A4 A5 LTR EXECB5 A4 A5 LTR 2 Pull the multipurpose feeder extender. 6 From the scanner control panel, set the size and type in the Paper menu to avoid paper jams and print quality problems. Loading the multipurpose feeder 1 Pull down...
... a job is fully extended and open. EXECB5 A4 A5 LTR EXECB5 A4 A5 LTR EXECB5 A4 A5 LTR 2 Pull the multipurpose feeder extender. 6 From the scanner control panel, set the size and type in the Paper menu to avoid paper jams and print quality problems. Loading the multipurpose feeder 1 Pull down...


