User's Guide
Page 2
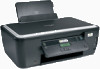
... for choosing this printer!...6 Minimizing your printer's environmental impact 6 Finding information about the printer...7 Understanding the parts of the printer...9 Ordering and replacing supplies 11 Ordering ink cartridges...11 Using genuine Lexmark ink cartridges...11 Replacing ink cartridges...12 Ordering paper and other supplies...13 Recycling Lexmark products...14 Using the printer control panel buttons and...
... for choosing this printer!...6 Minimizing your printer's environmental impact 6 Finding information about the printer...7 Understanding the parts of the printer...9 Ordering and replacing supplies 11 Ordering ink cartridges...11 Using genuine Lexmark ink cartridges...11 Replacing ink cartridges...12 Ordering paper and other supplies...13 Recycling Lexmark products...14 Using the printer control panel buttons and...
User's Guide
Page 100
...number and size of the following : IF YOU ARE USING A USB CONNECTION, THEN TRY A DIFFERENT USB CABLE IF YOU ARE ON A NETWORK, THEN RESET THE POWER OF THE ACCESS POINT (ROUTER) 1 Unplug the power cord from your system. SELECT A LOWER PRINT QUALITY FROM THE PRINTER SOFTWARE MANUALLY SELECT ... slows down when printing These are possible solutions. Troubleshooting 100 SELECT A HIGHER PRINT QUALITY FROM THE PRINTER SOFTWARE MAKE SURE THE INK CARTRIDGES ARE PROPERLY INSTALLED ALIGN THE PRINTHEAD CLEAN OR DEEP CLEAN THE PRINTHEAD NOZZLES Note: If these solutions do not remove the streaks or ...
...number and size of the following : IF YOU ARE USING A USB CONNECTION, THEN TRY A DIFFERENT USB CABLE IF YOU ARE ON A NETWORK, THEN RESET THE POWER OF THE ACCESS POINT (ROUTER) 1 Unplug the power cord from your system. SELECT A LOWER PRINT QUALITY FROM THE PRINTER SOFTWARE MANUALLY SELECT ... slows down when printing These are possible solutions. Troubleshooting 100 SELECT A HIGHER PRINT QUALITY FROM THE PRINTER SOFTWARE MAKE SURE THE INK CARTRIDGES ARE PROPERLY INSTALLED ALIGN THE PRINTHEAD CLEAN OR DEEP CLEAN THE PRINTHEAD NOZZLES Note: If these solutions do not remove the streaks or ...
User's Guide
Page 139
... flash drive 104 cannot print over wireless network 106 cannot print through USB 95 cannot scan to computer over a network 103 cartridges, ink ordering 11 using genuine Lexmark 11 changing Power Saver timeout 17 changing printing mode 47 changing temporary settings into default 16 changing wireless settings after installation (Mac... reducing an image 52 repeating an image 53 tips 51 custom-size paper printing on 38 D default printer, setting 47 defaults resetting factory defaults 18 disabling settings timeout 16 documents loading on scanner glass 30 printing 31 scanning for editing 59 Index 139
... flash drive 104 cannot print over wireless network 106 cannot print through USB 95 cannot scan to computer over a network 103 cartridges, ink ordering 11 using genuine Lexmark 11 changing Power Saver timeout 17 changing printing mode 47 changing temporary settings into default 16 changing wireless settings after installation (Mac... reducing an image 52 repeating an image 53 tips 51 custom-size paper printing on 38 D default printer, setting 47 defaults resetting factory defaults 18 disabling settings timeout 16 documents loading on scanner glass 30 printing 31 scanning for editing 59 Index 139
User's Guide
Page 140
...7 information needed for setting up printer on wireless network 64 infrastructure network 78 ink conserving 6 ink cartridge access 10 ink cartridges ordering 11 replacing 12 using genuine Lexmark 11 ink levels checking 86 inserting a memory card or flash drive 39 installation cable 77, 78 ...wireless network (Windows) 65 installing printer software 25 installing wireless printer additional computers 65 interference wireless network 80 internal wireless print server resetting to factory default settings 106 Index 140 IP address 83, 84 configuring 67 IP address, assigning 84 iron-on transfers 29 ...
...7 information needed for setting up printer on wireless network 64 infrastructure network 78 ink conserving 6 ink cartridge access 10 ink cartridges ordering 11 replacing 12 using genuine Lexmark 11 ink levels checking 86 inserting a memory card or flash drive 39 installation cable 77, 78 ...wireless network (Windows) 65 installing printer software 25 installing wireless printer additional computers 65 interference wireless network 80 internal wireless print server resetting to factory default settings 106 Index 140 IP address 83, 84 configuring 67 IP address, assigning 84 iron-on transfers 29 ...
User's Guide
Page 142
... mode changing 47 proof sheet using 43 protocol 84 publications finding 7 R recycling 6 Lexmark products 14 WEEE statement 126 reducing an image 52 repeating an image 53 replacing ink cartridges 12 resetting internal wireless print server to factory default settings 106 resetting to factory defaults 18 resuming print job 49 reverse page order 32 S safety...
... mode changing 47 proof sheet using 43 protocol 84 publications finding 7 R recycling 6 Lexmark products 14 WEEE statement 126 reducing an image 52 repeating an image 53 replacing ink cartridges 12 resetting internal wireless print server to factory default settings 106 resetting to factory defaults 18 resuming print job 49 reverse page order 32 S safety...
Quick Reference
Page 20
... page prints. 6 Press the arrow buttons to scroll to wake up the printer. If the cartridges do not seem to a defective port. If the printer will not come out of Power Saver mode, then reset the power: 1 Unplug the power cord from the power supply. 3 After one minute, reconnect... remove the alignment page until printing is marked with a USB symbol. Note: If you troubleshoot" checklist does not solve the problem, then try installing the cartridges again. 2 Load plain paper. 3 From the printer control panel, press . 4 Press the arrow buttons to scroll to Maintenance, and then press . ...
... page prints. 6 Press the arrow buttons to scroll to wake up the printer. If the cartridges do not seem to a defective port. If the printer will not come out of Power Saver mode, then reset the power: 1 Unplug the power cord from the power supply. 3 After one minute, reconnect... remove the alignment page until printing is marked with a USB symbol. Note: If you troubleshoot" checklist does not solve the problem, then try installing the cartridges again. 2 Load plain paper. 3 From the printer control panel, press . 4 Press the arrow buttons to scroll to Maintenance, and then press . ...


