KM-NET Viewer Operation Guide Rev-5.2-2010.10
Page 51
... name with the extension .XML.Click Finish. On the Settings page, select the category of device accounts with information about print, copy, scan and FAX counts. Warning: When Account List is selected in .XML format. 5 Click Finish. 4-9 KMnet Viewer Account Account List This is a list of ...over the destination device settings. Only one source device from the current software version (*.xml) 3 Click Open, and then click Next. 4 The Confirmation page shows a list of the Method page is selected, the source device settings will be selected for your settings to a file, click Save ...
... name with the extension .XML.Click Finish. On the Settings page, select the category of device accounts with information about print, copy, scan and FAX counts. Warning: When Account List is selected in .XML format. 5 Click Finish. 4-9 KMnet Viewer Account Account List This is a list of ...over the destination device settings. Only one source device from the current software version (*.xml) 3 Click Open, and then click Next. 4 The Confirmation page shows a list of the Method page is selected, the source device settings will be selected for your settings to a file, click Save ...
KM-NET Viewer Operation Guide Rev-5.2-2010.10
Page 58
..., and enabling/disabling of settings to copy to see a list of the errors. Click Next. The settings are included. Click Next. 3 The Confirmation page shows a list of settings can be selected for accessing a device. Browse or type a file name with the extension .XML.Click Finish. ...Click Next. 2 Click on the device, and administrator access permission. These settings vary by device. Device Document Box Users' Custom and FAX boxes. If you want to the settings. The availability of .CSV. Only one source device from the current software version (*.xml) User ...
..., and enabling/disabling of settings to copy to see a list of the errors. Click Next. The settings are included. Click Next. 3 The Confirmation page shows a list of settings can be selected for accessing a device. Browse or type a file name with the extension .XML.Click Finish. ...Click Next. 2 Click on the device, and administrator access permission. These settings vary by device. Device Document Box Users' Custom and FAX boxes. If you want to the settings. The availability of .CSV. Only one source device from the current software version (*.xml) User ...

Kyocera Command Center Operation Guide Rev 6.3
Page 11
... Pages to Advanced > Security > Secure Protocols on page 3-53. for each operation. Device/Printer > APL.Filter Parameters This allows you to Rule3) on page 3-51; FAX / i-FAX > General, FAX, i-FAX This allows you to confirm the log of printed pages for IPSec, refer to Advanced > Security > IPSec > Rule1 (to verify the settings made on the... Page on page 3-5 and Printer Page on page 3-31. Start > Information This page provides information about the maximum and current numbers of Firmware can be confirmed. for more information, refer to the Kyocera Mita Corporation web sites.
... Pages to Advanced > Security > Secure Protocols on page 3-53. for each operation. Device/Printer > APL.Filter Parameters This allows you to Rule3) on page 3-51; FAX / i-FAX > General, FAX, i-FAX This allows you to confirm the log of printed pages for IPSec, refer to Advanced > Security > IPSec > Rule1 (to verify the settings made on the... Page on page 3-5 and Printer Page on page 3-31. Start > Information This page provides information about the maximum and current numbers of Firmware can be confirmed. for more information, refer to the Kyocera Mita Corporation web sites.
Kyocera Command Center Operation Guide Rev 6.3
Page 15
... Entering this code, comprised of four digits from 1 to use of day. COMMAND CENTER 3-8 After you have changed the setting, you to confirm the destination to be usable during the time of period of period during the time of day specified by time of the machine by Unusable... Time. When turned On, the machine becomes unoperative during which the machine is 10 to use . Except, the received FAXes are cleared automatically. Unusable Time This determines the time of restriction. Dest(ination) Check Before Send This enables the front panel message which ...
... Entering this code, comprised of four digits from 1 to use of day. COMMAND CENTER 3-8 After you have changed the setting, you to confirm the destination to be usable during the time of period of period during the time of day specified by time of the machine by Unusable... Time. When turned On, the machine becomes unoperative during which the machine is 10 to use . Except, the received FAXes are cleared automatically. Unusable Time This determines the time of restriction. Dest(ination) Check Before Send This enables the front panel message which ...
Kyocera Command Center Operation Guide Rev 6.3
Page 16
... selected, all contacts displayed on the left side of the address. 4 Click Submit. The Address Book Contacts - Default Screen (Send/FAX) You can confirm the addresses to edit.The Address Book Contacts Edit page appears. 3 Modify the information of Number is not installed. 4 Click Submit.... Open the Address Book Contacts page. 2 Click the number or name of the address to be checked. 3 Click Delete Contact. In order for confirmation when adding a new destination. Deleting a Contact 1 Open the Address Book Contacts page. 2 Check the desired contact. When the check box on the...
... selected, all contacts displayed on the left side of the address. 4 Click Submit. The Address Book Contacts - Default Screen (Send/FAX) You can confirm the addresses to edit.The Address Book Contacts Edit page appears. 3 Modify the information of Number is not installed. 4 Click Submit.... Open the Address Book Contacts page. 2 Click the number or name of the address to be checked. 3 Click Delete Contact. In order for confirmation when adding a new destination. Deleting a Contact 1 Open the Address Book Contacts page. 2 Check the desired contact. When the check box on the...
Kyocera Command Center Operation Guide Rev 6.3
Page 26
... folder, Login User Name, and the Login Password. • FTP - Check that you want to add to the destination. 3 After you accept the confirming prompt, click Delete. Enter the Host Name, Port Number, path to an accessible FTP server. Adding an Address from an Address Book To add an...8226; %ip = IP Address Body You can enter the information that the destination is added to the destination list. Scanner > Send and Forward When sending a FAX, FTP, SMB or a E-mail job, Send and Forward automatically forwards the same job to the E-mail address entered. • SMB - forwards the job ...
... folder, Login User Name, and the Login Password. • FTP - Check that you want to add to the destination. 3 After you accept the confirming prompt, click Delete. Enter the Host Name, Port Number, path to an accessible FTP server. Adding an Address from an Address Book To add an...8226; %ip = IP Address Body You can enter the information that the destination is added to the destination list. Scanner > Send and Forward When sending a FAX, FTP, SMB or a E-mail job, Send and Forward automatically forwards the same job to the E-mail address entered. • SMB - forwards the job ...
Kyocera Command Center Operation Guide Rev 6.3
Page 33
... settings, click Submit. Speaker Volume COMMAND CENTER 3-26 Deletion You can confirm the destinations to be impossible. You can delete a Destination from the Address Book There are using. FAX / i-FAX > FAX > Defaults The description below provides a summary of phone line to correspond to Basic > Defaults >...Address Book > Contacts on page 3-9 or Basic > Defaults > Address Book > Groups on the FAX / i-FAX > FAX > Defaults page. Local FAX Number (Port 1/ 2) Specifies your FAX system ID. FAX Line Sets the type of the items displayed on page 3-10. When an address of address book:...
... settings, click Submit. Speaker Volume COMMAND CENTER 3-26 Deletion You can confirm the destinations to be impossible. You can delete a Destination from the Address Book There are using. FAX / i-FAX > FAX > Defaults The description below provides a summary of phone line to correspond to Basic > Defaults >...Address Book > Contacts on page 3-9 or Basic > Defaults > Address Book > Groups on the FAX / i-FAX > FAX > Defaults page. Local FAX Number (Port 1/ 2) Specifies your FAX system ID. FAX Line Sets the type of the items displayed on page 3-10. When an address of address book:...
Kyocera Command Center Operation Guide Rev 6.3
Page 35
... Delete. Add page. If you accept the confirming prompt, click Delete. Add page. FAX / i-FAX > FAX > FAX Restrictions > Permit ID List The table below provides a summary of the items displayed on the Permit Number List page. Enter in Permit FAX Number the FAX number to the FAX number, then click Delete. FAX / i-FAX > FAX > FAX Restrictions > Permit Number List The section below...
... Delete. Add page. If you accept the confirming prompt, click Delete. Add page. FAX / i-FAX > FAX > FAX Restrictions > Permit ID List The table below provides a summary of the items displayed on the Permit Number List page. Enter in Permit FAX Number the FAX number to the FAX number, then click Delete. FAX / i-FAX > FAX > FAX Restrictions > Permit Number List The section below...
Kyocera Command Center Operation Guide Rev 6.3
Page 36
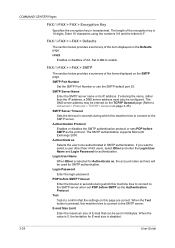
...settings on the Defaults page. When the value is 0, the limitation for authentication. COMMAND CENTER Pages FAX / i-FAX > FAX > Encryption Key Specifies the encryption key in Kilobytes. FAX / i-FAX > i-FAX > Defaults The section below provides a summary of the encryption key is selected for Authenticate as, ...the account name set POP before SMTP as Selects the user to enable. If you want to confirm that can be configured...
...settings on the Defaults page. When the value is 0, the limitation for authentication. COMMAND CENTER Pages FAX / i-FAX > FAX > Encryption Key Specifies the encryption key in Kilobytes. FAX / i-FAX > i-FAX > Defaults The section below provides a summary of the encryption key is selected for Authenticate as, ...the account name set POP before SMTP as Selects the user to enable. If you want to confirm that can be configured...
Kyocera Command Center Operation Guide Rev 6.3
Page 37
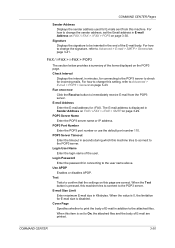
...for incoming mails. The E-mail address is pressed, this item is disabled. Login User Name Enter the login name of E-mail in Sender Address on FAX / i-FAX > i-FAX > SMTP on page 3-30. When the Test button is displayed in addition to On, the attached files and the body of E-mail are correct....setting, refer to the POP3 server. POP3 Server Name Enter the POP3 server name or IP address. Run once now Click the Receive button to confirm that the settings on page 3-41. Test Tests to immediately receive E-mail from this page are printed. For how to change the signature, ...
...for incoming mails. The E-mail address is pressed, this item is disabled. Login User Name Enter the login name of E-mail in Sender Address on FAX / i-FAX > i-FAX > SMTP on page 3-30. When the Test button is displayed in addition to On, the attached files and the body of E-mail are correct....setting, refer to the POP3 server. POP3 Server Name Enter the POP3 server name or IP address. Run once now Click the Receive button to confirm that the settings on page 3-41. Test Tests to immediately receive E-mail from this page are printed. For how to change the signature, ...
Kyocera Command Center Operation Guide Rev 6.3
Page 39
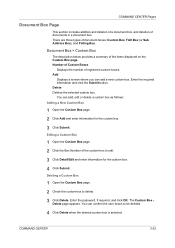
Add Displays a screen where you can confirm the user boxes to be deleted. 4 Click Delete when the desired custom box is selected. You can add, edit or delete a custom box as follows: ... in a document box. COMMAND CENTER Pages Document Box Page This section includes addition and deletion of a document box, and deletion of document boxes: Custom Box, FAX Box (or Sub Address Box), and Polling Box. The Custom Box Delete page appears.
Add Displays a screen where you can confirm the user boxes to be deleted. 4 Click Delete when the desired custom box is selected. You can add, edit or delete a custom box as follows: ... in a document box. COMMAND CENTER Pages Document Box Page This section includes addition and deletion of a document box, and deletion of document boxes: Custom Box, FAX Box (or Sub Address Box), and Polling Box. The Custom Box Delete page appears.
Kyocera Command Center Operation Guide Rev 6.3
Page 40
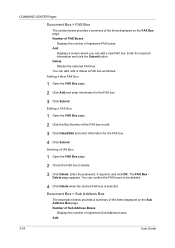
...Displays the number of registered FAX boxes. Document Box > Sub Address Box The description below provides a summary of the items displayed on the Sub Address Box page. You can confirm the FAX boxes to edit. 3 Click Detail/Edit and enter information for the FAX box. 3 Click Submit.... Delete Deletes the selected FAX box. Enter the required information and click the Submit button. Enter the ...
...Displays the number of registered FAX boxes. Document Box > Sub Address Box The description below provides a summary of the items displayed on the Sub Address Box page. You can confirm the FAX boxes to edit. 3 Click Detail/Edit and enter information for the FAX box. 3 Click Submit.... Delete Deletes the selected FAX box. Enter the required information and click the Submit button. Enter the ...
FS-C2126MFP Network Fax Driver Operation Guide Rev. 3
Page 11
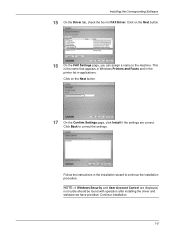
...are correct. Installing the Corresponding Software 15 On the Driver tab, check the box for FAX Driver. Continue installation. 1-5 Click Back to the machine. Click on the Next button. 17 On the Confirm Settings page, click Install if the settings are displayed, no trouble should be found ...with operation after installing the driver and software we have provided. Follow the instructions in applications. Click on the Next button. 16 On the FAX Settings page, you can...
...are correct. Installing the Corresponding Software 15 On the Driver tab, check the box for FAX Driver. Continue installation. 1-5 Click Back to the machine. Click on the Next button. 17 On the Confirm Settings page, click Install if the settings are displayed, no trouble should be found ...with operation after installing the driver and software we have provided. Follow the instructions in applications. Click on the Next button. 16 On the FAX Settings page, you can...
FS-C2126MFP Network Fax Driver Operation Guide Rev. 3
Page 17
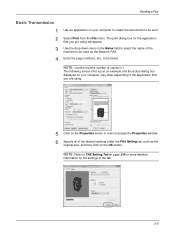
...Sending a Fax Basic Transmission 1 Use an application on your computer may differ depending to the application that you are using will appear. 3 Use the drop-down menu in order to access the Properties window. 6 Specify all of the machine to be sent. 2 Select Print from the File menu. NOTE: Confirm that ...you are using . 5 Click on the Properties button in the Name field to select the name of the desired settings under the FAX Setting tab, such as the Network FAX. 4 Enter the page numbers, etc., to be used as ...
...Sending a Fax Basic Transmission 1 Use an application on your computer may differ depending to the application that you are using will appear. 3 Use the drop-down menu in order to access the Properties window. 6 Specify all of the machine to be sent. 2 Select Print from the File menu. NOTE: Confirm that ...you are using . 5 Click on the Properties button in the Name field to select the name of the desired settings under the FAX Setting tab, such as the Network FAX. 4 Enter the page numbers, etc., to be used as ...
FS-C2126MFP Network Fax Driver Operation Guide Rev. 3
Page 21
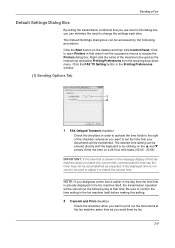
...menu. If the displayed time is actually displayed in the fax machine itself before making this setting. 2 Transmit and Print checkbox Check the checkbox when you send them by fax. 2-9 Be sure to confirm the time setting in the fax machine itself , the transmission operation will be entered directly... with the keyboard or by the following day at the fax machine same time as expected. Sending a Fax Default Settings Dialog Box By ...
...menu. If the displayed time is actually displayed in the fax machine itself before making this setting. 2 Transmit and Print checkbox Check the checkbox when you send them by fax. 2-9 Be sure to confirm the time setting in the fax machine itself , the transmission operation will be entered directly... with the keyboard or by the following day at the fax machine same time as expected. Sending a Fax Default Settings Dialog Box By ...
FS-C2126MFP Network Fax Driver Operation Guide Rev. 3
Page 35
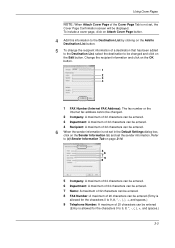
...button. 1 2 3 4 1 FAX Number (Internet FAX Address): The fax number or the Internet fax address cannot be changed and click on the Edit button. Using Cover Pages NOTE: When Attach Cover Page of the Cover Page Tab is not set, the Cover Page Confirmation screen will be changed . 2 ... maximum of 64 characters can be entered. 6 Department: A maximum of 64 characters can be entered. 7 Name: A maximum of 32 characters can be entered. 8 FAX Number: A maximum of 20 characters can be entered (Entry is allowed for the characters 0 to 9 and spaces.) 9 Telephone Number: A maximum of a destination that ...
...button. 1 2 3 4 1 FAX Number (Internet FAX Address): The fax number or the Internet fax address cannot be changed and click on the Edit button. Using Cover Pages NOTE: When Attach Cover Page of the Cover Page Tab is not set, the Cover Page Confirmation screen will be changed . 2 ... maximum of 64 characters can be entered. 6 Department: A maximum of 64 characters can be entered. 7 Name: A maximum of 32 characters can be entered. 8 FAX Number: A maximum of 20 characters can be entered (Entry is allowed for the characters 0 to 9 and spaces.) 9 Telephone Number: A maximum of a destination that ...
KM-NET for Clients Operation Guide Rev-3.7
Page 57
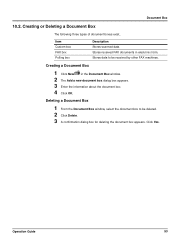
... Guide 53 Item Custom box FAX box Polling box Description Stores scanned data. Creating a Document Box 1 Click New in electronic form. Deleting a Document Box 1 From the Document Box window, select the document box to be deleted. 2 Click Delete. 3 A confirmation dialog box for deleting the ...document box appears. Document Box 10.2. Stores received FAX documents in the Document Box window. 2 The Add a new document box dialog box appears. 3 Enter the...
... Guide 53 Item Custom box FAX box Polling box Description Stores scanned data. Creating a Document Box 1 Click New in electronic form. Deleting a Document Box 1 From the Document Box window, select the document box to be deleted. 2 Click Delete. 3 A confirmation dialog box for deleting the ...document box appears. Document Box 10.2. Stores received FAX documents in the Document Box window. 2 The Add a new document box dialog box appears. 3 Enter the...
KX Driver User Guide Version 5.90
Page 7
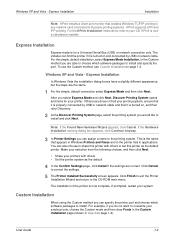
... The Printer Installed Successfully screen appears. This is now a standalone installer. Click Cancel to Kyocera printing systems. KPrint supports LPR and IPP printing. You can specify the printer port and...Custom method you can also choose to share this printer as the default 4 In the Confirm Settings page, click Install if the settings are the same. 1 For the simple, ...Express Installation Installation Note: KPrint installs a client port monitor that appears in Windows Printers and Faxes and in the printer lists in step 2 on page 1-2. Windows XP and Vista - For...
... The Printer Installed Successfully screen appears. This is now a standalone installer. Click Cancel to Kyocera printing systems. KPrint supports LPR and IPP printing. You can specify the printer port and...Custom method you can also choose to share this printer as the default 4 In the Confirm Settings page, click Install if the settings are the same. 1 For the simple, ...Express Installation Installation Note: KPrint installs a client port monitor that appears in Windows Printers and Faxes and in the printer lists in step 2 on page 1-2. Windows XP and Vista - For...
KX Driver User Guide Version 5.90
Page 8
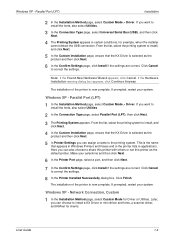
... the printing system. Windows XP - Installation Vista - This name appears in Windows Printers and Faxes and in the printer lists in Vista 1 At the Welcome page, ensure that your selections and then click Next. 5 6 In the Confirm Settings page, click Install if the settings are connected using the Universal Serial Bus (USB...
... the printing system. Windows XP - Installation Vista - This name appears in Windows Printers and Faxes and in the printer lists in Vista 1 At the Welcome page, ensure that your selections and then click Next. 5 6 In the Confirm Settings page, click Install if the settings are connected using the Universal Serial Bus (USB...
KX Driver User Guide Version 5.90
Page 9
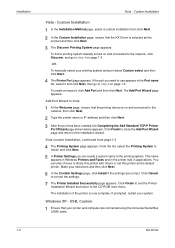
...complete. Make your selections and then click Next. 2 6 In the Printer Port page, select a port, and then click Next. 3 7 In the Confirm Settings page, click Install if the settings are correct. If you can assign a name to install the fonts, also select Utilities. 3 In the Connection Type.... If you can also choose to install, and click Next. 4 5 In the Custom Installation page, ensure that appears in Windows Printers and Faxes and in the printer lists in certain conditions, for Driver or Utilities. Click Finish. 5 The installation of the printer is the name that the...
...complete. Make your selections and then click Next. 2 6 In the Printer Port page, select a port, and then click Next. 3 7 In the Confirm Settings page, click Install if the settings are correct. If you can assign a name to install the fonts, also select Utilities. 3 In the Connection Type.... If you can also choose to install, and click Next. 4 5 In the Custom Installation page, ensure that appears in Windows Printers and Faxes and in the printer lists in certain conditions, for Driver or Utilities. Click Finish. 5 The installation of the printer is the name that the...


