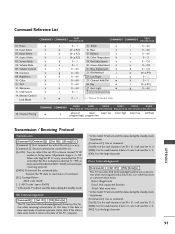
RS232 Serial Commands (English)
Page 3
... Code Data2: Not supported function Data3: Wait more time * In this model, TV will not send the status during the standby mode. * Data Format [Command 2]: Use as Hexa decimal (0x0~0x63) on menu and as command. [Set ID]: Use the small character, if set ID to choose desired TV ID number in Setup menu. Volume Mute k 07. Remote Control Lock Mode k a 0~1 15. Red Adjustment k e 0~1 20. Low Power j i 0 ~ 64 25. Power k 02. Input Select x 04. Screen Mute...
... Code Data2: Not supported function Data3: Wait more time * In this model, TV will not send the status during the standby mode. * Data Format [Command 2]: Use as Hexa decimal (0x0~0x63) on menu and as command. [Set ID]: Use the small character, if set ID to choose desired TV ID number in Setup menu. Volume Mute k 07. Remote Control Lock Mode k a 0~1 15. Red Adjustment k e 0~1 20. Low Power j i 0 ~ 64 25. Power k 02. Input Select x 04. Screen Mute...
RS232 Serial Commands (English)
Page 4
.... Input Select (Command: x b) To select input source for the TV. Volume Mute (Command: k e) To control volume mute on remote control. Volume Control (Command: k f) To adjust volume. You can also adjust mute using the RATIO button on remote control. Transmission [k][g][ ][Set ID][ ][Data][Cr] Data Min: 0 ~ Max: 64 (*transmit by program 4: Zoom 1 9: Just scan Reserved Acknowledgement [c][ ][Set ID][ ][OK/NG][Data][x] 05. You can also adjust volume with the volume buttons on remote control or in the Picture menu. Contrast (Command: k g) To adjust screen...
.... Input Select (Command: x b) To select input source for the TV. Volume Mute (Command: k e) To control volume mute on remote control. Volume Control (Command: k f) To adjust volume. You can also adjust mute using the RATIO button on remote control. Transmission [k][g][ ][Set ID][ ][Data][Cr] Data Min: 0 ~ Max: 64 (*transmit by program 4: Zoom 1 9: Just scan Reserved Acknowledgement [c][ ][Set ID][ ][OK/NG][Data][x] 05. You can also adjust volume with the volume buttons on remote control or in the Picture menu. Contrast (Command: k g) To adjust screen...
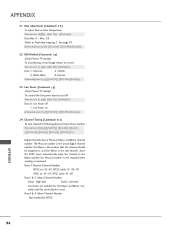
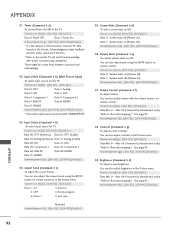
RS232 Serial Commands (English)
Page 6
...~45, ATSC cable: 01~87 Data1 & 2: Major Channel Number Data1: High byte Data2: Low byte Two bytes are available for NTSC. See page 93. Data3 & 4: Minor Channel Number Not needed for the Major and Minor, normally only the second byte is the sub-channel. ISM Method (Command: j p) (Only Plasma TV model) To avoid having a fixed image remain on Acknowledgement [q][ ][Set ID][ ][OK...
...~45, ATSC cable: 01~87 Data1 & 2: Major Channel Number Data1: High byte Data2: Low byte Two bytes are available for NTSC. See page 93. Data3 & 4: Minor Channel Number Not needed for the Major and Minor, normally only the second byte is the sub-channel. ISM Method (Command: j p) (Only Plasma TV model) To avoid having a fixed image remain on Acknowledgement [q][ ][Set ID][ ][OK...
User Manual (Spanish)
Page 3
... and off timers 18 Setting the sleep timer 19 Turning Auto Off on and off 19 Selecting the aspect ratio 19 Selecting the on-screen display (OSD) language . 20 Checking the DTV signal strength 20 Selecting closed captions 20 Changing closed caption styles 21 Using low power 21 Avoiding image burn-in 21 Setting parental controls 22 Maintaining 23 Cleaning the screen 23 Cleaning the cabinet 23 Troubleshooting 23 Specifications 24 Programming the remote control 24 Remote control codes 24 One-Year Limited Warranty 29...
... and off timers 18 Setting the sleep timer 19 Turning Auto Off on and off 19 Selecting the aspect ratio 19 Selecting the on-screen display (OSD) language . 20 Checking the DTV signal strength 20 Selecting closed captions 20 Changing closed caption styles 21 Using low power 21 Avoiding image burn-in 21 Setting parental controls 22 Maintaining 23 Cleaning the screen 23 Cleaning the cabinet 23 Troubleshooting 23 Specifications 24 Programming the remote control 24 Remote control codes 24 One-Year Limited Warranty 29...
User Manual (Spanish)
Page 4
... package should contain: • Your plasma TV • Remote control and batteries • Power cord • Round 75 ohm cable • Eye-bolts (2) • Bolts (2) • Wall brackets (2) • This user guide 2 www.insignia-products.com Overloaded wall outlets, loose or damaged wall outlets, extension cords, frayed power cords, or damaged or cracked wire insulation are not possible, have a qualified electrician install a separate circuit breaker. Do not...
... package should contain: • Your plasma TV • Remote control and batteries • Power cord • Round 75 ohm cable • Eye-bolts (2) • Bolts (2) • Wall brackets (2) • This user guide 2 www.insignia-products.com Overloaded wall outlets, loose or damaged wall outlets, extension cords, frayed power cords, or damaged or cracked wire insulation are not possible, have a qualified electrician install a separate circuit breaker. Do not...
User Manual (Spanish)
Page 5
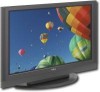
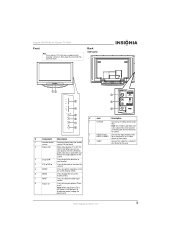
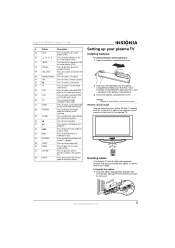
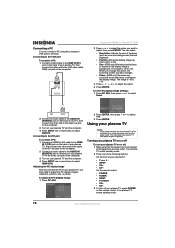
... connect an audio cable to the audio jacks for sound. 2 AUDIO-R and Connect the right and left audio AUDIO L MONO for a standard AV or S-Video device to these jacks. 3 VIDEO Connect the video for a standard A/V device to this jack. Insignia NS-PDP50 50" Plasma TV-720P Front Note If your plasma TV is off, this LED is still present. Back Side jacks 12 CH 3 VOL 4 ENTER 5 MENU 6 INPUT 7 8 # Component Description 1 Remote control Receives signals from the remote sensor control. Note: An S-Video cable...
... connect an audio cable to the audio jacks for sound. 2 AUDIO-R and Connect the right and left audio AUDIO L MONO for a standard AV or S-Video device to these jacks. 3 VIDEO Connect the video for a standard A/V device to this jack. Insignia NS-PDP50 50" Plasma TV-720P Front Note If your plasma TV is off, this LED is still present. Back Side jacks 12 CH 3 VOL 4 ENTER 5 MENU 6 INPUT 7 8 # Component Description 1 Remote control Receives signals from the remote sensor control. Note: An S-Video cable...
User Manual (Spanish)
Page 6
... analog or digital TV. Do not use your plasma TV as the video input source. Press to pause videotape or DVD playback. Press to select a connected component device as a PC (RGB/DVI) monitor. 5 REMOTE Connect a wired remote control to these jacks. 11 Power cord connector Plug the power cord into this jack. 6 RS-232C IN Service port. There are two jacks. Do not use. 7 DIGITAL AUDIO Connect a digital sound system to OUT this jack. 3 HDMI1/DVI IN 1 Connect HDMI (DVI) devices to /HDMI IN 2 these jacks to (PC)/AUDIO IN use . 2 ANTENNA /CABLE...
... analog or digital TV. Do not use your plasma TV as the video input source. Press to pause videotape or DVD playback. Press to select a connected component device as a PC (RGB/DVI) monitor. 5 REMOTE Connect a wired remote control to these jacks. 11 Power cord connector Plug the power cord into this jack. 6 RS-232C IN Service port. There are two jacks. Do not use. 7 DIGITAL AUDIO Connect a digital sound system to OUT this jack. 3 HDMI1/DVI IN 1 Connect HDMI (DVI) devices to /HDMI IN 2 these jacks to (PC)/AUDIO IN use . 2 ANTENNA /CABLE...
User Manual (Spanish)
Page 7
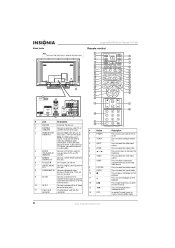
... channel you are watching. Press to select the RGB (computer) video mode. TUNER POWER INPUT MODE TV DVD ZOOM VCR VIDEO COMP HDMI RGB-PC PICTURE AUDIO ADJUST DISPLAY Bundling cables You plasma TV has a cable management bracket that the + and - To bundle the cables: 1 Hold the cable management bracket with the + and - Press to open the on-screen display (OSD). Press to mute the sound. Press to adjust the video settings for a connected computer. Setting up your plasma TV Installing batteries To install remote control...
... channel you are watching. Press to select the RGB (computer) video mode. TUNER POWER INPUT MODE TV DVD ZOOM VCR VIDEO COMP HDMI RGB-PC PICTURE AUDIO ADJUST DISPLAY Bundling cables You plasma TV has a cable management bracket that the + and - To bundle the cables: 1 Hold the cable management bracket with the + and - Press to open the on-screen display (OSD). Press to mute the sound. Press to adjust the video settings for a connected computer. Setting up your plasma TV Installing batteries To install remote control...
User Manual (Spanish)
Page 9
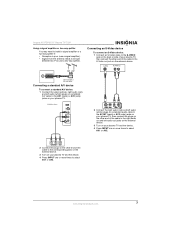
... between two TVs (use a signal amplifier). • Signal from the antenna needs to select AV1 or AV2. ANTENNA/ CABLE IN Signal amplifier or two-way splitter Connecting a standard A/V device To connect a standard A/V device: 1 Connect the video (yellow), right audio (red), and left audio out jacks on the external device. 3 Turn on your plasma TV and the device. 4 Press INPUT one or more times to the corresponding jacks on the external device. 3 Turn on your plasma TV.
... between two TVs (use a signal amplifier). • Signal from the antenna needs to select AV1 or AV2. ANTENNA/ CABLE IN Signal amplifier or two-way splitter Connecting a standard A/V device To connect a standard A/V device: 1 Connect the video (yellow), right audio (red), and left audio out jacks on the external device. 3 Turn on your plasma TV and the device. 4 Press INPUT one or more times to the corresponding jacks on the external device. 3 Turn on your plasma TV.
User Manual (Spanish)
Page 10
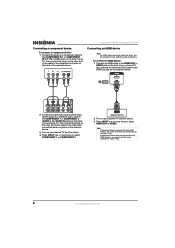
.... 4 Press INPUT one or more times to select COMPONENT 1 or COMPONENT 2. 2 Turn on your TV, then connect the plugs on the other end of the cable to make additional audio connections. Note If the external device supports the Auto HDMI function, the screen resolution is automatically set the screen resolution to 1280 × 720p. 8 www.insignia-products.com Insignia NS-PDP50 50" Plasma TV-720P Connecting a component device To connect a component device: 1 Connect the plugs on a component cable to the COMPONENT IN 1 or COMPONENT IN...
.... 4 Press INPUT one or more times to select COMPONENT 1 or COMPONENT 2. 2 Turn on your TV, then connect the plugs on the other end of the cable to make additional audio connections. Note If the external device supports the Auto HDMI function, the screen resolution is automatically set the screen resolution to 1280 × 720p. 8 www.insignia-products.com Insignia NS-PDP50 50" Plasma TV-720P Connecting a component device To connect a component device: 1 Connect the plugs on a component cable to the COMPONENT IN 1 or COMPONENT IN...
User Manual (Spanish)
Page 11
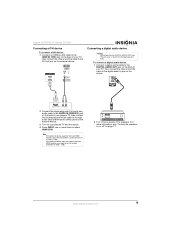
... set the screen resolution to 1280 × 720p. 2 Turn off " on page 17. If the external device does not support the Auto HDMI function, you need to set to 1280 × 720p. Connecting a digital audio device Warning Do not look into the DIGITAL AUDIO OUT jack. For more times to select HDMI1/DVI. www.insignia-products.com 9 The jack uses a laser that could damage your plasma TV, then connect the double-plug end of the cable...
... set the screen resolution to 1280 × 720p. 2 Turn off " on page 17. If the external device does not support the Auto HDMI function, you need to set to 1280 × 720p. Connecting a digital audio device Warning Do not look into the DIGITAL AUDIO OUT jack. For more times to select HDMI1/DVI. www.insignia-products.com 9 The jack uses a laser that could damage your plasma TV, then connect the double-plug end of the cable...
User Manual (Spanish)
Page 12
... DVI jack. On the remote control: • POWER • TUNER • INPUT • TV INPUT • CH+ • CH- 3 To turn your plasma TV from the power outlet. Insignia NS-PDP50 50" Plasma TV-720P 2 Press or to adjust, then press ENTER. When you want to select the option you change this option, the horizontal screen size also changes. • Phase-(RGB only) Removes any horizontal noise and clears or sharpens the display image...
... DVI jack. On the remote control: • POWER • TUNER • INPUT • TV INPUT • CH+ • CH- 3 To turn your plasma TV from the power outlet. Insignia NS-PDP50 50" Plasma TV-720P 2 Press or to adjust, then press ENTER. When you want to select the option you change this option, the horizontal screen size also changes. • Phase-(RGB only) Removes any horizontal noise and clears or sharpens the display image...
User Manual (Spanish)
Page 14
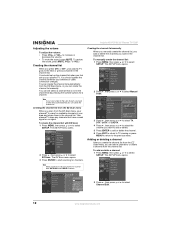
... select Manual Scan. 3 Press , then press or to select TV, DTV, CATV, or CADTV. 4 Press , then press or to the previous menu. Insignia NS-PDP50 50" Plasma TV-720P Adjusting the volume To adjust the volume: • Press VOL+ or VOL- To restore the sound, press MUTE, VOL+, or VOL-. You should update the channel list when your area and stores them in the channel list by pressing the number buttons...
... select Manual Scan. 3 Press , then press or to select TV, DTV, CATV, or CADTV. 4 Press , then press or to the previous menu. Insignia NS-PDP50 50" Plasma TV-720P Adjusting the volume To adjust the volume: • Press VOL+ or VOL- To restore the sound, press MUTE, VOL+, or VOL-. You should update the channel list when your area and stores them in the channel list by pressing the number buttons...
User Manual (Spanish)
Page 16
... overall picture color (from the Video menu. Adjusting the HD picture quality You can use the EZ Picture menu to select VIDEO. When you want to adjust. Decreases the brightness to add more light to dark areas of red, blue, and green in the picture. Decreases the level to show cleaner and clearer images. Insignia NS-PDP50 50" Plasma TV-720P 4 Press , then press or to select the option you select a preset Picture mode...
... overall picture color (from the Video menu. Adjusting the HD picture quality You can use the EZ Picture menu to select VIDEO. When you want to adjust. Decreases the brightness to add more light to dark areas of red, blue, and green in the picture. Decreases the level to show cleaner and clearer images. Insignia NS-PDP50 50" Plasma TV-720P 4 Press , then press or to select the option you select a preset Picture mode...
User Manual (Spanish)
Page 18
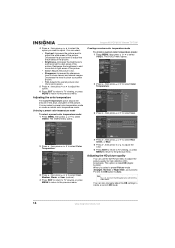
... multi-channel format without needing to the previous menu. Restoring video settings You can restore all video settings to select VIDEO. To restore video settings: 1 Press MENU, then press or to the factory defaults. Insignia NS-PDP50 50" Plasma TV-720P Creating a custom sound mode Note SRS TruSurround XT takes advantage of stereo audio enhancement produces an impressive sound experience from the AUDIO menu. 3 Press , then press or to select User. 4 Press , then press or to select the sound...
... multi-channel format without needing to the previous menu. Restoring video settings You can restore all video settings to select VIDEO. To restore video settings: 1 Press MENU, then press or to the factory defaults. Insignia NS-PDP50 50" Plasma TV-720P Creating a custom sound mode Note SRS TruSurround XT takes advantage of stereo audio enhancement produces an impressive sound experience from the AUDIO menu. 3 Press , then press or to select User. 4 Press , then press or to select the sound...
User Manual (Spanish)
Page 19
... Turning the speakers on or off If you are using an external sound system, you set the clock manually. To select the audio language: 1 Press MENU, then press or to the previous menu. Setting the clock You can also set the clock automatically: 1 Press MENU, then press or to select AUDIO. Selecting the audio language Note The available languages depend on or off your plasma TV's speakers. Insignia NS-PDP50 50" Plasma TV-720P Adjusting...
... Turning the speakers on or off If you are using an external sound system, you set the clock manually. To select the audio language: 1 Press MENU, then press or to the previous menu. Setting the clock You can also set the clock automatically: 1 Press MENU, then press or to select AUDIO. Selecting the audio language Note The available languages depend on or off your plasma TV's speakers. Insignia NS-PDP50 50" Plasma TV-720P Adjusting...
User Manual (Spanish)
Page 21
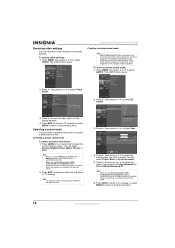
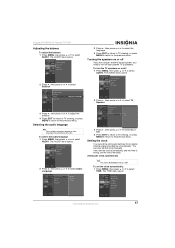
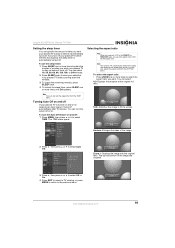
... to TV viewing, or press MENU to return to select TIME. Insignia NS-PDP50 50" Plasma TV-720P Setting the sleep timer You can specific the amount of time you want your plasma TV to stay on before the time has expired, the sleep timer is not receiving an input signal, it turns off automatically after 10 minutes. Note You can also select the aspect ratio from the TIME menu. You can turn the Auto Off feature...
... to TV viewing, or press MENU to return to select TIME. Insignia NS-PDP50 50" Plasma TV-720P Setting the sleep timer You can specific the amount of time you want your plasma TV to stay on before the time has expired, the sleep timer is not receiving an input signal, it turns off automatically after 10 minutes. Note You can also select the aspect ratio from the TIME menu. You can turn the Auto Off feature...
User Manual (Spanish)
Page 24
... been set a password, and turn the lock system on or off . • Set Password-Changes the password. • Block Channel-Blocks a TV channel. • Movie Rating (MPPA)-(For US only) Blocks movies based on the screen every two minutes. • Inversion-Reverses the image color every 30 minutes. 4 Press EXIT to return to TV viewing, or press MENU to return to use. Setting parental controls You can select: • Normal-Select this...
... been set a password, and turn the lock system on or off . • Set Password-Changes the password. • Block Channel-Blocks a TV channel. • Movie Rating (MPPA)-(For US only) Blocks movies based on the screen every two minutes. • Inversion-Reverses the image color every 30 minutes. 4 Press EXIT to return to TV viewing, or press MENU to return to use. Setting parental controls You can select: • Normal-Select this...
User Manual (Spanish)
Page 25
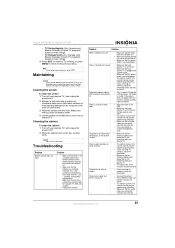
... remote control and the remote control sensor on . • Make sure that the audio cables are installed correctly. The + and - Maintaining Caution If you are using an antenna, adjust the orientation. • Increase the volume. • Press MUTE to use a wet cloth. Cleaning the cabinet To clean the cabinet: 1 Turn off . Caution Do not use your plasma TV. • The signal from lightning or power surges. The picture...
... remote control and the remote control sensor on . • Make sure that the audio cables are installed correctly. The + and - Maintaining Caution If you are using an antenna, adjust the orientation. • Increase the volume. • Press MUTE to use a wet cloth. Cleaning the cabinet To clean the cabinet: 1 Turn off . Caution Do not use your plasma TV. • The signal from lightning or power surges. The picture...
User Manual (Spanish)
Page 26
... horizontal noise, or the image position is cancelled. 5 Press MENU to program the remote control. In PC mode, the color is unstable or there is only one color. • Adjust the audio balance. • A change without programming: 1 Turn on the device (such as a VCR), then press the corresponding mode button on the remote control for the device. Power requirement Television system Channel coverage External antenna impedance Temperature Humidity Dimensions (W × H × D) Weight AC100-240 V @ 50...
... horizontal noise, or the image position is cancelled. 5 Press MENU to program the remote control. In PC mode, the color is unstable or there is only one color. • Adjust the audio balance. • A change without programming: 1 Turn on the device (such as a VCR), then press the corresponding mode button on the remote control for the device. Power requirement Television system Channel coverage External antenna impedance Temperature Humidity Dimensions (W × H × D) Weight AC100-240 V @ 50...


