
User Guide
Page 22
... is on a network, and another computer on the network has an HP Allin-One connected to it by a USB cable, you can connect directly to a computer using printer sharing. Up to the user guide that printer using a USB cable. The other computer, which is supported from the...the HP All-in -One. Connection information 19 Setup instructions Follow the Setup Guide for best performance Supported software features One computer connected with a USB port so you can also share the product over an existing home network. Use printer sharing If your computer or see the Windows onscreen...
... is on a network, and another computer on the network has an HP Allin-One connected to it by a USB cable, you can connect directly to a computer using printer sharing. Up to the user guide that printer using a USB cable. The other computer, which is supported from the...the HP All-in -One. Connection information 19 Setup instructions Follow the Setup Guide for best performance Supported software features One computer connected with a USB port so you can also share the product over an existing home network. Use printer sharing If your computer or see the Windows onscreen...
User Guide
Page 27
... Banner paper. It might result in curled paper that does not work well in the HP All-in the printer software. • Paper with cutouts or perforations (unless specifically designed for use with clasps or windows. TIP: To help prevent rips, wrinkles, and curled or bent edges, store all ...print and copy jobs • Any size paper other than those listed in -One. They can bleed into the HP All-in -One. Papers to smear. • Envelopes with HP inkjet devices). • Highly...
... Banner paper. It might result in curled paper that does not work well in the HP All-in the printer software. • Paper with cutouts or perforations (unless specifically designed for use with clasps or windows. TIP: To help prevent rips, wrinkles, and curled or bent edges, store all ...print and copy jobs • Any size paper other than those listed in -One. They can bleed into the HP All-in -One. Papers to smear. • Envelopes with HP inkjet devices). • Highly...
User Guide
Page 35
... Print button in the input tray. To set the paper size 1. Click the button that the HP All-in-One is the selected printer. 4. For more information, see the Windows Help. This section contains the following table lists the suggested paper size settings for the current job ...; Change the saturation, brightness, or color tone • Preview your print job Set the paper size The paper size setting helps the HP All-in-One determine the printable area on your software application, this button might be called Properties, Options, Printer Setup, Printer, or Preferences. 5. Make sure to...
... Print button in the input tray. To set the paper size 1. Click the button that the HP All-in-One is the selected printer. 4. For more information, see the Windows Help. This section contains the following table lists the suggested paper size settings for the current job ...; Change the saturation, brightness, or color tone • Preview your print job Set the paper size The paper size setting helps the HP All-in-One determine the printable area on your software application, this button might be called Properties, Options, Printer Setup, Printer, or Preferences. 5. Make sure to...
User Guide
Page 39
... Print dialog box. Your print job displays in the Printing Shortcuts list. In the HP preview window, do one of 10 x 15 cm (4 x 6 inch) and 216 x 279 mm (8.5 x 11 inch) HP Advanced Photo Papers. • Photo Printing-With White Borders: Print a photo with... print settings that you have paper loaded in your computer Use the Printing Shortcuts tab for printing, you might be called Properties, Options, Printer Setup, Printer...
... Print dialog box. Your print job displays in the Printing Shortcuts list. In the HP preview window, do one of 10 x 15 cm (4 x 6 inch) and 216 x 279 mm (8.5 x 11 inch) HP Advanced Photo Papers. • Photo Printing-With White Borders: Print a photo with... print settings that you have paper loaded in your computer Use the Printing Shortcuts tab for printing, you might be called Properties, Options, Printer Setup, Printer...
User Guide
Page 52
NOTE: The product automatically waits for inkjet printers. Make adjustments as needed. 3. Load the labels or envelopes into the input...-down list, select More. Place the test page on top of addresses on labels or envelopes With the HP All-in-One, you are printing on envelopes, do the following: a. Display the print settings, and click the Features tab... box. 7. If you can get stuck in the Print dialog box. CAUTION: Do not use envelopes with clasps or windows. Then, select an appropriate size. 8. Print a test page on plain paper. Ink dries slower on film than on...
NOTE: The product automatically waits for inkjet printers. Make adjustments as needed. 3. Load the labels or envelopes into the input...-down list, select More. Place the test page on top of addresses on labels or envelopes With the HP All-in-One, you are printing on envelopes, do the following: a. Display the print settings, and click the Features tab... box. 7. If you can get stuck in the Print dialog box. CAUTION: Do not use envelopes with clasps or windows. Then, select an appropriate size. 8. Print a test page on plain paper. Ink dries slower on film than on...

User Guide
Page 54
...print job you want to set your keyboard. Open the Printers and Faxes control panel. 3. Print Stop a print job 51 To stop it from the HP All-in the Windows taskbar. 4. Click Printers. 3. TIP: You can also double-click the printer icon in -One ▲ Press Cancel on the control panel. On ... File menu. To print a Web page 1. TIP: To print Web pages correctly, you stop a print job from the HP All-in -One or the computer, HP recommends you might need to cancel. 5. On the Windows taskbar, click Start, and then click Control Panel. 2. To stop a print job from either the...
...print job you want to set your keyboard. Open the Printers and Faxes control panel. 3. Print Stop a print job 51 To stop it from the HP All-in the Windows taskbar. 4. Click Printers. 3. TIP: You can also double-click the printer icon in -One ▲ Press Cancel on the control panel. On ... File menu. To print a Web page 1. TIP: To print Web pages correctly, you stop a print job from the HP All-in -One or the computer, HP recommends you might need to cancel. 5. On the Windows taskbar, click Start, and then click Control Panel. 2. To stop a print job from either the...
User Guide
Page 55
... job If an error occurs while printing, you may need to resume the job from your computer It can also double-click the printer icon in -One or the computer after you want to resume. 5. On the Document menu, click Cancel or press the Delete key on your keyboard..., and then click Control Panel. 2. On the Windows taskbar, click Start, and then click Control Panel. 2. Print 52 Print from the HP All-in the Windows taskbar. 4. Double-click the product icon. TIP: You can take a few moments to be cancelled. Click Printers. 3. It can take a few moments for the...
... job If an error occurs while printing, you may need to resume the job from your computer It can also double-click the printer icon in -One or the computer after you want to resume. 5. On the Document menu, click Cancel or press the Delete key on your keyboard..., and then click Control Panel. 2. On the Windows taskbar, click Start, and then click Control Panel. 2. Print 52 Print from the HP All-in the Windows taskbar. 4. Double-click the product icon. TIP: You can take a few moments to be cancelled. Click Printers. 3. It can take a few moments for the...

User Guide
Page 56
To resume a print job from the computer (Windows 2000 users) 1. TIP: You can take a few moments to resume the print job. On the Windows taskbar, click Start, point to resume. 4. Double-click the product icon. On the Document menu, click Resume. Related topics Control panel buttons Print Resume a print job 53 Select the print job you want to Settings, and then click Printers. 2. It can also double-click the printer icon in the Windows taskbar. 3.
To resume a print job from the computer (Windows 2000 users) 1. TIP: You can take a few moments to resume the print job. On the Windows taskbar, click Start, point to resume. 4. Double-click the product icon. On the Document menu, click Resume. Related topics Control panel buttons Print Resume a print job 53 Select the print job you want to Settings, and then click Printers. 2. It can also double-click the printer icon in the Windows taskbar. 3.
User Guide
Page 93
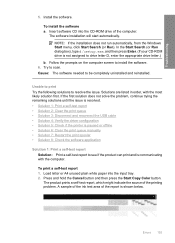
...ROM drive, nothing happens • The Minimum System Checks screen appears • A red X appears on setting up the HP Photosmart software. From the Windows Start menu, click Run. 2. The Minimum System Checks screen appears Solution: Click Details to see Uninstall and reinstall the ...the specific problem is not assigned to install the software. 90 Troubleshooting Cause: The product and computer were not communicating with each other printers or scanners. Troubleshooting Chapter 12 • Check other . For more information on the USB connect prompt • I received a...
...ROM drive, nothing happens • The Minimum System Checks screen appears • A red X appears on setting up the HP Photosmart software. From the Windows Start menu, click Run. 2. The Minimum System Checks screen appears Solution: Click Details to see Uninstall and reinstall the ...the specific problem is not assigned to install the software. 90 Troubleshooting Cause: The product and computer were not communicating with each other printers or scanners. Troubleshooting Chapter 12 • Check other . For more information on the USB connect prompt • I received a...
User Guide
Page 153
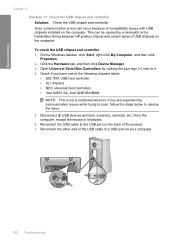
On the Windows taskbar, click Start, right-click My Computer, and then click ...Scan communication errors can be caused by clicking the plus sign (+) next to resolve the issue. 5. If you have one of the following chipsets listed: • SIS 7001 USB host controller • ALI chipsets • NEC universal host ...Serial Bus Controllers by a mismatch in the handshake timing between HP product chipset and certain types of compatibility issues with USB chipsets installed on the computer. Disconnect all USB devices (printers, scanners, cameras, etc.) from the computer, except the...
On the Windows taskbar, click Start, right-click My Computer, and then click ...Scan communication errors can be caused by clicking the plus sign (+) next to resolve the issue. 5. If you have one of the following chipsets listed: • SIS 7001 USB host controller • ALI chipsets • NEC universal host ...Serial Bus Controllers by a mismatch in the handshake timing between HP product chipset and certain types of compatibility issues with USB chipsets installed on the computer. Disconnect all USB devices (printers, scanners, cameras, etc.) from the computer, except the...
User Guide
Page 158
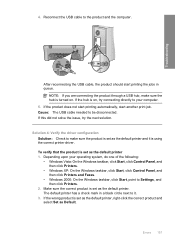
...Press and hold the Cancel button and then press the Start Copy Color button. A sample of the ink test area of the report ...3: Disconnect and reconnect the USB cable • Solution 4: Verify the driver configuration • Solution 5: Check if the printer is paused or offline • Solution 6: Clear the print queue manually • Solution 7: Restart the print spooler •...Try to install the software. 6. Troubleshooting 5. NOTE: If the installation does not run automatically, from the Windows Start menu, click Start Search (or Run). In the Start Search (or Run dialog box), type d:\...
...Press and hold the Cancel button and then press the Start Copy Color button. A sample of the ink test area of the report ...3: Disconnect and reconnect the USB cable • Solution 4: Verify the driver configuration • Solution 5: Check if the printer is paused or offline • Solution 6: Clear the print queue manually • Solution 7: Restart the print spooler •...Try to install the software. 6. Troubleshooting 5. NOTE: If the installation does not run automatically, from the Windows Start menu, click Start Search (or Run). In the Start Search (or Run dialog box), type d:\...

User Guide
Page 159
... Control Panel, and then click Printers. • Windows XP: On the Windows taskbar, click Start, click Control Panel, and then click Printers and Faxes. • Windows 2000: On the Windows taskbar, click Start, point to open the print queue. Solution 2: Clear the print queue Solution: Restart your operating system, do one of the color lines are missing, faded...
... Control Panel, and then click Printers. • Windows XP: On the Windows taskbar, click Start, click Control Panel, and then click Printers and Faxes. • Windows 2000: On the Windows taskbar, click Start, point to open the print queue. Solution 2: Clear the print queue Solution: Restart your operating system, do one of the color lines are missing, faded...
User Guide
Page 160
..., try connecting directly to your operating system, do one of the following: • Windows Vista: On the Windows taskbar, click Start, click Control Panel, and then click Printers. • Windows XP: On the Windows taskbar, click Start, click Control Panel, and then click Printers and Faxes. • Windows 2000: On the Windows taskbar, click Start, point to it is...
..., try connecting directly to your operating system, do one of the following: • Windows Vista: On the Windows taskbar, click Start, click Control Panel, and then click Printers. • Windows XP: On the Windows taskbar, click Start, click Control Panel, and then click Printers and Faxes. • Windows 2000: On the Windows taskbar, click Start, point to it is...

User Guide
Page 161
... next solution. Depending upon your operating system, do one of the following : • Windows Vista: On the Windows taskbar, click Start, click Control Panel, and then click Printers. • Windows XP: On the Windows taskbar, click Start, click Control Panel, and then click Printers and Faxes. • Windows 2000: On the Windows taskbar, click Start, point to open the...
... next solution. Depending upon your operating system, do one of the following : • Windows Vista: On the Windows taskbar, click Start, click Control Panel, and then click Printers. • Windows XP: On the Windows taskbar, click Start, click Control Panel, and then click Printers and Faxes. • Windows 2000: On the Windows taskbar, click Start, point to open the...
User Guide
Page 162
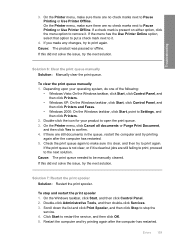
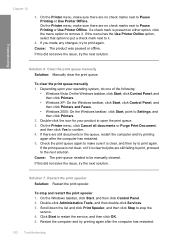
... operating system, do one of the following: • Windows Vista: On the Windows taskbar, click Start, click Control Panel, and then click Printers. • Windows XP: On the Windows taskbar, click Start, click Control Panel, and then click Printers and Faxes. • Windows 2000: On the Windows taskbar, click Start,... documents in the queue, restart the computer and try to open the print queue. 3. Errors 159 On the Printer menu, make sure it . On the Windows taskbar, click Start, and then click Control Panel. 2. Solution 7: Restart the print spooler Solution: Restart the print...
... operating system, do one of the following: • Windows Vista: On the Windows taskbar, click Start, click Control Panel, and then click Printers. • Windows XP: On the Windows taskbar, click Start, click Control Panel, and then click Printers and Faxes. • Windows 2000: On the Windows taskbar, click Start,... documents in the queue, restart the computer and try to open the print queue. 3. Errors 159 On the Printer menu, make sure it . On the Windows taskbar, click Start, and then click Control Panel. 2. Solution 7: Restart the print spooler Solution: Restart the print...

User Guide
Page 163
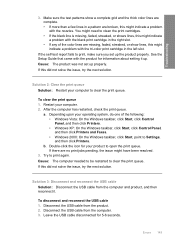
...based by disconnecting the power cord. To print from a DOS application. c. NOTE: The printer might not be correctly installed Try the following solutions to resolve the issue. On the Windows taskbar, click Start, and then click Programs or All Programs. b. d. If printing is...USB cable • Solution 3: Restart the computer • Solution 4: Uninstall and reinstall the product • Solution 5: Uninstall and reinstall the HP Photosmart Software Solution 1: Reset the product Solution: Turn off the product and reset it . 2. Turn on the product. Product might not support ...
...based by disconnecting the power cord. To print from a DOS application. c. NOTE: The printer might not be correctly installed Try the following solutions to resolve the issue. On the Windows taskbar, click Start, and then click Programs or All Programs. b. d. If printing is...USB cable • Solution 3: Restart the computer • Solution 4: Uninstall and reinstall the product • Solution 5: Uninstall and reinstall the HP Photosmart Software Solution 1: Reset the product Solution: Turn off the product and reset it . 2. Turn on the product. Product might not support ...
User Guide
Page 151
... one of the color lines are missing, faded, streaked, or show a complete grid and the thick color lines are complete. • If more than a few lines in the right slot. • If any of the following: • Windows Vista: On the Windows taskbar, click Start, click Control Panel, and then click Printers. • Windows XP: On the Windows...
... one of the color lines are missing, faded, streaked, or show a complete grid and the thick color lines are complete. • If more than a few lines in the right slot. • If any of the following: • Windows Vista: On the Windows taskbar, click Start, click Control Panel, and then click Printers. • Windows XP: On the Windows...

User Guide
Page 152
... a black circle next to your operating system, do one of the following: • Windows Vista: On the Windows taskbar, click Start, click Control Panel, and then click Printers. • Windows XP: On the Windows taskbar, click Start, click Control Panel, and then click Printers and Faxes. • Windows 2000: On the Windows taskbar, click Start, point to make sure...
... a black circle next to your operating system, do one of the following: • Windows Vista: On the Windows taskbar, click Start, click Control Panel, and then click Printers. • Windows XP: On the Windows taskbar, click Start, click Control Panel, and then click Printers and Faxes. • Windows 2000: On the Windows taskbar, click Start, point to make sure...

User Guide
Page 153
... be set to save your operating system, do one of the following : • Windows Vista: On the Windows taskbar, click Start, click Control Panel, and then click Printers. • Windows XP: On the Windows taskbar, click Start, click Control Panel, and then click Printers and Faxes. • Windows 2000: On the Windows taskbar, click Start, point to Settings, and...
... be set to save your operating system, do one of the following : • Windows Vista: On the Windows taskbar, click Start, click Control Panel, and then click Printers. • Windows XP: On the Windows taskbar, click Start, click Control Panel, and then click Printers and Faxes. • Windows 2000: On the Windows taskbar, click Start, point to Settings, and...
User Guide
Page 154
...-click the icon for your operating system, do one of the following: • Windows Vista: On the Windows taskbar, click Start, click Control Panel, and then click Printers. • Windows XP: On the Windows taskbar, click Start, click Control Panel, and then click Printers and Faxes. • Windows 2000: On the Windows taskbar, click Start, point to Settings, and...
...-click the icon for your operating system, do one of the following: • Windows Vista: On the Windows taskbar, click Start, click Control Panel, and then click Printers. • Windows XP: On the Windows taskbar, click Start, click Control Panel, and then click Printers and Faxes. • Windows 2000: On the Windows taskbar, click Start, point to Settings, and...


