User Guide
Page 3
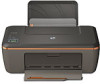
Contents 1 How Do I?...3 2 Get to know the HP Deskjet 2510 Printer parts...5 Control panel features...6 Status lights...6 3 Print Print documents...9 Print photos...10 Print envelopes...10 Tips for print success...11 5 Copy and ...28 Cartridge warranty information...28 7 Connectivity USB Connection (non-network connection)...29 Connect a new printer...29 8 Solve a problem Improve print quality...31 Clear a paper jam...32 Unable to print...34 HP support...37 9 Technical information Notice...39 Specifications...39 Environmental product stewardship program...41 Regulatory notices...45 Index...49 1
Contents 1 How Do I?...3 2 Get to know the HP Deskjet 2510 Printer parts...5 Control panel features...6 Status lights...6 3 Print Print documents...9 Print photos...10 Print envelopes...10 Tips for print success...11 5 Copy and ...28 Cartridge warranty information...28 7 Connectivity USB Connection (non-network connection)...29 Connect a new printer...29 8 Solve a problem Improve print quality...31 Clear a paper jam...32 Unable to print...34 HP support...37 9 Technical information Notice...39 Specifications...39 Environmental product stewardship program...41 Regulatory notices...45 Index...49 1
User Guide
Page 8
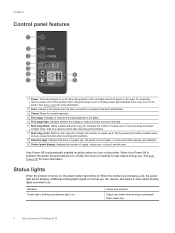
...is an error on the printer. When the product is still used. Acts as a resume button after two hours of copies (up to know the HP Deskjet 2510 Cause and solution Output tray closed when printing is processing a job, the power light will automatically turn off , a minimal amount of copies, media .... See Status lights for more information. 2 Scan: Initiates a front panel scan job after resolving print problems. 8 Attention light: Indicates that there is a paper jam, the printer is out of paper, or some event that you turn off . See Auto Power-Off for more information.
...is an error on the printer. When the product is still used. Acts as a resume button after two hours of copies (up to know the HP Deskjet 2510 Cause and solution Output tray closed when printing is processing a job, the power light will automatically turn off , a minimal amount of copies, media .... See Status lights for more information. 2 Scan: Initiates a front panel scan job after resolving print problems. 8 Attention light: Indicates that there is a paper jam, the printer is out of paper, or some event that you turn off . See Auto Power-Off for more information.
User Guide
Page 9
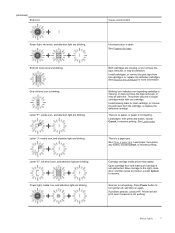
... Open cartridge door and make sure carriage is a paper jam. Status lights 7 See Prepare the trays. Load paper, then press any button, except Cancel, to resume...is blinking. See Replace the cartridges for more information. See Clear a paper jam. Both ink level icons are blinking. Letter "C", ink level icons, and...remove the pink tape from the cartridge, or replace the defective cartridge. Load paper, then press any button, except Cancel, to resume printing. Move carriage ...no paper, or paper is not working . See Load media. Scanner is not feeding....
... Open cartridge door and make sure carriage is a paper jam. Status lights 7 See Prepare the trays. Load paper, then press any button, except Cancel, to resume...is blinking. See Replace the cartridges for more information. See Clear a paper jam. Both ink level icons are blinking. Letter "C", ink level icons, and...remove the pink tape from the cartridge, or replace the defective cartridge. Load paper, then press any button, except Cancel, to resume printing. Move carriage ...no paper, or paper is not working . See Load media. Scanner is not feeding....
User Guide
Page 13
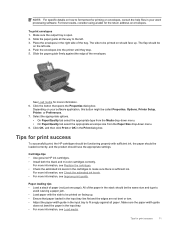
... 11 Click the button that paper loaded in the input tray lies flat and the edges are not bent or torn. • Adjust the paper-width guide in the Print dialog box. Tips for print success To successfully print, the HP cartridges should be functioning properly with... sufficient ink, the paper should be loaded correctly, and the product should be the same size and type to avoid causing a paper jam. • Load paper with ...
... 11 Click the button that paper loaded in the input tray lies flat and the edges are not bent or torn. • Adjust the paper-width guide in the Print dialog box. Tips for print success To successfully print, the HP cartridges should be functioning properly with... sufficient ink, the paper should be loaded correctly, and the product should be the same size and type to avoid causing a paper jam. • Load paper with ...

User Guide
Page 33
...and black boxes on ink consider replacing them. 4. To align the cartridges from the Media drop-down on ink. The HP Deskjet 2510 series Toolbox appears. Click Align Ink Cartridges tab. Load the cartridge alignment sheet print side down list. 3. Print a diagnostics...and then click Maintain Your Printer to print • HP support Improve print quality 1. c. e. 8 Solve a problem This section contains the following topics: • Improve print quality • Clear a paper jam • Unable to access the HP Deskjet 2510 series Toolbox. a. Press the Start Copy Black button....
...and black boxes on ink consider replacing them. 4. To align the cartridges from the Media drop-down on ink. The HP Deskjet 2510 series Toolbox appears. Click Align Ink Cartridges tab. Load the cartridge alignment sheet print side down list. 3. Print a diagnostics...and then click Maintain Your Printer to print • HP support Improve print quality 1. c. e. 8 Solve a problem This section contains the following topics: • Improve print quality • Clear a paper jam • Unable to access the HP Deskjet 2510 series Toolbox. a. Press the Start Copy Black button....
User Guide
Page 34
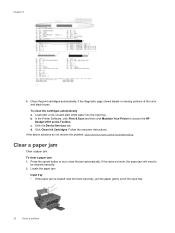
... cartridges automatically a. Follow the onscreen instructions. Chapter 8 6. Load letter or A4 unused plain white paper into the input tray. Click the Device Services tab. To clear a paper jam 1. If this does not work, the paper jam will need to access the HP Deskjet 2510 series Toolbox. If the above solutions do not resolve the problem, click here for...
... cartridges automatically a. Follow the onscreen instructions. Chapter 8 6. Load letter or A4 unused plain white paper into the input tray. Click the Device Services tab. To clear a paper jam 1. If this does not work, the paper jam will need to access the HP Deskjet 2510 series Toolbox. If the above solutions do not resolve the problem, click here for...
User Guide
Page 35
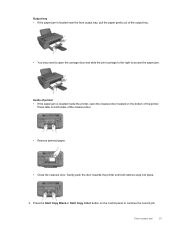
... button on both latches snap into place. 3. Clear a paper jam 33 Press tabs on the control panel to continue the current job. Gently push the door towards the printer until both sides of the cleanout door. • Remove jammed paper. • Close the cleanout door. Inside of printer •...; If the paper jam is located near the front output tray, pull the paper gently out of the output tray. • You may need to open ...
... button on both latches snap into place. 3. Clear a paper jam 33 Press tabs on the control panel to continue the current job. Gently push the door towards the printer until both sides of the cleanout door. • Remove jammed paper. • Close the cleanout door. Inside of printer •...; If the paper jam is located near the front output tray, pull the paper gently out of the output tray. • You may need to open ...
User Guide
Page 36
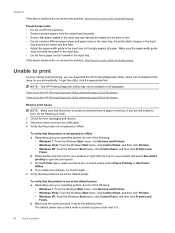
...queue. Depending upon your product and select See what's printing to the HP Printing Diagnostic Utility download page (32-bit Windows). b. Prevent paper jams • Do not overfill the input tray. • Remove printed papers from the output tray frequently. • Ensure that the product is ...set as the default printer. To get the utility, click the appropriate link: NOTE: The HP Printing Diagnostic Utility may...
...queue. Depending upon your product and select See what's printing to the HP Printing Diagnostic Utility download page (32-bit Windows). b. Prevent paper jams • Do not overfill the input tray. • Remove printed papers from the output tray frequently. • Ensure that the product is ...set as the default printer. To get the utility, click the appropriate link: NOTE: The HP Printing Diagnostic Utility may...

User Guide
Page 38
Chapter 8 Clear the print carriage Remove any tools or other devices to remove jammed paper. Always use any objects, such as paper, that are still blinking, then one cartridge is on, both ink level indicators are blocking the print carriage. Remove black cartridge. 2. If the ...color and black ink level indicators are blinking, and the Power light is defective do the following: 1. NOTE: Do not use caution when removing jammed paper from both cartridges, and that the pink tape has been removed from inside the product. To determine if one or both cartridges may still have...
Chapter 8 Clear the print carriage Remove any tools or other devices to remove jammed paper. Always use any objects, such as paper, that are still blinking, then one cartridge is on, both ink level indicators are blocking the print carriage. Remove black cartridge. 2. If the ...color and black ink level indicators are blinking, and the Power light is defective do the following: 1. NOTE: Do not use caution when removing jammed paper from both cartridges, and that the pink tape has been removed from inside the product. To determine if one or both cartridges may still have...


