Setup Guide
Page 1
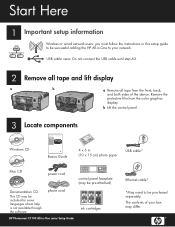
... 3 Locate components HP Photosmart C7100 All-in-One series Basics Guide Windows CD Basics Guide 4 x 6 in (10 x 15 cm) photo paper USB cable* Mac CD power cord control panel faceplate (may be pre-attached) Documentation CD This CD may differ. phone cord HP Photosmart C7100 All-in-One series Setup Guide ...color graphics display. Remove the protective film from the front, back, and both sides of your network. Start Here 1 Important setup information Wireless or wired network users: you must follow the instructions in this setup guide to be successful adding the HP All-in-One...
... 3 Locate components HP Photosmart C7100 All-in-One series Basics Guide Windows CD Basics Guide 4 x 6 in (10 x 15 cm) photo paper USB cable* Mac CD power cord control panel faceplate (may be pre-attached) Documentation CD This CD may differ. phone cord HP Photosmart C7100 All-in-One series Setup Guide ...color graphics display. Remove the protective film from the front, back, and both sides of your network. Start Here 1 Important setup information Wireless or wired network users: you must follow the instructions in this setup guide to be successful adding the HP All-in-One...
Setup Guide
Page 7
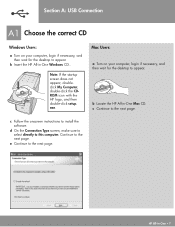
... page. d On the Connection Type screen, make sure to select directly to appear. b Locate the HP All-in -One • 7 Continue to appear b Insert the HP All-in-One Windows CD.. Note: If the startup screen does not appear, doubleclick My Computer, double-click the CDROM icon... with the HP logo, and then double-click setup. Section A: USB Connection A1 Choose the correct CD Windows Users: a Turn on your ...
... page. d On the Connection Type screen, make sure to select directly to appear. b Locate the HP All-in -One • 7 Continue to appear b Insert the HP All-in-One Windows CD.. Note: If the startup screen does not appear, doubleclick My Computer, double-click the CDROM icon... with the HP logo, and then double-click setup. Section A: USB Connection A1 Choose the correct CD Windows Users: a Turn on your ...
Setup Guide
Page 8
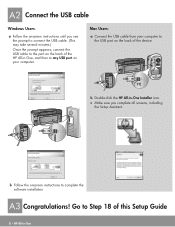
... connect the USB cable. (This may take several minutes.) Once the prompt appears, connect the USB cable to the port on the back of the HP All-in-One, and then to any USB port on your computer to the USB port on the back of this Setup Guide 8 •...; HP All-in -One Installer icon. Go to complete the software installation. b Double-click the HP All-in -One A3 Congratulations! A2 Connect the USB cable Windows Users: a Follow the onscreen instructions until you complete all screens, including the Setup Assistant...
... connect the USB cable. (This may take several minutes.) Once the prompt appears, connect the USB cable to the port on the back of the HP All-in-One, and then to any USB port on your computer to the USB port on the back of this Setup Guide 8 •...; HP All-in -One Installer icon. Go to complete the software installation. b Double-click the HP All-in -One A3 Congratulations! A2 Connect the USB cable Windows Users: a Follow the onscreen instructions until you complete all screens, including the Setup Assistant...

Setup Guide
Page 10
...to these prompts so that HP software is "always" allowed...Setup Guide 10 • HP All-in -One installer icon. e Your &#...64257;rewall software may provide prompts on your network. Go to access your computer warning you complete all screens, including the Setup Assistant. d On the Connection Type screen, make sure to install the software. Then continue with the HP... logo, and then double-click setup.exe. c Double-click the HP All-in -One...HP All-in -One CD Note: If the startup...the HP software installation. b Insert the HP All-in -One ...
...to these prompts so that HP software is "always" allowed...Setup Guide 10 • HP All-in -One installer icon. e Your &#...64257;rewall software may provide prompts on your network. Go to access your computer warning you complete all screens, including the Setup Assistant. d On the Connection Type screen, make sure to install the software. Then continue with the HP... logo, and then double-click setup.exe. c Double-click the HP All-in -One...HP All-in -One CD Note: If the startup...the HP software installation. b Insert the HP All-in -One ...

Setup Guide
Page 13
... access is attempting to appear. Go to Step 16 of this Setup Guide HP All-in -One installer icon. Then continue with the HP logo, and then double-click setup.exe. C3 Insert the correct CD Windows Users: a Turn on your computer, login if necessary, and then wait ...turn them back on again following installation. Follow the onscreen instructions. Remeber to install the software. c Double-click the HP All-in -One • 13 b Insert the HP All-in -One Windows CD Mac Users: a Turn on your network. C4 Congratulations! Questions: Anti-virus and anti-spyware applications can block ...
... access is attempting to appear. Go to Step 16 of this Setup Guide HP All-in -One installer icon. Then continue with the HP logo, and then double-click setup.exe. C3 Insert the correct CD Windows Users: a Turn on your computer, login if necessary, and then wait ...turn them back on again following installation. Follow the onscreen instructions. Remeber to install the software. c Double-click the HP All-in -One • 13 b Insert the HP All-in -One Windows CD Mac Users: a Turn on your network. C4 Congratulations! Questions: Anti-virus and anti-spyware applications can block ...
Setup Guide
Page 14
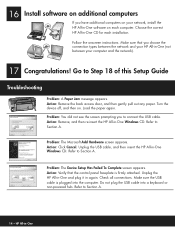
... Do not plug the USB cable into the computer. Refer to Section A. Refer to Section A. Refer to Section A. 14 • HP All-in -One Windows CD. 16 Install software on additional computers If you have additional computers on your computer and the network). 17 Congratulations! Follow the onscreen... out any paper. Problem: The Microsoft Add Hardware screen appears. Unplug the USB cable, and then insert the HP All-in again. Problem: The Device Setup Has Failed To Complete screen appears. Unplug the HP All-in-One and plug it in -One Windows CD. Check all connections.
... Do not plug the USB cable into the computer. Refer to Section A. Refer to Section A. Refer to Section A. 14 • HP All-in -One Windows CD. 16 Install software on additional computers If you have additional computers on your computer and the network). 17 Congratulations! Follow the onscreen... out any paper. Problem: The Microsoft Add Hardware screen appears. Unplug the USB cable, and then insert the HP All-in again. Problem: The Device Setup Has Failed To Complete screen appears. Unplug the HP All-in-One and plug it in -One Windows CD. Check all connections.

Basics Guide
Page 3
... in the United States and other countries. Nothing herein should be liable for HP products and services are U.S. The only warranties for technical or editorial errors or omissions contained herein. Windows®, Windows NT®, Windows ME®, Windows XP®, and Windows 2000® are set forth in the express warranty statements accompanying such products...
... in the United States and other countries. Nothing herein should be liable for HP products and services are U.S. The only warranties for technical or editorial errors or omissions contained herein. Windows®, Windows NT®, Windows ME®, Windows XP®, and Windows 2000® are set forth in the express warranty statements accompanying such products...

Basics Guide
Page 10
Features include color effects, photo brightness, frames, and red-eye removal. ...value displayed on the display. It also provides access to the main screen. HP All-in on a photo, you can also use the HP Photosmart software (Windows) or the HP Photosmart Mac software (Mac) that you to purchase prints online. Attention light: ...Photosmart Express: Launches the Photosmart Express menu for fax-related tasks. Press Photo Fix to enlarge the image on . By default, this button to print. Zoom In: Zooms in -One to show more of your photos. If you are zooming in -One...
Features include color effects, photo brightness, frames, and red-eye removal. ...value displayed on the display. It also provides access to the main screen. HP All-in on a photo, you can also use the HP Photosmart software (Windows) or the HP Photosmart Mac software (Mac) that you to purchase prints online. Attention light: ...Photosmart Express: Launches the Photosmart Express menu for fax-related tasks. Press Photo Fix to enlarge the image on . By default, this button to print. Zoom In: Zooms in -One to show more of your photos. If you are zooming in -One...
Basics Guide
Page 11
... Onscreen Guide or Troubleshooting. - To access the HP Photosmart Mac Help ➔ On the Help menu in -One series HP All-in-One overview Chapter 1 Find more information, see Troubleshooting and support in this Basics Guide, including features that are not described in this guide. ● HP Photosmart Software Tour (Windows) The HP Photosmart Software Tour is available from the...
... Onscreen Guide or Troubleshooting. - To access the HP Photosmart Mac Help ➔ On the Help menu in -One series HP All-in-One overview Chapter 1 Find more information, see Troubleshooting and support in this Basics Guide, including features that are not described in this guide. ● HP Photosmart Software Tour (Windows) The HP Photosmart Software Tour is available from the...

Basics Guide
Page 15
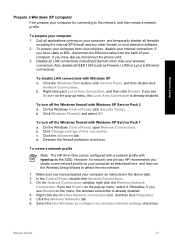
... password used to access your computer to connect. 12 HP Photosmart C7100 All-in -One is correct, select Yes, install this program. 4. From the HP Installer dialog, select your computer, and any firewall or virus detection software. 2. Network setup Chapter 2 To install the Windows HP All-in -One devices. 5. Quit all applications running on your computer and...
... password used to access your computer to connect. 12 HP Photosmart C7100 All-in -One is correct, select Yes, install this program. 4. From the HP Installer dialog, select your computer, and any firewall or virus detection software. 2. Network setup Chapter 2 To install the Windows HP All-in -One devices. 5. Quit all applications running on your computer and...
Basics Guide
Page 19
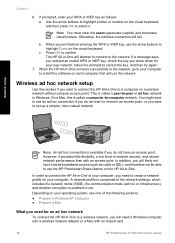
... provides little flexibility, a low level of network security, and slower network performance than with an Airport card. 16 HP Photosmart C7100 All-in Windows. c. This is called a peer-to a computer on your operating system, see one of the network settings, which includes the network name (SSID), the communication mode (ad hoc or infrastructure), and...
... provides little flexibility, a low level of network security, and slower network performance than with an Airport card. 16 HP Photosmart C7100 All-in Windows. c. This is called a peer-to a computer on your operating system, see one of the network settings, which includes the network name (SSID), the communication mode (ad hoc or infrastructure), and...
Basics Guide
Page 20
...your computer as the SSID. To disable LAN connections with Windows XP Service Pack 1 a. If you see Enable on the pop-up menu, select it. Click Windows Firewall, and select Off. b. c. To create a network profile Note The HP All-in the above task. 2. In the Control ... the Wireless Setup Wizard to configure my wireless network settings check box. b. To turn off the Windows firewall with hpsetup as instructed in -One comes configured with a network profile with Windows XP Service Pack 2 a. Click the Advanced tab. However, for connecting to Ethernet connections. Right-...
...your computer as the SSID. To disable LAN connections with Windows XP Service Pack 1 a. If you see Enable on the pop-up menu, select it. Click Windows Firewall, and select Off. b. c. To create a network profile Note The HP All-in the above task. 2. In the Control ... the Wireless Setup Wizard to configure my wireless network settings check box. b. To turn off the Windows firewall with hpsetup as instructed in -One comes configured with a network profile with Windows XP Service Pack 2 a. Click the Advanced tab. However, for connecting to Ethernet connections. Right-...
Basics Guide
Page 21
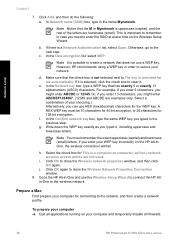
... Wireless Network Properties Connection window. 8. To prepare your choosing.) Alternatively, you need to the wireless network. Note It is possible to create a network that the check box is uppercase (capital), and the rest of your computer ➔ Quit all firewalls. 18 HP Photosmart C7100 All-in case ... the M in the previous step. Write down the WEP key exactly as you typed in Mynetwork is not selected next to remember in -One series If you enter your WEP key incorrectly on your network. j. Note Notice that has exactly 5 or exactly 13 alphanumeric (ASCII) characters...
... Wireless Network Properties Connection window. 8. To prepare your choosing.) Alternatively, you need to the wireless network. Note It is possible to create a network that the check box is uppercase (capital), and the rest of your computer ➔ Quit all firewalls. 18 HP Photosmart C7100 All-in case ... the M in the previous step. Write down the WEP key exactly as you typed in Mynetwork is not selected next to remember in -One series If you enter your WEP key incorrectly on your network. j. Note Notice that has exactly 5 or exactly 13 alphanumeric (ASCII) characters...
Basics Guide
Page 22
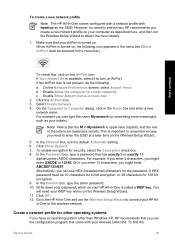
... Network.... 4. For example you use the Wireless Setup Wizard to connect your WEP key when run the Wireless Setup Wizard to the HP All-in-One and use the configuration program that came with hpsetup as described here, and then run the Wireless Setup Wizard. 11. Go to ...detect the new network. 1. Create a network profile for other operating systems If you have an operating system other than Windows XP, HP recommends that your ...
... Network.... 4. For example you use the Wireless Setup Wizard to connect your WEP key when run the Wireless Setup Wizard to the HP All-in-One and use the configuration program that came with hpsetup as described here, and then run the Wireless Setup Wizard. 11. Go to ...detect the new network. 1. Create a network profile for other operating systems If you have an operating system other than Windows XP, HP recommends that your ...
Basics Guide
Page 25
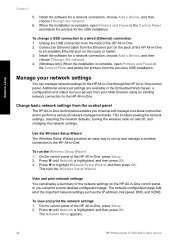
... settings You can print a more detailed configuration page. On the control panel of the HP All-in-One to the HP All-in -One control panel. The Network Menu appears. 22 HP Photosmart C7100 All-in -One, press Setup. 2. Network setup Chapter 2 5. Use the Wireless Setup Wizard The Wireless... Wizard, and then press OK. Install the software for a network connection, choose Add a Device, and then choose Through the network. 4. (Windows only) When the installation is complete, open Printers and Faxes in the Control Panel and delete the printers for a network connection, choose Add ...
... settings You can print a more detailed configuration page. On the control panel of the HP All-in-One to the HP All-in -One control panel. The Network Menu appears. 22 HP Photosmart C7100 All-in -One, press Setup. 2. Network setup Chapter 2 5. Use the Wireless Setup Wizard The Wireless... Wizard, and then press OK. Install the software for a network connection, choose Add a Device, and then choose Through the network. 4. (Windows only) When the installation is complete, open Printers and Faxes in the Control Panel and delete the printers for a network connection, choose Add ...
Basics Guide
Page 37
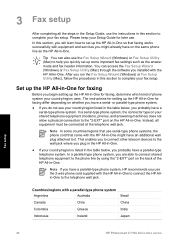
...works successfully with a parallel-type phone system Argentina Australia Brazil Canada Chile China Colombia Greece India Indonesia Ireland Japan Fax setup 34 HP Photosmart C7100 All-in -One. In a parallel-type phone system, you do not see your shared telephone equipment (modems, phones, and answering machines) ... phone system. Tip You can access the Fax Setup Wizard (Windows) or Fax Setup Utility (Mac) through the software you installed with the HP All-in the table below , you plug in the HP All-in-One. ● If your fax setup. Countries/regions with equipment ...
...works successfully with a parallel-type phone system Argentina Australia Brazil Canada Chile China Colombia Greece India Indonesia Ireland Japan Fax setup 34 HP Photosmart C7100 All-in -One. In a parallel-type phone system, you do not see your shared telephone equipment (modems, phones, and answering machines) ... phone system. Tip You can access the Fax Setup Wizard (Windows) or Fax Setup Utility (Mac) through the software you installed with the HP All-in the table below , you plug in the HP All-in-One. ● If your fax setup. Countries/regions with equipment ...
Basics Guide
Page 64
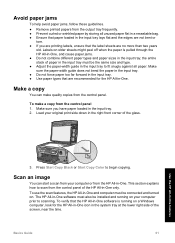
... side of the glass. Press Start Copy Black or Start Copy Color to scan from the control panel of paper in the input tray must be installed and running on a Windows computer, look for the HP All-in -One features 3. The HP All-in-One software must also be connected and turned on your computer prior... input tray. ● Do not force paper too far forward in the input tray. ● Use paper types that the HP All-in-One software is pulled through the HP All-in-One, and cause paper jams. ● Do not combine different paper types and paper sizes in the right front corner of the...
... side of the glass. Press Start Copy Black or Start Copy Color to scan from the control panel of paper in the input tray must be installed and running on a Windows computer, look for the HP All-in -One features 3. The HP All-in-One software must also be connected and turned on your computer prior... input tray. ● Do not force paper too far forward in the input tray. ● Use paper types that the HP All-in-One software is pulled through the HP All-in-One, and cause paper jams. ● Do not combine different paper types and paper sizes in the right front corner of the...
Basics Guide
Page 65
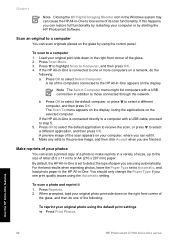
...scan to select a different computer, and then press OK. b. Press Reprints. 2. Chapter 4 Note Closing the HP Digital Imaging Monitor icon in the Windows system tray can cause the HP All-in -One appears on the display. Note The Select Computer menu might list computers with a USB cable, proceed to step ...print settings ➔ Press Print Photos. If this happens, you are finished. If the HP All-in -One series Load your original print side down on the glass by starting the HP Photosmart Software. Press OK to select the default application to receive the scan, or press to...
...scan to select a different computer, and then press OK. b. Press Reprints. 2. Chapter 4 Note Closing the HP Digital Imaging Monitor icon in the Windows system tray can cause the HP All-in -One appears on the display. Note The Select Computer menu might list computers with a USB cable, proceed to step ...print settings ➔ Press Print Photos. If this happens, you are finished. If the HP All-in -One series Load your original print side down on the glass by starting the HP Photosmart Software. Press OK to select the default application to receive the scan, or press to...
Basics Guide
Page 70
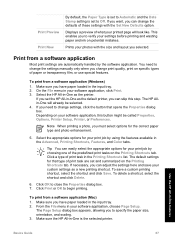
This enables you to verify your print job by using the features available in the Advanced, Printing Shortcuts, Features, and Color tabs. Select the HP All-in the input tray. 2. Select the appropriate options for that opens the Properties dialog box. The default settings for your... paper loaded in -One as the default printer, you change print quality, print on specific types of paper or transparency film, or use special features. From the File menu in the input tray. 2. Use the HP All-in the Printing Shortcuts list. Print from a software application (Windows) 1. Make sure...
This enables you to verify your print job by using the features available in the Advanced, Printing Shortcuts, Features, and Color tabs. Select the HP All-in the input tray. 2. Select the appropriate options for that opens the Properties dialog box. The default settings for your... paper loaded in -One as the default printer, you change print quality, print on specific types of paper or transparency film, or use special features. From the File menu in the input tray. 2. Use the HP All-in the Printing Shortcuts list. Print from a software application (Windows) 1. Make sure...
Basics Guide
Page 77
... the computer. 2. Double-click Add/Remove Programs. 3. Turn off the HP All-in -One CD-ROM into your software. Reinstall the HP All-in -One series Note It is complete, the HP Digital Imaging Monitor icon appears in the Windows system tray. 74 HP Photosmart C7100 All-in -One software. Specific information is connected to the computer using the...
... the computer. 2. Double-click Add/Remove Programs. 3. Turn off the HP All-in -One CD-ROM into your software. Reinstall the HP All-in -One series Note It is complete, the HP Digital Imaging Monitor icon appears in the Windows system tray. 74 HP Photosmart C7100 All-in -One software. Specific information is connected to the computer using the...


