Setup Guide
Page 15
...Wireless setup Wizard, you may be currently running on your PC. Problem: You see the error message Printer Not Found. HP Photosmart C6300 All-in -One cannot connect to another wireless router in -One may have not accidently inserted blank spaces at the beginning or end. • If you are ... router may not be power cycled. Make sure your HP All- Make sure your network name is unique. • The signal between the HP All-in One control panel Network Menu. • If you entered your network name (SSID) manually using the default network name (SSID) provided by your...
...Wireless setup Wizard, you may be currently running on your PC. Problem: You see the error message Printer Not Found. HP Photosmart C6300 All-in -One cannot connect to another wireless router in -One may have not accidently inserted blank spaces at the beginning or end. • If you are ... router may not be power cycled. Make sure your HP All- Make sure your network name is unique. • The signal between the HP All-in One control panel Network Menu. • If you entered your network name (SSID) manually using the default network name (SSID) provided by your...
User Guide
Page 76
...your computer The HP All-in the Advanced, Printing Shortcuts, Features, and Color tabs. Click a type of print task are automatically handled by using the features available in -One can adjust the ... Stop a print job Print from a software application 1. Make sure the product is the selected printer. 4. Select the appropriate options for the specific photo paper and photo enhancement. 5. You need ...Print from a software application 73 Make sure you need to change the settings manually only when you must select options for your custom settings as borderless images, newsletters, greeting ...
...your computer The HP All-in the Advanced, Printing Shortcuts, Features, and Color tabs. Click a type of print task are automatically handled by using the features available in -One can adjust the ... Stop a print job Print from a software application 1. Make sure the product is the selected printer. 4. Select the appropriate options for the specific photo paper and photo enhancement. 5. You need ...Print from a software application 73 Make sure you need to change the settings manually only when you must select options for your custom settings as borderless images, newsletters, greeting ...
User Guide
Page 78
...panorama size (if listed sizes are using. Make sure you can set the paper type for the current job 75 To set the paper type manually. Print Change the print settings for printing 1. Select the type of paper you are not appropriate, you can specify a custom paper size) ...loaded, and then click OK. the Size list to the paper type and print quality that you select in the printer software. Paper type Copier, multi-purpose, or plain papers Envelopes Greeting-card papers Index cards Inkjet papers Iron-on your software application, click Print. 3. Click the Features tab. 6.
...panorama size (if listed sizes are using. Make sure you can set the paper type for the current job 75 To set the paper type manually. Print Change the print settings for printing 1. Select the type of paper you are not appropriate, you can specify a custom paper size) ...loaded, and then click OK. the Size list to the paper type and print quality that you select in the printer software. Paper type Copier, multi-purpose, or plain papers Envelopes Greeting-card papers Index cards Inkjet papers Iron-on your software application, click Print. 3. Click the Features tab. 6.
User Guide
Page 82
... including letters and transparencies. • Two-sided (Duplex) Printing: Print two-sided pages manually. Depending on transparency film rather than changing the print settings each time. On the File...application, click Print. 2. Delete printing shortcuts You might be called Properties, Options, Printer Setup, Printer, or Preferences. 4. If you can create a printing shortcut by selecting the ...select it when printing on your own printing shortcuts. Change the print settings to HP Premium Inkjet Transparency Film, and then saving the modified shortcut under a new name; for ...
... including letters and transparencies. • Two-sided (Duplex) Printing: Print two-sided pages manually. Depending on transparency film rather than changing the print settings each time. On the File...application, click Print. 2. Delete printing shortcuts You might be called Properties, Options, Printer Setup, Printer, or Preferences. 4. If you can create a printing shortcut by selecting the ...select it when printing on your own printing shortcuts. Change the print settings to HP Premium Inkjet Transparency Film, and then saving the modified shortcut under a new name; for ...
User Guide
Page 86
...In the Features area, select the Enable maximum dpi setting check box. 7. Click the Features tab. 6. To print in -One manually. Make sure the product is the selected printer. 4. Print Perform special print jobs 83 On the File menu in your software application, click Print. 3. To print on... your software application, click Print. 3. Click the button that the HP All-in-One printer will print based on the following paper-types only: • HP Premium Plus Photo Paper • HP Premium Photo Paper • HP Advanced Photo Paper • Photo Hagaki cards Printing in maximum dpi ...
...In the Features area, select the Enable maximum dpi setting check box. 7. Click the Features tab. 6. To print in -One manually. Make sure the product is the selected printer. 4. Print Perform special print jobs 83 On the File menu in your software application, click Print. 3. To print on... your software application, click Print. 3. Click the button that the HP All-in-One printer will print based on the following paper-types only: • HP Premium Plus Photo Paper • HP Premium Photo Paper • HP Advanced Photo Paper • Photo Hagaki cards Printing in maximum dpi ...
User Guide
Page 88
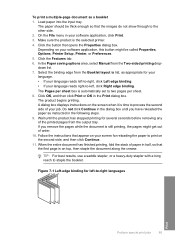
...and then click Print or OK in your software application, click Print. 3. The product begins printing. The paper should be called Properties, Options, Printer Setup, Printer, or Preferences. 5. Select the binding edge from the Booklet layout is list, as a booklet 1. When the entire document has finished printing, ... Print dialog box. Figure 7-1 Left-edge binding for left , click Right edge binding. In the Paper saving options area, select Manual from the output tray. If you have reloaded the paper as instructed in the dialog box until the product has stopped printing for...
...and then click Print or OK in your software application, click Print. 3. The product begins printing. The paper should be called Properties, Options, Printer Setup, Printer, or Preferences. 5. Select the binding edge from the Booklet layout is list, as a booklet 1. When the entire document has finished printing, ... Print dialog box. Figure 7-1 Left-edge binding for left , click Right edge binding. In the Paper saving options area, select Manual from the output tray. If you have reloaded the paper as instructed in the dialog box until the product has stopped printing for...
User Guide
Page 91
...select More. If the selected size is not what you want to make notations on labels or envelopes With the HP All-in the Size list. 7. NOTE: To prevent jams, manually feed the iron-on plain paper. Click the button that opens the Properties dialog box. Click the Features tab. ... Advanced tab, and select the Mirror Image check box. 7. To print on transparencies For the best results, HP recommends you want , click an appropriate size in -One, you allow enough time for inkjet printers. In the Resizing Options area, from the list. 6. Click OK, and then click Print or OK in...
...select More. If the selected size is not what you want to make notations on labels or envelopes With the HP All-in the Size list. 7. NOTE: To prevent jams, manually feed the iron-on plain paper. Click the button that opens the Properties dialog box. Click the Features tab. ... Advanced tab, and select the Mirror Image check box. 7. To print on transparencies For the best results, HP recommends you want , click an appropriate size in -One, you allow enough time for inkjet printers. In the Resizing Options area, from the list. 6. Click OK, and then click Print or OK in...
User Guide
Page 227
... Tools, and then press OK. 4. See the Start Here guide that the product is set as the default printer • Solution 5: Check if the printer is paused or offline • Solution 6: Clear the print queue manually • Solution 7: Stop and restart the print spooler • Solution 8: Verify whether the software application has a problem...
... Tools, and then press OK. 4. See the Start Here guide that the product is set as the default printer • Solution 5: Check if the printer is paused or offline • Solution 6: Clear the print queue manually • Solution 7: Stop and restart the print spooler • Solution 8: Verify whether the software application has a problem...

User Guide
Page 230
... did not solve the issue, try the next solution. Depending upon your operating system, do one of the following : • Windows Vista: On the Windows taskbar, click Start, click Control Panel, and then click Printers. • Windows XP: On the Windows taskbar, click Start, click Control Panel, and ...clear, or if it is clear, and then try to Pause Printing or Use Printer Offline. 4. Cause: The print queue needed to open the print queue. 3. Solution 6: Clear the print queue manually Solution: Manually clear the print queue. Double-click the icon for your product to be set ...
... did not solve the issue, try the next solution. Depending upon your operating system, do one of the following : • Windows Vista: On the Windows taskbar, click Start, click Control Panel, and then click Printers. • Windows XP: On the Windows taskbar, click Start, click Control Panel, and ...clear, or if it is clear, and then try to Pause Printing or Use Printer Offline. 4. Cause: The print queue needed to open the print queue. 3. Solution 6: Clear the print queue manually Solution: Manually clear the print queue. Double-click the icon for your product to be set ...


