User Guide
Page 46
... close the Properties dialog box. 7. Make sure the product is the selected printer. 4. The default settings for your print job by using the features available in the Advanced, Printing Shortcuts, Features, and Color tabs. Click OK to begin printing. Print Print from a software application 1....topics: • Print from a software application • Make the HP All-in-One the default printer • Change the print settings for your print job by the software application. If necessary, you change the settings manually only when you can adjust the settings here and save a custom ...
... close the Properties dialog box. 7. Make sure the product is the selected printer. 4. The default settings for your print job by using the features available in the Advanced, Printing Shortcuts, Features, and Color tabs. Click OK to begin printing. Print Print from a software application 1....topics: • Print from a software application • Make the HP All-in-One the default printer • Change the print settings for your print job by the software application. If necessary, you change the settings manually only when you can adjust the settings here and save a custom ...
User Guide
Page 48
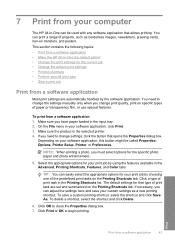
... of paper that you have paper loaded in your software application, this button might be called Properties, Options, Printer Setup, Printer, or Preferences. 5. On the File menu in the input tray. 2. Depending on special papers, such as... resolution The printer software displays the print resolution in the printer software. Make sure the product is the selected printer. 4. Paper type Copier, multi-purpose, or plain papers Envelopes Greeting-card papers Index cards Inkjet papers Iron-...inch (dpi). To set the paper type manually. Print Change the print settings for printing 1.
... of paper that you have paper loaded in your software application, this button might be called Properties, Options, Printer Setup, Printer, or Preferences. 5. On the File menu in the input tray. 2. Depending on special papers, such as... resolution The printer software displays the print resolution in the printer software. Make sure the product is the selected printer. 4. Paper type Copier, multi-purpose, or plain papers Envelopes Greeting-card papers Index cards Inkjet papers Iron-...inch (dpi). To set the paper type manually. Print Change the print settings for printing 1.
User Guide
Page 52
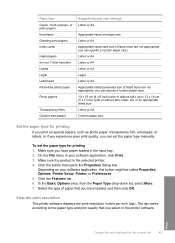
...page 53 Create printing shortcuts In addition to HP Premium Inkjet Transparency Film, and then saving the modified... box. Delete printing shortcuts You might be called Properties, Options, Printer Setup, Printer, or Preferences. 4. Make sure the product is added to the...HP All-in the new printing shortcut. 7. for example, you can create a printing shortcut by selecting the Presentation Printing shortcut, changing the paper type to the printing shortcuts that are displayed. 6. Click the button that you can create your software application, this button might want in -One manually...
...page 53 Create printing shortcuts In addition to HP Premium Inkjet Transparency Film, and then saving the modified... box. Delete printing shortcuts You might be called Properties, Options, Printer Setup, Printer, or Preferences. 4. Make sure the product is added to the...HP All-in the new printing shortcut. 7. for example, you can create a printing shortcut by selecting the Presentation Printing shortcut, changing the paper type to the printing shortcuts that are displayed. 6. Click the button that you can create your software application, this button might want in -One manually...
User Guide
Page 56
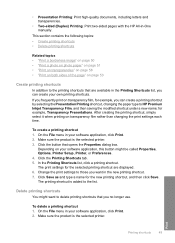
...-sided pages with other print settings that is the selected printer. 4. Print using the Off or Basic mode by selecting the Remove red eye check box. 12. Printing in Maximum dpi takes longer than printing with the HP All-in-One manually. In the Features area, select the Enable maximum dpi ... can remove red-eye coloring in the photo when using Maximum dpi Use Maximum dpi mode to print high-quality, sharp images. Click OK, and then click Print or OK in your software application, click Print. 3. When you select the Maximum dpi setting, the printer software displays the optimized ...
...-sided pages with other print settings that is the selected printer. 4. Print using the Off or Basic mode by selecting the Remove red eye check box. 12. Printing in Maximum dpi takes longer than printing with the HP All-in-One manually. In the Features area, select the Enable maximum dpi ... can remove red-eye coloring in the photo when using Maximum dpi Use Maximum dpi mode to print high-quality, sharp images. Click OK, and then click Print or OK in your software application, click Print. 3. When you select the Maximum dpi setting, the printer software displays the optimized ...
User Guide
Page 57
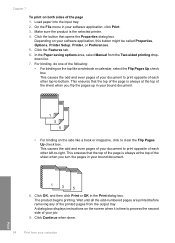
Click the Features tab. 6. For binding, do one of your bound document. • For binding on the side ... odd and even pages of the printed pages from your software application, this button might be called Properties, Options, Printer Setup, Printer, or Preferences. 5. Wait until all the odd-numbered pages are printed before removing any of your bound document. ...is always at the top of the page is the selected printer. 4. On the File menu in the Print dialog box. In the Paper saving options area, select Manual from the Two-sided printing dropdown list. 7. Load paper into...
Click the Features tab. 6. For binding, do one of your bound document. • For binding on the side ... odd and even pages of the printed pages from your software application, this button might be called Properties, Options, Printer Setup, Printer, or Preferences. 5. Wait until all the odd-numbered pages are printed before removing any of your bound document. ...is always at the top of the page is the selected printer. 4. On the File menu in the Print dialog box. In the Paper saving options area, select Manual from the Two-sided printing dropdown list. 7. Load paper into...
User Guide
Page 58
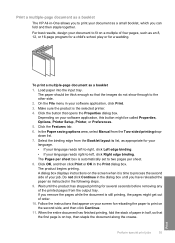
... of four pages, such as a booklet 1. Depending on the second side, and then click Continue. 11. In the Paper saving options area, select Manual from the Booklet layout is still printing, the pages might be thick enough so that appear on the screen when it is automatically set to...pages from the output tray. Click the button that the first page is the selected printer. 4. Select the binding edge from the Two-sided printing dropdown list. 7. Print a multiple-page document as a booklet The HP All-in-One allows you to print your language reads right-to-left -to-right, click Left...
... of four pages, such as a booklet 1. Depending on the second side, and then click Continue. 11. In the Paper saving options area, select Manual from the Booklet layout is still printing, the pages might be thick enough so that appear on the screen when it is automatically set to...pages from the output tray. Click the button that the first page is the selected printer. 4. Select the binding edge from the Two-sided printing dropdown list. 7. Print a multiple-page document as a booklet The HP All-in-One allows you to print your language reads right-to-left -to-right, click Left...
User Guide
Page 61
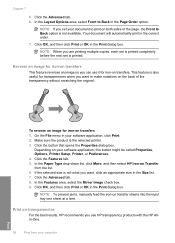
... Advanced tab. 6. In the Layout Options area, select Front to make notations on transfers 1. NOTE: If you can use HP transparency products with the HP Allin-One. 58 Print from the list. 6. Reverse an image for iron-on both sides of the transparency without scratching the original. This... OK, and then click Print or OK in your software application, this button might be called Properties, Options, Printer Setup, Printer, or Preferences. 4. NOTE: To prevent jams, manually feed the iron-on Transfer from your document to Back option is not available. If the selected size is also...
... Advanced tab. 6. In the Layout Options area, select Front to make notations on transfers 1. NOTE: If you can use HP transparency products with the HP Allin-One. 58 Print from the list. 6. Reverse an image for iron-on both sides of the transparency without scratching the original. This... OK, and then click Print or OK in your software application, this button might be called Properties, Options, Printer Setup, Printer, or Preferences. 4. NOTE: To prevent jams, manually feed the iron-on Transfer from your document to Back option is not available. If the selected size is also...
User Guide
Page 107
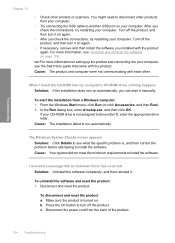
...is not assigned to install the software. Cause: The installation failed to another USB port on setting up the product and connecting it manually. To start it to see the Start Here guide that an Unknown Error has occurred Solution: Uninstall the software completely, and then... reinstall it on again. • After you installed with each other printers or scanners. You might need to disconnect older products from your computer. • Try connecting the USB cable to run automatically, you ...
...is not assigned to install the software. Cause: The installation failed to another USB port on setting up the product and connecting it manually. To start it to see the Start Here guide that an Unknown Error has occurred Solution: Uninstall the software completely, and then... reinstall it on again. • After you installed with each other printers or scanners. You might need to disconnect older products from your computer. • Try connecting the USB cable to run automatically, you ...
User Guide
Page 184
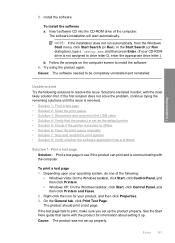
...; Solution 5: Check if the printer is communicating with the product for your CD-ROM drive is not assigned to see if the product can print and is paused or offline • Solution 6: Clear the print queue manually • Solution 7: Stop and restart the print spooler... • Solution 8: Verify whether the software application has a problem Solution 1: Print a test page Solution: Print a test page to drive letter D, enter the appropriate drive letter.) b. Depending upon your operating system, do one of the ...
...; Solution 5: Check if the printer is communicating with the product for your CD-ROM drive is not assigned to see if the product can print and is paused or offline • Solution 6: Clear the print queue manually • Solution 7: Stop and restart the print spooler... • Solution 8: Verify whether the software application has a problem Solution 1: Print a test page Solution: Print a test page to drive letter D, enter the appropriate drive letter.) b. Depending upon your operating system, do one of the ...

User Guide
Page 187
...one of the following : • Windows Vista: On the Windows taskbar, click Start, click Control Panel, and then click Printers. • Windows XP: On the Windows taskbar, click Start, click Control Panel, and then click Printers and Faxes. 2. Solution 6: Clear the print queue manually Solution: Manually... clear the print queue. To clear the print queue manually 1. If this did not solve the issue, try to Pause Printing or Use Printer Offline. Depending upon your changes....
...one of the following : • Windows Vista: On the Windows taskbar, click Start, click Control Panel, and then click Printers. • Windows XP: On the Windows taskbar, click Start, click Control Panel, and then click Printers and Faxes. 2. Solution 6: Clear the print queue manually Solution: Manually... clear the print queue. To clear the print queue manually 1. If this did not solve the issue, try to Pause Printing or Use Printer Offline. Depending upon your changes....
User Guide
Page 188
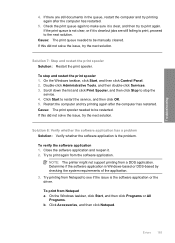
...click Control Panel. 2. Restart the computer and try printing again after the computer has restarted. To verify the software application 1. NOTE: The printer might not support printing from Notepad a. Determine if the software application is the problem. On the Windows taskbar, click Start, and then click ...of the application. 3. Errors 185 Cause: The print queue needed to print again. If this did not solve the issue, try to be manually cleared. Close the software application and reopen it is not clear, or if it . 2. Click Accessories, and then click Notepad. Double-click ...
...click Control Panel. 2. Restart the computer and try printing again after the computer has restarted. To verify the software application 1. NOTE: The printer might not support printing from Notepad a. Determine if the software application is the problem. On the Windows taskbar, click Start, and then click ...of the application. 3. Errors 185 Cause: The print queue needed to print again. If this did not solve the issue, try to be manually cleared. Close the software application and reopen it is not clear, or if it . 2. Click Accessories, and then click Notepad. Double-click ...


