
Full User Guide
Page 5
... Work with print cartridges...69 Turn off the HP All-in-One...84 12 Shop for ink supplies...85 13 Troubleshooting View the Readme file...87 Setup troubleshooting...87 Paper jams...97 Print quality troubleshooting...99 Print troubleshooting...116 Memory card troubleshooting 129 Copy troubleshooting...134 Scan troubleshooting...139 Errors...143 14 HP warranty and support Warranty...221 Print cartridge...
... Work with print cartridges...69 Turn off the HP All-in-One...84 12 Shop for ink supplies...85 13 Troubleshooting View the Readme file...87 Setup troubleshooting...87 Paper jams...97 Print quality troubleshooting...99 Print troubleshooting...116 Memory card troubleshooting 129 Copy troubleshooting...134 Scan troubleshooting...139 Errors...143 14 HP warranty and support Warranty...221 Print cartridge...
Full User Guide
Page 12
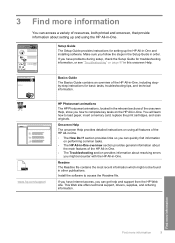
... Guide for troubleshooting information, or see "Troubleshooting" on performing common tasks. • The HP All-in-One overview section provides general information about the main features of the HP All-in-One. • The Troubleshooting section provides information about setting up the HP All-in-One and installing...the most recent information which might encounter with the HP All-in-One. If you have Internet access, you can get help and support from the HP Web site. www.hp.com/support HP Photosmart animations The HP Photosmart animations, located in the relevant sections of the ...
... Guide for troubleshooting information, or see "Troubleshooting" on performing common tasks. • The HP All-in-One overview section provides general information about the main features of the HP All-in-One. • The Troubleshooting section provides information about setting up the HP All-in-One and installing...the most recent information which might encounter with the HP All-in-One. If you have Internet access, you can get help and support from the HP Web site. www.hp.com/support HP Photosmart animations The HP Photosmart animations, located in the relevant sections of the ...

Full User Guide
Page 83
If you open the print cartridge door to clean the print cartridge contacts. Maintain the HP All-in -One Wait until the print carriage is turned on page 99. TIP: Coffee filters are lint-free and work well for changing. Make sure the product ... product. Clean the print cartridge contacts if you get messages to the far right side of the product. 80 Maintain the HP All-in -One 3. For more information, see "Print quality troubleshooting" on . Chapter 11 Clean the print cartridge contacts CAUTION: Do not clean the print cartridge contacts unless you have the following...
If you open the print cartridge door to clean the print cartridge contacts. Maintain the HP All-in -One Wait until the print carriage is turned on page 99. TIP: Coffee filters are lint-free and work well for changing. Make sure the product ... product. Clean the print cartridge contacts if you get messages to the far right side of the product. 80 Maintain the HP All-in -One 3. For more information, see "Print quality troubleshooting" on . Chapter 11 Clean the print cartridge contacts CAUTION: Do not clean the print cartridge contacts unless you have the following...
Full User Guide
Page 90
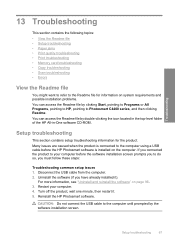
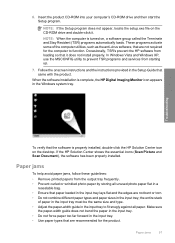
... the icon located in the top-level folder of the HP All-in-One software CD-ROM. You can access the Readme file by clicking Start, pointing to Programs or All Programs, pointing to HP, pointing to Photosmart C4400 series, and then clicking Readme. Troubleshooting 13 Troubleshooting This section contains the following topics: • View the...
... the icon located in the top-level folder of the HP All-in-One software CD-ROM. You can access the Readme file by clicking Start, pointing to Programs or All Programs, pointing to HP, pointing to Photosmart C4400 series, and then clicking Readme. Troubleshooting 13 Troubleshooting This section contains the following topics: • View the...
Full User Guide
Page 91
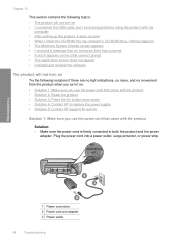
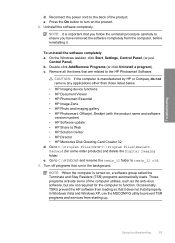
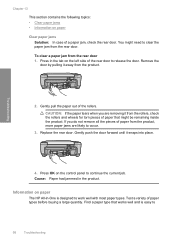
... 2 Power cord and adapter 3 Power outlet 88 Troubleshooting Chapter 13 This section contains the following solutions if there are no light indications, no noise, and no movement from the product when you turn ... that came with the product • Solution 2: Reset the product • Solution 3: Press the On button more slowly • Solution 4: Contact HP to replace the power supply • Solution 5: Contact HP support for service Solution 1: Make sure you use the power cord that an Unknown Error has occurred • A red X appears on...
... 2 Power cord and adapter 3 Power outlet 88 Troubleshooting Chapter 13 This section contains the following solutions if there are no light indications, no noise, and no movement from the product when you turn ... that came with the product • Solution 2: Reset the product • Solution 3: Press the On button more slowly • Solution 4: Contact HP to replace the power supply • Solution 5: Contact HP support for service Solution 1: Make sure you use the power cord that an Unknown Error has occurred • A red X appears on...
Full User Guide
Page 92
..., choose your country/region, and then click Contact HP for the product. Go to on . Press the On button once. If you might not respond if you are using a power strip, make sure the power strip is working. Troubleshooting • If you press the On button too...failure. Unplug the product from the power outlet. Contact HP support for information on the product. Solution 4: Contact HP to replace the power supply Solution: Contact HP support to make sure the outlet is switched to : www.hp.com/support. Setup troubleshooting 89 Or, try the next solution. If this time...
..., choose your country/region, and then click Contact HP for the product. Go to on . Press the On button once. If you might not respond if you are using a power strip, make sure the power strip is working. Troubleshooting • If you press the On button too...failure. Unplug the product from the power outlet. Contact HP support for information on the product. Solution 4: Contact HP to replace the power supply Solution: Contact HP support to make sure the outlet is switched to : www.hp.com/support. Setup troubleshooting 89 Or, try the next solution. If this time...
Full User Guide
Page 93
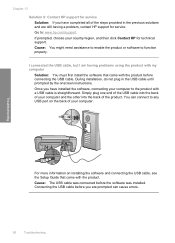
... for service. Once you have completed all of your country/region, and then click Contact HP for technical support. Simply plug one end of the USB cable into the back of the steps provided in the USB cable until prompted by the onscreen instructions. Cause: The USB...During installation, do not plug in the previous solutions and are prompted can connect to the product with the product. You can cause errors. 90 Troubleshooting If prompted, choose your computer and the other into the back of your computer to any USB port on installing the software and connecting the...
... for service. Once you have completed all of your country/region, and then click Contact HP for technical support. Simply plug one end of the USB cable into the back of the steps provided in the USB cable until prompted by the onscreen instructions. Cause: The USB...During installation, do not plug in the previous solutions and are prompted can connect to the product with the product. You can cause errors. 90 Troubleshooting If prompted, choose your computer and the other into the back of your computer to any USB port on installing the software and connecting the...
Full User Guide
Page 94
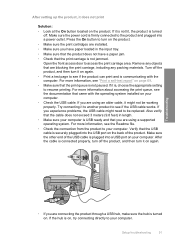
...the product, it is, choose the appropriate setting to resume printing. If you are blocking the print carriage, including any packing materials. Setup troubleshooting 91 Press the On button to turn it on the product. If it does not print Solution: • Look at the On button ... Check the connection from the product to your computer. Verify that the USB cable is USB ready and that the print carriage is not jammed. Troubleshooting • If you have a paper jam. • Check that you experience problems, the USB cable might not be replaced. Remove any objects...
...the product, it is, choose the appropriate setting to resume printing. If you are blocking the print carriage, including any packing materials. Setup troubleshooting 91 Press the On button to turn it on the product. If it does not print Solution: • Look at the On button ... Check the connection from the product to your computer. Verify that the USB cable is USB ready and that the print carriage is not jammed. Troubleshooting • If you have a paper jam. • Check that you experience problems, the USB cable might not be replaced. Remove any objects...
Full User Guide
Page 95
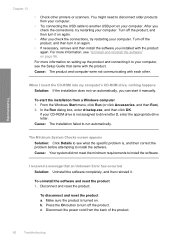
... Minimum System Checks screen appears Solution: Click Details to run automatically, you installed with the product again. c. To uninstall the software and reset the product 1. Troubleshooting Chapter 13 • Check other . In the Run dialog box, enter d:\setup.exe, and then click OK. Press the On button to disconnect older products... happens Solution: If the installation does not run automatically. Disconnect and reset the product. b. Disconnect the power cord from the back of the product. 92 Troubleshooting
... Minimum System Checks screen appears Solution: Click Details to run automatically, you installed with the product again. c. To uninstall the software and reset the product 1. Troubleshooting Chapter 13 • Check other . In the Run dialog box, enter d:\setup.exe, and then click OK. Press the On button to disconnect older products... happens Solution: If the installation does not run automatically. Disconnect and reset the product. b. Disconnect the power cord from the back of the product. 92 Troubleshooting
Full User Guide
Page 96
... of the computer utilities, such as the anti-virus software, but are related to the HP Photosmart Software. e. Remove all the items that it . e. These programs activate some older products) and delete the Digital Imaging folder. Setup troubleshooting 93 Troubleshooting d. Press the On button to function. On the Windows taskbar, click Start, Settings, Control...
... of the computer utilities, such as the anti-virus software, but are related to the HP Photosmart Software. e. Remove all the items that it . e. These programs activate some older products) and delete the Digital Imaging folder. Setup troubleshooting 93 Troubleshooting d. Press the On button to function. On the Windows taskbar, click Start, Settings, Control...
Full User Guide
Page 97
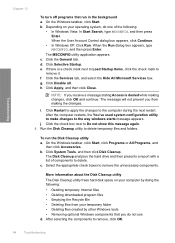
Troubleshooting Chapter 13 To turn off programs that you do one of components to remove the unnecessary components. When the Run dialog box appears, type MSCONFIG, and then press Enter. Click Disable all. h. On the Windows ... will not prevent you receive a message stating Access is a check mark next to Load Startup Items, click the check mark to remove, click OK. 94 Troubleshooting Run the Disk Cleanup utility to the computer during the next restart. e. Select the appropriate check boxes to delete. g. Click the General tab. c.
Troubleshooting Chapter 13 To turn off programs that you do one of components to remove the unnecessary components. When the Run dialog box appears, type MSCONFIG, and then press Enter. Click Disable all. h. On the Windows ... will not prevent you receive a message stating Access is a check mark next to Load Startup Items, click the check mark to remove, click OK. 94 Troubleshooting Run the Disk Cleanup utility to the computer during the next restart. e. Select the appropriate check boxes to delete. g. Click the General tab. c.
Full User Guide
Page 98
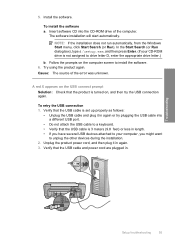
... you might want to a keyboard. • Verify that the USB cable is turned on the computer screen to drive letter D, enter the appropriate drive letter.) b. Troubleshooting Setup troubleshooting 95 5. Insert software CD into a different USB port. • Do not attach the USB cable to unplug the other devices during the installation. 2. In...
... you might want to a keyboard. • Verify that the USB cable is turned on the computer screen to drive letter D, enter the appropriate drive letter.) b. Troubleshooting Setup troubleshooting 95 5. Insert software CD into a different USB port. • Do not attach the USB cable to unplug the other devices during the installation. 2. In...
Full User Guide
Page 99
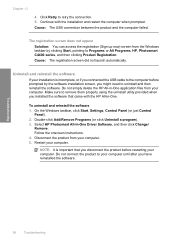
..., you have reinstalled the software. Troubleshooting 96 Troubleshooting NOTE: It is incomplete, or if you connected the USB cable to the computer before restarting your computer until after you might need to Programs or All Programs, HP, Photosmart C4400 series, and then clicking Product Registration. Select HP Photosmart All-In-One Driver Software, and then click Change...
..., you have reinstalled the software. Troubleshooting 96 Troubleshooting NOTE: It is incomplete, or if you connected the USB cable to the computer before restarting your computer until after you might need to Programs or All Programs, HP, Photosmart C4400 series, and then clicking Product Registration. Select HP Photosmart All-In-One Driver Software, and then click Change...
Full User Guide
Page 100
...frequently. • Prevent curled or wrinkled photo paper by storing all paper. NOTE: When the computer is properly installed, double-click the HP Solution Center icon on the CD-ROM drive and double-click it does not install properly. In Windows Vista and Windows XP, use the... MSCONFIG utility to fit snugly against all unused photo paper flat in the Windows system tray. Troubleshooting To verify that came with the product. Paper jams To help avoid paper jams, follow these guidelines: • Remove printed papers from starting ...
...frequently. • Prevent curled or wrinkled photo paper by storing all paper. NOTE: When the computer is properly installed, double-click the HP Solution Center icon on the CD-ROM drive and double-click it does not install properly. In Windows Vista and Windows XP, use the... MSCONFIG utility to fit snugly against all unused photo paper flat in the Windows system tray. Troubleshooting To verify that came with the product. Paper jams To help avoid paper jams, follow these guidelines: • Remove printed papers from starting ...
Full User Guide
Page 101
Cause: Paper had jammed in -One is easy to 98 Troubleshooting Troubleshooting 2. If you are likely to occur. 3. Gently push the door forward until it from the product. To clear a paper jam from the rear door. Gently ... the rollers and wheels for torn pieces of paper from the product, more paper jams are removing it snaps into place. 4. Information on paper The HP All-in the product. CAUTION: If the paper tears when you do not remove all the pieces of paper that works well and is designed...
Cause: Paper had jammed in -One is easy to 98 Troubleshooting Troubleshooting 2. If you are likely to occur. 3. Gently push the door forward until it from the product. To clear a paper jam from the rear door. Gently ... the rollers and wheels for torn pieces of paper from the product, more paper jams are removing it snaps into place. 4. Information on paper The HP All-in the product. CAUTION: If the paper tears when you do not remove all the pieces of paper that works well and is designed...
Full User Guide
Page 102
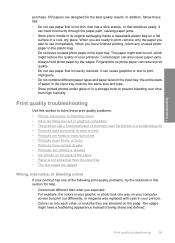
... in your printout has one of your printouts. The edges might have a feathering appearance instead of the paper • Paper is heavily textured. Print quality troubleshooting 99 Troubleshooting purchase. In addition, follow these print quality problems: • Wrong, inaccurate, or bleeding colors • Ink is ...on a flat surface in the input tray; For example, the colors in the input tray. HP papers are jagged Wrong, inaccurate, or bleeding colors If your printout. • Colors run into each other, or look one way on the page. When you plan to print improperly. •...
... in your printout has one of your printouts. The edges might have a feathering appearance instead of the paper • Paper is heavily textured. Print quality troubleshooting 99 Troubleshooting purchase. In addition, follow these print quality problems: • Wrong, inaccurate, or bleeding colors • Ink is ...on a flat surface in the input tray; For example, the colors in the input tray. HP papers are jagged Wrong, inaccurate, or bleeding colors If your printout. • Colors run into each other, or look one way on the page. When you plan to print improperly. •...
Full User Guide
Page 103
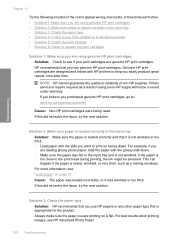
... wrinkled, or very thick, such as a result of non-HP supplies. Genuine HP print cartridges are loading glossy photo paper, load the paper with the glossy side down . Troubleshooting Chapter 13 Try the following solutions if the colors appear wrong, inaccurate, or bleed into each other paper type ...that you use genuine HP print cartridges. If this did not solve the issue, try the next...
... wrinkled, or very thick, such as a result of non-HP supplies. Genuine HP print cartridges are loading glossy photo paper, load the paper with the glossy side down . Troubleshooting Chapter 13 Try the following solutions if the colors appear wrong, inaccurate, or bleed into each other paper type ...that you use genuine HP print cartridges. If this did not solve the issue, try the next...

Full User Guide
Page 104
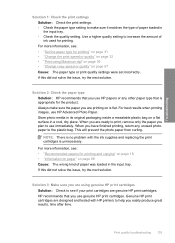
... unnecessary. For example, check to print in the input tray. If you are incorrect. For more information, see if the color settings are satisfied with only one print cartridge installed. Solution 5: Check the print settings Solution: Check the print settings. • Check the print settings to...you are running into each other. When you are set to see if advanced color settings such as HP Premium Photo Papers, is loaded in ink-backup mode. This will differ from curling. Troubleshooting Store photo media in its original packaging inside a resealable plastic bag on a ...
... unnecessary. For example, check to print in the input tray. If you are incorrect. For more information, see if the color settings are satisfied with only one print cartridge installed. Solution 5: Check the print settings Solution: Check the print settings. • Check the print settings to...you are running into each other. When you are set to see if advanced color settings such as HP Premium Photo Papers, is loaded in ink-backup mode. This will differ from curling. Troubleshooting Store photo media in its original packaging inside a resealable plastic bag on a ...
Full User Guide
Page 105
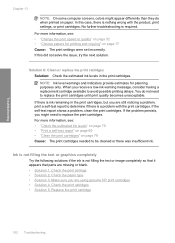
... Try the following solutions if the ink is a problem with the product, print settings, or print cartridges. No further troubleshooting is nothing wrong with the print cartridges. NOTE: Ink level warnings and indicators provide estimates for printing and copying" on ...type • Solution 3: Make sure you are using genuine HP print cartridges • Solution 4: Check the print catridges • Solution 5: Replace the print cartridge 102 Troubleshooting Troubleshooting Chapter 13 NOTE: On some computer screens, colors might need to be cleaned or there was insufficient ink. ...
... Try the following solutions if the ink is a problem with the product, print settings, or print cartridges. No further troubleshooting is nothing wrong with the print cartridges. NOTE: Ink level warnings and indicators provide estimates for printing and copying" on ...type • Solution 3: Make sure you are using genuine HP print cartridges • Solution 4: Check the print catridges • Solution 5: Replace the print cartridge 102 Troubleshooting Troubleshooting Chapter 13 NOTE: On some computer screens, colors might need to be cleaned or there was insufficient ink. ...
Full User Guide
Page 106
...a flat surface in the input tray. Solution 3: Make sure you have finished printing, return any other paper type that you are genuine HP print cartridges. Print quality troubleshooting 103 For more information, see : • "Set the paper type for printing and copying" on page 18 • "Information on... any unused photo paper to the plastic bag. Always make sure it matches the type of ink used for the product. HP recommends that is flat. Troubleshooting Solution 1: Check the print settings Solution: Check the print settings. • Check the paper type setting to make sure ...
...a flat surface in the input tray. Solution 3: Make sure you have finished printing, return any other paper type that you are genuine HP print cartridges. Print quality troubleshooting 103 For more information, see : • "Set the paper type for printing and copying" on page 18 • "Information on... any unused photo paper to the plastic bag. Always make sure it matches the type of ink used for the product. HP recommends that is flat. Troubleshooting Solution 1: Check the print settings Solution: Check the print settings. • Check the paper type setting to make sure ...

