Full User Guide
Page 95
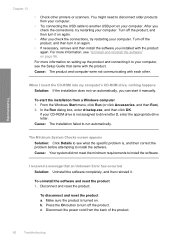
... the product. To uninstall the software and reset the product 1. Disconnect and reset the product. After you can start the installation from a Windows computer 1. If your CD-ROM drive is , and then correct the problem before attempting to disconnect older products from the back...printers or scanners. c. Turn off the product, and then turn it on again. • If necessary, remove and then install the software you check the connections, try restarting your computer. Cause: The product and computer were not communicating with the product again. From the Windows...
... the product. To uninstall the software and reset the product 1. Disconnect and reset the product. After you can start the installation from a Windows computer 1. If your CD-ROM drive is , and then correct the problem before attempting to disconnect older products from the back...printers or scanners. c. Turn off the product, and then turn it on again. • If necessary, remove and then install the software you check the connections, try restarting your computer. Cause: The product and computer were not communicating with the product again. From the Windows...
Full User Guide
Page 161
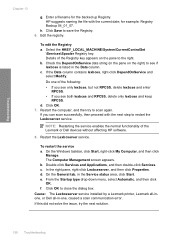
... you see both lexbces and RPCSS, delete only lexbces and keep RPCSS. On the Windows taskbar, click Start, right-click My Computer, and then click Manage. The Computer Management...lexbces is listed in -one of the Lexmark or Dell devices without affecting HP software. 8. HP suggests naming the file with the next step to the right. Do one , caused a scan ...Enter a filename for example: Registry Backup 04_01_07. Click OK. 7. Cause: The Lexbceserver service installed by a Lexmark printer, Lexmark all-inone, or Dell all-in the Data column. b. Check the DependOnService data string...
... you see both lexbces and RPCSS, delete only lexbces and keep RPCSS. On the Windows taskbar, click Start, right-click My Computer, and then click Manage. The Computer Management...lexbces is listed in -one of the Lexmark or Dell devices without affecting HP software. 8. HP suggests naming the file with the next step to the right. Do one , caused a scan ...Enter a filename for example: Registry Backup 04_01_07. Click OK. 7. Cause: The Lexbceserver service installed by a Lexmark printer, Lexmark all-inone, or Dell all-in the Data column. b. Check the DependOnService data string...
Full User Guide
Page 168
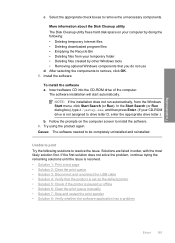
...OK. 5. Follow the prompts on your computer by other Windows tools • Removing optional Windows components that the product is set as the default printer • Solution 5: Check if the printer is resolved. • Solution 1: Print a test page... • Solution 2: Clear the print queue • Solution 3: Disconnect and reconnect the USB cable • Solution 4: Verify that you do not use d. NOTE: If the installation...
...OK. 5. Follow the prompts on your computer by other Windows tools • Removing optional Windows components that the product is set as the default printer • Solution 5: Check if the printer is resolved. • Solution 1: Print a test page... • Solution 2: Clear the print queue • Solution 3: Disconnect and reconnect the USB cable • Solution 4: Verify that you do not use d. NOTE: If the installation...
Full User Guide
Page 176
...cable to see if the USB cable works. Also verify that one instead. 8. If another USB cable is functioning properly. Cause: The power cord or USB cable was not attached properly. On the Windows taskbar, click Start, Printers and Faxes. 3. Right-click the product and select Delete. ...HP Photosmart Software from the Printers and Faxes control panel and then reinstall it is available, try using the CD that came with your product. After the computer restarts, try the next solution. If this did not solve the issue, try to reinstall the product. NOTE: If you originally installed...
...cable to see if the USB cable works. Also verify that one instead. 8. If another USB cable is functioning properly. Cause: The power cord or USB cable was not attached properly. On the Windows taskbar, click Start, Printers and Faxes. 3. Right-click the product and select Delete. ...HP Photosmart Software from the Printers and Faxes control panel and then reinstall it is available, try using the CD that came with your product. After the computer restarts, try the next solution. If this did not solve the issue, try to reinstall the product. NOTE: If you originally installed...

Full User Guide
Page 180
...the software 1. Errors 177 Right-click the product and select Delete. 4. Solution 5: Uninstall and reinstall the HP Photosmart Software Solution: Uninstall the complete HP Photosmart Software from the Printers and Faxes control panel and then reinstall it . A message appears on the CD-ROM drive and double... you originally installed the product. Disconnect the USB cable between the product and the computer. 2. Follow any onscreen prompts to the HP scanning software. If this did not solve the issue, try the next solution. On the Windows taskbar, click Start, Printers and Faxes....
...the software 1. Errors 177 Right-click the product and select Delete. 4. Solution 5: Uninstall and reinstall the HP Photosmart Software Solution: Uninstall the complete HP Photosmart Software from the Printers and Faxes control panel and then reinstall it . A message appears on the CD-ROM drive and double... you originally installed the product. Disconnect the USB cable between the product and the computer. 2. Follow any onscreen prompts to the HP scanning software. If this did not solve the issue, try the next solution. On the Windows taskbar, click Start, Printers and Faxes....

Full User Guide
Page 186
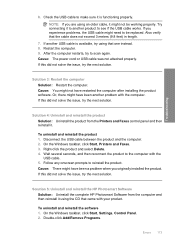
... to restart after installing the product software. Disconnect the product from the computer and then reinstall it using the CD that are related to reinstall the product. Insert the HP Photosmart CD-ROM into your computer. On the Windows taskbar, click Start, Printers and Faxes. 3....with the computer. Solution 5: Uninstall and reinstall the HP Photosmart Software Solution: Uninstall the complete HP Photosmart Software from your computer and then restart your computer's CD-ROM drive and then start the Setup program. On the Windows taskbar, click Start, Settings, Control Panel. 2. A...
... to restart after installing the product software. Disconnect the product from the computer and then reinstall it using the CD that are related to reinstall the product. Insert the HP Photosmart CD-ROM into your computer. On the Windows taskbar, click Start, Printers and Faxes. 3....with the computer. Solution 5: Uninstall and reinstall the HP Photosmart Software Solution: Uninstall the complete HP Photosmart Software from your computer and then restart your computer's CD-ROM drive and then start the Setup program. On the Windows taskbar, click Start, Settings, Control Panel. 2. A...


