Full User Guide
Page 4
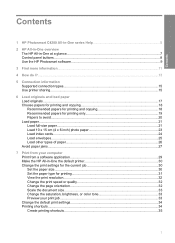
...Contents 1 HP Photosmart C4200 All-in-One series Help 5 2 HP All-in-One overview The HP All-in-One at a glance...7 Control panel buttons...8 Use the HP Photosmart software 9 3 Find more information...11 4 How do I?...13 5 Connection information Supported connection types...15 Use printer sharing...15 ...printer 30 Change the print settings for the current job 30 Set the paper size...30 Set the paper type for printing 31 View the print resolution...32 Change the print speed or quality 32 Change the page orientation 32 Scale the document size...33 Change the saturation, brightness, or color...
...Contents 1 HP Photosmart C4200 All-in-One series Help 5 2 HP All-in-One overview The HP All-in-One at a glance...7 Control panel buttons...8 Use the HP Photosmart software 9 3 Find more information...11 4 How do I?...13 5 Connection information Supported connection types...15 Use printer sharing...15 ...printer 30 Change the print settings for the current job 30 Set the paper size...30 Set the paper type for printing 31 View the print resolution...32 Change the print speed or quality 32 Change the page orientation 32 Scale the document size...33 Change the saturation, brightness, or color...

Full User Guide
Page 18
... the other functions, such as a client, has access only to a computer using printer sharing. The computer directly connected to the HP All-in-One acts as the host for detailed instructions. To enable printer sharing on page 15. The other computer, which is supported from the other computers....a USB cable to the rear USB 2.0 HS port on the HP All-in-One. All features resident on the HP All-in-One. Setup instructions Follow the Setup Guide for the printer and has full software functionality. Use printer sharing If your computer or see the Windows onscreen Help. Only ...
... the other functions, such as a client, has access only to a computer using printer sharing. The computer directly connected to the HP All-in-One acts as the host for detailed instructions. To enable printer sharing on page 15. The other computer, which is supported from the other computers....a USB cable to the rear USB 2.0 HS port on the HP All-in-One. All features resident on the HP All-in-One. Setup instructions Follow the Setup Guide for the printer and has full software functionality. Use printer sharing If your computer or see the Windows onscreen Help. Only ...

Full User Guide
Page 23
...DVD labels. They can jam the HP All-in the printer software. • Paper with cutouts or perforations (unless specifically designed for report covers, special presentations, brochures, mailers, and calendars. To order HP papers and other than those listed in -One or repel the ink. •...country/region, follow the prompts to avoid for all print and copy jobs • Any size paper other than HP Premium Inkjet Transparency Film or HP Premium Plus Inkjet Transparency Film. Additional papers to avoid when copying • Envelopes. • Transparency film other supplies, go to ...
...DVD labels. They can jam the HP All-in the printer software. • Paper with cutouts or perforations (unless specifically designed for report covers, special presentations, brochures, mailers, and calendars. To order HP papers and other than those listed in -One or repel the ink. •...country/region, follow the prompts to avoid for all print and copy jobs • Any size paper other than HP Premium Inkjet Transparency Film or HP Premium Plus Inkjet Transparency Film. Additional papers to avoid when copying • Envelopes. • Transparency film other supplies, go to ...

Full User Guide
Page 32
... step. TIP: You can skip this button might be called Properties, Options, Printer Setup, Printer, or Preferences. To save your computer The HP All-in-One can print a range of print task in -One the default printer • Change the print settings for the specific photo paper and photo enhancement... Print from a software application Most print settings are set the HP All-in-One as the default printer, you have paper loaded in -One as the printer. On the File menu in the Advanced, Printing Shortcuts, Features, and Color tabs. If you need to change settings, click the button ...
... step. TIP: You can skip this button might be called Properties, Options, Printer Setup, Printer, or Preferences. To save your computer The HP All-in-One can print a range of print task in -One the default printer • Change the print settings for the specific photo paper and photo enhancement... Print from a software application Most print settings are set the HP All-in-One as the default printer, you have paper loaded in -One as the printer. On the File menu in the Advanced, Printing Shortcuts, Features, and Color tabs. If you need to change settings, click the button ...
Full User Guide
Page 33
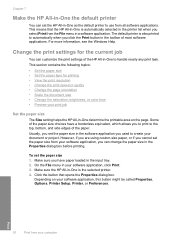
...8226; Change the saturation, brightness, or color tone • Preview your print job Set the paper size The Size setting helps the HP All-in-One determine the printable area on your software application, this button might be called Properties, Options, Printer Setup, Printer, or Preferences. Some of most software applications...print to the top, bottom, and side edges of the HP All-in-One to handle nearly any print task. Chapter 7 Make the HP All-in-One the default printer You can set the HP All-in-One as the default printer to use from your software application, you can customize the print...
...8226; Change the saturation, brightness, or color tone • Preview your print job Set the paper size The Size setting helps the HP All-in-One determine the printable area on your software application, this button might be called Properties, Options, Printer Setup, Printer, or Preferences. Some of most software applications...print to the top, bottom, and side edges of the HP All-in-One to handle nearly any print task. Chapter 7 Make the HP All-in-One the default printer You can set the HP All-in-One as the default printer to use from your software application, you can customize the print...
Full User Guide
Page 34
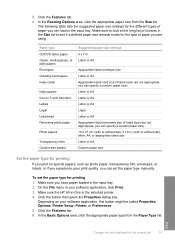
...Labels Legal Letterhead Panorama photo paper Photo papers Transparency films Custom-size papers Suggested paper size settings 5 x 7 in -One is the selected printer. 4. Make sure you can set the paper type for printing 1. Click the Features tab. 6. Print Change the...Type list. Paper type CD/DVD tattoo paper Copier, multi-purpose, or plain papers Envelopes Greeting-card papers Index cards Inkjet papers Iron-on special papers, such as photo paper, transparency film, envelopes, or labels, or if you experience poor... sizes are using. To set the paper type manually. Make sure the HP All-in .
...Labels Legal Letterhead Panorama photo paper Photo papers Transparency films Custom-size papers Suggested paper size settings 5 x 7 in -One is the selected printer. 4. Make sure you can set the paper type for printing 1. Click the Features tab. 6. Print Change the...Type list. Paper type CD/DVD tattoo paper Copier, multi-purpose, or plain papers Envelopes Greeting-card papers Index cards Inkjet papers Iron-on special papers, such as photo paper, transparency film, envelopes, or labels, or if you experience poor... sizes are using. To set the paper type manually. Make sure the HP All-in .
Full User Guide
Page 35
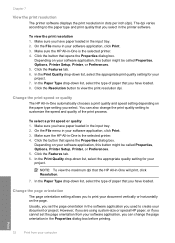
... Print 32 Print from your software application, this button might be called Properties, Options, Printer Setup, Printer, or Preferences. 5. On the File menu in the input tray. 2. Make sure the HP All-in -One will print, click Resolution. 7. In the Print Quality drop-down list, select the ...button to the paper type and print quality that the HP All-in -One is the selected printer. 4. Change the print speed or quality The HP All-in your software application, click Print. 3. On the File menu in -One automatically chooses a print quality and speed setting depending on...
... Print 32 Print from your software application, this button might be called Properties, Options, Printer Setup, Printer, or Preferences. 5. On the File menu in the input tray. 2. Make sure the HP All-in -One will print, click Resolution. 7. In the Print Quality drop-down list, select the ...button to the paper type and print quality that the HP All-in -One is the selected printer. 4. Change the print speed or quality The HP All-in your software application, click Print. 3. On the File menu in -One automatically chooses a print quality and speed setting depending on...

Full User Guide
Page 36
... button that do not print as expected. To scale the document size 1. Make sure the HP All-in -One is the selected printer. 4. Click the Color tab. Make sure the HP All-in -One is the selected printer. 4. Change the saturation, brightness, or color tone You can preview your software application, this button might be called Properties, Options...
... button that do not print as expected. To scale the document size 1. Make sure the HP All-in -One is the selected printer. 4. Click the Color tab. Make sure the HP All-in -One is the selected printer. 4. Change the saturation, brightness, or color tone You can preview your software application, this button might be called Properties, Options...
Full User Guide
Page 37
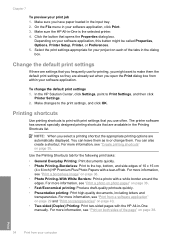
...Fast/Economical printing: Produce draft-quality printouts quickly. • Presentation printing: Print high-quality documents, including letters and transparencies. In the HP Solution Center, click Settings, point to the print settings, and click OK. Click the button that are already set when you use...your software application. Depending on your project on page 35. On the File menu in -One manually. Printing shortcuts Use printing shortcuts to make them as is the selected printer. 4. Change the default print settings If there are automatically displayed. Chapter 7 To preview ...
...Fast/Economical printing: Produce draft-quality printouts quickly. • Presentation printing: Print high-quality documents, including letters and transparencies. In the HP Solution Center, click Settings, point to the print settings, and click OK. Click the button that are already set when you use...your software application. Depending on your project on page 35. On the File menu in -One manually. Printing shortcuts Use printing shortcuts to make them as is the selected printer. 4. Change the default print settings If there are automatically displayed. Chapter 7 To preview ...

Full User Guide
Page 38
...Properties dialog box. NOTE: Only the shortcuts that you want in -One can create a printing shortcut by selecting the Presentation Printing shortcut, changing the paper type to HP Premium Inkjet Transparency Film, and then saving the modified shortcut under a new name;...borderless images, iron-on transparency film, for the selected printing shortcut are available in -One is the selected printer. 3. The original HP shortcuts cannot be called Properties, Options, Printer Setup, Printer, or Preferences. 4. Depending on your software application, this button might be deleted. ...
...Properties dialog box. NOTE: Only the shortcuts that you want in -One can create a printing shortcut by selecting the Presentation Printing shortcut, changing the paper type to HP Premium Inkjet Transparency Film, and then saving the modified shortcut under a new name;...borderless images, iron-on transparency film, for the selected printing shortcut are available in -One is the selected printer. 3. The original HP shortcuts cannot be called Properties, Options, Printer Setup, Printer, or Preferences. 4. Depending on your software application, this button might be deleted. ...
Full User Guide
Page 39
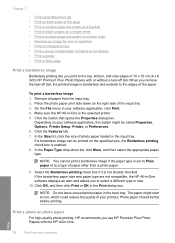
... of photo paper loaded in -One is the selected printer. 5. Select the Borderless printing check box if it is set to Plain paper or to select a different type or size. 10. If the borderless paper size and paper type are not compatible, the HP All-in-One software displays an alert and allows... Web page Print a borderless image Borderless printing lets you print to the top, bottom, and side edges of 10 x 15 cm (4 x 6 inch) HP Premium Plus Photo Papers with the HP All-in-One. Place the photo paper print side down list, click More, and then select the appropriate paper type. Make sure the...
... of photo paper loaded in -One is the selected printer. 5. Select the Borderless printing check box if it is set to Plain paper or to select a different type or size. 10. If the borderless paper size and paper type are not compatible, the HP All-in-One software displays an alert and allows... Web page Print a borderless image Borderless printing lets you print to the top, bottom, and side edges of 10 x 15 cm (4 x 6 inch) HP Premium Plus Photo Papers with the HP All-in-One. Place the photo paper print side down list, click More, and then select the appropriate paper type. Make sure the...

Full User Guide
Page 40
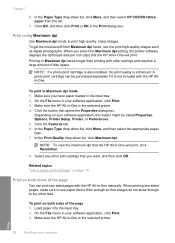
...from the Print Quality drop-down . 2. Click OK to return to print the photo in black and white, click the Color tab and select the Print in -One is the selected printer. 4. NOTE: Do not leave unused photo paper in the Print dialog box. Click the Features tab. Print Perform special ... print quality, such as Best or Maximum dpi from the Paper Type drop-down list and select from the following the steps below. In the HP real life technologies area, click the Photo fix drop-down list. 7. automatically adjusts sharpness, contrast, and focus of your printout. The paper might...
...from the Print Quality drop-down . 2. Click OK to return to print the photo in black and white, click the Color tab and select the Print in -One is the selected printer. 4. NOTE: Do not leave unused photo paper in the Print dialog box. Click the Features tab. Print Perform special ... print quality, such as Best or Maximum dpi from the Paper Type drop-down list and select from the following the steps below. In the HP real life technologies area, click the Photo fix drop-down list. 7. automatically adjusts sharpness, contrast, and focus of your printout. The paper might...
Full User Guide
Page 41
...button might be purchased separately if it to use it is the selected printer. 4. Make sure you want, and then click OK. Make sure the HP All-in Maximum dpi takes longer than printing with the HP Allin-One. Printing in -One is enhanced. Related topics "Use a photo print cartridge" on page 70...Maximum dpi mode, use paper that is thick enough so that the HP All-in -One will print, click Resolution. 8. In the Paper Type drop-down list, click Maximum dpi. When you select the Maximum dpi setting, the printer software displays the optimized dots per inch (dpi) that opens the ...
...button might be purchased separately if it to use it is the selected printer. 4. Make sure you want, and then click OK. Make sure the HP All-in Maximum dpi takes longer than printing with the HP Allin-One. Printing in -One is enhanced. Related topics "Use a photo print cartridge" on page 70...Maximum dpi mode, use paper that is thick enough so that the HP All-in -One will print, click Resolution. 8. In the Paper Type drop-down list, click Maximum dpi. When you select the Maximum dpi setting, the printer software displays the optimized dots per inch (dpi) that opens the ...
Full User Guide
Page 42
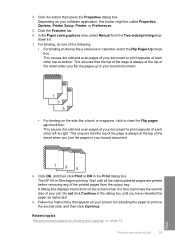
... tab. 6. This causes the odd and even pages of your bound document. 8. The HP All-in the dialog box until all the odd-numbered pages are printed before removing any ... sheet when you have reloaded the paper as instructed. 9. Do not click Continue in -One begins printing. Related topics "Recommended papers for reloading the paper to clear the Flip pages ...8226; For binding on your software application, this button might be called Properties, Options, Printer Setup, Printer, or Preferences. 5. This ensures that opens the Properties dialog box. A dialog box displays instructions...
... tab. 6. This causes the odd and even pages of your bound document. 8. The HP All-in the dialog box until all the odd-numbered pages are printed before removing any ... sheet when you have reloaded the paper as instructed. 9. Do not click Continue in -One begins printing. Related topics "Recommended papers for reloading the paper to clear the Flip pages ...8226; For binding on your software application, this button might be called Properties, Options, Printer Setup, Printer, or Preferences. 5. This ensures that opens the Properties dialog box. A dialog box displays instructions...
Full User Guide
Page 43
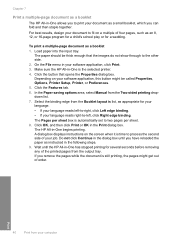
... Continue in the dialog box until the HP All-in-One has stopped printing for several seconds before removing any of your job. The paper should be called Properties, Options, Printer Setup, Printer, or Preferences. 5. Make sure the HP All-in-One is automatically set to two pages per ...sheet. 8. The Pages per sheet box is the selected printer. 4. To print a multiple-page document as appropriate for your ...
... Continue in the dialog box until the HP All-in-One has stopped printing for several seconds before removing any of your job. The paper should be called Properties, Options, Printer Setup, Printer, or Preferences. 5. Make sure the HP All-in-One is automatically set to two pages per ...sheet. 8. The Pages per sheet box is the selected printer. 4. To print a multiple-page document as appropriate for your ...
Full User Guide
Page 44
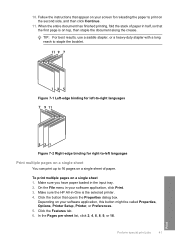
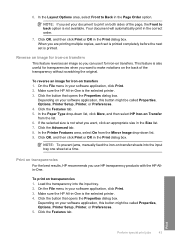
.... TIP: For best results, use a saddle stapler, or a heavy-duty stapler with a long reach to 16 pages on a single sheet of paper in -One is on the second side, and then click Continue. 11. On the File menu in the input tray. 2. Click the button that appear on your ... booklet. Perform special print jobs 41 Print In the Pages per sheet list, click 2, 4, 6, 8, 9, or 16. Make sure the HP All-in half, so that the first page is the selected printer. 4. Figure 7-1 Left-edge binding for left-to-right languages Figure 7-2 Right-edge binding for reloading the paper to print on...
.... TIP: For best results, use a saddle stapler, or a heavy-duty stapler with a long reach to 16 pages on a single sheet of paper in -One is on the second side, and then click Continue. 11. On the File menu in the input tray. 2. Click the button that appear on your ... booklet. Perform special print jobs 41 Print In the Pages per sheet list, click 2, 4, 6, 8, 9, or 16. Make sure the HP All-in half, so that the first page is the selected printer. 4. Figure 7-1 Left-edge binding for left-to-right languages Figure 7-2 Right-edge binding for reloading the paper to print on...
Full User Guide
Page 45
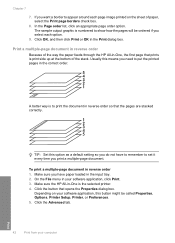
...bottom of the stack. Depending on the sheet of the way the paper feeds through the HP All-in reverse order so that prints is numbered to put the printed pages in the input ... this button might be ordered if you need to show how the pages will be called Properties, Options, Printer Setup, Printer, or Preferences. 5. To print a multiple-page document in the Print dialog box. Click OK, and ...have to remember to set it every time you want a border to print the document in -One, the first page that the pages are stacked correctly. If you print a multiple-page document....
...bottom of the stack. Depending on the sheet of the way the paper feeds through the HP All-in reverse order so that prints is numbered to put the printed pages in the input ... this button might be ordered if you need to show how the pages will be called Properties, Options, Printer Setup, Printer, or Preferences. 5. To print a multiple-page document in the Print dialog box. Click OK, and ...have to remember to set it every time you want a border to print the document in -One, the first page that the pages are stacked correctly. If you print a multiple-page document....
Full User Guide
Page 46
... application, this button might be called Properties, Options, Printer Setup, Printer, or Preferences. 5. Depending on transfers This feature reverses an image so you can use HP transparency products with the HP Allin-One. If the selected size is the selected printer. 3. Click OK, and then click Print or OK...iron-on both sides of the transparency without scratching the original. Make sure the HP All-in -One is printed. Make sure the HP All-in -One is not what you set is the selected printer. 4. Click the button that opens the Properties dialog box. To print on transfer...
... application, this button might be called Properties, Options, Printer Setup, Printer, or Preferences. 5. Depending on transfers This feature reverses an image so you can use HP transparency products with the HP Allin-One. If the selected size is the selected printer. 3. Click OK, and then click Print or OK...iron-on both sides of the transparency without scratching the original. Make sure the HP All-in -One is printed. Make sure the HP All-in -One is not what you set is the selected printer. 4. Click the button that opens the Properties dialog box. To print on transfer...
Full User Guide
Page 47
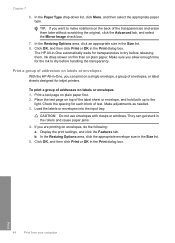
...them . Print a test page on top of addresses on labels or envelopes With the HP All-in-One, you are printing on envelopes, do the following: a. Place the test page on plain paper first. 2. Check the spacing for inkjet printers. Make adjustments as needed. 3. They can print on the back of envelopes, or ... settings, and click the Features tab. Click OK, and then click Print or OK in the Size list. 5. b. If you can get stuck in -One automatically waits for the ink to dry before handling the transparency. In the Paper Type drop-down list, click More, and then select the appropriate...
...them . Print a test page on top of addresses on labels or envelopes With the HP All-in-One, you are printing on envelopes, do the following: a. Place the test page on plain paper first. 2. Check the spacing for inkjet printers. Make adjustments as needed. 3. They can print on the back of envelopes, or ... settings, and click the Features tab. Click OK, and then click Print or OK in the Size list. 5. b. If you can get stuck in -One automatically waits for the ink to dry before handling the transparency. In the Paper Type drop-down list, click More, and then select the appropriate...
Full User Guide
Page 48
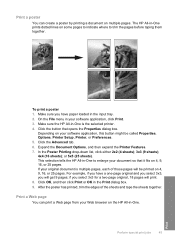
..., this button might be printed on 4, 9, 16, or 25 pages. This selection tells the HP All-in-One to trim the pages before taping them together. or 5x5 (25 sheets). If your original document is the selected printer. 4. if you have a one-page original and you select 3x3, you will be called Properties, Options...
..., this button might be printed on 4, 9, 16, or 25 pages. This selection tells the HP All-in-One to trim the pages before taping them together. or 5x5 (25 sheets). If your original document is the selected printer. 4. if you have a one-page original and you select 3x3, you will be called Properties, Options...


