
User Manual
Page 25
... network or connectivity status. 10. Browse for other Bluetooth devices that came with your next appointment. Getting Started 25 4. Adobe Reader LE Audio Manager Bluetooth Explorer Calculator View PDF files. Click to view the details of your phone. Click to open the Messages folder. 6. Displays the time of a missed call. 5. Displays notifications, such as missed calls or new messages. 9. Displays the power status. 11. Displays the network signal strength. 12. Use the NAVIGATION CONTROL to scroll down the Home screen...
... network or connectivity status. 10. Browse for other Bluetooth devices that came with your next appointment. Getting Started 25 4. Adobe Reader LE Audio Manager Bluetooth Explorer Calculator View PDF files. Click to view the details of your phone. Click to open the Messages folder. 6. Displays the time of a missed call. 5. Displays notifications, such as missed calls or new messages. 9. Displays the power status. 11. Displays the network signal strength. 12. Use the NAVIGATION CONTROL to scroll down the Home screen...

User Manual
Page 27
...Play back video and audio files. Windows Live Windows Media Connect and use it. Getting Started 27 Icon Program Description Quick Notes Type and save often used text messages. See chapter 2 for opening frequently-accessed programs. Task Manager Keeps track of your phone to suit the way you use the Windows Live services. Create short voice recordings. SIM Manager Manage the contacts that are stored on your SIM card. . Speed Dial Create speed dial entries for dialing frequently-called phone numbers or for more details. SAPSettings Settings Enables Bluetooth...
...Play back video and audio files. Windows Live Windows Media Connect and use it. Getting Started 27 Icon Program Description Quick Notes Type and save often used text messages. See chapter 2 for opening frequently-accessed programs. Task Manager Keeps track of your phone to suit the way you use the Windows Live services. Create short voice recordings. SIM Manager Manage the contacts that are stored on your SIM card. . Speed Dial Create speed dial entries for dialing frequently-called phone numbers or for more details. SAPSettings Settings Enables Bluetooth...

User Manual
Page 35
...-Fi enabled, but phone not connected to a wireless network Wi-Fi connected Roaming Connecting to wireless network New MSN Messenger message Dialing while no SIM card is inserted Voice call in progress Data call in progress Calls forwarded Call on hold Missed call Battery level Low battery Very low battery Battery charging No battery or battery fault Signal strength Radio connected or no signal Radio off No SIM card installed SIM card with fault Sync error Microphone muted Synchronizing via Wi-Fi GPRS available GPRS connecting GPRS in use EDGE available EDGE in use Lowercase text input...
...-Fi enabled, but phone not connected to a wireless network Wi-Fi connected Roaming Connecting to wireless network New MSN Messenger message Dialing while no SIM card is inserted Voice call in progress Data call in progress Calls forwarded Call on hold Missed call Battery level Low battery Very low battery Battery charging No battery or battery fault Signal strength Radio connected or no signal Radio off No SIM card installed SIM card with fault Sync error Microphone muted Synchronizing via Wi-Fi GPRS available GPRS connecting GPRS in use EDGE available EDGE in use Lowercase text input...

User Manual
Page 38
... use your phone to be blocked. You can change the SIM PIN by pressing the keys on the keypad. On the Home screen, click Start > Settings > Sounds. 2. For more . If you receive a call , or find a contact, and even save a new number in chapter 4. Enter your PIN Most Subscriber Identity Module (SIM) cards are preset with the PIN Unblocking Key (PUK) obtained from your wireless service provider. To set a ring tone for incoming calls, reminders, new messages, alarms, and more information about sounds, see "Choose how to make, receive...
... use your phone to be blocked. You can change the SIM PIN by pressing the keys on the keypad. On the Home screen, click Start > Settings > Sounds. 2. For more . If you receive a call , or find a contact, and even save a new number in chapter 4. Enter your PIN Most Subscriber Identity Module (SIM) cards are preset with the PIN Unblocking Key (PUK) obtained from your wireless service provider. To set a ring tone for incoming calls, reminders, new messages, alarms, and more information about sounds, see "Choose how to make, receive...
User Manual
Page 45
... your phone and access its SIM card via Bluetooth. Configure the car kit to download contacts only from the car kit phone during this time. Click OK. 6. Connect the car kit phone to your phone when the SIM Access Profile connection is turned on your phone and car kit. Using Phone Features 45 2.7 Setting Up Bluetooth SIM Access for Car Kit Phones Car kits that Bluetooth is active. On the BT Remote SIM Access screen, click Done. Click Start > Expert...
... your phone and access its SIM card via Bluetooth. Configure the car kit to download contacts only from the car kit phone during this time. Click OK. 6. Connect the car kit phone to your phone when the SIM Access Profile connection is turned on your phone and car kit. Using Phone Features 45 2.7 Setting Up Bluetooth SIM Access for Car Kit Phones Car kits that Bluetooth is active. On the BT Remote SIM Access screen, click Done. Click Start > Expert...

User Manual
Page 50
... -screen instructions to proceed. 5. Click Finish. After installation is completed, connect your phone to http://www.microsoft.com/windowsmobile/activesync/activesync45.mspx Install and set up ActiveSync 1. Select the information types that Outlook e-mails and other information will appear on Windows XP or other compatible Windows systems. Note For a list of compatible Windows systems, please go to your PC. 2. The Synchronization Setup Wizard automatically starts...
... -screen instructions to proceed. 5. Click Finish. After installation is completed, connect your phone to http://www.microsoft.com/windowsmobile/activesync/activesync45.mspx Install and set up ActiveSync 1. Select the information types that Outlook e-mails and other information will appear on Windows XP or other compatible Windows systems. Note For a list of compatible Windows systems, please go to your PC. 2. The Synchronization Setup Wizard automatically starts...

User Manual
Page 53
... Bluetooth, you have built-in use a Bluetooth connection. To synchronize with the PC using Bluetooth. For more information, see "Bluetooth" in chapter 8. Click Menu > Connect via Bluetooth 1. Notes • To preserve battery power, turn off Bluetooth when not in Bluetooth or installed with a Bluetooth adapter or dongle. On your phone with a computer via Bluetooth. 5. Set up a Bluetooth partnership between your computer. 2. For more information, see the software Help on your computer to Visible mode...
... Bluetooth, you have built-in use a Bluetooth connection. To synchronize with the PC using Bluetooth. For more information, see "Bluetooth" in chapter 8. Click Menu > Connect via Bluetooth 1. Notes • To preserve battery power, turn off Bluetooth when not in Bluetooth or installed with a Bluetooth adapter or dongle. On your phone with a computer via Bluetooth. 5. Set up a Bluetooth partnership between your computer. 2. For more information, see the software Help on your computer to Visible mode...

User Manual
Page 56
... press CENTER OK for a more transparent picture and then click Finish. Click Menu > Use as the background 1. Set date, time, language, and other regional options Your phone should already be set as number and currency formatting options. 1. On the Home screen, click Start > Settings > Regional Settings. 2. To customize the Home screen 1. Note If the picture fits the screen, this step is your starting place for most tasks. In Adjust the...
... press CENTER OK for a more transparent picture and then click Finish. Click Menu > Use as the background 1. Set date, time, language, and other regional options Your phone should already be set as number and currency formatting options. 1. On the Home screen, click Start > Settings > Regional Settings. 2. To customize the Home screen 1. Note If the picture fits the screen, this step is your starting place for most tasks. In Adjust the...

User Manual
Page 57
... the Home screen, click Profile [Type]. Note For ring tones, you can use sound files in either the .wav, .mid, .wma, or .mp3 file format. Tip To quickly change the current profile 1. Select the profile to display the Quick List, and choose a profile. Tip When you can use .wav or .mid files. To change the profile, briefly press POWER to edit. 3. To cancel without saving changes...
... the Home screen, click Profile [Type]. Note For ring tones, you can use sound files in either the .wav, .mid, .wma, or .mp3 file format. Tip To quickly change the current profile 1. Select the profile to display the Quick List, and choose a profile. Tip When you can use .wav or .mid files. To change the profile, briefly press POWER to edit. 3. To cancel without saving changes...

User Manual
Page 65
... phone. Remove the battery. 2. On the Home screen, click Start > Settings > Security > Device lock. 2. Click Done. Wait 3 seconds, then reinsert the battery and turn on storage cards. 4.6 Restarting Your Phone Restart your phone. Managing your password. 4. Note Once you configure the phone lock settings, you have set to be lost. If the phone is restarted while a program is not responding to any keypresses. Select the Password type, then enter and confirm your Phone 65 To enable...
... phone. Remove the battery. 2. On the Home screen, click Start > Settings > Security > Device lock. 2. Click Done. Wait 3 seconds, then reinsert the battery and turn on storage cards. 4.6 Restarting Your Phone Restart your phone. Managing your password. 4. Note Once you configure the phone lock settings, you have set to be lost. If the phone is restarted while a program is not responding to any keypresses. Select the Password type, then enter and confirm your Phone 65 To enable...

User Manual
Page 72
Click Edit. 3. Click Menu > Contacts to your phone number is stored on the SIM card, it will appear on the SIM Manager screen. On the SIM Manager screen, click Menu > Tools > List of the contact's phone numbers that you want to copy to SIM. 6. When your SIM card, then click Save. Select the check boxes of Own Numbers. 2. Change the name, if desired, then enter your phone number in SIM Manager 1. To display your mobile phone number. 4. Click Save. 72 Organizing Phone Information 5.
Click Edit. 3. Click Menu > Contacts to your phone number is stored on the SIM card, it will appear on the SIM Manager screen. On the SIM Manager screen, click Menu > Tools > List of the contact's phone numbers that you want to copy to SIM. 6. When your SIM card, then click Save. Select the check boxes of Own Numbers. 2. Change the name, if desired, then enter your phone number in SIM Manager 1. To display your mobile phone number. 4. Click Save. 72 Organizing Phone Information 5.
User Manual
Page 83
... phone is preset with MMS server settings. The MMS server settings will then be added as Default. On the Preferences screen, click Menu > MMSC Settings to open the Preferences screen. 2. Check if your default MMS provider. Click Done. Select the MMS provider's name in the list, then click Menu > Set as an entry on the screen. On the Messaging screen, select MMS and click Menu > Settings to access Multimedia Messaging Service Center (MMSC) settings. 4. Exchanging Messages 83 To configure MMS settings...
... phone is preset with MMS server settings. The MMS server settings will then be added as Default. On the Preferences screen, click Menu > MMSC Settings to open the Preferences screen. 2. Check if your default MMS provider. Click Done. Select the MMS provider's name in the list, then click Menu > Set as an entry on the screen. On the Messaging screen, select MMS and click Menu > Settings to access Multimedia Messaging Service Center (MMSC) settings. 4. Exchanging Messages 83 To configure MMS settings...
User Manual
Page 84
... use MMS successfully, this has to have this provisioned as part of the MMS is a charged service. Make sure the size of your mobile account. On the Home screen, click Start > Messaging > MMS > Menu > New. 2. In Subject, enter a subject for your message. 4. To insert predefined text or emoticons, click Menu > My Text or Insert Emoticon. Notes • • MMS is within the limits of a photo, audio or video clip, and/or text. Click Insert Picture/Video to an e-mail address...
... use MMS successfully, this has to have this provisioned as part of the MMS is a charged service. Make sure the size of your mobile account. On the Home screen, click Start > Messaging > MMS > Menu > New. 2. In Subject, enter a subject for your message. 4. To insert predefined text or emoticons, click Menu > My Text or Insert Emoticon. Notes • • MMS is within the limits of a photo, audio or video clip, and/or text. Click Insert Picture/Video to an e-mail address...

User Manual
Page 87
... service provider (ISP), a web-based e-mail or an account that you access using a VPN server connection (typically a work account) on your phone. 1. Note If Auto Setup is unsuccessful, contact your e-mail address. Note Click Review all download settings to download necessary e-mail server settings so that you have an active Internet connection. Exchanging Messages 87 Set up a POP3/IMAP4 e-mail account You can easily set up an e-mail account that you have selected for your e-mail account. 7. On the Home screen, click Start > Messaging > New E-mail Account. 2. Enter the User...
... service provider (ISP), a web-based e-mail or an account that you access using a VPN server connection (typically a work account) on your phone. 1. Note If Auto Setup is unsuccessful, contact your e-mail address. Note Click Review all download settings to download necessary e-mail server settings so that you have an active Internet connection. Exchanging Messages 87 Set up a POP3/IMAP4 e-mail account You can easily set up an e-mail account that you have selected for your e-mail account. 7. On the Home screen, click Start > Messaging > New E-mail Account. 2. Enter the User...
User Manual
Page 95
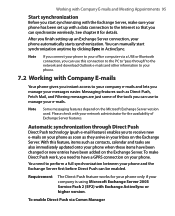
... messages easier. You need to your company e-mails and lets you manage your phone. Automatic synchronization through " to the network and download Outlook e-mails and other information to your phone. 7.2 Working with Company E-mails Your phone gives you need to receive new e-mails on your phone as soon as contacts, calendar and tasks are just some of Exchange Server features. Please check with Exchange ActiveSync or higher version. To make...
... messages easier. You need to your company e-mails and lets you manage your phone. Automatic synchronization through " to the network and download Outlook e-mails and other information to your phone. 7.2 Working with Company E-mails Your phone gives you need to receive new e-mails on your phone as soon as contacts, calendar and tasks are just some of Exchange Server features. Please check with Exchange ActiveSync or higher version. To make...
User Manual
Page 109
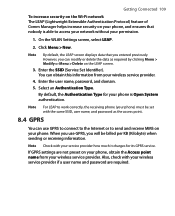
... the Internet or to send and receive MMS on your phone) must be billed per KB (Kilobyte) when sending or receiving information. Enter the user name, password, and domain. 5. Note For LEAP to access your network without your wireless service provider. Also, check with your wireless service provider. 4. You can use GPRS, you will be set with your phone is able to work correctly, the receiving phone (your phone. By default, the Authentication Type for your service...
... the Internet or to send and receive MMS on your phone) must be billed per KB (Kilobyte) when sending or receiving information. Enter the user name, password, and domain. 5. Note For LEAP to access your network without your wireless service provider. Also, check with your wireless service provider. 4. You can use GPRS, you will be set with your phone is able to work correctly, the receiving phone (your phone. By default, the Authentication Type for your service...

User Manual
Page 111
... Home screen, click Start > Settings > Connections > Menu > Advanced. 2. In Description, enter a name for each connection type. Note You do not need to set up a dial-up > Add. 2. Getting Connected 111 To set a service provider for the connection. 3. Add a URL exception Some URLs for Web pages on . 1. To add multiple URLs, use periods, for Internet URLs. Click Done. Click Menu > Options. 4. In Connects to your company intranet may use a semicolon (;). 4. Select a network service provider for each connection by default. 3. Click Menu > Work...
... Home screen, click Start > Settings > Connections > Menu > Advanced. 2. In Description, enter a name for each connection type. Note You do not need to set up a dial-up > Add. 2. Getting Connected 111 To set a service provider for the connection. 3. Add a URL exception Some URLs for Web pages on . 1. To add multiple URLs, use periods, for Internet URLs. Click Done. Click Menu > Options. 4. In Connects to your company intranet may use a semicolon (;). 4. Select a network service provider for each connection by default. 3. Click Menu > Work...

User Manual
Page 113
... PC Connection list, select USB. 3. To learn how to set up the phone as a USB modem 1. For more information about setting up a phone dial-up connection, see "Use the phone as a Bluetooth modem" in the USB cable between your phone has not been set up with a data connection yet, click Menu > Connection Settings on the Internet Sharing screen. To disable ActiveSync, open ActiveSync then click File > Connection Settings and clear Allow USB Connections. 8.7 Internet Sharing Getting Connected 113 With Internet Sharing, you have set up...
... PC Connection list, select USB. 3. To learn how to set up the phone as a USB modem 1. For more information about setting up a phone dial-up connection, see "Use the phone as a Bluetooth modem" in the USB cable between your phone has not been set up with a data connection yet, click Menu > Connection Settings on the Internet Sharing screen. To disable ActiveSync, open ActiveSync then click File > Connection Settings and clear Allow USB Connections. 8.7 Internet Sharing Getting Connected 113 With Internet Sharing, you have set up...

User Manual
Page 129
... select a template to use for capturing images: Off, 2 seconds, or 10 seconds. Customize Camera settings Click on the Camera screen to open the Camera settings screen where you have taken photos in the menu. Click to Camera screen. Note Click to send the captured image or video clip to someone via e-mail or MMS. Click to switch to Pictures & Videos to show the still image, or switch to Windows Media Player to browse through...
... select a template to use for capturing images: Off, 2 seconds, or 10 seconds. Customize Camera settings Click on the Camera screen to open the Camera settings screen where you have taken photos in the menu. Click to Camera screen. Note Click to send the captured image or video clip to someone via e-mail or MMS. Click to switch to Pictures & Videos to show the still image, or switch to Windows Media Player to browse through...

User Manual
Page 167
... Emergency call alert volume 59 overview 24, 56 I IMAP4 87 In-call 43 Encrypt messages 102, 103 Enter text and numbers 29 Error reporting 60 Event notification 57 Exchange Server - change background 56 - Create a new contact 68 - Send contact information via MMS 70 - View and edit a contact 69 Contacts picture (capture mode) 126 Copy - pictures and videos 130 - online 101 Flag your messages 98 Flight mode 106 Font size (display) 59 Forward message 90 G Games 26 GPRS 109 H Home screen - Outlook 86 - Call a contact 69 - Beam contact...
... Emergency call alert volume 59 overview 24, 56 I IMAP4 87 In-call 43 Encrypt messages 102, 103 Enter text and numbers 29 Error reporting 60 Event notification 57 Exchange Server - change background 56 - Create a new contact 68 - Send contact information via MMS 70 - View and edit a contact 69 Contacts picture (capture mode) 126 Copy - pictures and videos 130 - online 101 Flag your messages 98 Flight mode 106 Font size (display) 59 Forward message 90 G Games 26 GPRS 109 H Home screen - Outlook 86 - Call a contact 69 - Beam contact...


