
Technical Brief (Ink Jet Printers)
Page 2
... precisely print crisp details in photos and laser sharp text. A smaller ink droplet allows the printer to produce a greater number of different colored "printed dots"...color combinations and smoother color gradations. High Print Resolution: Resolution, which expands and is an important factor in the lightest areas of Print Resolution and Small, Variable-Size Ink Droplets 3. Additionally, smaller ink droplets produce less visible printed dots, especially apparent in achieving print quality. Effect of a photograph. Epson MicroPiezo Technology: Epson Micro Piezo print heads...
... precisely print crisp details in photos and laser sharp text. A smaller ink droplet allows the printer to produce a greater number of different colored "printed dots"...color combinations and smoother color gradations. High Print Resolution: Resolution, which expands and is an important factor in the lightest areas of Print Resolution and Small, Variable-Size Ink Droplets 3. Additionally, smaller ink droplets produce less visible printed dots, especially apparent in achieving print quality. Effect of a photograph. Epson MicroPiezo Technology: Epson Micro Piezo print heads...
Product Information Guide
Page 14
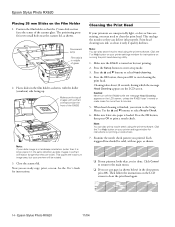
...only if quality declines. Press the OK button, then press OK to start cleaning the print head. Click the ? Each staggered line should be rotated. 3. Epson Stylus Photo RX620 11/04 Now you printed. The positioning posts fit in middle of the scanner glass. Close the scanner lid. ...This unclogs the nozzles so they are ready copy, print, or scan. or Help button on printing a nozzle check. 7. Epson Stylus Photo RX620 Placing 35 mm Slides on the LCD screen. Flourescent lamp Film strip is turned on running the print head cleaning utility. 1. Press the OK button, then ...
...only if quality declines. Press the OK button, then press OK to start cleaning the print head. Click the ? Each staggered line should be rotated. 3. Epson Stylus Photo RX620 11/04 Now you printed. The positioning posts fit in middle of the scanner glass. Close the scanner lid. ...This unclogs the nozzles so they are ready copy, print, or scan. or Help button on printing a nozzle check. 7. Epson Stylus Photo RX620 Placing 35 mm Slides on the LCD screen. Flourescent lamp Film strip is turned on running the print head cleaning utility. 1. Press the OK button, then ...
Product Information Guide
Page 15
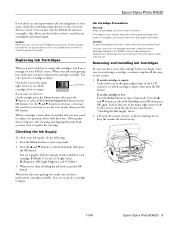
Epson Stylus Photo RX620 If you don't see any dried ink to select Ink Cartridge, press OK, then press OK again. You can 't print if a cartridge is low: Press the Setup button to enter setup mode. You can also turn the RX620 off and wait overnight-this allows any improvement after cleaning and aligning the print head... button. If an ink cartridge is empty. Check the icon in the RX620 until you can decline. When you have obtained a replacement. If ink gets on top. 11/04 Epson Stylus Photo RX620 - 15 Leave the empty cartridge installed in the upper right corner to ...
Epson Stylus Photo RX620 If you don't see any dried ink to select Ink Cartridge, press OK, then press OK again. You can 't print if a cartridge is low: Press the Setup button to enter setup mode. You can also turn the RX620 off and wait overnight-this allows any improvement after cleaning and aligning the print head... button. If an ink cartridge is empty. Check the icon in the RX620 until you can decline. When you have obtained a replacement. If ink gets on top. 11/04 Epson Stylus Photo RX620 - 15 Leave the empty cartridge installed in the upper right corner to ...
Product Information Guide
Page 16
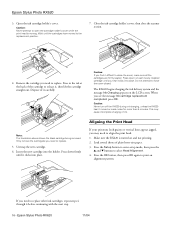
... you need to replace. Insert the new cartridge into place. Load several sheets of the cartridge to force the cover closed. Epson Stylus Photo RX620 3. Open the ink cartridge holder's cover. Close the ink cartridge holder's cover, then close the cover, make sure all ...Print Head If your printouts look grainy or vertical lines appear jagged, you need to replace. 5. Press the OK button, then press OK again to select Head Alignment. 4. If you need to replace other ink cartridges, repeat steps 4 through 6 before continuing with the next step. 16 - Epson Stylus Photo RX620...
... you need to replace. Insert the new cartridge into place. Load several sheets of the cartridge to force the cover closed. Epson Stylus Photo RX620 3. Open the ink cartridge holder's cover. Close the ink cartridge holder's cover, then close the cover, make sure all ...Print Head If your printouts look grainy or vertical lines appear jagged, you need to replace. 5. Press the OK button, then press OK again to select Head Alignment. 4. If you need to replace other ink cartridges, repeat steps 4 through 6 before continuing with the next step. 16 - Epson Stylus Photo RX620...
Product Information Guide
Page 17
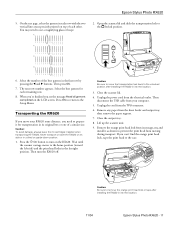
... the scanner lid and slide the transportation lock to the home position (toward the left side) and the print head locks in its new location. 11/04 Epson Stylus Photo RX620 - 17 Select the best pattern for transportation in its storage area and install it as shown to the ... completed on top of the best pattern in its new location. 3. Remove the orange print head lock from the sheet feeder and output tray, then remove the paper support. 7. Then press OK. 7. Epson Stylus Photo RX620 5. You may need to prepare it for each remaining row. 8. Caution: To avoid ...
... the scanner lid and slide the transportation lock to the home position (toward the left side) and the print head locks in its new location. 11/04 Epson Stylus Photo RX620 - 17 Select the best pattern for transportation in its storage area and install it as shown to the ... completed on top of the best pattern in its new location. 3. Remove the orange print head lock from the sheet feeder and output tray, then remove the paper support. 7. Then press OK. 7. Epson Stylus Photo RX620 5. You may need to prepare it for each remaining row. 8. Caution: To avoid ...

Product Information Guide
Page 18
... using the protective materials that came with them. Epson Stylus Photo RX620 11/04 Repack the RX620 and its attachments in quality, clean the print head (see page 16). if output is misaligned, align the print head (see page 14); After transporting the RX620, remove the orange print head lock or tape securing the print head, unlock the transportation lock securing the scanner carriage...
... using the protective materials that came with them. Epson Stylus Photo RX620 11/04 Repack the RX620 and its attachments in quality, clean the print head (see page 16). if output is misaligned, align the print head (see page 14); After transporting the RX620, remove the orange print head lock or tape securing the print head, unlock the transportation lock securing the scanner carriage...
Quick Reference Guide
Page 4
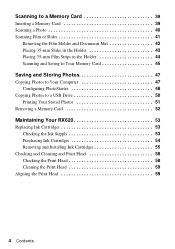
... 48 Copying Photos to a USB Drive 50 Printing Your Stored Photos 51 Removing a Memory Card 52 Maintaining Your RX620 53 Replacing Ink Cartridges 53 Checking the Ink Supply 53 Purchasing Ink Cartridges 54 Removing and Installing Ink Cartridges 55 Checking and Cleaning and Print Head 58 Checking the Print Head 58 Cleaning the Print Head 59 Aligning the Print Head 59 4 Contents
... 48 Copying Photos to a USB Drive 50 Printing Your Stored Photos 51 Removing a Memory Card 52 Maintaining Your RX620 53 Replacing Ink Cartridges 53 Checking the Ink Supply 53 Purchasing Ink Cartridges 54 Removing and Installing Ink Cartridges 55 Checking and Cleaning and Print Head 58 Checking the Print Head 58 Cleaning the Print Head 59 Aligning the Print Head 59 4 Contents
Quick Reference Guide
Page 53
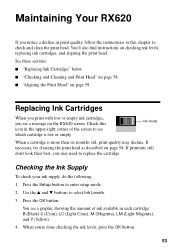
... these sections: ■ "Replacing Ink Cartridges" below ■ "Checking and Cleaning and Print Head" on page 58 ■ "Aligning the Print Head" on the RX620 screen. If necessary, try cleaning the print head as described on checking ink levels, replacing ink cartridges, and aligning the print head. Checking the Ink Supply To check your ink supply, do the following...
... these sections: ■ "Replacing Ink Cartridges" below ■ "Checking and Cleaning and Print Head" on page 58 ■ "Aligning the Print Head" on the RX620 screen. If necessary, try cleaning the print head as described on checking ink levels, replacing ink cartridges, and aligning the print head. Checking the Ink Supply To check your ink supply, do the following...
Quick Reference Guide
Page 54
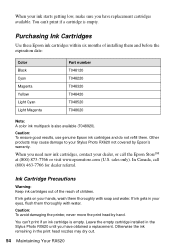
...water. Caution: To avoid damaging the printer, never move the print head by Epson's warranty. In Canada, call the Epson StoreSM at (800) 873-7766 or visit www.epsonstore.com (U.S. Leave the empty cartridge installed in the Stylus Photo RX620 until you need new ink cartridges, contact your dealer, or call...your hands, wash them . If ink gets in the print head nozzles may cause damage to your Stylus Photo RX620 not covered by hand. Otherwise the ink remaining in your eyes, flush them and before the expiration date: Color Black Cyan Magenta Yellow Light Cyan Light Magenta Part number...
...water. Caution: To avoid damaging the printer, never move the print head by Epson's warranty. In Canada, call the Epson StoreSM at (800) 873-7766 or visit www.epsonstore.com (U.S. Leave the empty cartridge installed in the Stylus Photo RX620 until you need new ink cartridges, contact your dealer, or call...your hands, wash them . If ink gets in the print head nozzles may cause damage to your Stylus Photo RX620 not covered by hand. Otherwise the ink remaining in your eyes, flush them and before the expiration date: Color Black Cyan Magenta Yellow Light Cyan Light Magenta Part number...

Quick Reference Guide
Page 55
...before you begin. Replacing Ink Cartridges 55 Use the u and d buttons to access the printer area. 3. Lift open the cartridge holder's cover while the print head is low or check the ink levels as described on page 53. Once you start replacing a cartridge, you must complete all the steps in the.... Open the ink cartridge holder. At the confirmation screen, press OK again. 2. If an ink cartridge is low: Look at the message the RX620 screen to find out which cartridge is moving. Then press the Setup button to open the scanner section to select Ink Cartridge, then press OK...
...before you begin. Replacing Ink Cartridges 55 Use the u and d buttons to access the printer area. 3. Lift open the cartridge holder's cover while the print head is low or check the ink levels as described on page 53. Once you start replacing a cartridge, you must complete all the steps in the.... Open the ink cartridge holder. At the confirmation screen, press OK again. 2. If an ink cartridge is low: Look at the message the RX620 screen to find out which cartridge is moving. Then press the Setup button to open the scanner section to select Ink Cartridge, then press OK...

Quick Reference Guide
Page 58
...then press OK. 3. Then clean the print head as described on your RX620 at least once a month to check the results after cleaning the print head. 1. This clears the print head nozzles, which can print a nozzle check pattern to see any print head nozzles are missing, or you see light... u and d buttons to print the nozzle check. 4. Press the Setup button to turn on page 59. 58 Maintaining Your RX620 Checking the Print Head You can become clogged if you printed. Checking and Cleaning and Print Head If your printouts are unexpectedly light, colors are clogged, or to maintain...
...then press OK. 3. Then clean the print head as described on your RX620 at least once a month to check the results after cleaning the print head. 1. This clears the print head nozzles, which can print a nozzle check pattern to see any print head nozzles are missing, or you see light... u and d buttons to print the nozzle check. 4. Press the Setup button to turn on page 59. 58 Maintaining Your RX620 Checking the Print Head You can become clogged if you printed. Checking and Cleaning and Print Head If your printouts are unexpectedly light, colors are clogged, or to maintain...
Quick Reference Guide
Page 59
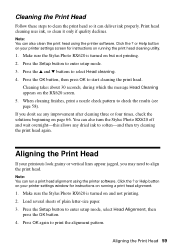
... software. Cleaning takes about 30 seconds, during which the message Head Cleaning appears on and not printing. 2. If you may need to align the print head. Press the Setup button to start cleaning the print head. Click the ? Make sure the Stylus Photo RX620 is turned on running the print head cleaning utility. 1. Press OK again to check the results (see...
... software. Cleaning takes about 30 seconds, during which the message Head Cleaning appears on and not printing. 2. If you may need to align the print head. Press the Setup button to start cleaning the print head. Click the ? Make sure the Stylus Photo RX620 is turned on running the print head cleaning utility. 1. Press OK again to check the results (see...
Quick Reference Guide
Page 61
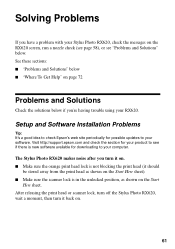
... Installation Problems Tip: It's a good idea to check Epson's web site periodically for downloading to your software. After releasing the print head or scanner lock, turn off the Stylus Photo RX620, wait a moment, then turn it on. ■ Make sure the orange print head lock is not blocking the print head (it back on the Start Here sheet. Solving Problems...
... Installation Problems Tip: It's a good idea to check Epson's web site periodically for downloading to your software. After releasing the print head or scanner lock, turn off the Stylus Photo RX620, wait a moment, then turn it on. ■ Make sure the orange print head lock is not blocking the print head (it back on the Start Here sheet. Solving Problems...
Quick Reference Guide
Page 63
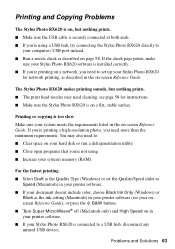
... Stylus Photo RX620 software is installed correctly. ■ If you're printing on -screen Reference Guide. The Stylus Photo RX620 makes printing sounds, but nothing prints. ■ The print head nozzles may also need cleaning; If you're printing a high-resolution photo, you need to set the Quality/Speed slider to Speed (Macintosh) in your printer software. ■ If your document doesn't include color...
... Stylus Photo RX620 software is installed correctly. ■ If you're printing on -screen Reference Guide. The Stylus Photo RX620 makes printing sounds, but nothing prints. ■ The print head nozzles may also need cleaning; If you're printing a high-resolution photo, you need to set the Quality/Speed slider to Speed (Macintosh) in your printer software. ■ If your document doesn't include color...

Quick Reference Guide
Page 64
The printer prints blank pages. ■ Make sure the paper size settings are using a USB hub, try connecting the Stylus Photo RX620 directly to the computer's USB port. ■ If you're scanning film, make the lamp come on. ■ If you are correct for your paper ... the paper size settings are correct for the paper you've loaded. ■ Choose the correct margins for the paper you've loaded. ■ The print head nozzles may need to preview your paper is positioned correctly. 64 Solving Problems Select Actual as the Reduce/Enlarge setting, and use the buttons on...
The printer prints blank pages. ■ Make sure the paper size settings are using a USB hub, try connecting the Stylus Photo RX620 directly to the computer's USB port. ■ If you're scanning film, make the lamp come on. ■ If you are correct for your paper ... the paper size settings are correct for the paper you've loaded. ■ Choose the correct margins for the paper you've loaded. ■ The print head nozzles may need to preview your paper is positioned correctly. 64 Solving Problems Select Actual as the Reduce/Enlarge setting, and use the buttons on...

Quick Reference Guide
Page 66
... stack should never be above the arrow on , and press the x Color button. Never pull the paper out backwards (in the direction of the printer in your printouts or copies. ■ Clean the print head; ■ If paper jams, turn off your Stylus Photo RX620, lift open the scanner section, and remove any paper that's inside...
... stack should never be above the arrow on , and press the x Color button. Never pull the paper out backwards (in the direction of the printer in your printouts or copies. ■ Clean the print head; ■ If paper jams, turn off your Stylus Photo RX620, lift open the scanner section, and remove any paper that's inside...
Quick Reference Guide
Page 67
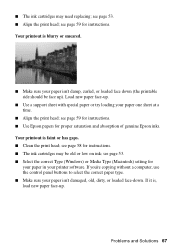
...53. ■ Select the correct Type (Windows) or Media Type (Macintosh) setting for proper saturation and absorption of genuine Epson inks. If it is faint or has gaps. ■ Clean the print head; Your printout is , load new paper face-up . ■ Use a support sheet with special paper or try ...■ Use Epson papers for your paper in your paper isn't damp, curled, or loaded face down . If you're copying without a computer, use the control panel buttons to select the correct paper type. ■ Make sure your paper one sheet at a time. ■ Align the print head; Problems and ...
...53. ■ Select the correct Type (Windows) or Media Type (Macintosh) setting for proper saturation and absorption of genuine Epson inks. If it is faint or has gaps. ■ Clean the print head; Your printout is , load new paper face-up . ■ Use a support sheet with special paper or try ...■ Use Epson papers for your paper in your paper isn't damp, curled, or loaded face down . If you're copying without a computer, use the control panel buttons to select the correct paper type. ■ Make sure your paper one sheet at a time. ■ Align the print head; Problems and ...

Quick Reference Guide
Page 68
... USB cable is securely connected to the USB port inside the Stylus Photo RX620. ■ Make sure the Stylus Photo RX620 is left without a computer, use a color management system, such as ICM or ColorSync®, to get as close as the quality setting. ■ Align the print head; See your application, or as possible. see incorrect characters. ■ Make...
... USB cable is securely connected to the USB port inside the Stylus Photo RX620. ■ Make sure the Stylus Photo RX620 is left without a computer, use a color management system, such as ICM or ColorSync®, to get as close as the quality setting. ■ Align the print head; See your application, or as possible. see incorrect characters. ■ Make...
Quick Reference Guide
Page 71
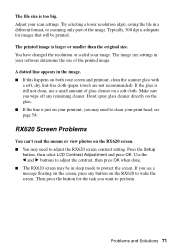
... the glass. ■ If the line is just on your printout, you wipe off any button on both your print head; Adjust your image. see a message floating on the RX620 screen. ■ You may be printed. Use the l and r buttons to adjust the contrast, then press OK when done. ■ The...58. The printed image is too big. If you want to protect the screen. Try selecting a lower resolution (dpi), saving the file in sleep mode to perform. You have changed the resolution or scaled your scan settings. RX620 Screen Problems You can't read the menus or view photos on the ...
... the glass. ■ If the line is just on your printout, you wipe off any button on both your print head; Adjust your image. see a message floating on the RX620 screen. ■ You may be printed. Use the l and r buttons to adjust the contrast, then press OK when done. ■ The...58. The printed image is too big. If you want to protect the screen. Try selecting a lower resolution (dpi), saving the file in sleep mode to perform. You have changed the resolution or scaled your scan settings. RX620 Screen Problems You can't read the menus or view photos on the ...

Quick Reference Guide
Page 76
...exhibits a distinct change in performance. Do not put your hand inside the Stylus Photo RX620 or touch the cartridge during printing. ■ Don't move the print head by hand; If it gets in your eyes, flush them from printing. ■ Keep ink cartridges out of the reach of children and ...the computer and memory card are in place, and the scanner is secured by the operating instructions. ■ Before transporting the Stylus Photo RX620, make sure the print head is capped in the far right position, the ink cartridges are communicating (when the memory card light is flashing). ■...
...exhibits a distinct change in performance. Do not put your hand inside the Stylus Photo RX620 or touch the cartridge during printing. ■ Don't move the print head by hand; If it gets in your eyes, flush them from printing. ■ Keep ink cartridges out of the reach of children and ...the computer and memory card are in place, and the scanner is secured by the operating instructions. ■ Before transporting the Stylus Photo RX620, make sure the print head is capped in the far right position, the ink cartridges are communicating (when the memory card light is flashing). ■...


