
Technical Brief (Ink Jet Printers)
Page 1
... printing technologies work together to produce award-winning print quality, and each of offering a one printers. Print Quality-Core Printing Technologies The core technologies used in Epson ink jet printers work together to produce brilliant Photo Quality color, sharp text, and incredible print speeds Small Ink Droplet Size Small ink droplets produce smoother gradations and...
... printing technologies work together to produce award-winning print quality, and each of offering a one printers. Print Quality-Core Printing Technologies The core technologies used in Epson ink jet printers work together to produce brilliant Photo Quality color, sharp text, and incredible print speeds Small Ink Droplet Size Small ink droplets produce smoother gradations and...

Technical Brief (Ink Jet Printers)
Page 2
... Large droplets are used in photos and laser sharp text. Epson printers are increased Epson printers use Variable Size Droplet Technology, where the printers can use high-precision mechanical pumps to produce ink droplets, and no heat is involved in consistent ink droplets without having to achieve more color combinations and smoother color gradations. The size and number...
... Large droplets are used in photos and laser sharp text. Epson printers are increased Epson printers use Variable Size Droplet Technology, where the printers can use high-precision mechanical pumps to produce ink droplets, and no heat is involved in consistent ink droplets without having to achieve more color combinations and smoother color gradations. The size and number...

Technical Brief (Ink Jet Printers)
Page 3
... same page. High Quality Halftoning: Every ink jet printer uses a method referred to as halftoning, that produces fast, high-quality, color-accurate output. Specifications subject to get sharp black text, superb photo quality photos, or both on the content, selected output quality, and paper type. Epson, Exceed Your Vision, MicroPiezo, AcuPhoto Halftoning, Claria...
... same page. High Quality Halftoning: Every ink jet printer uses a method referred to as halftoning, that produces fast, high-quality, color-accurate output. Specifications subject to get sharp black text, superb photo quality photos, or both on the content, selected output quality, and paper type. Epson, Exceed Your Vision, MicroPiezo, AcuPhoto Halftoning, Claria...
Printer Basics
Page 3
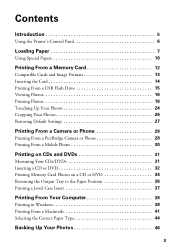
... Introduction 5 Using the Printer's Control Panel 6 Loading Paper 7 Using Special Papers 10 Printing From a Memory Card 12 Compatible Cards and Image Formats 13 Inserting the Card 14 Printing From a USB Flash Drive 15 Viewing Photos 16 Printing Photos 16 Touching Up Your Photos 24 Cropping Your Photos 26 Restoring Default Settings ... a Mobile Phone 30 Printing on CDs and DVDs 31 Measuring Your CDs/DVDs 31 Inserting a CD or DVD 32 Printing Memory Card Photos on a CD or DVD 34 Returning the Output Tray to the Paper Position 36 Printing a Jewel Case Insert 37 Printing From Your ...
... Introduction 5 Using the Printer's Control Panel 6 Loading Paper 7 Using Special Papers 10 Printing From a Memory Card 12 Compatible Cards and Image Formats 13 Inserting the Card 14 Printing From a USB Flash Drive 15 Viewing Photos 16 Printing Photos 16 Touching Up Your Photos 24 Cropping Your Photos 26 Restoring Default Settings ... a Mobile Phone 30 Printing on CDs and DVDs 31 Measuring Your CDs/DVDs 31 Inserting a CD or DVD 32 Printing Memory Card Photos on a CD or DVD 34 Returning the Output Tray to the Paper Position 36 Printing a Jewel Case Insert 37 Printing From Your ...
Printer Basics
Page 4
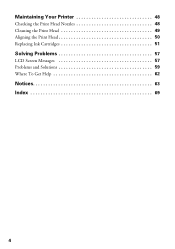
Maintaining Your Printer 48 Checking the Print Head Nozzles 48 Cleaning the Print Head 49 Aligning the Print Head 50 Replacing Ink Cartridges 51 Solving Problems 57 LCD Screen Messages 57 Problems and Solutions 59 Where To Get Help 62 Notices 63 Index 69 4
Maintaining Your Printer 48 Checking the Print Head Nozzles 48 Cleaning the Print Head 49 Aligning the Print Head 50 Replacing Ink Cartridges 51 Solving Problems 57 LCD Screen Messages 57 Problems and Solutions 59 Where To Get Help 62 Notices 63 Index 69 4
Printer Basics
Page 5
...Macintosh® computer. Of course your printer can do most of these guidelines as described on the Start Here sheet, turn here to: ■ Load paper ■ Print photos stored on a memory card ■ Print photos directly from your camera or mobile phone...basic document or photo from your computer ■ Backup your photos ■ Perform routine maintenance ■ Solve simple problems This book tells you how to do lots more when you read your Epson Stylus Photo R380 instructions: Warning: Warnings must be followed carefully to your Epson Stylus Photo R380. Caution: Cautions...
...Macintosh® computer. Of course your printer can do most of these guidelines as described on the Start Here sheet, turn here to: ■ Load paper ■ Print photos stored on a memory card ■ Print photos directly from your camera or mobile phone...basic document or photo from your computer ■ Backup your photos ■ Perform routine maintenance ■ Solve simple problems This book tells you how to do lots more when you read your Epson Stylus Photo R380 instructions: Warning: Warnings must be followed carefully to your Epson Stylus Photo R380. Caution: Cautions...
Printer Basics
Page 6
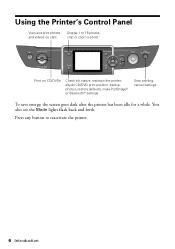
maintain the printer; restore defaults; backup photos; cancel settings To save energy, the screen goes dark after the printer has been idle for a while. You also see the Mode lights flash back and forth. Using the Printer's Control Panel View and print photos and videos on CD/DVDs Check ink status; make PictBridge® or Bluetooth® settings Stop printing; Press any button to 16 photos; crop or zoom a photo Print on card Display 1 to reactivate the printer. 6 Introduction adjust CD/DVD print position;
maintain the printer; restore defaults; backup photos; cancel settings To save energy, the screen goes dark after the printer has been idle for a while. You also see the Mode lights flash back and forth. Using the Printer's Control Panel View and print photos and videos on CD/DVDs Check ink status; make PictBridge® or Bluetooth® settings Stop printing; Press any button to 16 photos; crop or zoom a photo Print on card Display 1 to reactivate the printer. 6 Introduction adjust CD/DVD print position;
Printer Basics
Page 7
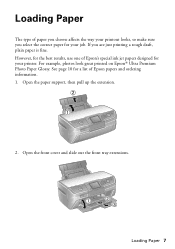
Loading Paper 7 See page 10 for your printer. If you select the correct paper for your job. Open the paper support, then pull up the extension. 2. For example, photos look great printed on Epson® Ultra Premium Photo Paper Glossy. Open the front cover and slide out the front ...tray extensions. Loading Paper The type of Epson papers and ordering information. 1. However, for the best results, use...
Loading Paper 7 See page 10 for your printer. If you select the correct paper for your job. Open the paper support, then pull up the extension. 2. For example, photos look great printed on Epson® Ultra Premium Photo Paper Glossy. Open the front cover and slide out the front ...tray extensions. Loading Paper The type of Epson papers and ordering information. 1. However, for the best results, use...
Printer Basics
Page 11
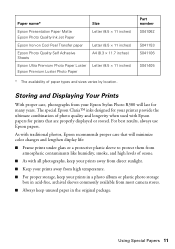
...printer provide the ultimate combination of paper types and sizes varies by location. Using Special Papers 11 Paper name* Epson Presentation Paper Matte Epson Photo Quality Ink Jet Paper Epson Iron-on Cool Peel Transfer paper Epson Photo Quality Self Adhesive Sheets Epson Ultra Premium Photo Paper Luster Epson Premium Luster Photo... sunlight. ■ Keep your prints away from high temperature. ■ For proper storage, keep your Epson Stylus Photo R380 will minimize color changes and lengthen display life: ■ Frame prints under glass or a protective plastic sleeve to protect them...
...printer provide the ultimate combination of paper types and sizes varies by location. Using Special Papers 11 Paper name* Epson Presentation Paper Matte Epson Photo Quality Ink Jet Paper Epson Iron-on Cool Peel Transfer paper Epson Photo Quality Self Adhesive Sheets Epson Ultra Premium Photo Paper Luster Epson Premium Luster Photo... sunlight. ■ Keep your prints away from high temperature. ■ For proper storage, keep your Epson Stylus Photo R380 will minimize color changes and lengthen display life: ■ Frame prints under glass or a protective plastic sleeve to protect them...
Printer Basics
Page 12
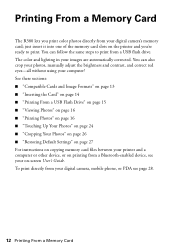
... a computer or other device, or on printing from your digital camera's memory card; Printing From a Memory Card The R380 lets you print color photos directly from a Bluetooth-enabled device, see your on the printer and you're ready to print from your digital camera, mobile phone, or PDA see page 28. 12 Printing From...
... a computer or other device, or on printing from your digital camera's memory card; Printing From a Memory Card The R380 lets you print color photos directly from a Bluetooth-enabled device, see your on the printer and you're ready to print from your digital camera, mobile phone, or PDA see page 28. 12 Printing From...

Printer Basics
Page 13
Compatible Cards and Image Formats You can use the following types of cards with your printer: Top slot Bottom slot Slot Top slot Bottom slot Type of card xD-Picture Card™ xD-Picture Card Type M xD-Picture Card Type H MagicGate&#... PRO Duo™* MultiMediaCard SD™ Card SDHC Card miniSD™ Card* miniSDHC Card* microSD Card* microSDHC Card* CompactFlash® Microdrive™ * Adapter required The printer supports image files that meet the following requirements: Media format File format Image size Number of files DCF version 1.0 or 2.0 compliant* JPEG, DOS FAT (FAT...
Compatible Cards and Image Formats You can use the following types of cards with your printer: Top slot Bottom slot Slot Top slot Bottom slot Type of card xD-Picture Card™ xD-Picture Card Type M xD-Picture Card Type H MagicGate&#... PRO Duo™* MultiMediaCard SD™ Card SDHC Card miniSD™ Card* miniSDHC Card* microSD Card* microSDHC Card* CompactFlash® Microdrive™ * Adapter required The printer supports image files that meet the following requirements: Media format File format Image size Number of files DCF version 1.0 or 2.0 compliant* JPEG, DOS FAT (FAT...
Printer Basics
Page 14
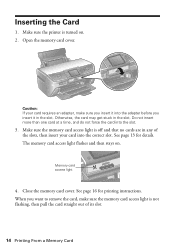
Make sure the printer is off and that no cards are in the slot. Caution: If your card into the slot. 3. Make sure the memory card access light is ...
Make sure the printer is off and that no cards are in the slot. Caution: If your card into the slot. 3. Make sure the memory card access light is ...
Printer Basics
Page 15
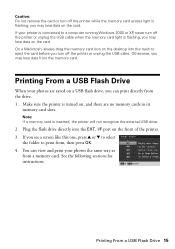
Printing From a USB Flash Drive When your photos are no memory cards in its memory card slots. If your photos the same way as from the memory card. I/F port on the desktop into the EXT. you can view and print your printer is connected to print from the drive. 1. Otherwise, you may ...lose data on the card. Make sure the printer is flashing; See the ...
Printing From a USB Flash Drive When your photos are no memory cards in its memory card slots. If your photos the same way as from the memory card. I/F port on the desktop into the EXT. you can view and print your printer is connected to print from the drive. 1. Otherwise, you may ...lose data on the card. Make sure the printer is flashing; See the ...

Printer Basics
Page 16
... sure the printer is in Memory Card mode and you want to start displaying your photos one by one copy, press the Copies + button again. 16 Printing From a Memory Card Viewing and Printing Individual Photos The View and Print Photos option lets you want to view a slide show of your photos, or display... then press OK. 2. Press the Memory Card mode button. 2. If you want to print, press the Copies + button. Press l or r to choose the photo you want to print, press OK. You see page 13). First, insert your memory card or USB flash drive as shown: ■ To view the...
... sure the printer is in Memory Card mode and you want to start displaying your photos one by one copy, press the Copies + button again. 16 Printing From a Memory Card Viewing and Printing Individual Photos The View and Print Photos option lets you want to view a slide show of your photos, or display... then press OK. 2. Press the Memory Card mode button. 2. If you want to print, press the Copies + button. Press l or r to choose the photo you want to print, press OK. You see page 13). First, insert your memory card or USB flash drive as shown: ■ To view the...
Printer Basics
Page 19
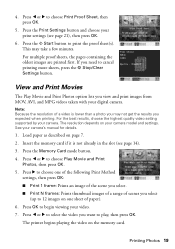
...by your camera's manual for details. 1. Load paper as described on your digital camera. Insert the memory card if it is lower than a photo you expected when printing. If you want to cancel printing more sheets, press the y Stop/Clear Settings button. See your camera. Press the ...and choose your video. 7. For multiple proof sheets, the pages containing the oldest images are printed first. Press the Memory Card mode button. 4. The printer begins playing the video on one sheet of a video is not already in the slot (see page 21), then press OK. 6. Press l or r...
...by your camera's manual for details. 1. Load paper as described on your digital camera. Insert the memory card if it is lower than a photo you expected when printing. If you want to cancel printing more sheets, press the y Stop/Clear Settings button. See your camera. Press the ...and choose your video. 7. For multiple proof sheets, the pages containing the oldest images are printed first. Press the Memory Card mode button. 4. The printer begins playing the video on one sheet of a video is not already in the slot (see page 21), then press OK. 6. Press l or r...
Printer Basics
Page 24
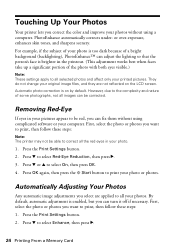
...your original image files, and they are applied to print, then follow these steps: Note: The printer may not be able to be corrected. First, select the photo or photos you want to print, then follow these steps: 1. Press the Print Settings button. 2. First,... your photo or photos. Touching Up Your Photos Your printer lets you select are not reflected on by default. For example, if the subject of your photo is brighter in your computer. Automatically Adjusting Your Photos Any automatic image adjustments you correct the color and improve your photos without ...
...your original image files, and they are applied to print, then follow these steps: Note: The printer may not be able to be corrected. First, select the photo or photos you want to print, then follow these steps: 1. Press the Print Settings button. 2. First,... your photo or photos. Touching Up Your Photos Your printer lets you select are not reflected on by default. For example, if the subject of your photo is brighter in your computer. Automatically Adjusting Your Photos Any automatic image adjustments you correct the color and improve your photos without ...
Printer Basics
Page 26
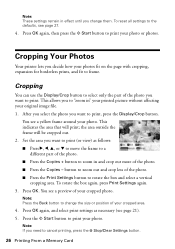
... or position of your photo. Set the area you need to print your cropped photo. Press the x Start button to cancel printing, press the y Stop/Clear Settings button. 26 Printing From a Memory Card Note: If you want to frame. Cropping Your Photos Your printer lets you want to print... (or view) as necessary (see page 27. 4. After you select the photo you decide how your photo. You see a yellow frame around your photos fit on the page with cropping, expansion for borderless prints...
... or position of your photo. Set the area you need to print your cropped photo. Press the x Start button to cancel printing, press the y Stop/Clear Settings button. 26 Printing From a Memory Card Note: If you want to frame. Cropping Your Photos Your printer lets you want to print... (or view) as necessary (see page 27. 4. After you select the photo you decide how your photo. You see a yellow frame around your photos fit on the page with cropping, expansion for borderless prints...
Printer Basics
Page 27
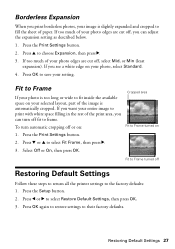
...then press OK. 3. Press l or r to save your setting. Press the Print Settings button. 2. Press the Setup button. 2. If too much of your photo, select Standard. 4. Press d or u to their factory defaults. Press OK again to restore settings to select Fit Frame, then press r. 3. Select Off or...as described below. 1. If you want your entire image to print with white space filling in the rest of your photo edges are cut off Restoring Default Settings Follow these steps to return all the printer settings to the factory defaults: 1. Restoring Default Settings 27
...then press OK. 3. Press l or r to save your setting. Press the Print Settings button. 2. Press the Setup button. 2. If too much of your photo, select Standard. 4. Press d or u to their factory defaults. Press OK again to restore settings to select Fit Frame, then press r. 3. Select Off or...as described below. 1. If you want your entire image to print with white space filling in the rest of your photo edges are cut off Restoring Default Settings Follow these steps to return all the printer settings to the factory defaults: 1. Restoring Default Settings 27
Printer Basics
Page 28
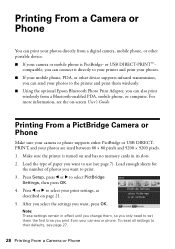
... Guide. For more information, see page 7). compatible, you can connect it directly to your printer and print your photos. ■ If your mobile phone, PDA, or other portable device. ■ If your photos are sized between 80 × 80 pixels and 9200 × 9200 pixels. 1. Make ...sure the printer is PictBridge- Press l or r to select your photos to set them wirelessly. ■ Using the optional Epson Bluetooth Photo Print Adapter, you can also print wirelessly from a Bluetooth-enabled PDA, mobile phone, or ...
... Guide. For more information, see page 7). compatible, you can connect it directly to your printer and print your photos. ■ If your mobile phone, PDA, or other portable device. ■ If your photos are sized between 80 × 80 pixels and 9200 × 9200 pixels. 1. Make ...sure the printer is PictBridge- Press l or r to select your photos to set them wirelessly. ■ Using the optional Epson Bluetooth Photo Print Adapter, you can also print wirelessly from a Bluetooth-enabled PDA, mobile phone, or ...
Printer Basics
Page 29
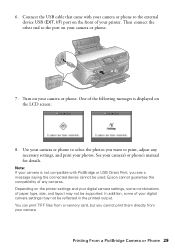
...of paper type, size, and layout may not be reflected in the printed output. Turn on the LCD screen: 8. Depending on the printer settings and your camera is displayed on your camera's or phone's manual for details. Printing From a PictBridge Camera or Phone 29 See ... compatible with your camera. Use your camera or phone to select the photos you see a message saying the connected device cannot be supported. 6. I/F) port on your printer. Then connect the other end to print, adjust any cameras. Epson cannot guarantee the compatibility of your camera or phone. 7.
...of paper type, size, and layout may not be reflected in the printed output. Turn on the LCD screen: 8. Depending on the printer settings and your camera is displayed on your camera's or phone's manual for details. Printing From a PictBridge Camera or Phone 29 See ... compatible with your camera. Use your camera or phone to select the photos you see a message saying the connected device cannot be supported. 6. I/F) port on your printer. Then connect the other end to print, adjust any cameras. Epson cannot guarantee the compatibility of your camera or phone. 7.


