Printer Basics
Page 21
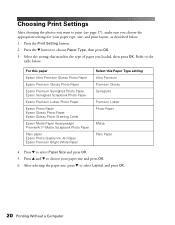
... print layout, as described below : For this paper Epson Ultra Premium Glossy Photo Paper Epson Premium Glossy Photo Paper Epson Premium Semigloss Photo Paper Epson Semigloss Scrapbook Photo Paper Epson Premium Luster Photo Paper Epson Photo Paper Epson Glossy Photo Paper Epson Glossy Photo Greeting Cards Epson Matte Paper Heavyweight PremierArtTM Matte Scrapbook Photo Paper Plain paper Epson Photo Quality Ink Jet Paper Epson Premium Bright White Paper Select this Paper Type...
... print layout, as described below : For this paper Epson Ultra Premium Glossy Photo Paper Epson Premium Glossy Photo Paper Epson Premium Semigloss Photo Paper Epson Semigloss Scrapbook Photo Paper Epson Premium Luster Photo Paper Epson Photo Paper Epson Glossy Photo Paper Epson Glossy Photo Greeting Cards Epson Matte Paper Heavyweight PremierArtTM Matte Scrapbook Photo Paper Plain paper Epson Photo Quality Ink Jet Paper Epson Premium Bright White Paper Select this Paper Type...

Printer Basics
Page 26
... or video is still highlighted, then press OK. 6. Before you insert a CD or DVD, make sure it 's a good idea to print a small sample, then wait a day and check the quality to eject the paper from EPSON Print CD on small CDs (8 cm), you may not be positioned correctly. Push in the... the data. Repeat steps 3 through 6 three or four times. Otherwise, dirt or scratches on . Press OK to load CDs and DVDs into the printer. 5. Press OK again to make sure the printer is satisfactory. Follow these steps to feed paper into your ink jet-printable CDs or DVDs before you print.
... or video is still highlighted, then press OK. 6. Before you insert a CD or DVD, make sure it 's a good idea to print a small sample, then wait a day and check the quality to eject the paper from EPSON Print CD on small CDs (8 cm), you may not be positioned correctly. Push in the... the data. Repeat steps 3 through 6 three or four times. Otherwise, dirt or scratches on . Press OK to load CDs and DVDs into the printer. 5. Press OK again to make sure the printer is satisfactory. Follow these steps to feed paper into your ink jet-printable CDs or DVDs before you print.

Printer Basics
Page 39
... select Paper Feed/Paper Eject and press OK. 4. You can do this printer. Caution: Use only ink jet-printable CDs or DVDs for printing. You can print on both standard-size 12-cm CDs and 8-cm mini CDs. Make sure the printer is turned on CDs and DVDs. Press OK again to feed paper... information on designing CDs and DVDs, see the on-screen help in EPSON Print CD. ■ "Cleaning the Roller" below to print on and letter-size plain paper is still highlighted, then press OK. 6. Press d to import your own photos, add text, and modify your designs with this by feeding and ejecting...
... select Paper Feed/Paper Eject and press OK. 4. You can do this printer. Caution: Use only ink jet-printable CDs or DVDs for printing. You can print on both standard-size 12-cm CDs and 8-cm mini CDs. Make sure the printer is turned on CDs and DVDs. Press OK again to feed paper... information on designing CDs and DVDs, see the on-screen help in EPSON Print CD. ■ "Cleaning the Roller" below to print on and letter-size plain paper is still highlighted, then press OK. 6. Press d to import your own photos, add text, and modify your designs with this by feeding and ejecting...

Printer Basics
Page 40
... want to check the print position or color, see the instructions for "Adjusting the Print Position" on page 41 and "Adjusting the Print Density" on page 43. Before you insert a CD or DVD, make sure it is turned on. Follow these steps to make sure the printer is satisfactory. Lower CD/DVD tray guide... a small sample, then wait a day and check the quality to load CDs and DVDs into your ink jet-printable CDs or DVDs before you print. Inserting a CD or DVD Make sure the data, music, or video is burned on your printer: Caution: If you don't insert the tray correctly, you may damage the...
... want to check the print position or color, see the instructions for "Adjusting the Print Position" on page 41 and "Adjusting the Print Density" on page 43. Before you insert a CD or DVD, make sure it is turned on. Follow these steps to make sure the printer is satisfactory. Lower CD/DVD tray guide... a small sample, then wait a day and check the quality to load CDs and DVDs into your ink jet-printable CDs or DVDs before you print. Inserting a CD or DVD Make sure the data, music, or video is burned on your printer: Caution: If you don't insert the tray correctly, you may damage the...
Printer Basics
Page 42
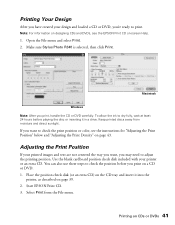
...You can also use these steps to check the position before playing the disc or inserting it into the printer, as described on CDs or DVDs 41 Make sure Stylus Photo R340 is selected, then click Print. Macintosh Windows Note: After you may need to print. Printing Your Design... After you have created your design and loaded a CD or DVD, you're ready to adjust the printing position. To allow the ink to check the print position or color, see the EPSON...
...You can also use these steps to check the position before playing the disc or inserting it into the printer, as described on CDs or DVDs 41 Make sure Stylus Photo R340 is selected, then click Print. Macintosh Windows Note: After you may need to print. Printing Your Design... After you have created your design and loaded a CD or DVD, you're ready to adjust the printing position. To allow the ink to check the print position or color, see the EPSON...
Printer Basics
Page 44
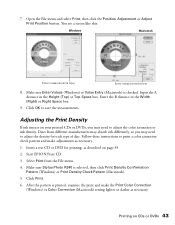
...color saturation or ink density. Make sure Stylus Photo R340 is checked. Click Print. 6. Adjusting the Print Density If ink smears on your printed CDs or DVDs, you may need to save the measurements. After the pattern is printed, examine the print and make adjustments as necessary. Start EPSON ... on CDs or DVDs 43 Select Print from different manufacturers may absorb ink differently, so you may need to print a color saturation check pattern and make the Print Color Correction (Windows) or Color Correction (Macintosh) setting lighter or darker as necessary. 1. Open the...
...color saturation or ink density. Make sure Stylus Photo R340 is checked. Click Print. 6. Adjusting the Print Density If ink smears on your printed CDs or DVDs, you may need to save the measurements. After the pattern is printed, examine the print and make adjustments as necessary. Start EPSON ... on CDs or DVDs 43 Select Print from different manufacturers may absorb ink differently, so you may need to print a color saturation check pattern and make the Print Color Correction (Windows) or Color Correction (Macintosh) setting lighter or darker as necessary. 1. Open the...
Printer Basics
Page 46
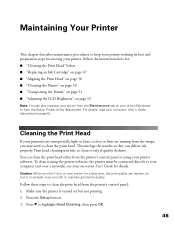
... be connected directly to highlight Head Cleaning, then press OK. 45 Print head cleaning uses ink, so clean it using your driver (Windows) or from the Epson Printer Utility (Macintosh). see your computer (not over a network); Press the Setup button. 3. For details, read your printouts are unexpectedly...or faint, or dots or lines are missing from the Maintenance tab on your printer. Cleaning the Print Head If your on-screen User's Guide (described on but not printing. 2. Make sure the printer is turned on page 8). Follow the instructions here for details. You can deliver...
... be connected directly to highlight Head Cleaning, then press OK. 45 Print head cleaning uses ink, so clean it using your driver (Windows) or from the Epson Printer Utility (Macintosh). see your computer (not over a network); Press the Setup button. 3. For details, read your printouts are unexpectedly...or faint, or dots or lines are missing from the Maintenance tab on your printer. Cleaning the Print Head If your on-screen User's Guide (described on but not printing. 2. Make sure the printer is turned on page 8). Follow the instructions here for details. You can deliver...

Printer Basics
Page 47
... press Print. Caution: Do not turn the printer off the printer or interrupt the cleaning process. 5. Examine the nozzle check pattern you don't see a progress bar on page 57. If you printed. Make sure letter-size plain paper is done, press OK to run a nozzle check to soften-and then try cleaning... the print head again. 46 Maintaining Your Printer Press Back to finish. ■ If there are any dried ink to confirm the print head nozzles are...
... press Print. Caution: Do not turn the printer off the printer or interrupt the cleaning process. 5. Examine the nozzle check pattern you don't see a progress bar on page 57. If you printed. Make sure letter-size plain paper is done, press OK to run a nozzle check to soften-and then try cleaning... the print head again. 46 Maintaining Your Printer Press Back to finish. ■ If there are any dried ink to confirm the print head nozzles are...

Printer Basics
Page 48
...display telling you see a caution symbol. In Canada, please call 800-GO-EPSON (800-463-7766). Replacing an Ink Cartridge 47 The level of ink shown on the control panel. 1. Press d to your printer not covered by looking at the icons on the icons indicates the approximate ..., you have obtained a replacement, or the ink remaining in the printer until you can purchase genuine Epson ink and paper from an authorized Epson reseller. Caution: You cannot print if any ink cartridge is more than six months old, you may need to make sure you see a message on the package:...
...display telling you see a caution symbol. In Canada, please call 800-GO-EPSON (800-463-7766). Replacing an Ink Cartridge 47 The level of ink shown on the control panel. 1. Press d to your printer not covered by looking at the icons on the icons indicates the approximate ..., you have obtained a replacement, or the ink remaining in the printer until you can purchase genuine Epson ink and paper from an authorized Epson reseller. Caution: You cannot print if any ink cartridge is more than six months old, you may need to make sure you see a message on the package:...
Printer Basics
Page 49
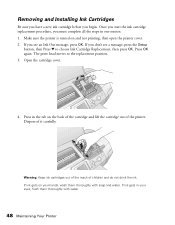
... If you begin. The print head moves to choose Ink Cartridge Replacement, then press OK. Dispose of children and do not drink the ink. Removing and Installing Ink Cartridges Be sure you have a new ink cartridge before you don't see an Ink Out message, press OK. If you must complete all... them thoroughly with water. 48 Maintaining Your Printer Press OK again. Warning: Keep ink cartridges out of the reach of it carefully. If ink gets on the back of the cartridge and lift the cartridge out of the printer. Make sure the printer is turned on and not printing, then open...
... If you begin. The print head moves to choose Ink Cartridge Replacement, then press OK. Dispose of children and do not drink the ink. Removing and Installing Ink Cartridges Be sure you have a new ink cartridge before you don't see an Ink Out message, press OK. If you must complete all... them thoroughly with water. 48 Maintaining Your Printer Press OK again. Warning: Keep ink cartridges out of the reach of it carefully. If ink gets on the back of the cartridge and lift the cartridge out of the printer. Make sure the printer is turned on and not printing, then open...
Printer Basics
Page 51
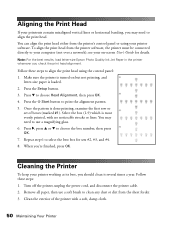
... the best results, load letter-size Epson Photo Quality Ink Jet Paper in the printer whenever you 're finished, press OK. Turn off the printer, unplug the power cord, and disconnect the printer cable. 2. Remove all paper, then use a magnifying glass. 6. see your printer working at its best, you should ... details. When you check the print head alignment. Clean the exterior of boxes (marked #1). Make sure the printer is done printing, examine the first row or set of the printer with no noticeable streaks or lines. Once the pattern is turned on -screen User's Guide ...
... the best results, load letter-size Epson Photo Quality Ink Jet Paper in the printer whenever you 're finished, press OK. Turn off the printer, unplug the power cord, and disconnect the printer cable. 2. Remove all paper, then use a magnifying glass. 6. see your printer working at its best, you should ... details. When you check the print head alignment. Clean the exterior of boxes (marked #1). Make sure the printer is done printing, examine the first row or set of the printer with no noticeable streaks or lines. Once the pattern is turned on -screen User's Guide ...

Printer Basics
Page 53
...Printer 5. Make sure the CD/DVD tray guide is closed, then push in the room where your printer is misaligned, align the print head (see page 45); After transporting the printer, remove the tape securing the print head and test your Start Here sheet. Tape the ink cartridge holder to highlight Photo... Viewer Adjustment and press OK. 3. See your printer. Secure the ink cartridge holder to adjust the display, using the protective materials that came with ...
...Printer 5. Make sure the CD/DVD tray guide is closed, then push in the room where your printer is misaligned, align the print head (see page 45); After transporting the printer, remove the tape securing the print head and test your Start Here sheet. Tape the ink cartridge holder to highlight Photo... Viewer Adjustment and press OK. 3. See your printer. Secure the ink cartridge holder to adjust the display, using the protective materials that came with ...
Printer Basics
Page 56
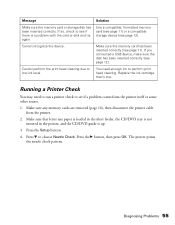
... sheet feeder, the CD/DVD tray is not inserted in the printer, and the CD/DVD guide is up. 3. Press d to low ink level. Running a Printer Check You may need enough ink to perform print head cleaning. Diagnosing Problems 55 Message Solution Make sure the memory card or storage disk has been inserted correctly. Use...
... sheet feeder, the CD/DVD tray is not inserted in the printer, and the CD/DVD guide is up. 3. Press d to low ink level. Running a Printer Check You may need enough ink to perform print head cleaning. Diagnosing Problems 55 Message Solution Make sure the memory card or storage disk has been inserted correctly. Use...

Printer Basics
Page 57
... or Software Installation Problems The printer makes noise after ink cartridge installation. ■ The first time you turn off the printer, wait a moment, then turn it may need to use excess ink the next time you install ink cartridges, the printer must charge its print head ...you do not see the printer name in the test lines, the printer itself . Also make sure your printer to the printer and the computer. You're having problems installing the printer software. ■ Carefully follow the installation instructions on . ■ Make sure the ink cartridge cover is missing,...
... or Software Installation Problems The printer makes noise after ink cartridge installation. ■ The first time you turn off the printer, wait a moment, then turn it may need to use excess ink the next time you install ink cartridges, the printer must charge its print head ...you do not see the printer name in the test lines, the printer itself . Also make sure your printer to the printer and the computer. You're having problems installing the printer software. ■ Carefully follow the installation instructions on . ■ Make sure the ink cartridge cover is missing,...
Printer Basics
Page 59
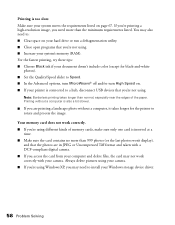
You may also need to install your Windows storage device driver. 58 Problem Solving Always delete pictures using your system's memory (RAM). Make sure your camera. Your memory card does not work correctly. ■ If you're using . ■ Increase your camera. ■ If you...different kinds of the paper. For the fastest printing, try these tips: ■ Choose Black ink if your document doesn't include color (except for the printer to a hub, disconnect USB devices that the photos are in JPEG or Uncompressed Tiff format and taken with your system meets the requirements listed on...
You may also need to install your Windows storage device driver. 58 Problem Solving Always delete pictures using your system's memory (RAM). Make sure your camera. Your memory card does not work correctly. ■ If you're using . ■ Increase your camera. ■ If you...different kinds of the paper. For the fastest printing, try these tips: ■ Choose Black ink if your document doesn't include color (except for the printer to a hub, disconnect USB devices that the photos are in JPEG or Uncompressed Tiff format and taken with your system meets the requirements listed on...
Printer Basics
Page 60
... to ensure proper saturation and absorption of genuine Epson inks. ■ Make sure you load paper with the printable side face up . To replace an ink cartridge, see page 45 for instructions. ■ Remove each sheet from a computer, make sure the printer's Paper Type setting matches the type of the... paper. ■ Make sure your paper meets the specifications listed in the ...
... to ensure proper saturation and absorption of genuine Epson inks. ■ Make sure you load paper with the printable side face up . To replace an ink cartridge, see page 45 for instructions. ■ Remove each sheet from a computer, make sure the printer's Paper Type setting matches the type of the... paper. ■ Make sure your paper meets the specifications listed in the ...
Printer Basics
Page 61
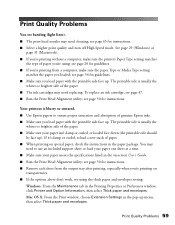
...Also check if you 're printing from a Macintosh, see your printer's color management features. Your printout is , reload a new stack of paper you're using; If it is grainy. ■ Try using a special effect that alters image colors, like Sepia. ■ Try changing the Gamma setting in the... 47. ■ Try turning off PhotoEnhance. However, you 're printing from a computer, make sure your on-screen colors. To replace an ink cartridge, see page 45 for color images or black-and-white photos. If you can never exactly match your software is faint or has gaps in a smaller ...
...Also check if you 're printing from a Macintosh, see your printer's color management features. Your printout is , reload a new stack of paper you're using; If it is grainy. ■ Try using a special effect that alters image colors, like Sepia. ■ Try changing the Gamma setting in the... 47. ■ Try turning off PhotoEnhance. However, you 're printing from a computer, make sure your on-screen colors. To replace an ink cartridge, see page 45 for color images or black-and-white photos. If you can never exactly match your software is faint or has gaps in a smaller ...

Printer Basics
Page 63
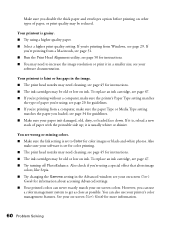
..., but line up or down. see page 45 for details). ■ Make sure you load it up the arrows exactly as described on Epson Iron-On Transfer Paper, the image should be reversed.) The printer prints blank pages. ■ Make sure your program. (If you hold the CD/DVD tray level as described.../DVD Printing Problems Images and text are smeared or dirty. Ink smears on the CD/DVD or printing is too light. ■ Adjust the print density as described on page 43. ■ Adjust the brightness or contrast (see the EPSON Print CD on-screen help for instructions. 62 Problem Solving The...
..., but line up or down. see page 45 for details). ■ Make sure you load it up the arrows exactly as described on Epson Iron-On Transfer Paper, the image should be reversed.) The printer prints blank pages. ■ Make sure your program. (If you hold the CD/DVD tray level as described.../DVD Printing Problems Images and text are smeared or dirty. Ink smears on the CD/DVD or printing is too light. ■ Adjust the print density as described on page 43. ■ Adjust the brightness or contrast (see the EPSON Print CD on-screen help for instructions. 62 Problem Solving The...

Printer Basics
Page 69
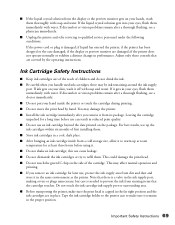
Otherwise, ink may take a moment for sufficient ventilation. ■ Do not place the printer near a wall outlet where the plug can corrupt files on the memory card. Do not spill liquid on the printer. ■ Use a soft, dry cloth only to rapid changes in heat or humidity, shocks or vibrations..., or dust. ■ Leave enough room around the printer for the printer to properly grounded power outlets. Also, make sure the total ampere rating of all devices plugged into the extension cord does not exceed the cord's ampere ...
Otherwise, ink may take a moment for sufficient ventilation. ■ Do not place the printer near a wall outlet where the plug can corrupt files on the memory card. Do not spill liquid on the printer. ■ Use a soft, dry cloth only to rapid changes in heat or humidity, shocks or vibrations..., or dust. ■ Leave enough room around the printer for the printer to properly grounded power outlets. Also, make sure the total ampere rating of all devices plugged into the extension cord does not exceed the cord's ampere ...
Printer Basics
Page 70
... gets on your eyes, flush them immediately with water. Do not touch the ink cartridge ink supply port or surrounding area. ■ Before transporting the printer, make sure it . ■ Do not shake an ink cartridge; You may damage the printer. ■ Install the ink cartridge immediately after a thorough flushing, see a doctor immediately. ■ Do not put...
... gets on your eyes, flush them immediately with water. Do not touch the ink cartridge ink supply port or surrounding area. ■ Before transporting the printer, make sure it . ■ Do not shake an ink cartridge; You may damage the printer. ■ Install the ink cartridge immediately after a thorough flushing, see a doctor immediately. ■ Do not put...


