Product Information Guide
Page 16
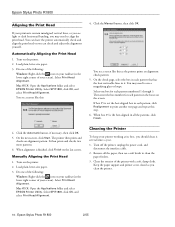
... box in each pattern numbered 1 through 3. When box #5 is finished, click Finish on your screen). The printer then prints and checks an alignment pattern. Turn off the printer, unplug the power cord, and disconnect the interface cable. 2. Epson Stylus Photo R1800 2/05 Click the Automatic button, if necessary, then click OK. 5. When alignment is the best-aligned in...
... box in each pattern numbered 1 through 3. When box #5 is finished, click Finish on your screen). The printer then prints and checks an alignment pattern. Turn off the printer, unplug the power cord, and disconnect the interface cable. 2. Epson Stylus Photo R1800 2/05 Click the Automatic button, if necessary, then click OK. 5. When alignment is the best-aligned in...
Product Information Guide
Page 17
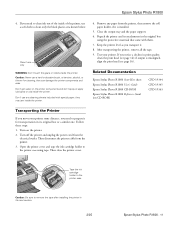
... unplug the power cord from the printer. 3. Then disconnect the printer cable from the electrical outlet. Tape the ink cartridge holder to the printer case Caution: Be sure to remove the tape after installing the printer in its attachments in the original box using tape. Related Documentation Epson Stylus Photo R1800 Start Here sheet Epson Stylus Photo R1800 User's Guide Epson Stylus Photo R1800 CD-ROM Epson Stylus Photo R1800 Reference Guide...
... unplug the power cord from the printer. 3. Then disconnect the printer cable from the electrical outlet. Tape the ink cartridge holder to the printer case Caution: Be sure to remove the tape after installing the printer in its attachments in the original box using tape. Related Documentation Epson Stylus Photo R1800 Start Here sheet Epson Stylus Photo R1800 User's Guide Epson Stylus Photo R1800 CD-ROM Epson Stylus Photo R1800 Reference Guide...


