
Dell™ Technology Guide
Page 11
... Using Your Laptop Computer for the First Time 142 Preserving the Life of a Battery 142 Replacing a Battery 143 Checking the Battery Charge 143 Conserving Battery Power 145 Charging the Battery 145 Storing a Battery 146 US Department of Transportation (DOT) Notebook Battery Restrictions 146 Dell™ ControlPoint Power Manager 146 12 Networks (LAN, Wireless, Mobile Broadband 149 Overview 149 Local...
... Using Your Laptop Computer for the First Time 142 Preserving the Life of a Battery 142 Replacing a Battery 143 Checking the Battery Charge 143 Conserving Battery Power 145 Charging the Battery 145 Storing a Battery 146 US Department of Transportation (DOT) Notebook Battery Restrictions 146 Dell™ ControlPoint Power Manager 146 12 Networks (LAN, Wireless, Mobile Broadband 149 Overview 149 Local...
Dell™ Technology Guide
Page 107
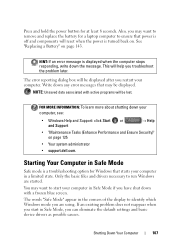
...; "Maintenance Tasks (Enhance Performance and Ensure Security)" on page 125 • Your system administrator • support.dell.com. Shutting Down Your Computer 107 Also, you may want to remove and replace the battery for at least 8 seconds. See "Replacing a Battery" on . NOTE: Unsaved data associated with a frozen blue screen. You may want to start in...
...; "Maintenance Tasks (Enhance Performance and Ensure Security)" on page 125 • Your system administrator • support.dell.com. Shutting Down Your Computer 107 Also, you may want to remove and replace the battery for at least 8 seconds. See "Replacing a Battery" on . NOTE: Unsaved data associated with a frozen blue screen. You may want to start in...
Dell™ Technology Guide
Page 143
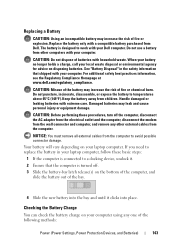
... all external cables from children. Replace the battery only with a compatible battery purchased from other external cables from the computer. Do not use a battery from Dell. When your battery no longer holds a charge, call your Dell computer. Do not puncture, incinerate, disassemble, or expose the battery to work with extreme care. The battery is turned off the computer, disconnect...
... all external cables from children. Replace the battery only with a compatible battery purchased from other external cables from the computer. Do not use a battery from Dell. When your battery no longer holds a charge, call your Dell computer. Do not puncture, incinerate, disassemble, or expose the battery to work with extreme care. The battery is turned off the computer, disconnect...
Dell™ Technology Guide
Page 144
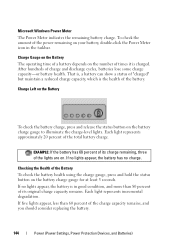
... gauge, press and hold the status button on the battery charge gauge to illuminate the charge-level lights. If no charge. To check the amount of the charge capacity remains, and you should consider replacing the battery. 144 Power (Power Settings, Power Protection Devices, and Batteries) Each light represents incremental degradation. Checking the Health...
... gauge, press and hold the status button on the battery charge gauge to illuminate the charge-level lights. If no charge. To check the amount of the charge capacity remains, and you should consider replacing the battery. 144 Power (Power Settings, Power Protection Devices, and Batteries) Each light represents incremental degradation. Checking the Health...
Dell™ Technology Guide
Page 275
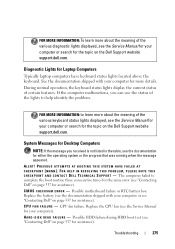
... for assistance). Diagnostic Lights for the topic on the Dell Support website support.dell.com. Possible motherboard failure or RTC battery low. Replace the CPU fan (see "Contacting Dell" on page 337 for your computer or search for ... IN RESOLVING THIS PROBLEM, PLEASE NOTE THIS C H E C K P O I N T A N D C O N T A C T D E L L TE C H N I C A L S U P P O R T - C M O S C H E C K S U M E R R O R - Replace the battery (see the documentation shipped with your computer for more about the meaning of the various diagnostic lights displayed, see the Service Manual for your computer).
... for assistance). Diagnostic Lights for the topic on the Dell Support website support.dell.com. Possible motherboard failure or RTC battery low. Replace the CPU fan (see "Contacting Dell" on page 337 for your computer or search for ... IN RESOLVING THIS PROBLEM, PLEASE NOTE THIS C H E C K P O I N T A N D C O N T A C T D E L L TE C H N I C A L S U P P O R T - C M O S C H E C K S U M E R R O R - Replace the battery (see the documentation shipped with your computer for more about the meaning of the various diagnostic lights displayed, see the Service Manual for your computer).
Dell™ Technology Guide
Page 277
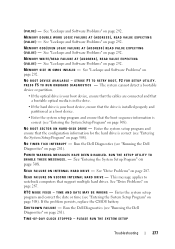
... C T O R O N H A R D - R E A D F A I L U R E O N I N T E R N A L H A R D D R I V E - Enter the system setup program and correct the date or time (see "Running the Dell Diagnostics" on page 281). PLEASE RUN THE SYSTEM SETUP Troubleshooting 277 The system cannot detect a bootable device or partition. • If the optical drive is... (see "Running the Dell Diagnostics" on page 308). If the problem persists, replace the CMOS battery. Run the Dell Diagnostics (see "Entering the System Setup Program" on page 308). ( V A L U E) - Run the Dell Diagnostics (see "Entering...
... C T O R O N H A R D - R E A D F A I L U R E O N I N T E R N A L H A R D D R I V E - Enter the system setup program and correct the date or time (see "Running the Dell Diagnostics" on page 281). PLEASE RUN THE SYSTEM SETUP Troubleshooting 277 The system cannot detect a bootable device or partition. • If the optical drive is... (see "Running the Dell Diagnostics" on page 308). If the problem persists, replace the CMOS battery. Run the Dell Diagnostics (see "Entering the System Setup Program" on page 308). ( V A L U E) - Run the Dell Diagnostics (see "Entering...
Dell™ Technology Guide
Page 278
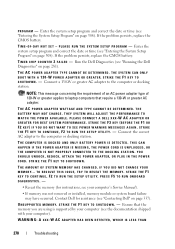
... station. PRESS F5 TO RUN ONBOARD DIAGNOSTICS. - • Reseat the memory (for assistance (see "Running the Dell Diagnostics" on page 308). Ensure that require a 130-W or greater AC adapter. D A Y N O T S E T - If the problem persists, replace the CMOS battery. STRIKE THE F1 KEY TO SHUTDOWN. THE AMOUNT OF SYSTEM MEMORY HAS CHANGED. U N S U P P O R T E D M E M O R Y. Enter the system...
... station. PRESS F5 TO RUN ONBOARD DIAGNOSTICS. - • Reseat the memory (for assistance (see "Running the Dell Diagnostics" on page 308). Ensure that require a 130-W or greater AC adapter. D A Y N O T S E T - If the problem persists, replace the CMOS battery. STRIKE THE F1 KEY TO SHUTDOWN. THE AMOUNT OF SYSTEM MEMORY HAS CHANGED. U N S U P P O R T E D M E M O R Y. Enter the system...

Dell™ Technology Guide
Page 279
... V E D . - IT IS ADVISABLE TO IMMEDIATELY BACK UP YOUR DATA AND REPLACE YOUR HARD DRIVE BY CALLING YOUR SUPPORT DESK OR D E L L. - STRIKE T H E F 1 K E Y T O S H U T D O W N . - For computers with two batteries installed, one or more of the batteries may be installed incorrectly, or the batteries or system board may be defective. THIS SYSTEM WILL BE U N A B L...! Contact Dell for assistance (see "Contacting Dell" on page 307. Contact Dell for assistance (see "Contacting Dell" on page 337). EITHER UNDOCK OR INSERT AN APPROPRIATE ADAPTER. PLEASE CONNECT A DELL XXX-W ...
... V E D . - IT IS ADVISABLE TO IMMEDIATELY BACK UP YOUR DATA AND REPLACE YOUR HARD DRIVE BY CALLING YOUR SUPPORT DESK OR D E L L. - STRIKE T H E F 1 K E Y T O S H U T D O W N . - For computers with two batteries installed, one or more of the batteries may be installed incorrectly, or the batteries or system board may be defective. THIS SYSTEM WILL BE U N A B L...! Contact Dell for assistance (see "Contacting Dell" on page 307. Contact Dell for assistance (see "Contacting Dell" on page 337). EITHER UNDOCK OR INSERT AN APPROPRIATE ADAPTER. PLEASE CONNECT A DELL XXX-W ...
Dell™ Technology Guide
Page 287
...; XP • Click Start → and click My Computer. Replace the battery only with your Service Manual or contact Dell (see "Contacting Dell" on the computer, or if an incorrect time or date displays during start-up, replace the battery (see the Regulatory Compliance Homepage at www.dell.com/regulatory_compliance. For additional safety best practices information, see...
...; XP • Click Start → and click My Computer. Replace the battery only with your Service Manual or contact Dell (see "Contacting Dell" on the computer, or if an incorrect time or date displays during start-up, replace the battery (see the Regulatory Compliance Homepage at www.dell.com/regulatory_compliance. For additional safety best practices information, see...
Setup Guide
Page 5
Contents Setting Up Your Studio Laptop 5 Before Setting Up Your Computer 5 Connect the AC Adapter 6 Connect the Network Cable (Optional 7 Press the Power Button 8 Set Up Microsoft Windows 9 Create System ... 16 Using Your Studio Laptop 20 Right Side Features 20 Left Side Features 24 Computer Base and Keyboard Features 28 Touch Pad Gestures 30 Multimedia Controls 32 Display Features 34 Using the Touch Screen (Optional 36 Removing and Replacing the Battery 40 Software Features 42 Dell DataSafe Online Backup 43 Dell Dock 44 Free Fall...
Contents Setting Up Your Studio Laptop 5 Before Setting Up Your Computer 5 Connect the AC Adapter 6 Connect the Network Cable (Optional 7 Press the Power Button 8 Set Up Microsoft Windows 9 Create System ... 16 Using Your Studio Laptop 20 Right Side Features 20 Left Side Features 24 Computer Base and Keyboard Features 28 Touch Pad Gestures 30 Multimedia Controls 32 Display Features 34 Using the Touch Screen (Optional 36 Removing and Replacing the Battery 40 Software Features 42 Dell DataSafe Online Backup 43 Dell Dock 44 Free Fall...
Setup Guide
Page 14
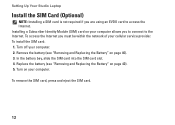
Remove the battery (see "Removing and Replacing the Battery" on page 40). 3. Turn off your computer. Replace the battery (see "Removing and Replacing the Battery" on page 40). 5. Turn on your cellular service provider. In the battery bay, slide the SIM card into the SIM card slot. 4. To remove the SIM card, ...press and eject the SIM card. 12 Installing a Subscriber Identity Module (SIM) card on your computer. 2. To install the SIM card: 1. Setting Up Your Studio Laptop Install the...
Remove the battery (see "Removing and Replacing the Battery" on page 40). 3. Turn off your computer. Replace the battery (see "Removing and Replacing the Battery" on page 40). 5. Turn on your cellular service provider. In the battery bay, slide the SIM card into the SIM card slot. 4. To remove the SIM card, ...press and eject the SIM card. 12 Installing a Subscriber Identity Module (SIM) card on your computer. 2. To install the SIM card: 1. Setting Up Your Studio Laptop Install the...
Setup Guide
Page 42
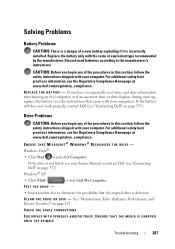
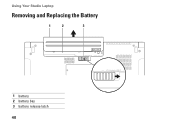
Using Your Studio Laptop Removing and Replacing the Battery 1 2 3 1 battery 2 battery bay 3 battery release latch 40
Using Your Studio Laptop Removing and Replacing the Battery 1 2 3 1 battery 2 battery bay 3 battery release latch 40
Setup Guide
Page 43
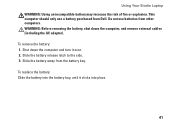
... the side. 3. Do not use a battery purchased from Dell. This computer should only use batteries from the battery bay. Shut down the computer, and remove external cables (including the AC adapter). To replace the battery: Slide the battery into the battery bay, until it over. 2. Using Your Studio Laptop WARNING: Using an incompatible battery may increase the risk of fire...
... the side. 3. Do not use a battery purchased from Dell. This computer should only use batteries from the battery bay. Shut down the computer, and remove external cables (including the AC adapter). To replace the battery: Slide the battery into the battery bay, until it over. 2. Using Your Studio Laptop WARNING: Using an incompatible battery may increase the risk of fire...

Setup Guide
Page 59
... during HDD boot test. To replace the keyboard, see "Contacting Dell" on page 77). Replace the battery (see the Service Manual at support.dell.com/manuals) or contact Dell (see the Service Manual at support.dell.com/manuals). Replace the CPU fan (see "Contacting Dell" on page 77). Contact Dell (see the Service Manual at support.dell.com/manuals. Keyboard failure...
... during HDD boot test. To replace the keyboard, see "Contacting Dell" on page 77). Replace the battery (see the Service Manual at support.dell.com/manuals) or contact Dell (see the Service Manual at support.dell.com/manuals). Replace the CPU fan (see "Contacting Dell" on page 77). Contact Dell (see the Service Manual at support.dell.com/manuals. Keyboard failure...


