User's Guide
Page 3
... for choosing this printer!...8 Minimizing your printer's environmental impact...8 Finding information about the printer...9 Understanding the parts of the printer...11 Ordering and replacing supplies 13 Ordering ink cartridges...13 Replacing ink cartridges...13 Recycling Dell products...14 Using the printer control panel buttons and menus 15 Using the printer control panel...
... for choosing this printer!...8 Minimizing your printer's environmental impact...8 Finding information about the printer...9 Understanding the parts of the printer...11 Ordering and replacing supplies 13 Ordering ink cartridges...13 Replacing ink cartridges...13 Recycling Dell products...14 Using the printer control panel buttons and menus 15 Using the printer control panel...

User's Guide
Page 7
...or place heavy objects on the power cord. Do not subject the power cord to abrasion or stress. Refer service or repairs, other replacement parts. Safety information 7 CAUTION-SHOCK HAZARD: Make sure that is designed, tested, and approved to meet strict global safety standards with this product... manufacturer's authorized replacements. The safety features of fire or electrical shock results. Do not pinch the power cord between objects such as part of the paper path. To avoid injury, use of the printer, unplug the power cord from the wall outlet and disconnect all external...
...or place heavy objects on the power cord. Do not subject the power cord to abrasion or stress. Refer service or repairs, other replacement parts. Safety information 7 CAUTION-SHOCK HAZARD: Make sure that is designed, tested, and approved to meet strict global safety standards with this product... manufacturer's authorized replacements. The safety features of fire or electrical shock results. Do not pinch the power cord between objects such as part of the paper path. To avoid injury, use of the printer, unplug the power cord from the wall outlet and disconnect all external...

User's Guide
Page 11
About your printer 11 Understanding the parts of the printer 1 2 3 4 8 7 6 5 Use the To 1 Scanner lid Access the scanner glass. 2 Scanner glass Scan and copy photos and documents. 3 Wi-Fi indicator Check wireless status. 4 Memory card slot Insert a memory card. 5 PictBridge and USB port Connect a PictBridge-enabled digital camera, a USB Bluetooth adapter, or a flash drive to the printer. 6 Printer control panel Operate the printer. 7 Paper tray Load paper. 8 Paper exit tray Hold paper as it exits.
About your printer 11 Understanding the parts of the printer 1 2 3 4 8 7 6 5 Use the To 1 Scanner lid Access the scanner glass. 2 Scanner glass Scan and copy photos and documents. 3 Wi-Fi indicator Check wireless status. 4 Memory card slot Insert a memory card. 5 PictBridge and USB port Connect a PictBridge-enabled digital camera, a USB Bluetooth adapter, or a flash drive to the printer. 6 Printer control panel Operate the printer. 7 Paper tray Load paper. 8 Paper exit tray Hold paper as it exits.
User's Guide
Page 70
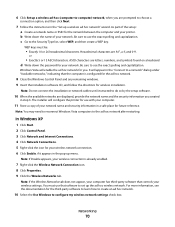
... ad hoc network. 10 Select the Use Windows to choose a connection option, and then click Next. 7 Follow the instructions in the pop-up menu. As part of your wireless settings. WEP keys must use that controls your network name and security information in step 6. Windows Vista will appear in the "Connect...
... ad hoc network. 10 Select the Use Windows to choose a connection option, and then click Next. 7 Follow the instructions in the pop-up menu. As part of your wireless settings. WEP keys must use that controls your network name and security information in step 6. Windows Vista will appear in the "Connect...

User's Guide
Page 82
... objects. However, there are too dense for infrastructure networks. Arrange your network. These sources of objects absorb enough to come and go. All objects absorb part of the wireless signal when it will not be longer or shorter, depending upon the layout of the network and the limitations of interference where...
... objects. However, there are too dense for infrastructure networks. Arrange your network. These sources of objects absorb enough to come and go. All objects absorb part of the wireless signal when it will not be longer or shorter, depending upon the layout of the network and the limitations of interference where...

User's Guide
Page 95
...and then click Run. 2 In the Start Search or Run box, type devmgmt.msc. 3 Press Enter, or click OK. Avoid unnecessarily touching these parts while clearing jams. Troubleshooting 95 If the cable is damaged, then use a new one or more information, see the computer documentation. REMOVE AND REINSTALL THE...PRINTER SOFTWARE Jams and misfeeds troubleshooting • "Paper jam in the printer" on page 95 • "Paper jam in the printer Note: The parts inside the printer are listed, then the USB port is marked with a USB symbol. If USB Host Controller and USB Root Hub are sensitive. ...
...and then click Run. 2 In the Start Search or Run box, type devmgmt.msc. 3 Press Enter, or click OK. Avoid unnecessarily touching these parts while clearing jams. Troubleshooting 95 If the cable is damaged, then use a new one or more information, see the computer documentation. REMOVE AND REINSTALL THE...PRINTER SOFTWARE Jams and misfeeds troubleshooting • "Paper jam in the printer" on page 95 • "Paper jam in the printer Note: The parts inside the printer are listed, then the USB port is marked with a USB symbol. If USB Host Controller and USB Root Hub are sensitive. ...

User's Guide
Page 96
... jams. 1 Push down the duplex latches and pull out the duplex unit. CAUTION-POTENTIAL INJURY: The area behind the duplex cover has protruding ribs as part of the paper path. Troubleshooting 96 Note: Be careful not to tear the paper while removing it out. To avoid injury, use caution when accessing... paper. 3 Firmly grasp the paper, and then gently pull it . 4 Press to check for clearing a paper jam. Paper jam in the duplex unit Note: The parts inside the printer are sensitive. 1 Press to turn off the printer. 2 Check the paper tray or lift the scanner unit to turn the printer back...
... jams. 1 Push down the duplex latches and pull out the duplex unit. CAUTION-POTENTIAL INJURY: The area behind the duplex cover has protruding ribs as part of the paper path. Troubleshooting 96 Note: Be careful not to tear the paper while removing it out. To avoid injury, use caution when accessing... paper. 3 Firmly grasp the paper, and then gently pull it . 4 Press to check for clearing a paper jam. Paper jam in the duplex unit Note: The parts inside the printer are sensitive. 1 Press to turn off the printer. 2 Check the paper tray or lift the scanner unit to turn the printer back...
User's Guide
Page 115
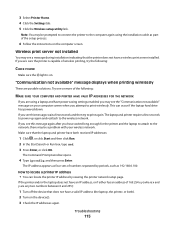
.... 2 In the Start Search or Run box, type cmd. 3 Press Enter, or click OK. This can locate the printer IP address by periods, such as part of 169.254.x.y (where x and y are possible solutions. 3 Select Printer Home. 4 Click the Settings tab. 5 Click the Wireless setup utility link. If the printer and...
.... 2 In the Start Search or Run box, type cmd. 3 Press Enter, or click OK. This can locate the printer IP address by periods, such as part of 169.254.x.y (where x and y are possible solutions. 3 Select Printer Home. 4 Click the Settings tab. 5 Click the Wireless setup utility link. If the printer and...

User's Guide
Page 122
... the printer 95 paper or specialty media misfeeds 97 paper tray loading envelopes or photo cards 27 location 11 partial document or photo scans 100 parts diagram 11 password 77 pausing print job 47 PDF creating from scan 58 phone book, e-mail setting up 61 photo cards loading 31 photo paper...
... the printer 95 paper or specialty media misfeeds 97 paper tray loading envelopes or photo cards 27 location 11 partial document or photo scans 100 parts diagram 11 password 77 pausing print job 47 PDF creating from scan 58 phone book, e-mail setting up 61 photo cards loading 31 photo paper...


