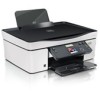
User's Guide
Page 2
Contents Safety information 5 About your printer 6 Thank you for choosing this printer!...6 Minimizing your printer's environmental impact...6 Finding information about the printer...7 Understanding the parts of the printer...9 Ordering and replacing supplies 11 Ordering ink cartridges...11 Replacing ink cartridges...11 Recycling Dell products...13 Using the printer control panel buttons and menus 14 Using the printer control panel...14 Changing...
Contents Safety information 5 About your printer 6 Thank you for choosing this printer!...6 Minimizing your printer's environmental impact...6 Finding information about the printer...7 Understanding the parts of the printer...9 Ordering and replacing supplies 11 Ordering ink cartridges...11 Replacing ink cartridges...11 Recycling Dell products...13 Using the printer control panel buttons and menus 14 Using the printer control panel...14 Changing...
User's Guide
Page 4
Maintaining the printer 83 Maintaining ink cartridges...83 Cleaning the exterior of the printer...85 Cleaning the scanner glass...85 Troubleshooting 86 Before you troubleshoot...86 Using the Service Center to solve printer problems 86 If Troubleshooting does not solve your problem...86 Setup troubleshooting...86 Jams and misfeeds troubleshooting...93 Print troubleshooting...95 Copy and scan troubleshooting...97 Memory card troubleshooting...99 Wireless troubleshooting...101 Notices 119 Product information...119 Edition notice...119 Power consumption...121 Index 130 Contents 4
Maintaining the printer 83 Maintaining ink cartridges...83 Cleaning the exterior of the printer...85 Cleaning the scanner glass...85 Troubleshooting 86 Before you troubleshoot...86 Using the Service Center to solve printer problems 86 If Troubleshooting does not solve your problem...86 Setup troubleshooting...86 Jams and misfeeds troubleshooting...93 Print troubleshooting...95 Copy and scan troubleshooting...97 Memory card troubleshooting...99 Wireless troubleshooting...101 Notices 119 Product information...119 Edition notice...119 Power consumption...121 Index 130 Contents 4
User's Guide
Page 7
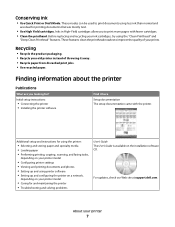
... and printing documents and photos • Setting up and configuring the printer on a network, depending on your printer 7 Initial setup instructions: • Connecting the printer • Installing the printer software Find it away. • Recycle paper from discarded print jobs. • Use recycled paper. Conserving ink • Use Quick Print or Draft Mode. Inks in High-Yield...
... and printing documents and photos • Setting up and configuring the printer on a network, depending on your printer 7 Initial setup instructions: • Connecting the printer • Installing the printer software Find it away. • Recycle paper from discarded print jobs. • Use recycled paper. Conserving ink • Use Quick Print or Draft Mode. Inks in High-Yield...
User's Guide
Page 10
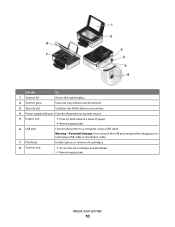
.... 8 Scanner unit • Access the ink cartridges and printhead. • Remove paper jams. About your printer. 4 Power supply with port Connect the printer to a power source. 5 Duplex unit • Print on your printer 10 Use the To 1 Scanner lid Access the scanner glass. 2 Scanner glass Scan and copy photos and documents. 3 Security slot Install an...
.... 8 Scanner unit • Access the ink cartridges and printhead. • Remove paper jams. About your printer. 4 Power supply with port Connect the printer to a power source. 5 Duplex unit • Print on your printer 10 Use the To 1 Scanner lid Access the scanner glass. 2 Scanner glass Scan and copy photos and documents. 3 Security slot Install an...
User's Guide
Page 11
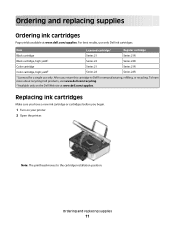
... and replacing supplies 11 Note: The printhead moves to Dell for a single use only Dell ink cartridges. For best results, use only. To learn more about recycling Dell products, visit www.dell.com/recycling. 2 Available only on your printer. 2 Open the printer. Replacing ink cartridges Make sure you have a new ink cartridge or cartridges before you begin. 1 Turn on...
... and replacing supplies 11 Note: The printhead moves to Dell for a single use only Dell ink cartridges. For best results, use only. To learn more about recycling Dell products, visit www.dell.com/recycling. 2 Available only on your printer. 2 Open the printer. Replacing ink cartridges Make sure you have a new ink cartridge or cartridges before you begin. 1 Turn on...
User's Guide
Page 12
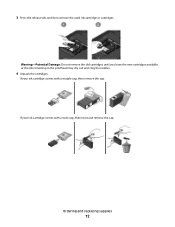
3 Press the release tab, and then remove the used ink cartridge or cartridges. Warning-Potential Damage: Do not remove the old cartridges until you have the new cartridges available, or the ink remaining in the printhead may dry out and clog the nozzles. 4 Unpack the cartridges. If your ink cartridge comes with a muzzle cap, then remove the cap. Ordering and replacing supplies 12 If your ink cartridge comes with a twist cap, then twist and remove the cap.
3 Press the release tab, and then remove the used ink cartridge or cartridges. Warning-Potential Damage: Do not remove the old cartridges until you have the new cartridges available, or the ink remaining in the printhead may dry out and clog the nozzles. 4 Unpack the cartridges. If your ink cartridge comes with a muzzle cap, then remove the cap. Ordering and replacing supplies 12 If your ink cartridge comes with a twist cap, then twist and remove the cap.
User's Guide
Page 13
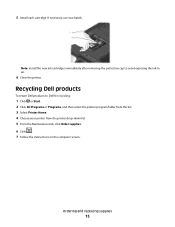
... immediately after removing the protective cap to avoid exposing the ink to Dell for recycling: 1 Click or Start. 2 Click All Programs or Programs, and then select the printer program folder from the list. 3 Select Printer Home. 4 Choose your printer from the printer drop-down list. 5 From the Maintenance tab, click Order supplies. 6 Click . 7 Follow the instructions...
... immediately after removing the protective cap to avoid exposing the ink to Dell for recycling: 1 Click or Start. 2 Click All Programs or Programs, and then select the printer program folder from the list. 3 Select Printer Home. 4 Choose your printer from the printer drop-down list. 5 From the Maintenance tab, click Order supplies. 6 Click . 7 Follow the instructions...
User's Guide
Page 20
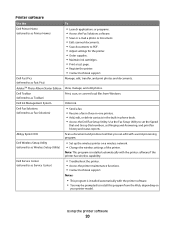
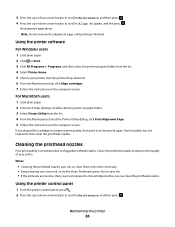
...Dell Ink Management System Order ink. Abbyy Sprint OCR Scan a document and produce text that you can edit with the printer software if the printer has wireless capability. Dell Toolbar (referred to as Fax Solutions) • Send a fax. • Receive a fax in three-in-one printers.... Set up the wireless printer on your printer model. Using the printer software 20 Notes: • This program is installed automatically with a word-processing program. Dell Service Center (referred to install this program from Windows. AdobeTM Photo Album Starter Edition View...
...Dell Ink Management System Order ink. Abbyy Sprint OCR Scan a document and produce text that you can edit with the printer software if the printer has wireless capability. Dell Toolbar (referred to as Fax Solutions) • Send a fax. • Receive a fax in three-in-one printers.... Set up the wireless printer on your printer model. Using the printer software 20 Notes: • This program is installed automatically with a word-processing program. Dell Service Center (referred to install this program from Windows. AdobeTM Photo Album Starter Edition View...
User's Guide
Page 21
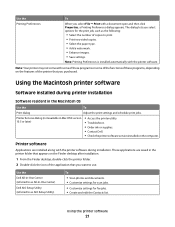
...and schedule print jobs. Using the Macintosh printer software Software installed during installation. Use the Dell All-In-One Center (referred to as All-In-One Center) Dell AIO Setup Utility (referred to print. .... Printer software Applications are saved in Mac OS X version 10.5 or later) • Access the printer utility. • Troubleshoot. • Order ink or supplies. • Contact Dell. • Check the printer software...of the functions of these programs, depending on the features of the printer that you want to use. The dialog lets you select options for the print...
...and schedule print jobs. Using the Macintosh printer software Software installed during installation. Use the Dell All-In-One Center (referred to as All-In-One Center) Dell AIO Setup Utility (referred to print. .... Printer software Applications are saved in Mac OS X version 10.5 or later) • Access the printer utility. • Troubleshoot. • Order ink or supplies. • Contact Dell. • Check the printer software...of the functions of these programs, depending on the features of the printer that you want to use. The dialog lets you select options for the print...
User's Guide
Page 22
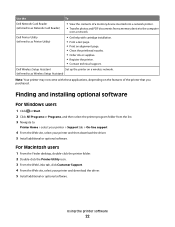
...printhead nozzles. • Order ink or supplies. • Register the printer. • Contact technical support. Finding and installing optional software For Windows users 1 Click or Start. 2 Click All Programs or Programs, and then select the printer program folder from a memory device...device inserted into a network printer. • Transfer photos and PDF documents from the list. 3 Navigate to as Network Card Reader) • View the contents of the printer that you purchased. Using the printer software 22 Dell Printer Utility (referred to as Printer Utility) • Get...
...printhead nozzles. • Order ink or supplies. • Register the printer. • Contact technical support. Finding and installing optional software For Windows users 1 Click or Start. 2 Click All Programs or Programs, and then select the printer program folder from a memory device...device inserted into a network printer. • Transfer photos and PDF documents from the list. 3 Navigate to as Network Card Reader) • View the contents of the printer that you purchased. Using the printer software 22 Dell Printer Utility (referred to as Printer Utility) • Get...
User's Guide
Page 30
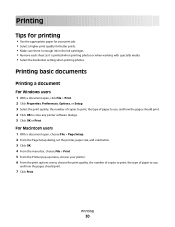
... 1 With a document open , choose File > Page Setup. 2 From the Page Setup dialog, set the printer, paper size, and orientation. 3 Click OK. 4 From the menu bar, choose File > Print. 5 From the Printer pop-up menu, choose your print job. • Select a higher print quality for your... paper for better prints. • Make sure there is enough ink in the ink cartridges. • Remove each sheet as it is printed when printing photos or when working with specialty media. • Select the borderless setting when printing photos. Printing 30 For Macintosh users 1 With a document open , ...
... 1 With a document open , choose File > Page Setup. 2 From the Page Setup dialog, set the printer, paper size, and orientation. 3 Click OK. 4 From the menu bar, choose File > Print. 5 From the Printer pop-up menu, choose your print job. • Select a higher print quality for your... paper for better prints. • Make sure there is enough ink in the ink cartridges. • Remove each sheet as it is printed when printing photos or when working with specialty media. • Select the borderless setting when printing photos. Printing 30 For Macintosh users 1 With a document open , ...
User's Guide
Page 44
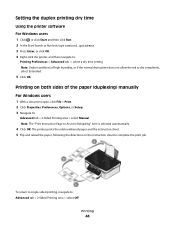
The printer prints the odd-numbered pages and the instruction sheet. 5 Flip and reload the paper, following the directions on both sides of high humidity, or if the normal drying time does not allow the ink to dry completely, select Extended. 5 Click OK. To return to single-sided printing,... navigate to: Advanced tab > 2-Sided Printing area > select Off Printing 44 Printing on the instruction sheet to complete the print job. Setting the duplex printing dry time Using the printer software For...
The printer prints the odd-numbered pages and the instruction sheet. 5 Flip and reload the paper, following the directions on both sides of high humidity, or if the normal drying time does not allow the ink to dry completely, select Extended. 5 Click OK. To return to single-sided printing,... navigate to: Advanced tab > 2-Sided Printing area > select Off Printing 44 Printing on the instruction sheet to complete the print job. Setting the duplex printing dry time Using the printer software For...
User's Guide
Page 46
... Printing Preferences. 5 Select Quick Print as Default Printer. Printing 46 You must choose this configuration name from the Print dialog before sending the print job. It uses less ink and is ideal for all print jobs to print photos or other high-quality documents, then you can ...Windows users 1 With a document open , choose File > Print. 2 From the printer pop-up menu, choose the printer. 3 From the print options pop-up menu for your operating system. Changing the printing mode To conserve ink, you can change the default print mode: For Windows users 1 Click , or click...
... Printing Preferences. 5 Select Quick Print as Default Printer. Printing 46 You must choose this configuration name from the Print dialog before sending the print job. It uses less ink and is ideal for all print jobs to print photos or other high-quality documents, then you can ...Windows users 1 With a document open , choose File > Print. 2 From the printer pop-up menu, choose the printer. 3 From the print options pop-up menu for your operating system. Changing the printing mode To conserve ink, you can change the default print mode: For Windows users 1 Click , or click...
User's Guide
Page 47
...or Run box, type control printers. 3 Press Enter, or ..., then click Printer, and then select...printers. 3 Press Enter, or click OK. Printing 47 Note: Printing using Quick Print uses less ink and is ideal for printing text documents. The printer folder opens. 4 Right-click the printer... then click Pause Printer or Stop Jobs...printer icon on your operating system. Note: Printing in Draft or Quick Print mode uses less ink... and is ideal for printing text documents. For Macintosh users 1 With a document open, choose File > Print. 2 From the printer pop-up menu, choose the printer...
...or Run box, type control printers. 3 Press Enter, or ..., then click Printer, and then select...printers. 3 Press Enter, or click OK. Printing 47 Note: Printing using Quick Print uses less ink and is ideal for printing text documents. The printer folder opens. 4 Right-click the printer... then click Pause Printer or Stop Jobs...printer icon on your operating system. Note: Printing in Draft or Quick Print mode uses less ink... and is ideal for printing text documents. For Macintosh users 1 With a document open, choose File > Print. 2 From the printer pop-up menu, choose the printer...
User's Guide
Page 83
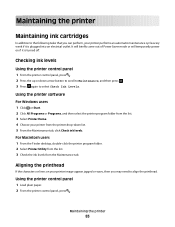
...if it is plugged into an electrical outlet. Maintaining the printer 83 Checking ink levels Using the printer control panel 1 From the printer control panel, press . 2 Press the up or down list. 5 From the Maintenance tab, click Check ink levels. Aligning the printhead If the characters or lines on... briefly come out of Power Saver mode or will temporarily power on your printer image appear jagged or wavy, then you can perform, your printer from the Maintenance tab. Maintaining the printer Maintaining ink cartridges In addition to the following tasks that you may need to select ...
...if it is plugged into an electrical outlet. Maintaining the printer 83 Checking ink levels Using the printer control panel 1 From the printer control panel, press . 2 Press the up or down list. 5 From the Maintenance tab, click Check ink levels. Aligning the printhead If the characters or lines on... briefly come out of Power Saver mode or will temporarily power on your printer image appear jagged or wavy, then you can perform, your printer from the Maintenance tab. Maintaining the printer Maintaining ink cartridges In addition to the following tasks that you may need to select ...
User's Guide
Page 84
...screen. Notes: • Cleaning the printhead nozzles uses ink, so clean them only when necessary. • Deep cleaning uses more ink, so try the Clean Printhead option first to Align Printer, and the press . Maintaining the printer 84 Note: Do not remove the alignment page until ...paper. 2 From the Finder desktop, double-click the printer program folder. 3 Select Printer Utility from the printer drop-down arrow button to scroll to save ink. • If the ink levels are too low, then you must replace the ink cartridges before you aligned the cartridges to clogged printhead nozzles....
...screen. Notes: • Cleaning the printhead nozzles uses ink, so clean them only when necessary. • Deep cleaning uses more ink, so try the Clean Printhead option first to Align Printer, and the press . Maintaining the printer 84 Note: Do not remove the alignment page until ...paper. 2 From the Finder desktop, double-click the printer program folder. 3 Select Printer Utility from the printer drop-down arrow button to scroll to save ink. • If the ink levels are too low, then you must replace the ink cartridges before you aligned the cartridges to clogged printhead nozzles....
User's Guide
Page 85
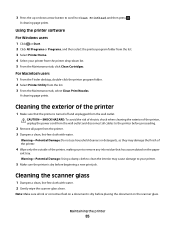
... cloth to clean the interior may damage the finish of the printer. 4 Wipe only the outside of the printer, unplug the power cord from the printer drop-down arrow button to scroll to remove any ink residue that the printer is dry before beginning a new print job. CAUTION-SHOCK HAZARD..., click Clean Cartridges. Warning-Potential Damage: Do not use household cleaners or detergents, as they may cause damage to your printer from the wall outlet and disconnect all ink or corrective fluid on the paper exit tray. A cleaning page prints. A cleaning page prints. Cleaning the scanner glass 1...
... cloth to clean the interior may damage the finish of the printer. 4 Wipe only the outside of the printer, unplug the power cord from the printer drop-down arrow button to scroll to remove any ink residue that the printer is dry before beginning a new print job. CAUTION-SHOCK HAZARD..., click Clean Cartridges. Warning-Potential Damage: Do not use household cleaners or detergents, as they may cause damage to your printer from the wall outlet and disconnect all ink or corrective fluid on the paper exit tray. A cleaning page prints. A cleaning page prints. Cleaning the scanner glass 1...

User's Guide
Page 86
If Troubleshooting does not solve your problem Visit our Web site at support.dell.com to find the following: • Live online technical support • Contact numbers for paper jam messages, and clear any errors. • Check for telephone ... any jams. • Check the ink cartridges, and install new cartridges if necessary. • Use the Service Center to locate and solve the problem (Windows only). • Turn the printer off, wait about 10 seconds, and then turn the printer back on. To open the Service Center, use one of these methods: Method 1 If...
If Troubleshooting does not solve your problem Visit our Web site at support.dell.com to find the following: • Live online technical support • Contact numbers for paper jam messages, and clear any errors. • Check for telephone ... any jams. • Check the ink cartridges, and install new cartridges if necessary. • Use the Service Center to locate and solve the problem (Windows only). • Turn the printer off, wait about 10 seconds, and then turn the printer back on. To open the Service Center, use one of these methods: Method 1 If...
User's Guide
Page 88
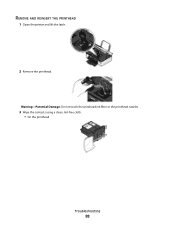
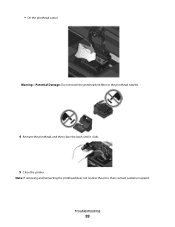
Warning-Potential Damage: Do not touch the printhead ink filter or the printhead nozzles. 3 Wipe the contacts using a clean, lint-free cloth. • On the printhead Troubleshooting 88 REMOVE AND REINSERT THE PRINTHEAD 1 Open the printer and lift the latch. 2 Remove the printhead.
Warning-Potential Damage: Do not touch the printhead ink filter or the printhead nozzles. 3 Wipe the contacts using a clean, lint-free cloth. • On the printhead Troubleshooting 88 REMOVE AND REINSERT THE PRINTHEAD 1 Open the printer and lift the latch. 2 Remove the printhead.
User's Guide
Page 89
• On the printhead carrier Warning-Potential Damage: Do not touch the printhead ink filter or the printhead nozzles. 4 Reinsert the printhead, and then close the latch until it clicks. 5 Close the printer. Note: If removing and reinserting the printhead does not resolve the error, then contact customer support. Troubleshooting 89
• On the printhead carrier Warning-Potential Damage: Do not touch the printhead ink filter or the printhead nozzles. 4 Reinsert the printhead, and then close the latch until it clicks. 5 Close the printer. Note: If removing and reinserting the printhead does not resolve the error, then contact customer support. Troubleshooting 89


