User's Guide
Page 38
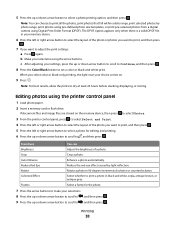
...For best results, allow the prints to print a photo in black and white, sepia, antique brown, or antique gray. Select whether to dry at least 24 hours before stacking, displaying, or storing. Note: You can Brightness Crop Adjust the brightness of the photo or photos ...the photos, print photos that fall within a date range, print selected photos by light reflection. Crop a photo. Reduce the red-eye effect caused by photo range, print photos using pre-defined photo size templates, or print pre-selected photos from a digital camera using the printer control panel 1 Load photo paper....
...For best results, allow the prints to print a photo in black and white, sepia, antique brown, or antique gray. Select whether to dry at least 24 hours before stacking, displaying, or storing. Note: You can Brightness Crop Adjust the brightness of the photo or photos ...the photos, print photos that fall within a date range, print selected photos by light reflection. Crop a photo. Reduce the red-eye effect caused by photo range, print photos using pre-defined photo size templates, or print pre-selected photos from a digital camera using the printer control panel 1 Load photo paper....
User's Guide
Page 39
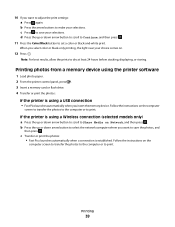
... buttons to adjust the print settings: a Press again. When you want to make your selections. If the printer is established. c Transfer or print the photos: • Fast Pics launches automatically when a connection is using a USB connection • Fast Pics launches...best results, allow the prints to Share Media on . 12 Press . b Press the up or down arrow button to scroll to dry at least 24 hours before stacking, displaying, or storing. 10 If you insert the memory device. Printing photos from a memory device using the printer software 1 Load photo paper. 2 From the printer...
... buttons to adjust the print settings: a Press again. When you want to make your selections. If the printer is established. c Transfer or print the photos: • Fast Pics launches automatically when a connection is using a USB connection • Fast Pics launches...best results, allow the prints to Share Media on . 12 Press . b Press the up or down arrow button to scroll to dry at least 24 hours before stacking, displaying, or storing. 10 If you insert the memory device. Printing photos from a memory device using the printer software 1 Load photo paper. 2 From the printer...
User's Guide
Page 42
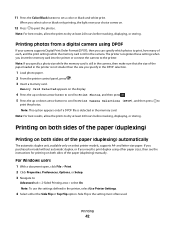
...in the camera. 11 Press the Color/Black button to print, how many of the paper (duplexing) manually. Note: For best results, allow the prints to print the photos. Memory Card Detected appears on . 12 Press to dry at least 24 hours before stacking, displaying, or storing. If you... then press . 5 Press the up or down arrow button to scroll to Print Camera Selections (DPOF), and then press to the printer. Printing 42 Printing photos from a digital camera using other paper sizes, then see the instructions for printing on both sides of the paper (duplexing) automatically The ...
...in the camera. 11 Press the Color/Black button to print, how many of the paper (duplexing) manually. Note: For best results, allow the prints to print the photos. Memory Card Detected appears on . 12 Press to dry at least 24 hours before stacking, displaying, or storing. If you... then press . 5 Press the up or down arrow button to scroll to Print Camera Selections (DPOF), and then press to the printer. Printing 42 Printing photos from a digital camera using other paper sizes, then see the instructions for printing on both sides of the paper (duplexing) automatically The ...
User's Guide
Page 47
... Printing. For Macintosh users 1 With a document open, choose File > Print. 2 From the printer pop-up menu, choose the printer. 3 From the print options pop-up menu, choose Automatic, Draft or Quick Print, Normal, Photo or Best. The print queue dialog appears. 2 Pause the print job: • If you want to ...pause a particular print job, then choose the document name, and then click Hold. • If you want to pause all print jobs in the queue, then click Pause Printer or Stop Jobs...
... Printing. For Macintosh users 1 With a document open, choose File > Print. 2 From the printer pop-up menu, choose the printer. 3 From the print options pop-up menu, choose Automatic, Draft or Quick Print, Normal, Photo or Best. The print queue dialog appears. 2 Pause the print job: • If you want to ...pause a particular print job, then choose the document name, and then click Hold. • If you want to pause all print jobs in the queue, then click Pause Printer or Stop Jobs...
User's Guide
Page 50
... to select the desired photo size. 6 Press . Press to save the setting. • If you select Borderless, then the printer will reduce or enlarge the document or photo as necessary to print a borderless copy on the paper size that you want. Copying 50 Note: For best results, allow the prints... to the default. 3 From the printer control panel, press . 4 Press the up or...
... to select the desired photo size. 6 Press . Press to save the setting. • If you select Borderless, then the printer will reduce or enlarge the document or photo as necessary to print a borderless copy on the paper size that you want. Copying 50 Note: For best results, allow the prints... to the default. 3 From the printer control panel, press . 4 Press the up or...
User's Guide
Page 96
... solve the problem, then try one or more of the Print Setup tab, select Borderless. d Select an orientation, and then click OK. 2 From the menu bar, choose File > Print. For example, if you may have already specified the printer, paper size, and orientation in step 1, then you loaded a 4 x 6 photo card, then choose US...; From the Paper Type pop-up menu, choose a paper type. • From the Print Quality pop-up menu before going to step 2. Otherwise, specify your printer again from the Printer pop-up menu, choose Photo or Best. 5 Click Print.
... solve the problem, then try one or more of the Print Setup tab, select Borderless. d Select an orientation, and then click OK. 2 From the menu bar, choose File > Print. For example, if you may have already specified the printer, paper size, and orientation in step 1, then you loaded a 4 x 6 photo card, then choose US...; From the Paper Type pop-up menu, choose a paper type. • From the Print Quality pop-up menu before going to step 2. Otherwise, specify your printer again from the Printer pop-up menu, choose Photo or Best. 5 Click Print.


