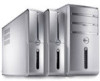
- 20 Inspiron One 2020 All-in-One - Dell
- 20 Inspiron One 2020 All-in-One
View Results Below
Free Dell Inspiron One 2020 manuals!
Problems with Dell Inspiron One 2020?
Ask a Question
Free Dell Inspiron One 2020 manuals!
Problems with Dell Inspiron One 2020?
Ask a Question
Related Manual Pages


Related Videos

DELL Inspiron One 2020???????
Duration: 2:25
Total Views: 1,860
Duration: 2:25
Total Views: 1,860
TODAY ONLY Dell Inspiron One 2020 Intel Core i3 20in Touchsc
Duration: 1:26
Total Views: 274
Duration: 1:26
Total Views: 274
Dell Inspiron One 2020 io2020-5000BK 20-Inch All-in-One Desktop (Black)
Duration: 1:31
Total Views: 4
Duration: 1:31
Total Views: 4
Similar Questions

Bose Companion 20 Computer Speakers
I hooked up the Bose Companion 20 speakers and I can't get any sound out of the speakers, it's only ...
I hooked up the Bose Companion 20 speakers and I can't get any sound out of the speakers, it's only ...
(Posted by tammyregacho 8 years ago)

Start Up Issues..amber Light Flashing But Will Start Up After 20 Attempts
how to troubleshoot and determine the problem when computer does not start up in a normal fashion
how to troubleshoot and determine the problem when computer does not start up in a normal fashion
(Posted by dddobranski 12 years ago)
Related Terms
The following terms were also used when searching for - 20 Inspiron One 2020 All-in-One - Dell:- - 20 inspiron one 2020
- - 20 inspiron one 2020 all-in-one
- - 20 inspiron one 2020 all-in-one computer
- dell - 20 inspiron one 2020
- dell - 20 inspiron one 2020 all-in-one
- dell - 20 inspiron one 2020 all-in-one computer
- dell - inspiron one 2020 20
- dell inspiron all in one 2020
- dell inspiron one 2020
- dell inspiron one 2020 20
- dell inspiron one 2020 20 all-in-one desktop
- dell inspiron one 2020 aio
- dell inspiron one 2020 aio pc
- dell inspiron one 2020 all in one desktop
- dell inspiron one 2020 all-in-one desktop
- dell inspiron one 2020 all-in-one desktop pc
- dell inspiron one 2020 all-in-one desktop review
- dell inspiron one 2020 all-in-one pc
- dell inspiron one 2020 beeps
- dell inspiron one 2020 best buy
- dell inspiron one 2020 black screen
- dell inspiron one 2020 brightness
- dell inspiron one 2020 card reader
- dell inspiron one 2020 computer
- dell inspiron one 2020 cooling fan
- dell inspiron one 2020 coupon
- dell inspiron one 2020 cpu upgrade
- dell inspiron one 2020 desktop
- dell inspiron one 2020 desktop computer
- dell inspiron one 2020 desktop computer reviews
- dell inspiron one 2020 disassembly
- dell inspiron one 2020 display problems
- dell inspiron one 2020 display too bright
- dell inspiron one 2020 driver
- dell inspiron one 2020 drivers
- dell inspiron one 2020 drivers for windows xp
- dell inspiron one 2020 drivers windows 7
- dell inspiron one 2020 dual monitor
- dell inspiron one 2020 external monitor
- dell inspiron one 2020 factory reset
- dell inspiron one 2020 factory restore
- dell inspiron one 2020 factory restore windows 8
- dell inspiron one 2020 graphics card
- dell inspiron one 2020 hard drive
- dell inspiron one 2020 hard drive removal
- dell inspiron one 2020 hard drive replacement
- dell inspiron one 2020 hdmi
- dell inspiron one 2020 io2020-5000bk 20-inch all-in-one desktop
- dell inspiron one 2020 manual
- dell inspiron one 2020 max ram
- dell inspiron one 2020 memory
- dell inspiron one 2020 memory upgrade
- dell inspiron one 2020 motherboard
- dell inspiron one 2020 network controller
- dell inspiron one 2020 no boot device available
- dell inspiron one 2020 optical drive
- dell inspiron one 2020 orange power light
- dell inspiron one 2020 pc
- dell inspiron one 2020 ports
- dell inspiron one 2020 power adapter
- dell inspiron one 2020 power cord
- dell inspiron one 2020 power supply
- dell inspiron one 2020 price
- dell inspiron one 2020 problems
- dell inspiron one 2020 processor upgrade
- dell inspiron one 2020 quick start guide
- dell inspiron one 2020 ram
- dell inspiron one 2020 ram upgrade
- dell inspiron one 2020 recovery
- dell inspiron one 2020 recovery disk
- dell inspiron one 2020 reinstall os
- dell inspiron one 2020 release date
- dell inspiron one 2020 replace hard drive
- dell inspiron one 2020 replacement screen
- dell inspiron one 2020 restore
- dell inspiron one 2020 review
- dell inspiron one 2020 reviews
- dell inspiron one 2020 safe mode
- dell inspiron one 2020 screen
- dell inspiron one 2020 screen replacement
- dell inspiron one 2020 second monitor
- dell inspiron one 2020 speakers
- dell inspiron one 2020 spec power supply
- dell inspiron one 2020 spec sheet
- dell inspiron one 2020 specifications
- dell inspiron one 2020 specs
- dell inspiron one 2020 support
- dell inspiron one 2020 touch
- dell inspiron one 2020 touch screen all-in-one desktop
- dell inspiron one 2020 touchscreen
- dell inspiron one 2020 touchscreen all-in-one desktop
- dell inspiron one 2020 troubleshooting
- dell inspiron one 2020 user guide
- dell inspiron one 2020 user manual
- dell inspiron one 2020 user's guide
- dell inspiron one 2020 user's manual
- dell inspiron one 2020 video problems
- dell inspiron one 2020 volume control
- dell inspiron one 2020 w06b
- dell inspiron one 2020 wall mount
- dell inspiron one 2020 wifi
- dell inspiron one 2020 will not turn on
- dell inspiron one 2020 windows 10
- dell inspiron one 2020 windows 7
- dell inspiron one 2020 windows 7 reviews
- dell inspiron one 2020 windows 8 cd key
- dell inspiron one 2020 windows 8.1
- dell inspiron one 2020 wireless switch
- dell inspiron one 2020 won't boot
- dell inspiron one 2020 wont boot
- dell inspiron one 2020 wont turn on
- inspiron all in one 2020
- inspiron one 2020
- inspiron one 2020 20
- inspiron one 2020 20 all-in-one desktop
- inspiron one 2020 ac adapter
- inspiron one 2020 aio
- inspiron one 2020 aio pc
- inspiron one 2020 all in one desktop
- inspiron one 2020 all mount
- inspiron one 2020 all-in-one (aio) desktop
- inspiron one 2020 all-in-one desktop
- inspiron one 2020 all-in-one desktop computer
- inspiron one 2020 all-in-one desktop pc
- inspiron one 2020 all-in-one desktop review
- inspiron one 2020 all-in-one pc
- inspiron one 2020 all-in-one review
- inspiron one 2020 amazon
- inspiron one 2020 as extended monitor
- inspiron one 2020 beeps
- inspiron one 2020 best buy
- inspiron one 2020 bios
- inspiron one 2020 black screen
- inspiron one 2020 brightness
- inspiron one 2020 card reader
- inspiron one 2020 computer
- inspiron one 2020 connections
- inspiron one 2020 contrast settings
- inspiron one 2020 cooling fan
- inspiron one 2020 coupon
- inspiron one 2020 cpu upgrade
- inspiron one 2020 dell
- inspiron one 2020 desktop
- inspiron one 2020 desktop computer
- inspiron one 2020 desktop computer reviews
- inspiron one 2020 dimensions
- inspiron one 2020 disassembly
- inspiron one 2020 display problems
- inspiron one 2020 display settings
- inspiron one 2020 display too bright
- inspiron one 2020 driver
- inspiron one 2020 drivers
- inspiron one 2020 drivers for windows 7
- inspiron one 2020 drivers for windows xp
- inspiron one 2020 drivers windows 7
- inspiron one 2020 dual monitor
- inspiron one 2020 external monitor
- inspiron one 2020 factory reset
- inspiron one 2020 factory restore
- inspiron one 2020 factory restore windows 8
- inspiron one 2020 factory settings
- inspiron one 2020 graphics card
- inspiron one 2020 hard drive
- inspiron one 2020 hard drive removal
- inspiron one 2020 hard drive replacement
- inspiron one 2020 hdmi
- inspiron one 2020 i3
- inspiron one 2020 io2020-5000bk 20-inch all-in-one desktop
- inspiron one 2020 lcd
- inspiron one 2020 manual
- inspiron one 2020 max ram
- inspiron one 2020 memory
- inspiron one 2020 memory upgrade
- inspiron one 2020 motherboard
- inspiron one 2020 mount
- inspiron one 2020 network controller
- inspiron one 2020 no boot device available
- inspiron one 2020 no power
- inspiron one 2020 optical drive
- inspiron one 2020 orange power light
- inspiron one 2020 owner's manual
- inspiron one 2020 pc
- inspiron one 2020 pdf
- inspiron one 2020 ports
- inspiron one 2020 power adapter
- inspiron one 2020 power cord
- inspiron one 2020 power supply
- inspiron one 2020 price
- inspiron one 2020 problems
- inspiron one 2020 processor upgrade
- inspiron one 2020 quick start guide
- inspiron one 2020 ram
- inspiron one 2020 ram upgrade
- inspiron one 2020 recovery
- inspiron one 2020 recovery disk
- inspiron one 2020 recovery partition
- inspiron one 2020 reinstall os
- inspiron one 2020 release date
- inspiron one 2020 replace hard drive
- inspiron one 2020 replacement screen
- inspiron one 2020 restore
- inspiron one 2020 review
- inspiron one 2020 reviews
- inspiron one 2020 safe mode
- inspiron one 2020 screen
- inspiron one 2020 screen replacement
- inspiron one 2020 second monitor
- inspiron one 2020 service manual
- inspiron one 2020 software
- inspiron one 2020 speakers
- inspiron one 2020 spec power supply
- inspiron one 2020 spec sheet
- inspiron one 2020 specifications
- inspiron one 2020 specs
- inspiron one 2020 support
- inspiron one 2020 system restore
- inspiron one 2020 to tv
- inspiron one 2020 torrent
- inspiron one 2020 touch
- inspiron one 2020 touch screen
- inspiron one 2020 touch screen all-in-one desktop
- inspiron one 2020 touch screen replacement
- inspiron one 2020 touchscreen
- inspiron one 2020 touchscreen all-in-one desktop
- inspiron one 2020 troubleshoot
- inspiron one 2020 troubleshooting
- inspiron one 2020 upgrades
- inspiron one 2020 user guide
- inspiron one 2020 user manual
- inspiron one 2020 user's guide
- inspiron one 2020 user's manual
- inspiron one 2020 vesa mount
- inspiron one 2020 video card
- inspiron one 2020 video output
- inspiron one 2020 video problems
- inspiron one 2020 volume control
- inspiron one 2020 w06b
- inspiron one 2020 wall mount
- inspiron one 2020 webcam
- inspiron one 2020 wifi
- inspiron one 2020 will not turn on
- inspiron one 2020 windows 10
- inspiron one 2020 windows 7
- inspiron one 2020 windows 7 reviews
- inspiron one 2020 windows 8
- inspiron one 2020 windows 8 cd key
- inspiron one 2020 windows 8.1
- inspiron one 2020 wireless switch
- inspiron one 2020 with energy
- inspiron one 2020 won't boot
- inspiron one 2020 wont boot
- inspiron one 2020 wont turn on
- new inspiron one 2020