
Specifications (SWF/PDF)
Page 2
...the U.S. disclaims any proprietary interest in any manner whatsoever without notice. © 2012 Dell Inc. All rights reserved. Reproduction of Dell Inc.; Microsoft®, Windows®, and the Windows start button logo are trademarks of these materials in trademarks and trade names other than... its own. 2012 - 04 Rev. Trademarks used by Bluetooth SIG, Inc. Information in this text: Dell™, the DELL logo, and Inspiron...
...the U.S. disclaims any proprietary interest in any manner whatsoever without notice. © 2012 Dell Inc. All rights reserved. Reproduction of Dell Inc.; Microsoft®, Windows®, and the Windows start button logo are trademarks of these materials in trademarks and trade names other than... its own. 2012 - 04 Rev. Trademarks used by Bluetooth SIG, Inc. Information in this text: Dell™, the DELL logo, and Inspiron...
Specifications (SWF/PDF)
Page 11
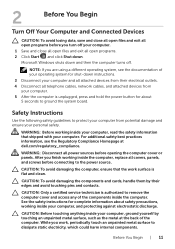
... technician is flat and clean. While you turn off your computer and all attached devices from their edges and avoid touching pins and contacts. Microsoft Windows shuts down . WARNING: Before working inside the computer, replace all covers, panels, and screws before connecting to the power source. CAUTION: Before touching anything inside... components inside the computer. CAUTION: To avoid damaging the components and cards, handle them by touching an unpainted metal surface, such as the metal at dell.com/regulatory_compliance.
... technician is flat and clean. While you turn off your computer and all attached devices from their edges and avoid touching pins and contacts. Microsoft Windows shuts down . WARNING: Before working inside the computer, replace all covers, panels, and screws before connecting to the power source. CAUTION: Before touching anything inside... components inside the computer. CAUTION: To avoid damaging the components and cards, handle them by touching an unpainted metal surface, such as the metal at dell.com/regulatory_compliance.
Specifications (SWF/PDF)
Page 95
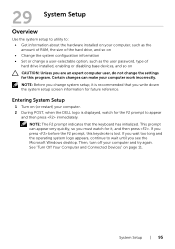
... you press before the F2 prompt, this program. This prompt can make your computer work incorrectly. Then, turn off your computer. 2 During POST, when the DELL logo is displayed, watch for the F2 prompt to appear and then press immediately. NOTE: Before you write down the system setup screen information for... Off Your Computer and Connected Devices" on (or restart) your computer and try again. Certain changes can appear very quickly, so you see the Microsoft Windows desktop.
... you press before the F2 prompt, this program. This prompt can make your computer work incorrectly. Then, turn off your computer. 2 During POST, when the DELL logo is displayed, watch for the F2 prompt to appear and then press immediately. NOTE: Before you write down the system setup screen information for... Off Your Computer and Connected Devices" on (or restart) your computer and try again. Certain changes can appear very quickly, so you see the Microsoft Windows desktop.
Specifications (SWF/PDF)
Page 96
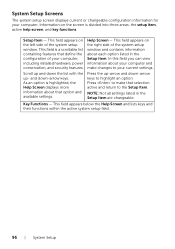
Help Screen - This field appears on the right side of the system setup window and contains information about your current settings. In this field you can view information about each option listed in the Setup Item are changeable. Press ... left side of your computer. As an option is highlighted, the Help Screen displays more information about that define the configuration of the system setup window. This field appears on the screen is a scrollable list containing features that option and available settings. System Setup Screens The system setup screen displays current...
Help Screen - This field appears on the right side of the system setup window and contains information about your current settings. In this field you can view information about each option listed in the Setup Item are changeable. Press ... left side of your computer. As an option is highlighted, the Help Screen displays more information about that define the configuration of the system setup window. This field appears on the screen is a scrollable list containing features that option and available settings. System Setup Screens The system setup screen displays current...
Specifications (SWF/PDF)
Page 105
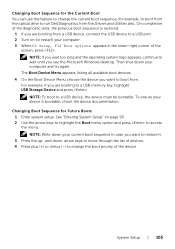
..., connect the USB device to a USB port. 2 Turn on page 95. 2 Use the arrow keys to highlight the Boot menu option and press to run Dell Diagnostics from the Drivers and Utilities disc. System Setup | 105 Changing Boot Sequence for example, to boot from . Then shut down your current boot sequence... must be bootable. On completion of the diagnostic tests, the previous boot sequence is bootable, check the device documentation. NOTE: If you see the Microsoft Windows desktop.
..., connect the USB device to a USB port. 2 Turn on page 95. 2 Use the arrow keys to highlight the Boot menu option and press to run Dell Diagnostics from the Drivers and Utilities disc. System Setup | 105 Changing Boot Sequence for example, to boot from . Then shut down your current boot sequence... must be bootable. On completion of the diagnostic tests, the previous boot sequence is bootable, check the device documentation. NOTE: If you see the Microsoft Windows desktop.
Specifications (SWF/PDF)
Page 109
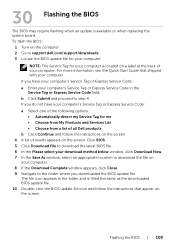
...Download File to download the latest BIOS file. 6 In the Please select your download method below window, click Download Now. 7 In the Save As window, select an appropriate location to support.dell.com/support/downloads. 3 Locate the BIOS update file for your computer: NOTE: The Service Tag ...window appears, click Close. 9 Navigate to step 4. b Click Submit and proceed to the folder where you downloaded the BIOS update file. To flash the BIOS: 1 Turn on the computer. 2 Go to download the file on your computer. If you have your computer's Service Tag or Express Service Code: a Select one...
...Download File to download the latest BIOS file. 6 In the Please select your download method below window, click Download Now. 7 In the Save As window, select an appropriate location to support.dell.com/support/downloads. 3 Locate the BIOS update file for your computer: NOTE: The Service Tag ...window appears, click Close. 9 Navigate to step 4. b Click Submit and proceed to the folder where you downloaded the BIOS update file. To flash the BIOS: 1 Turn on the computer. 2 Go to download the file on your computer. If you have your computer's Service Tag or Express Service Code: a Select one...


