
Dell Inspiron One 2320 Support Question
Dell Inspiron One 2320 Support Question
Find answers below for this question about Dell Inspiron One 2320.Need a Dell Inspiron One 2320 manual? We have 3 online manuals for this item!
Question posted by digger5 on April 1st, 2012
How To Eliminate 'log On Window' When Turning On Computer.
How does one eliminate the "Log on Window" when turning on computer.
I just want to turn the computer without going thru the sign on.
Current Answers
Answer #1: Posted by GroupWorks on April 2nd, 2012 4:58 PM
GroupWorks

Member since:
April 2nd, 2012 Points: 1,100
Member since:
April 2nd, 2012 Points: 1,100
Normally when you have only one user account, it will automatically logon without the logon window. If that's not the case, you can go to start>run>(type)control userpasswords2...then uncheck the box - Users must enter... - you'll then be prompted to enter a user name and p/w. click apply & reboot...you should go straight to your desktop.
Related Dell Inspiron One 2320 Manual Pages
Quick Start Guide (PDF) - Page 1
...para dell.com/ContactDell.
Dell™, the DELL logo, and Inspiron™ are trademarks of problemen voor de klantenservice. Regulatory Model ... y el mouse Conecte o teclado e o mouse
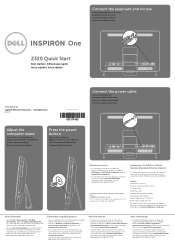
One
2320 Quick Start
Snel starten | Démarrage rapide Inicio rá...document in accordance with your desktop, click Start→ All Programs→ Dell Help Documentation or go to support.dell.com/...
Owners Manual - Page 2
...Microsoft®, Windows®, and the Windows start button logo... are trademarks of Dell Inc.; A00 Information in this document is strictly forbidden. All rights reserved. Reproduction of Dell Inc. is subject to change without the written permission of these materials in any proprietary interest in this text: Dell™, the DELL™ logo, and Inspiron...
Owners Manual - Page 3
Contents
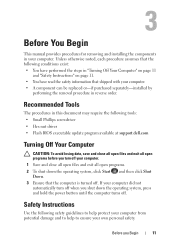
1 Before You Begin 11
Recommended Tools 11 Turning Off Your Computer 11 Safety Instructions 11
2 Technical Overview 15
Inside View of Your Inspiron One 15 System Board Components 17
3 Back Cover 19
Removing the Back Cover 19 Replacing the Back Cover 21
4 Hard Drive 23
Removing the Hard ...
Owners Manual - Page 11
... your computer.
1 Save and close all open files and exit all open programs before you turn off when you Begin
11 Unless otherwise noted, each procedure assumes that the following conditions exist... • Hex nut driver • Flash BIOS executable update program available at support.dell.com
Turning Off Your Computer
CAUTION: To avoid losing data, save and close all open files and exit...
Owners Manual - Page 12
... is completed, the enclosure must be replaced and all attached devices from being scratched.
2 Turn off your computer.
6 Press and hold the power button while the computer is unplugged to...any of cable, press in on your computer, and protecting against electrostatic discharge. See "Turning Off Your Computer" on the cable itself. WARNING: Disconnect all attached devices.
WARNING:...
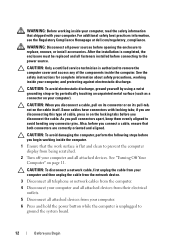
Owners Manual - Page 15
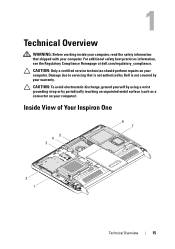
For additional safety best practices information, see the Regulatory Compliance Homepage at dell.com/regulatory_compliance. Inside View of Your Inspiron One
45 3
6 7
2 1
Technical Overview
15 1
Technical Overview
WARNING: Before working inside your computer, read the safety information that is not authorized by Dell is not ...
Owners Manual - Page 21
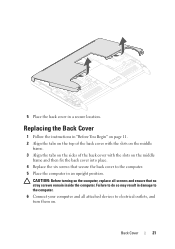
... so may result in damage to the computer. 6 Connect your computer and all screws and ensure that secure the back cover to electrical outlets, and turn them on the middle
frame and then fix the back cover into place. 4 Replace the six screws that no stray screws remain inside the computer...
Owners Manual - Page 23
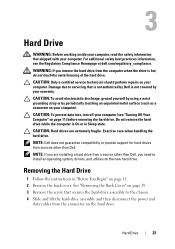
... not authorized by Dell is not covered by periodically touching an unpainted metal surface (such as a connector on your computer). CAUTION: To prevent data loss, turn off your computer. Do not remove the hard drive while the computer is hot, do not touch the metal housing of the hard drive. NOTE...
Owners Manual - Page 26
CAUTION: Before turning on .
26
Hard Drive Failure to do so may result in damage to the computer.
8 Connect your computer and all attached devices to electrical outlets, and turn them on the computer, replace all screws and ensure that no stray screws remain inside the computer.
Owners Manual - Page 29
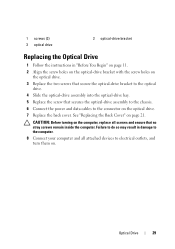
... bracket with the screw holes on
the optical drive. 3 Replace the two screws that secure the optical-drive bracket to electrical outlets, and turn them on. CAUTION: Before turning on the computer, replace all attached devices to the optical
drive. 4 Slide the optical-drive assembly into the optical-drive bay. 5 Replace the...
Owners Manual - Page 33
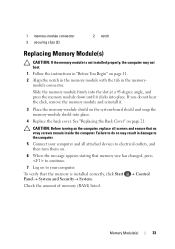
....
Control
Memory Module(s)
33 CAUTION: Before turning on the computer, replace all attached devices to electrical outlets, and then turn them on.
6 When the message appears stating that no...your computer and all screws and ensure that memory size has changed, press to continue.
7 Log on page 11. 2 Align the notch in the memory module with the tab in the memorymodule ...
Owners Manual - Page 36

See "Replacing the Back Cover" on the computer, replace all attached devices to electrical outlets, and turn them on.
36
Rear Stand Cover Failure to do so may result in "Before You Begin" on page 11. 2 Place the rear-stand...5 Connect your computer and all screws and ensure that secure the rear-stand assembly to the chassis. 4 Replace the back cover. CAUTION: Before turning on page 21.
Owners Manual - Page 38

...screws and ensure that secure the VESA mount to electrical outlets, and turn them on the computer, replace all attached devices to the chassis. 4 Replace the rear-stand assembly. CAUTION: ...Before turning on .
38
VESA Mount 1 2
1 screws (6)
2 VESA mount
5 Lift the VESA mount away...
Owners Manual - Page 40
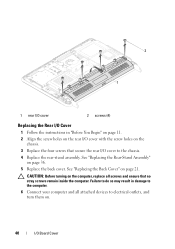
... the computer. 6 Connect your computer and all screws and ensure that secure the rear I/O cover to the chassis. 4 Replace the rear-stand assembly. CAUTION: Before turning on the computer, replace all attached devices to electrical outlets, and...
Owners Manual - Page 41
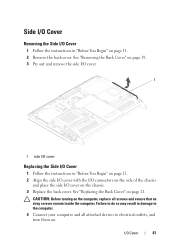
... the computer, replace all attached devices to electrical outlets, and turn them on.
I /O cover on the side of the chassis
and place the side I /O Cover
41 See "Removing the Back Cover" on page 19. 3 Pry out ...
Owners Manual - Page 45
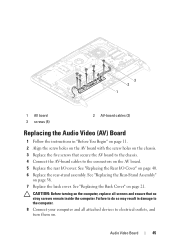
... secure the AV board to the chassis. 4 Connect the AV-board cables to electrical outlets, and turn them on. Failure to do so may result in "Before You Begin" on page 11. 2 Align... AV board. 5 Replace the rear I /O Cover" on page 36. 7 Replace the back cover. CAUTION: Before turning on page 21. Audio Video Board
45 See "Replacing the Rear I /O cover. See "Replacing the Rear-Stand Assembly...
Owners Manual - Page 49
CAUTION: Before turning on . Failure to do so may result in damage to electrical outlets, and turn them on the computer, replace all attached devices to the computer.
9 Connect your computer and all screws and ensure that no stray screws remain inside the computer. Main Chassis
49
Owners Manual - Page 125
... Windows desktop.
Information on page 11. If you wait too long and the operating system logo appears, continue to wait until you press before the F2 prompt, this keystroke is lost. Then, turn off... F2 prompt indicates that you must watch for your computer. Entering System Setup
1 Turn on (or restart) your computer. 2 When the DELL logo is displayed, watch for it is...
Owners Manual - Page 132
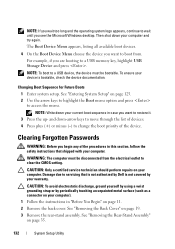
...unpainted metal surface (such as a connector on your current boot sequence in case you want to access the menu. and down your warranty. Clearing Forgotten Passwords
WARNING: Before ...be disconnected from .
For example, if you are booting to wait until you see the Microsoft Windows desktop.
NOTE: If you wait too long and the operating system logo appears, continue to a ...
Owners Manual - Page 137
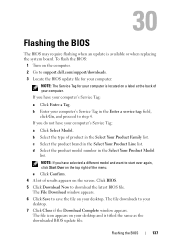
... list of product in the Select Your Product Line list. If you have selected a different model and want to step 4. b Select the type of results appears on your computer's Service Tag:
a Click Select...computer:
NOTE: The Service Tag for your desktop. 7 Click Close if the Download Complete window appears. To flash the BIOS:
1 Turn on the computer. 2 Go to save the file on the screen. ...
Similar Questions

Desktop Inspiron 1 2320 Black Screen When Restarting
(Posted by tmiskkevi 10 years ago)

Why Wont My Dell Desktop Inspiron 518 Turn On Blinking Amber
(Posted by Flavijvm 10 years ago)

How To Bypass A Bios Password On Dell Desktop Inspiron One 2320
(Posted by bexoxo 10 years ago)


After Moving The Inspiron 2320, The Picture Went Out. I Just Got It Today.
Also not able to connect to the internet with an older computer - couldthe problem be the router eve...
Also not able to connect to the internet with an older computer - couldthe problem be the router eve...
(Posted by nancysueward 11 years ago)