Casio XJ-SC215 - XGA DLP Projector Support and Manuals
Get Help and Manuals for this Casio item

View All Support Options Below
Free Casio XJ-SC215 manuals!
Problems with Casio XJ-SC215?
Ask a Question
Free Casio XJ-SC215 manuals!
Problems with Casio XJ-SC215?
Ask a Question
Most Recent Casio XJ-SC215 Questions

Can This Be Used For Movies
(Posted by kimbrooks7990 11 years ago)
Popular Casio XJ-SC215 Manual Pages
Owners Manual - Page 1

For details about setting up the projector and lamp replacement, see the User's Guide (Basic Operation). E
DATA PROJECTOR
XJ-SC210/XJ-SC215* XJ-S32/XJ-S37* XJ-S42/XJ-S47* XJ-S52/XJ-S57*
* USB Port Equipped Models
User's Guide
z Be sure to keep all user documentation handy for future reference. z Be sure to read the precautions in the separate User's Guide (Basic Operation).
Owners Manual - Page 2
.... • The contents of this User's Guide are subject to malfunction or maintenance of this product, or any lost profits due to loss of data due to change without the permission of CASIO COMPUTER CO., LTD. • CASIO COMPUTER CO., LTD. You are allowed to
use this manual for any loss or lost profits or...
Owners Manual - Page 3
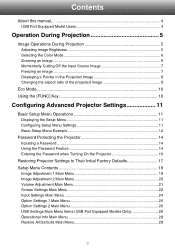
Contents
About this manual 4 USB Port Equipped Model Users 4
Operation...Projector Settings 11
Basic Setup Menu Operations 11 Displaying the Setup Menu 11 Configuring Setup Menu Settings 11 Basic Setup Menu Example 12
Password Protecting the Projector 14 Inputting a Password 14 Using the Password Feature 14 Entering the Password when Turning On the Projector 16
Restoring Projector Settings...
Owners Manual - Page 4
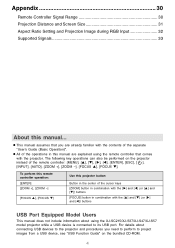
... the XJ-SC215/XJ-S37/XJ-S47/XJ-S57 model projector while a USB device is connected to project images from a USB device, see "USB Function Guide" on the projector instead of the cursor keys [ZOOM] button in combination with the [X] and [W] (or [S] and [T]) buttons [FOCUS] button in combination with the [S] and [T] (or [X] and [W]) buttons
USB Port Equipped Model Users
This manual...
Owners Manual - Page 11
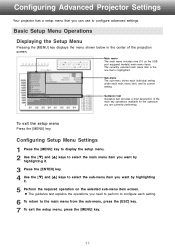
...models) main menu items. The currently selected main menu item is highlighted. z The guidance text explains the operations you need to perform to configure each main menu item, and its current setting.
Basic Setup Menu Operations
Displaying the Setup... To exit the setup menu, press the [MENU] key.
11
Configuring Advanced Projector Settings
Your projector has a setup menu that is the one...
Owners Manual - Page 12
... press
the [ENTER] key.
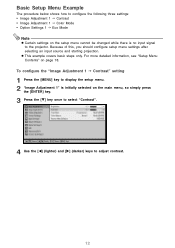
3 Press the [T] key once to select "Contrast".
4 Use the [W] (lighter) and [X] (darker) keys to the projector. To configure the "Image Adjustment 1 J Contrast" setting
1 Press the [MENU] key to display the setup menu. 2 "Image Adjustment 1" is no input signal to adjust contrast.
12
z This example covers basic steps only. Basic...
Owners Manual - Page 14
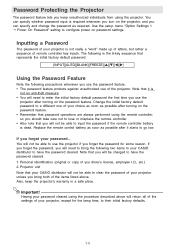
... the projector. Also, keep unauthorized individuals from using the procedure described above . Note that it starts to have the password cleared. 1.
If you forget the password, you will return all of the settings of your CASIO distributor to go low. Replace the remote control battery as soon as required. Use the setup menu "Option Settings 1 J Power On Password" setting to...
Owners Manual - Page 15
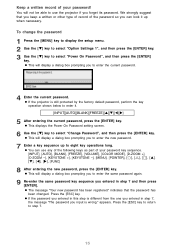
... the following keys as part of your password! z If the projector is still protected by the factory default password, perform the key operation shown below to enter the current password.
4 Enter the current password. z This displays the Power On Password setting screen.
6 Use the [T] key to enter the same password again.
9 Re-enter the same password key sequence you input...
Owners Manual - Page 17
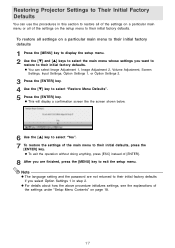
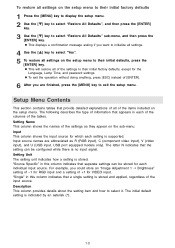
... doing anything, press [ESC] instead of the settings under "Setup Menu Contents" on the setup menu to their initial factory defaults.
Restoring Projector Settings to Their Initial Factory Defaults
You can select Image Adjustment 1, Image Adjustment 2, Volume Adjustment, Screen
Settings, Input Settings, Option Settings 1, or Option Settings 2.
3 Press the [ENTER] key. 4 Use the [T] key...
Owners Manual - Page 18
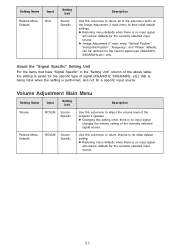
...setting is stored and applied, regardless of information that a single setting is supported. Description This column provides details about the setting item and how to exit the setup menu. The initial default setting... will restore all settings on the setup menu to their initial factory defaults, except for the
Language, Lamp Time, and password settings. "Source Specific" in this column...
Owners Manual - Page 19

... you adjust the color balance of the projected image.
Sharpness
RCV
Source Specific
Use this setting for easy viewing when projecting onto a blackboard. This setting is supported only when the
signal is selected as the "Preset" setting.
19 Graphics: Use this sub-menu to adjust the color saturation of a color increases along with image contents...
Owners Manual - Page 21
... the sub-menu items on the Image Adjustment 2 main menu to their initial default settings. Restore Menu Defaults
RCVUN Source Specific
Use this setting when there is saved for the specific type of the projector's speaker. z "Image Adjustment 2" main menu "Vertical Position", "Horizontal Position", "Frequency", and "Phase" defaults can be restored for the currently selected...
Owners Manual - Page 24
... is connected to the Projector" in the projected image.
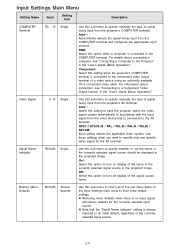
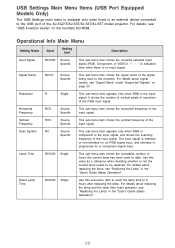
Input Settings Main Menu
Setting Name
Input
Setting Unit
Description
COMPUTER Terminal
RCUVN Single
Use this sub-menu to their initial default settings.
NTSC / NTSC4.43 / PAL / PAL-M / PAL-N / PAL60 / SECAM: Each setting selects the applicable video system.
Restore Menu Defaults
RCVUN Source Specific
Use this sub-menu...
Owners Manual - Page 26
... the projector is turned on or off plug-and-play.
26
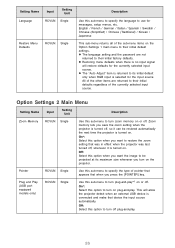
Plug and Play (USB port equipped models only)
RCVUN Single
Use this option when you turn on the Option Settings 1 ...off.
All of the sub-menu items on the projector. Off: Select this sub-menu to turn zoom memory on . This will restore defaults for messages, setup menus, etc. Pointer
RCVUN Single
Use this option to...
Owners Manual - Page 28
...-interlace for an RGB signal input, and interlace or progressive for a component signal input. It shows the number of vertical pixels of resolution of the XJ-SC215/XJ-S37/XJ-S47/XJ-S57 model projector.
For details about replacing the lamp, see "Replacing the Lamp" in the "User's Guide (Basic Operation)".
Casio XJ-SC215 Reviews
We have not received any reviews for Casio yet.