User Manual
Page 13
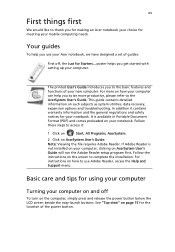
... system utilities, data recovery, expansion options and troubleshooting. Your guides To help you to be more productive, please refer to the AcerSystem User's Guide. Note: Viewing the file requires Adobe Reader. xv First things first We would like to thank you for making an Acer notebook your choice for meeting your computer can help you use Adobe Reader, access the Help and Support menu. poster helps you get started with setting up your notebook...
... system utilities, data recovery, expansion options and troubleshooting. Your guides To help you to be more productive, please refer to the AcerSystem User's Guide. Note: Viewing the file requires Adobe Reader. xv First things first We would like to thank you for making an Acer notebook your choice for meeting your computer can help you use Adobe Reader, access the Help and Support menu. poster helps you get started with setting up your notebook...
User Manual
Page 21
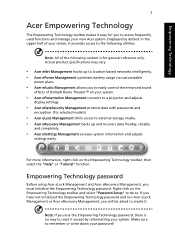
... Management or Acer eRecovery Management, you will be asked to access frequently used functions and manage your password! Displayed by reformatting your system. • Acer ePresentation Management connects to a projector and adjusts display settings. • Acer eDataSecurity Management protects data with passwords and encryption. (for selected models) • Acer eLock Management limits access to external storage media. • Acer eRecovery Management backs up to location-based networks intelligently. • Acer ePower Management optimizes battery usage via customizable power...
... Management or Acer eRecovery Management, you will be asked to access frequently used functions and manage your password! Displayed by reformatting your system. • Acer ePresentation Management connects to a projector and adjusts display settings. • Acer eDataSecurity Management protects data with passwords and encryption. (for selected models) • Acer eLock Management limits access to external storage media. • Acer eRecovery Management backs up to location-based networks intelligently. • Acer ePower Management optimizes battery usage via customizable power...

User Manual
Page 24
You can also turn on . 4 If necessary, change the display and sleep settings you want your computer to use. 5 Click "OK" to edit 2 Adjust settings as described below. You can also create customized power plans. To switch between , edit, delete and restore power plans, as required. Empowering Technology 4 Acer ePower Management Acer ePower Management features a straightforward user interface for configuring your new power plan. You can open Windows power options by...
You can also turn on . 4 If necessary, change the display and sleep settings you want your computer to use. 5 Click "OK" to edit 2 Adjust settings as described below. You can also create customized power plans. To switch between , edit, delete and restore power plans, as required. Empowering Technology 4 Acer ePower Management Acer ePower Management features a straightforward user interface for configuring your new power plan. You can open Windows power options by...
User Manual
Page 36
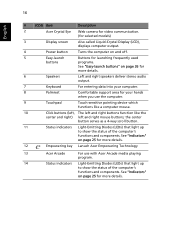
... Description 2 Acer Crystal Eye Web camera for video communication. (for selected models) 3 Display screen Also called Liquid-Crystal Display (LCD), displays computer output. 4 Power button Turns the computer on and off. 5 Easy-launch Buttons for launching frequently used buttons programs. See "Easy-launch buttons" on page 26 for more details. 6 Speakers Left and right speakers deliver stereo audio output. 7 Keyboard For entering data into your computer. 8 Palmrest Comfortable support area for...
... Description 2 Acer Crystal Eye Web camera for video communication. (for selected models) 3 Display screen Also called Liquid-Crystal Display (LCD), displays computer output. 4 Power button Turns the computer on and off. 5 Easy-launch Buttons for launching frequently used buttons programs. See "Easy-launch buttons" on page 26 for more details. 6 Speakers Left and right speakers deliver stereo audio output. 7 Keyboard For entering data into your computer. 8 Palmrest Comfortable support area for...
User Manual
Page 43
... W AC adapter • 105-/106-key keyboard, with inverted "T" cursor layout; 2.5 mm (minimum) key travel • Seamless touchpad with 4-way scroll button • 12 function keys, four cursor keys, two Windows® keys, hotkey controls, standard numeric keypad, international language support, independent US and Euro dollar sign keys, media control keys • Empowering Key • Easy-launch buttons: WLAN, Internet, email, Bluetooth, Acer Arcade™ • Volume wheel • ExpressCard™/54 slot • 5-in...
... W AC adapter • 105-/106-key keyboard, with inverted "T" cursor layout; 2.5 mm (minimum) key travel • Seamless touchpad with 4-way scroll button • 12 function keys, four cursor keys, two Windows® keys, hotkey controls, standard numeric keypad, international language support, independent US and Euro dollar sign keys, media control keys • Empowering Key • Easy-launch buttons: WLAN, Internet, email, Bluetooth, Acer Arcade™ • Volume wheel • ExpressCard™/54 slot • 5-in...
User Manual
Page 99
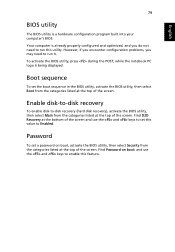
... boot, activate the BIOS utility, then select Security from the categories listed at the top of the screen and use the and keys to Enabled. However, if you encounter configuration problems, you do not need to -disk recovery (hard disk recovery), activate the BIOS utility, then select Main from the categories listed at the bottom of the screen. Enable disk-to-disk recovery To enable disk-to run this feature. Password To set this value to enable this utility. To activate the BIOS utility...
... boot, activate the BIOS utility, then select Security from the categories listed at the top of the screen and use the and keys to Enabled. However, if you encounter configuration problems, you do not need to -disk recovery (hard disk recovery), activate the BIOS utility, then select Main from the categories listed at the bottom of the screen. Enable disk-to-disk recovery To enable disk-to run this feature. Password To set this value to enable this utility. To activate the BIOS utility...
Service Guide
Page 7
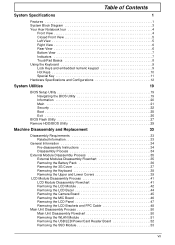
... Lock Keys and embedded numeric keypad 9 Hot Keys 10 Special Key 11 Hardware Specifications and Configurations 12 System Utilities 19 BIOS Setup Utility 19 Navigating the BIOS Utility 19 Information 20 Main 21 Security 22 Boot 25 Exit 26 BIOS Flash Utility 27 Remove HDD/BIOS Utility 29 Machine Disassembly and Replacement 33 Disassembly Requirements 33 Related Information 33 General Information 34 Pre-disassembly Instructions 34 Disassembly Process 34 External Module Disassembly Process 35 External Modules Disassembly Flowchart 35 Removing the Battery Pack 36 Removing...
... Lock Keys and embedded numeric keypad 9 Hot Keys 10 Special Key 11 Hardware Specifications and Configurations 12 System Utilities 19 BIOS Setup Utility 19 Navigating the BIOS Utility 19 Information 20 Main 21 Security 22 Boot 25 Exit 26 BIOS Flash Utility 27 Remove HDD/BIOS Utility 29 Machine Disassembly and Replacement 33 Disassembly Requirements 33 Related Information 33 General Information 34 Pre-disassembly Instructions 34 Disassembly Process 34 External Module Disassembly Process 35 External Modules Disassembly Flowchart 35 Removing the Battery Pack 36 Removing...
Service Guide
Page 12
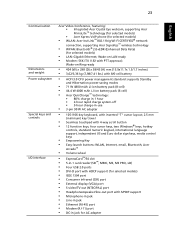
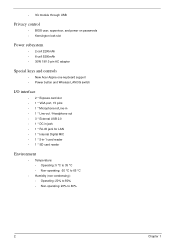
• 3G module through USB Privacy control • BIOS user, supervisor, and power on passwords • Kensington lock slot Power subsystem • 2-cell 2200mAh • 6-cell 5200mAh • 30W 19V 3-pin AC adapter Special keys and controls • New Acer Aspire one keyboard support • Power button and Wireless LAN/3G switch I/O interface • 2 * Express card slot • 1 * VGA port, 15 pins • 1 * Microphone-in/Line-in • 1 * Line-out / Headphone out • 3 * External USB 2.0 • 1 * DC in jack •...
• 3G module through USB Privacy control • BIOS user, supervisor, and power on passwords • Kensington lock slot Power subsystem • 2-cell 2200mAh • 6-cell 5200mAh • 30W 19V 3-pin AC adapter Special keys and controls • New Acer Aspire one keyboard support • Power button and Wireless LAN/3G switch I/O interface • 2 * Express card slot • 1 * VGA port, 15 pins • 1 * Microphone-in/Line-in • 1 * Line-out / Headphone out • 3 * External USB 2.0 • 1 * DC in jack •...
Service Guide
Page 15
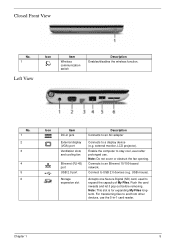
... wireless function. Note: Do not cover or obstruct the fan opening. Note: This slot is for expanding My Files longterm. USB mouse). Connect to expand the capacity of My Files. Chapter 1 5 external monitor, LCD projector). Accepts one Secure Digital (SD) card, used to USB 2.0 devices (e.g. Enable the computer to stay cool, even after prolonged use the 5-in jack External display (VGA) port Ventilation slots and cooling fan Ethernet (RJ-45) port USB 2.0 port Storage expansion slot Description Connects to an AC adapter Connects...
... wireless function. Note: Do not cover or obstruct the fan opening. Note: This slot is for expanding My Files longterm. USB mouse). Connect to expand the capacity of My Files. Chapter 1 5 external monitor, LCD projector). Accepts one Secure Digital (SD) card, used to USB 2.0 devices (e.g. Enable the computer to stay cool, even after prolonged use the 5-in jack External display (VGA) port Ventilation slots and cooling fan Ethernet (RJ-45) port USB 2.0 port Storage expansion slot Description Connects to an AC adapter Connects...
Service Guide
Page 29
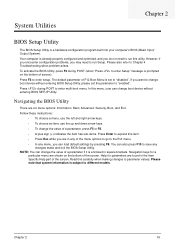
... of screen). However, if you encounter configuration problems, you do not need to "disabled". The default parameter of a parameter if it is a hardware configuration program built into your computer's BIOS (Basic Input/ Output System). You can also press F10 to the Exit menu. • In any changes made and exit the BIOS Setup Utility. Follow these instructions: • To choose a menu, use the left and right arrow keys...
... of screen). However, if you encounter configuration problems, you do not need to "disabled". The default parameter of a parameter if it is a hardware configuration program built into your computer's BIOS (Basic Input/ Output System). You can also press F10 to the Exit menu. • In any changes made and exit the BIOS Setup Utility. Follow these instructions: • To choose a menu, use the left and right arrow keys...
Service Guide
Page 33
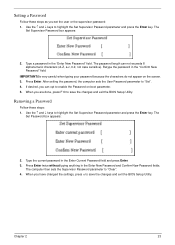
... Use the ↑ and ↓ keys to highlight the Set Supervisor Password parameter and press the Enter key. Use the ↑ and ↓ keys to highlight the Set Supervisor Password parameter and press the Enter key. The password length can opt to enable the Password on the screen. 3. When you have changed the settings, press u to save the changes and exit the BIOS Setup Utility. The computer then sets the Supervisor Password parameter to "Set...
... Use the ↑ and ↓ keys to highlight the Set Supervisor Password parameter and press the Enter key. Use the ↑ and ↓ keys to highlight the Set Supervisor Password parameter and press the Enter key. The password length can opt to enable the Password on the screen. 3. When you have changed the settings, press u to save the changes and exit the BIOS Setup Utility. The computer then sets the Supervisor Password parameter to "Set...
Service Guide
Page 37
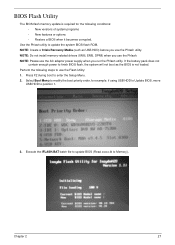
...: • New versions of system programs • New features or options • Restore a BIOS when it becomes corrupted. Press F2 during boot to Memory). BIOS Flash Utility The BIOS flash memory update is not loaded. NOTE: Create a Crisis Recovery Media (such as the BIOS is required for example, if using USB HDD to Update BIOS, move USB HDD to use the Phlash utility. Execute the IFLASH.BAT batch file to update BIOS (Read xxxxx.fd to enter the Setup Menu. 2.
...: • New versions of system programs • New features or options • Restore a BIOS when it becomes corrupted. Press F2 during boot to Memory). BIOS Flash Utility The BIOS flash memory update is not loaded. NOTE: Create a Crisis Recovery Media (such as the BIOS is required for example, if using USB HDD to Update BIOS, move USB HDD to use the Phlash utility. Execute the IFLASH.BAT batch file to update BIOS (Read xxxxx.fd to enter the Setup Menu. 2.
Service Guide
Page 89
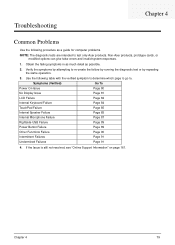
... No Display Issue Page 81 LCD Failure Page 84 Internal Keyboard Failure Page 84 TouchPad Failure Page 85 Internal Speaker Failure Page 85 Internal Microphone Failure Page 87 Rightside USB Failure Page 89 Power Button Failure Page 89 Other Functions Failure Page 90 Intermittent Failures Page 91 Undermined Failures Page 91 4. Obtain the failing symptoms in as much detail as a guide for computer problems...
... No Display Issue Page 81 LCD Failure Page 84 Internal Keyboard Failure Page 84 TouchPad Failure Page 85 Internal Speaker Failure Page 85 Internal Microphone Failure Page 87 Rightside USB Failure Page 89 Power Button Failure Page 89 Other Functions Failure Page 90 Intermittent Failures Page 91 Undermined Failures Page 91 4. Obtain the failing symptoms in as much detail as a guide for computer problems...
Service Guide
Page 93
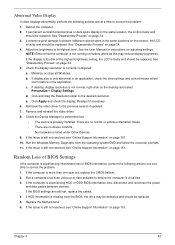
...; Display Settings. Check the display resolution is experiencing HDD or ODD BIOS information loss, disconnect and reconnect the power and data cables between devices. Minimize or close all Windows. If desktop display resolution is not running on page 34. 4. e. Click Apply and check the display. Remove and reinstall the video driver. 8. Check the Device Manager to the previous version if updated. 7. Run the Windows Memory Diagnostic from the BIOS, the drive may...
...; Display Settings. Check the display resolution is experiencing HDD or ODD BIOS information loss, disconnect and reconnect the power and data cables between devices. Minimize or close all Windows. If desktop display resolution is not running on page 34. 4. e. Click Apply and check the display. Remove and reinstall the video driver. 8. Check the Device Manager to the previous version if updated. 7. Run the Windows Memory Diagnostic from the BIOS, the drive may...
Service Guide
Page 96
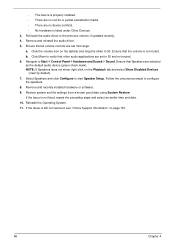
... to Start´ Control Panel´ Hardware and Sound´ Sound. Navigate to 50. Follow the onscreen prompts to 50 and not muted. 6. Reinstall the Operating System. 11. Click Mixer to verify that the volume is still not resolved, see "Online Support Information" on the Playback tab and select Show Disabled Devices (clear by default). 7. Select Speakers and click Configure to the previous version, if updated...
... to Start´ Control Panel´ Hardware and Sound´ Sound. Navigate to 50. Follow the onscreen prompts to 50 and not muted. 6. Reinstall the Operating System. 11. Click Mixer to verify that the volume is still not resolved, see "Online Support Information" on the Playback tab and select Show Disabled Devices (clear by default). 7. Select Speakers and click Configure to the previous version, if updated...
Service Guide
Page 98
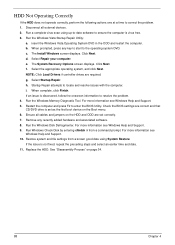
... all cables and jumpers on the Boot menu. 6. Run a complete virus scan using System Restore. When prompted, press any recently added hardware and associated software. 8. Click Next. f. NOTE: Click Load Drivers if controller drives are set as the first boot device on the HDD and ODD are required. Ensure all external devices. 2. d. Select Repair your computer. Select the appropriate operating system, and click Next. i. For more information see Windows Help and Support...
... all cables and jumpers on the Boot menu. 6. Run a complete virus scan using System Restore. When prompted, press any recently added hardware and associated software. 8. Click Next. f. NOTE: Click Load Drivers if controller drives are set as the first boot device on the HDD and ODD are required. Ensure all external devices. 2. d. Select Repair your computer. Select the appropriate operating system, and click Next. i. For more information see Windows Help and Support...
Service Guide
Page 100
... Issue is still not resolved, see Windows Help and Support. 10. Check Test Fixture is not fixed, repeat the preceding steps and select an earlier time and date. 9. Remove any recently added software and reboot. 8. Check the Device Manager to correct the problem. Other Failures If the CRT Switch, Dock, LAN Port, external MIC or Speakers, PCI Express Card, 5-in-1 Card Reader or Volume Wheel fail, perform the following...
... Issue is still not resolved, see Windows Help and Support. 10. Check Test Fixture is not fixed, repeat the preceding steps and select an earlier time and date. 9. Remove any recently added software and reboot. 8. Check the Device Manager to correct the problem. Other Failures If the CRT Switch, Dock, LAN Port, external MIC or Speakers, PCI Express Card, 5-in-1 Card Reader or Volume Wheel fail, perform the following...
Service Guide
Page 101
... the problem remains, replace the following devices: • Non-Acer devices • Printer, mouse, and other external devices • Battery pack • Hard disk drive • DIMM • CD-ROM/Diskette drive Module • PC Cards 4. When analyzing an intermittent problem, do not replace any error is inoperative. Determine if the problem has changed. 6. Intermittent Problems Intermittent system hang problems can be considered only when a recurring problem exists. Power-off the computer. 2. FRU replacement should...
... the problem remains, replace the following devices: • Non-Acer devices • Printer, mouse, and other external devices • Battery pack • Hard disk drive • DIMM • CD-ROM/Diskette drive Module • PC Cards 4. When analyzing an intermittent problem, do not replace any error is inoperative. Determine if the problem has changed. 6. Intermittent Problems Intermittent system hang problems can be considered only when a recurring problem exists. Power-off the computer. 2. FRU replacement should...
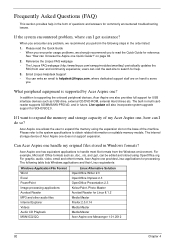
Service Guide
Page 102
... using the expansion slot on hand to [email protected], where dedicated support staff are on the base of my Acer Aspire one, how can I browse the Aspire one also provides full support for commonly encountered troubleshooting issues. Please refer to the system specifications to supporting the onboard peripheral devices, Acer Aspire one Quick Guide?" If the system encountered problem, where can I do so? on suitable memory models. users...
... using the expansion slot on hand to [email protected], where dedicated support staff are on the base of my Acer Aspire one, how can I browse the Aspire one also provides full support for commonly encountered troubleshooting issues. Please refer to the system specifications to supporting the onboard peripheral devices, Acer Aspire one Quick Guide?" If the system encountered problem, where can I do so? on suitable memory models. users...
Service Guide
Page 123
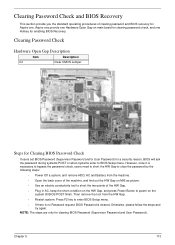
... enter BIOS Setup menu. • If there is no Password request, BIOS Password is necessary to bypass the password check, users need to short the HW Gap to clear the password by the following steps: • Power Off a system, and remove HDD, AC and Battery from the HW Gap. • Restart system. Clearing Password Check Hardware Open Gap Description Item G1 Description Clear CMOS Jumper Steps for Clearing BIOS Password Check If users set BIOS Password (Supervisor Password and/or User Password) for Aspire...
... enter BIOS Setup menu. • If there is no Password request, BIOS Password is necessary to bypass the password check, users need to short the HW Gap to clear the password by the following steps: • Power Off a system, and remove HDD, AC and Battery from the HW Gap. • Restart system. Clearing Password Check Hardware Open Gap Description Item G1 Description Clear CMOS Jumper Steps for Clearing BIOS Password Check If users set BIOS Password (Supervisor Password and/or User Password) for Aspire...


