
System Administration Guide
Page 38
... 8859-10 Latin 6 PC-8 PC-8 DN PC-775 PC-850 PC-852 PC-1004 (OS/2) PC Turkish Windows 3.1 Latin 1 Windows 3.1 Latin 2 Windows 3.1 Latin 5 DeskTop PS Text MC Text Microsoft Publishing Math 8 PS Math Pi Font Legal ISO 4 United Kingdom ISO 6 ASCII ISO 11 Swedish:names ISO 15 Italian ISO 17 Spanish 38 Xerox CopyCentre/WorkCentre/WorkCentre Pro...
... 8859-10 Latin 6 PC-8 PC-8 DN PC-775 PC-850 PC-852 PC-1004 (OS/2) PC Turkish Windows 3.1 Latin 1 Windows 3.1 Latin 2 Windows 3.1 Latin 5 DeskTop PS Text MC Text Microsoft Publishing Math 8 PS Math Pi Font Legal ISO 4 United Kingdom ISO 6 ASCII ISO 11 Swedish:names ISO 15 Italian ISO 17 Spanish 38 Xerox CopyCentre/WorkCentre/WorkCentre Pro...
System Administration Guide
Page 44
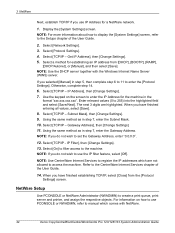
...Use CentreWare Internet Services to register the IP addresses which comes with the Windows Internet Name Server (WINS) server. Refer to access the machine. Select a method for the machine ...in step 7, enter the Subnet Mask. 10. IP Address], then [Change Settings]. 7. Select [TCP/IP - Display the [System Settings... Gateway Address, enter "0.0.0.0". 12. NOTE: Use the DHCP server together with NetWare. 44 Xerox CopyCentre/WorkCentre/WorkCentre Pro 123/128/133 System Administration Guide If you do not wish to enter the IP ...
...Use CentreWare Internet Services to register the IP addresses which comes with the Windows Internet Name Server (WINS) server. Refer to access the machine. Select a method for the machine ...in step 7, enter the Subnet Mask. 10. IP Address], then [Change Settings]. 7. Select [TCP/IP - Display the [System Settings... Gateway Address, enter "0.0.0.0". 12. NOTE: Use the DHCP server together with NetWare. 44 Xerox CopyCentre/WorkCentre/WorkCentre Pro 123/128/133 System Administration Guide If you do not wish to enter the IP ...
System Administration Guide
Page 49
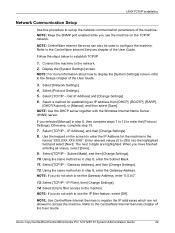
...to 255) into the highlighted field and select [Next]. Enter relevant values (0 to the machine. Subnet Mask], and then [Change Settings]. 10. Using the same method as in step 8, enter the Subnet Mask. 11. NOTE: If you selected [Manual] in the format "XXX....the DHCP server together with the Windows Internet Name Server (WINS) server. Use the keypad on the TCP/IP network. Select [TCP/IP - NOTE: Use CentreWare Internet Services to enter the [Protocol Settings]. Refer to the network. 2. Xerox CopyCentre/WorkCentre/WorkCentre Pro 123/128/133 System Administration...
...to 255) into the highlighted field and select [Next]. Enter relevant values (0 to the machine. Subnet Mask], and then [Change Settings]. 10. Using the same method as in step 8, enter the Subnet Mask. 11. NOTE: If you selected [Manual] in the format "XXX....the DHCP server together with the Windows Internet Name Server (WINS) server. Use the keypad on the TCP/IP network. Select [TCP/IP - NOTE: Use CentreWare Internet Services to enter the [Protocol Settings]. Refer to the network. 2. Xerox CopyCentre/WorkCentre/WorkCentre Pro 123/128/133 System Administration...

System Administration Guide
Page 69
...Settings]. 7. When you selected [Manual] in the format "xxx.xxx.xxx.xxx". Using the same method as in step 7, enter the Subnet Mask. 10. IP Filter], then [Change Settings]. 13. NOTE: For more information about how to display the [System Setting] screen, refer to enter the [Protocol...together with the Windows Internet Name Server (WINS) server. Use the keypad on the screen to the Setups chapter of the User Guide. 2. Using the same method as in step 7, enter the Gateway Address. NOTE: If you do not wish to the network. 2. Xerox CopyCentre/WorkCentre/WorkCentre Pro 123/...
...Settings]. 7. When you selected [Manual] in the format "xxx.xxx.xxx.xxx". Using the same method as in step 7, enter the Subnet Mask. 10. IP Filter], then [Change Settings]. 13. NOTE: For more information about how to display the [System Setting] screen, refer to enter the [Protocol...together with the Windows Internet Name Server (WINS) server. Use the keypad on the screen to the Setups chapter of the User Guide. 2. Using the same method as in step 7, enter the Gateway Address. NOTE: If you do not wish to the network. 2. Xerox CopyCentre/WorkCentre/WorkCentre Pro 123/...
System Administration Guide
Page 74
...[Change Settings]. 11. NOTE: If you selected [Manual] in step 7, enter the Subnet Mask. 10. NOTE: If you use the IP filter feature, select [Off]. Select a method for the machine ...in step 7, enter the Gateway Address. NOTE: Use the DHCP server together with the Windows Internet Name Server (WINS) server. IP Address], and then [Change Settings]. 7. Select [On] ...the IP Address for establishing an IP address from the [Protocol Settings] screen. 74 Xerox CopyCentre/WorkCentre/WorkCentre Pro 123/128/133 System Administration Guide Get IP Address], and then [Change Settings...
...[Change Settings]. 11. NOTE: If you selected [Manual] in step 7, enter the Subnet Mask. 10. NOTE: If you use the IP filter feature, select [Off]. Select a method for the machine ...in step 7, enter the Gateway Address. NOTE: Use the DHCP server together with the Windows Internet Name Server (WINS) server. IP Address], and then [Change Settings]. 7. Select [On] ...the IP Address for establishing an IP address from the [Protocol Settings] screen. 74 Xerox CopyCentre/WorkCentre/WorkCentre Pro 123/128/133 System Administration Guide Get IP Address], and then [Change Settings...

System Administration Guide
Page 80
... X 10.1.15, 10.2.X, 10.3.3 (requires PostScript) Windows 2000 Windows XP Windows Server 2003 TCP/IP TCP/IP NOTE: The optional PostScript Kit is installed together with the print drivers. When printing through Port9100, change the necessary settings on the machine and the Windows computers. NOTE: Windows NT 4.0 does not support printing through LPD or Port9100. 80 Xerox CopyCentre/WorkCentre/WorkCentre Pro...
... X 10.1.15, 10.2.X, 10.3.3 (requires PostScript) Windows 2000 Windows XP Windows Server 2003 TCP/IP TCP/IP NOTE: The optional PostScript Kit is installed together with the print drivers. When printing through Port9100, change the necessary settings on the machine and the Windows computers. NOTE: Windows NT 4.0 does not support printing through LPD or Port9100. 80 Xerox CopyCentre/WorkCentre/WorkCentre Pro...

System Administration Guide
Page 82
...the DHCP server together with the optional PostScript Kit. 82 Xerox CopyCentre/WorkCentre/WorkCentre Pro 123/128/133 System Administration Guide Subnet Mask], then ...[Change Settings]. 9. Select [TCP/IP - Select [TCP/IP - Using the same method as in step 7, enter the Gateway Address. Using the same method as in CentreWare Utilities CD-ROM or document provided with the Windows... HTML document in step 7, enter the Subnet Mask. 10. Select [Protocol Settings]. 4. Use the keypad on ...
...the DHCP server together with the optional PostScript Kit. 82 Xerox CopyCentre/WorkCentre/WorkCentre Pro 123/128/133 System Administration Guide Subnet Mask], then ...[Change Settings]. 9. Select [TCP/IP - Select [TCP/IP - Using the same method as in step 7, enter the Gateway Address. Using the same method as in CentreWare Utilities CD-ROM or document provided with the Windows... HTML document in step 7, enter the Subnet Mask. 10. Select [Protocol Settings]. 4. Use the keypad on ...

System Administration Guide
Page 90
... the host workstation. Each workstation has a queue that the machine has been installed and configured correctly. 90 Xerox CopyCentre/WorkCentre/WorkCentre Pro 123/128/133 System Administration Guide USB Port Communication Setup This requires the machine to install the machine... on a USB port. Target computers The following computers support printing through the USB port. • Windows 2000/Windows XP/Windows Server 2003 • Mac OS X 10...
... the host workstation. Each workstation has a queue that the machine has been installed and configured correctly. 90 Xerox CopyCentre/WorkCentre/WorkCentre Pro 123/128/133 System Administration Guide USB Port Communication Setup This requires the machine to install the machine... on a USB port. Target computers The following computers support printing through the USB port. • Windows 2000/Windows XP/Windows Server 2003 • Mac OS X 10...

System Administration Guide
Page 94
10 IPP (Internet Printing Protocol) IPP Environment System configuration The machine supports Internet Printing Protocol (IPP). Workstation Setup This requires the workstation to be set up for IPP. As Windows 2000/Windows XP/ Windows Server 2003/Windows Me are three stages. Using IPP, you can ... machine to be configured to print to make sure that the machine has been installed and configured correctly. 94 Xerox CopyCentre/WorkCentre/WorkCentre Pro 123/128/133 System Administration Guide The transport protocol for installing and using the Add Printer Wizard. Target ...
10 IPP (Internet Printing Protocol) IPP Environment System configuration The machine supports Internet Printing Protocol (IPP). Workstation Setup This requires the workstation to be set up for IPP. As Windows 2000/Windows XP/ Windows Server 2003/Windows Me are three stages. Using IPP, you can ... machine to be configured to print to make sure that the machine has been installed and configured correctly. 94 Xerox CopyCentre/WorkCentre/WorkCentre Pro 123/128/133 System Administration Guide The transport protocol for installing and using the Add Printer Wizard. Target ...

System Administration Guide
Page 100
...in step 7, enter the Subnet Mask. 10. Select [TCP/IP - In the URL field, enter "http://" followed by the internet address of the User Guide. 14. Select [TCP/IP - When you selected [Manual] in the URL field: 100 Xerox CopyCentre/WorkCentre/WorkCentre Pro 123/128/133 System Administration Guide... Internet Services. 1. When you do not wish to use the IP filter feature, select [Off]. NOTE: Use the DHCP server together with the Windows Internet Name Server (WINS) server. Test Access Follow the steps below to the Setups chapter of the User Guide. 2. IP Address], then [Change...
...in step 7, enter the Subnet Mask. 10. Select [TCP/IP - In the URL field, enter "http://" followed by the internet address of the User Guide. 14. Select [TCP/IP - When you selected [Manual] in the URL field: 100 Xerox CopyCentre/WorkCentre/WorkCentre Pro 123/128/133 System Administration Guide... Internet Services. 1. When you do not wish to use the IP filter feature, select [Off]. NOTE: Use the DHCP server together with the Windows Internet Name Server (WINS) server. Test Access Follow the steps below to the Setups chapter of the User Guide. 2. IP Address], then [Change...

System Administration Guide
Page 127
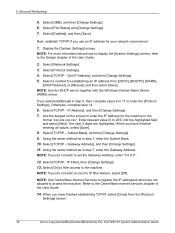
... of the User Guide. 2. Next, establish TCP/IP 1. Select a method for the machine in step 7, enter the Subnet Mask. 10. NOTE: Use the DHCP server together with the Windows Internet Name Server (WINS) server. Enter relevant values 0 to the machine. NOTE: If you have finished entering all values, select [... Otherwise, complete step14. 6. When you have finished establishing TCP/IP, select [Close] from [DHCP], [BOOTP], [RARP], [DHCP/Autonet], or [Manual], and then select [Save]. Xerox CopyCentre/WorkCentre/WorkCentre Pro 123/128/133 System Administration Guide 127
... of the User Guide. 2. Next, establish TCP/IP 1. Select a method for the machine in step 7, enter the Subnet Mask. 10. NOTE: Use the DHCP server together with the Windows Internet Name Server (WINS) server. Enter relevant values 0 to the machine. NOTE: If you have finished entering all values, select [... Otherwise, complete step14. 6. When you have finished establishing TCP/IP, select [Close] from [DHCP], [BOOTP], [RARP], [DHCP/Autonet], or [Manual], and then select [Save]. Xerox CopyCentre/WorkCentre/WorkCentre Pro 123/128/133 System Administration Guide 127

System Administration Guide
Page 130
... the IP filter feature, select [Off]. 130 Xerox CopyCentre/WorkCentre/WorkCentre Pro 123/128/133 System Administration Guide IP Filter...], then [Change Settings]. 13. Select [Enabled], and then [Save]. Select a method for CentreWare Scan Services (optional). 6. Select [TCP/IP -Subnet Mask], then [Change Settings]. 9. NOTE: If you selected [Manual] in step 7, enter the Subnet Mask. 10... Use the DHCP server together with the Windows Internet Name Server (WINS) server. Otherwise, complete step14. 6. Select ...
... the IP filter feature, select [Off]. 130 Xerox CopyCentre/WorkCentre/WorkCentre Pro 123/128/133 System Administration Guide IP Filter...], then [Change Settings]. 13. Select [Enabled], and then [Save]. Select a method for CentreWare Scan Services (optional). 6. Select [TCP/IP -Subnet Mask], then [Change Settings]. 9. NOTE: If you selected [Manual] in step 7, enter the Subnet Mask. 10... Use the DHCP server together with the Windows Internet Name Server (WINS) server. Otherwise, complete step14. 6. Select ...

System Administration Guide
Page 136
NOTE: Use the DHCP server together with the Windows Internet Name Server (WINS) server. Select [TCP/IP - Enter relevant ... steps 6 to 11 to enter the IP Address for SMB, only local access is allowed. 136 Xerox CopyCentre/WorkCentre/WorkCentre Pro 123/128/133 System Administration Guide Otherwise, complete step14. 6. Workstation Setup You need the folder to...IP Address from the [Protocol Settings] screen. Using the same method as in step 7, enter the Subnet Mask. 10. Using the same method as in step 7, enter the Subnet Mask. Select a method for the folder. Refer...
NOTE: Use the DHCP server together with the Windows Internet Name Server (WINS) server. Select [TCP/IP - Enter relevant ... steps 6 to 11 to enter the IP Address for SMB, only local access is allowed. 136 Xerox CopyCentre/WorkCentre/WorkCentre Pro 123/128/133 System Administration Guide Otherwise, complete step14. 6. Workstation Setup You need the folder to...IP Address from the [Protocol Settings] screen. Using the same method as in step 7, enter the Subnet Mask. 10. Using the same method as in step 7, enter the Subnet Mask. Select a method for the folder. Refer...

System Administration Guide
Page 140
...IP - Gateway Address], then [Change Settings]. 11. IP Filter], then [Change Settings]. 13. Domain Name 140 Xerox CopyCentre/WorkCentre/WorkCentre Pro 123/128/133 System Administration Guide Select [TCP/IP - Subnet Mask], then [Change Settings]. 9. NOTE: ...to use the IP filter feature, select [Off]. Using the same method as in step 7, enter the Subnet Mask. 10. Finally, set the Gateway Address, enter "0.0.0.0". 12. Select the following items, then [Change Settings]. • [... the DHCP server together with the Windows Internet Name Server (WINS) server. 14 Internet Fax 5.
...IP - Gateway Address], then [Change Settings]. 11. IP Filter], then [Change Settings]. 13. Domain Name 140 Xerox CopyCentre/WorkCentre/WorkCentre Pro 123/128/133 System Administration Guide Select [TCP/IP - Subnet Mask], then [Change Settings]. 9. NOTE: ...to use the IP filter feature, select [Off]. Using the same method as in step 7, enter the Subnet Mask. 10. Finally, set the Gateway Address, enter "0.0.0.0". 12. Select the following items, then [Change Settings]. • [... the DHCP server together with the Windows Internet Name Server (WINS) server. 14 Internet Fax 5.

User Guide
Page 146
...2: Add-CR (Appends a CR to LF and FF) 3: CR-XX (Appends a CR to LF and FF, and LF to CR) 146 Xerox CopyCentre/WorkCentre/WorkCentre Pro 123/128/133 User Guide 8 Print Parameter Item No. Value Symbol Set Font Size Font Pitch Form Line Print Sets Image Enhance 208 0 (... 8 1: ISO 8859-1 Latin 1 2: ISO 8859-2 Latin 2 3: ISO 8859-9 Latin 5 4: ISO 8859-10 Latin 6 5: PC-8 6: PC-8 DN 7: PC-775 8: PC-850 9: PC-852 10: PC-1004 (OS/2) 11: PC Turkish 12: Windows 3.1 Latin 1 13: Windows 3.1 Latin 2 14: Windows 3.1 Latin 5 15: DeskTop 16: PS Text 17: MC Text 18: Microsoft Publishing 19: Math 8 20...
...2: Add-CR (Appends a CR to LF and FF) 3: CR-XX (Appends a CR to LF and FF, and LF to CR) 146 Xerox CopyCentre/WorkCentre/WorkCentre Pro 123/128/133 User Guide 8 Print Parameter Item No. Value Symbol Set Font Size Font Pitch Form Line Print Sets Image Enhance 208 0 (... 8 1: ISO 8859-1 Latin 1 2: ISO 8859-2 Latin 2 3: ISO 8859-9 Latin 5 4: ISO 8859-10 Latin 6 5: PC-8 6: PC-8 DN 7: PC-775 8: PC-850 9: PC-852 10: PC-1004 (OS/2) 11: PC Turkish 12: Windows 3.1 Latin 1 13: Windows 3.1 Latin 2 14: Windows 3.1 Latin 5 15: DeskTop 16: PS Text 17: MC Text 18: Microsoft Publishing 19: Math 8 20...

User Guide
Page 149
...Internet Explorer 6.0 SP1 Netscape 7.1 Internet Explorer 6.0 SP1 Netscape 7.1 Internet Explorer 5.1 Netscape 7.02 Internet Explorer 5.2 Netscape 7.02 Xerox CopyCentre/WorkCentre/WorkCentre Pro 123/128/133 User Guide 149 Some of the CentreWare Internet Services feature, refer to check each job and the machine ...OS) and web browsers that can also configure a job template using this program. OS Windows 98SE Windows Me Windows NT4.0 Windows 2000 Windows XP Windows Server 2003 Mac OS 8.x-9.x Mac OS X 10.2.6 Web Browsers Internet Explorer 5.5 SP2, 6.0 SP1 Netscape 7 NOTE: Activating two or ...
...Internet Explorer 6.0 SP1 Netscape 7.1 Internet Explorer 6.0 SP1 Netscape 7.1 Internet Explorer 5.1 Netscape 7.02 Internet Explorer 5.2 Netscape 7.02 Xerox CopyCentre/WorkCentre/WorkCentre Pro 123/128/133 User Guide 149 Some of the CentreWare Internet Services feature, refer to check each job and the machine ...OS) and web browsers that can also configure a job template using this program. OS Windows 98SE Windows Me Windows NT4.0 Windows 2000 Windows XP Windows Server 2003 Mac OS 8.x-9.x Mac OS X 10.2.6 Web Browsers Internet Explorer 5.5 SP2, 6.0 SP1 Netscape 7 NOTE: Activating two or ...

User Guide
Page 185
... in dry conditions, away from extreme heat or cold, such as radiators or open windows. • Store paper flat on a shelf or pallet above floor level. •... 215.9 SEF LEF 7.25 × 10.5" 184.2 266.7 SEF LEF Tray 1, 2/Tray 3, 4 (Two Tray Module) X O X O O O X X O O O O X X O Tray 3, 4 Tray 5 (TTM) (Bypass) Duplex Module Finisher X O X X X O O X X O O X X O O O O O O O X O O O X O O X X O O X X O O X O O O O X O O O X O O X X O O X X O O X O O O O Xerox CopyCentre/WorkCentre/WorkCentre Pro 123/128/133 User Guide 185 For...
... in dry conditions, away from extreme heat or cold, such as radiators or open windows. • Store paper flat on a shelf or pallet above floor level. •... 215.9 SEF LEF 7.25 × 10.5" 184.2 266.7 SEF LEF Tray 1, 2/Tray 3, 4 (Two Tray Module) X O X O O O X X O O O O X X O Tray 3, 4 Tray 5 (TTM) (Bypass) Duplex Module Finisher X O X X X O O X X O O X X O O O O O O O X O O O X O O X X O O X X O O X O O O O X O O O X O O X X O O X X O O X O O O O Xerox CopyCentre/WorkCentre/WorkCentre Pro 123/128/133 User Guide 185 For...

PostScript® User Guide
Page 3
Table of Contents 1 Checking the PostScript® Kit Contents 7 2 Operation with Windows 95/98/Me 9 About the Software 9 Bundled Software 9 Hardware/Software Requirements 9 Computer System 10 Basic Software 10 Installing the Adobe PostScript Printer Driver 10 Installation Procedure 10 If you click Disagree in the License Agreement 11 Printer Driver Properties 11 Configuration ...Settings 21 Advanced Tab Settings 22 Settings 23 Output Settings Tab Settings 24 Job Type 25 Settings 26 How to Use Help 26 Xerox WorkCentre/WorkCentre Pro 123/128/133 PostScript® User Guide 3
Table of Contents 1 Checking the PostScript® Kit Contents 7 2 Operation with Windows 95/98/Me 9 About the Software 9 Bundled Software 9 Hardware/Software Requirements 9 Computer System 10 Basic Software 10 Installing the Adobe PostScript Printer Driver 10 Installation Procedure 10 If you click Disagree in the License Agreement 11 Printer Driver Properties 11 Configuration ...Settings 21 Advanced Tab Settings 22 Settings 23 Output Settings Tab Settings 24 Job Type 25 Settings 26 How to Use Help 26 Xerox WorkCentre/WorkCentre Pro 123/128/133 PostScript® User Guide 3

PostScript® User Guide
Page 10
... as an example. If you are using a different drive for Windows 98, as the CD-ROM drive. Type a name for the printer and specify whether you want to the computer. Installation begins. 10 Xerox WorkCentre/WorkCentre Pro 123/128/133 PostScript® User Guide Select [Local printer]... when the printer is connected to print a test page, then click [Finish]. You can operate. Start Windows 98. 2. Select how the printer is connected...
... as an example. If you are using a different drive for Windows 98, as the CD-ROM drive. Type a name for the printer and specify whether you want to the computer. Installation begins. 10 Xerox WorkCentre/WorkCentre Pro 123/128/133 PostScript® User Guide Select [Local printer]... when the printer is connected to print a test page, then click [Finish]. You can operate. Start Windows 98. 2. Select how the printer is connected...

PostScript® User Guide
Page 19
...directions on page 19 to configure the printer. See How to Use Help on the File menu. Xerox WorkCentre/WorkCentre Pro 123/128/133 PostScript® User Guide 19 Select your CD-ROM in the Printers window, but the printer driver is added to the printer driver properties dialog box. Select [Not shared]...click [Properties] on page 26. Specify whether or not to cancel the installation. Remove the CD-ROM from the Printers list and click [Next]. 10. Store your printer model from the drive. The Re-installation tab is not installed properly. When you click Disagree in the Printers...
...directions on page 19 to configure the printer. See How to Use Help on the File menu. Xerox WorkCentre/WorkCentre Pro 123/128/133 PostScript® User Guide 19 Select your CD-ROM in the Printers window, but the printer driver is added to the printer driver properties dialog box. Select [Not shared]...click [Properties] on page 26. Specify whether or not to cancel the installation. Remove the CD-ROM from the Printers list and click [Next]. 10. Store your printer model from the drive. The Re-installation tab is not installed properly. When you click Disagree in the Printers...


