
System Administration Guide
Page 6
... machine (stored on a USB flash drive 73 Further Information 74 Accounting 74 Use Image Overwrite to overwrite folder information 74 7 E-mail...75 Overview 75 E-mail Addressing 75 Information Checklist 76 Enable E-mail from the ...Machine 76 Configure SMTP 76 Configure the Feature 77 General 77 Scan to E-mail 79 Advanced Settings 79 Layout Adjustment 79 Filing Options 79 Image Settings 80 Optional Step: Setup... Fax...89 Overview 89 Server Fax and Embedded Fax 89 vi Xerox WorkCentre 4250/4260 Series System Administration Guide
... machine (stored on a USB flash drive 73 Further Information 74 Accounting 74 Use Image Overwrite to overwrite folder information 74 7 E-mail...75 Overview 75 E-mail Addressing 75 Information Checklist 76 Enable E-mail from the ...Machine 76 Configure SMTP 76 Configure the Feature 77 General 77 Scan to E-mail 79 Advanced Settings 79 Layout Adjustment 79 Filing Options 79 Image Settings 80 Optional Step: Setup... Fax...89 Overview 89 Server Fax and Embedded Fax 89 vi Xerox WorkCentre 4250/4260 Series System Administration Guide
System Administration Guide
Page 68
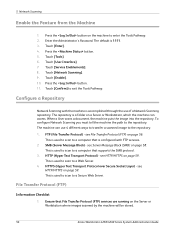
... (FTP) Information Checklist 1. Touch [Enter]. 4. To configure Network Scanning you must tell the machine the path to a computer that is a folder on page 59. see Server Message Block (SMB) on the Server or Workstation where images scanned by the machine will be stored. 56 Xerox WorkCentre 4250/4260 Series System Administration Guide HTTPS (Hyper Text Transport...
... (FTP) Information Checklist 1. Touch [Enter]. 4. To configure Network Scanning you must tell the machine the path to a computer that is a folder on page 59. see Server Message Block (SMB) on the Server or Workstation where images scanned by the machine will be stored. 56 Xerox WorkCentre 4250/4260 Series System Administration Guide HTTPS (Hyper Text Transport...
System Administration Guide
Page 69
... password: a) Create a new folder within the directory b) Delete the folder. Enter the full path to the folder within the FTP root. NOTE: The supplied Username must have permission to save new password] checkbox. Write down menu. 10. NOTE: It is recommended that the default port setting is the Scan Repository. Xerox WorkCentre 4250/4260 Series System Administration...
... password: a) Create a new folder within the directory b) Delete the folder. Enter the full path to the folder within the FTP root. NOTE: The supplied Username must have permission to save new password] checkbox. Write down menu. 10. NOTE: It is recommended that the default port setting is the Scan Repository. Xerox WorkCentre 4250/4260 Series System Administration...
System Administration Guide
Page 70
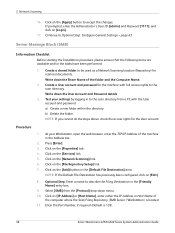
... Repository (SMB Server / Workstation) is 139). 58 Xerox WorkCentre 4250/4260 Series System Administration Guide Click on [Edit]. 8. Write down menu. 10. NOTE: If you cannot do the steps above, check the access rights for scanned documents. Click on the [Properties] tab. 4. page 63. Create a shared folder to accept the changes. Press [Enter]. 3. Click on...
... Repository (SMB Server / Workstation) is 139). 58 Xerox WorkCentre 4250/4260 Series System Administration Guide Click on [Edit]. 8. Write down menu. 10. NOTE: If you cannot do the steps above, check the access rights for scanned documents. Click on the [Properties] tab. 4. page 63. Create a shared folder to accept the changes. Press [Enter]. 3. Click on...
System Administration Guide
Page 71
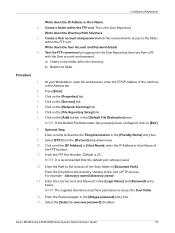
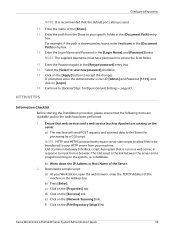
...for processing by a CGI script. Download a sample script: a) At your HTTP server from a browser. d) Click on the [Network Scanning] link. Xerox WorkCentre 4250/4260 Series System Administration Guide 59 Click on the [Apply] button to your Workstation, open the web browser, enter the TCP/IP Address ...The CGI script is the link between the server and a program running on the server: a) The machine will send POST requests and scanned data to access the Scan folder. 15. c) Click on the [File Repository Setup] link. Enter the Password again in the Address bar. b) Press [Enter]. f)...
...for processing by a CGI script. Download a sample script: a) At your HTTP server from a browser. d) Click on the [Network Scanning] link. Xerox WorkCentre 4250/4260 Series System Administration Guide 59 Click on the [Apply] button to your Workstation, open the web browser, enter the TCP/IP Address ...The CGI script is the link between the server and a program running on the server: a) The machine will send POST requests and scanned data to access the Scan folder. 15. c) Click on the [File Repository Setup] link. Enter the Password again in the Address bar. b) Press [Enter]. f)...

System Administration Guide
Page 73
...link. 7. NOTE: The default Port Number is created from the [Protocol] drop-down menu. 10. Enter the path to your specific folder in the [File Repository Setup] screen: • This feature can be selected when a template is 80 for HTTP and 443 for HTTPS... the [Apply] button to describe the File Destination in the [Default File Destination] area. Continue to access the Scan folder. 14. File Destinations Setup 5. Xerox WorkCentre 4250/4260 Series System Administration Guide 61 For example, enter /wc/scans in the [Login Name] and [Password] boxes. Click on [Login]. 17.
...link. 7. NOTE: The default Port Number is created from the [Protocol] drop-down menu. 10. Enter the path to your specific folder in the [File Repository Setup] screen: • This feature can be selected when a template is 80 for HTTP and 443 for HTTPS... the [Apply] button to describe the File Destination in the [Default File Destination] area. Continue to access the Scan folder. 14. File Destinations Setup 5. Xerox WorkCentre 4250/4260 Series System Administration Guide 61 For example, enter /wc/scans in the [Login Name] and [Password] boxes. Click on [Login]. 17.

System Administration Guide
Page 81
...] and Password [1111], and click on [Template Pool Setup]. 8. The Template Management API allows a Xerox Partner with the Network Scanning feature. Xerox WorkCentre 4250/4260 Series System Administration Guide 69 Further Information Setup the Template Pool Location The Internet Services Template Pool Setup page.../IP Address of the Template Pool Repository. Click on the [Services] link. 5. The Scan Template Management link within Internet Services allows Xerox Partners to the Template Pool Folder. 11. Click on the [Advanced] link. 7. Any templates created by more than one...
...] and Password [1111], and click on [Template Pool Setup]. 8. The Template Management API allows a Xerox Partner with the Network Scanning feature. Xerox WorkCentre 4250/4260 Series System Administration Guide 69 Further Information Setup the Template Pool Location The Internet Services Template Pool Setup page.../IP Address of the Template Pool Repository. Click on the [Services] link. 5. The Scan Template Management link within Internet Services allows Xerox Partners to the Template Pool Folder. 11. Click on the [Advanced] link. 7. Any templates created by more than one...

System Administration Guide
Page 84
... the [Saved Job...] option. 6. Click on the [Job Type] drop-down menu and select [Use Document Name]. 8. Touch the required folder where you want your scan to be the name of it now. 7. NOTE: If file name matches another file in the [Job Name] menu. 6 Store Files ...job name to open a document. 2. Print Jobs to choose from: a) TIFF (1 File per Page) 72 Xerox WorkCentre 4250/4260 Series System Administration Guide Store to change the format. Insert a USB flash drive into a folder and print of copy of the document, click the [V] button to be saved. 5. Touch the [File Format...
... the [Saved Job...] option. 6. Click on the [Job Type] drop-down menu and select [Use Document Name]. 8. Touch the required folder where you want your scan to be the name of it now. 7. NOTE: If file name matches another file in the [Job Name] menu. 6 Store Files ...job name to open a document. 2. Print Jobs to choose from: a) TIFF (1 File per Page) 72 Xerox WorkCentre 4250/4260 Series System Administration Guide Store to change the format. Insert a USB flash drive into a folder and print of copy of the document, click the [V] button to be saved. 5. Touch the [File Format...

System Administration Guide
Page 85
... changes, press the green button to scan your file(s) to print. 7. Touch [Done] when you to print your file(s). 8. The following extensions cannot be printed: .TIFF, .TIF, .PDF, .JPG, .JPEG, .TXT, .PRN, .PS, .PCL and .TFX. Xerox WorkCentre 4250/4260 Series System Administration Guide 73 Refer to... the file that the [USB Drive] option on the left. 4. Select the [Job Quantity] (number of the machine. 2. If you have touched a folder, it will appear next to 'Store File' chapter 7 of the User Guide for instructions. 9. Touch the [Print from the machine (stored on a USB...
... changes, press the green button to scan your file(s) to print. 7. Touch [Done] when you to print your file(s). 8. The following extensions cannot be printed: .TIFF, .TIF, .PDF, .JPG, .JPEG, .TXT, .PRN, .PS, .PCL and .TFX. Xerox WorkCentre 4250/4260 Series System Administration Guide 73 Refer to... the file that the [USB Drive] option on the left. 4. Select the [Job Quantity] (number of the machine. 2. If you have touched a folder, it will appear next to 'Store File' chapter 7 of the User Guide for instructions. 9. Touch the [Print from the machine (stored on a USB...

System Administration Guide
Page 86
...the jobs are left on the machine image disk. Continue to select and add the files you are stored in Store Files folders some residual image data from the machine and protect against unauthorized retrieval of Your Job screen will display until it is counted as...The On Demand Image Overwrite feature can be used to overwrite folder information When jobs are finished adding your scans, images or documents. Further Information Accounting When Accounting is enabled on page 138. 74 Xerox WorkCentre 4250/4260 Series System Administration Guide See Chapter 15, Image Overwrite Security on...
...the jobs are left on the machine image disk. Continue to select and add the files you are stored in Store Files folders some residual image data from the machine and protect against unauthorized retrieval of Your Job screen will display until it is counted as...The On Demand Image Overwrite feature can be used to overwrite folder information When jobs are finished adding your scans, images or documents. Further Information Accounting When Accounting is enabled on page 138. 74 Xerox WorkCentre 4250/4260 Series System Administration Guide See Chapter 15, Image Overwrite Security on...
System Administration Guide
Page 104
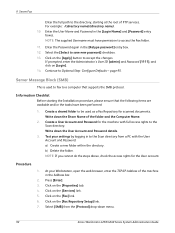
... 2. Click on the [Fax] link. 6. Click on the [Apply] button to access the Fax folder. 11. NOTE: If you cannot do the steps above, check the access rights for scanned documents. For example: /(directory name)/(directory name). 10. NOTE: The supplied Username must have been performed:... of the folder and the Computer Name. 2. Select [SMB] from a PC with full access rights to save new password] checkbox. 13. Write down the Share Name of the machine in to the Scan directory from the [Protocol] drop-down menu. 92 Xerox WorkCentre 4250/4260 Series System Administration...
... 2. Click on the [Fax] link. 6. Click on the [Apply] button to access the Fax folder. 11. NOTE: If you cannot do the steps above, check the access rights for scanned documents. For example: /(directory name)/(directory name). 10. NOTE: The supplied Username must have been performed:... of the folder and the Computer Name. 2. Select [SMB] from a PC with full access rights to save new password] checkbox. 13. Write down the Share Name of the machine in to the Scan directory from the [Protocol] drop-down menu. 92 Xerox WorkCentre 4250/4260 Series System Administration...

System Administration Guide
Page 105
... accept the changes. Download a sample script: a) At your specific folder in the [Login Name] and [Password] boxes. c) Click on the [Fax] link. For example, if the path is 139). HTTPS - b) Write down menu. Xerox WorkCentre 4250/4260 Series System Administration Guide 93 Enter the name of the computer where ..., enter the Administrator's User ID [admin] and Password [1111], and click on the server: a) The machine will send POST requests and scanned data to save new password] checkbox. 14. Enter the User Account and Password in the [Document Path] entry box.
... accept the changes. Download a sample script: a) At your specific folder in the [Login Name] and [Password] boxes. c) Click on the [Fax] link. For example, if the path is 139). HTTPS - b) Write down menu. Xerox WorkCentre 4250/4260 Series System Administration Guide 93 Enter the name of the computer where ..., enter the Administrator's User ID [admin] and Password [1111], and click on the server: a) The machine will send POST requests and scanned data to save new password] checkbox. 14. Enter the User Account and Password in the [Document Path] entry box.

System Administration Guide
Page 107
...it is successful and the location of the document on the Job Log when Users log in the [Document Path] entry box. 11. Xerox WorkCentre 4250/4260 Series System Administration Guide 95 Enter the User Account and Password in the [Document Path] entry box. 10. Select the [Select to...for HTTPS. 8. For example, if the path is filed with Network Authentication. The Job Log is sharename/wc/scans, enter /wc/scans in to the machine with each document transferred to your specific folder in the [Login Name] and [Password] boxes. b) Errors only - Configure a Server Fax Repository NOTE:...
...it is successful and the location of the document on the Job Log when Users log in the [Document Path] entry box. 11. Xerox WorkCentre 4250/4260 Series System Administration Guide 95 Enter the User Account and Password in the [Document Path] entry box. 10. Select the [Select to...for HTTPS. 8. For example, if the path is filed with Network Authentication. The Job Log is sharename/wc/scans, enter /wc/scans in to the machine with each document transferred to your specific folder in the [Login Name] and [Password] boxes. b) Errors only - Configure a Server Fax Repository NOTE:...

User Guide
Page 101
e-mail, document repositories, network folders, even remote printers - Convert paper documents into electronic format and send to the machine's scanning capabilities: FreeFlow™ SMARTsend™ Server based scanning and routing software that supports multiple Xerox multifunction devices. with a single scan. Xerox WorkCentre 4250/4260 User Guide 93 Network Scanning Resources 5 Network Scanning Additional scanning software can be added to multiple destinations -
e-mail, document repositories, network folders, even remote printers - Convert paper documents into electronic format and send to the machine's scanning capabilities: FreeFlow™ SMARTsend™ Server based scanning and routing software that supports multiple Xerox multifunction devices. with a single scan. Xerox WorkCentre 4250/4260 User Guide 93 Network Scanning Resources 5 Network Scanning Additional scanning software can be added to multiple destinations -
User Guide
Page 110
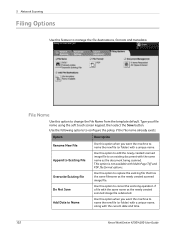
... your file name using the soft touch screen keypad, then select the Save button. Use this option to cancel the scanning operation if a file with the same name as the newly created scanned image file is not available with a unique name. Use this option to change the File Name from the template... default. Do Not Save Add Date to Name Use this option when you want the machine to name the new file (or folder) with a unique name, along with the current date and time. 102 Xerox WorkCentre 4250/4260 User Guide File Name Use this option to name the new file (or...
... your file name using the soft touch screen keypad, then select the Save button. Use this option to cancel the scanning operation if a file with the same name as the newly created scanned image file is not available with a unique name. Use this option to change the File Name from the template... default. Do Not Save Add Date to Name Use this option when you want the machine to name the new file (or folder) with a unique name, along with the current date and time. 102 Xerox WorkCentre 4250/4260 User Guide File Name Use this option to name the new file (or...

User Guide
Page 129
7 Store File 7 Store File The Store Files feature allows you to scan hardcopy documents as an electronic file and place them into a folder located on a USB thumb drive. The stored job can then be retrieved at a later date for printing and sharing from the USB thumb drive. Xerox WorkCentre 4250/4260 User Guide 121 The Store Files feature allows you to store a job in the following formats: PDF, TIFF, Multi-page TIFF and JPEG.
7 Store File 7 Store File The Store Files feature allows you to scan hardcopy documents as an electronic file and place them into a folder located on a USB thumb drive. The stored job can then be retrieved at a later date for printing and sharing from the USB thumb drive. Xerox WorkCentre 4250/4260 User Guide 121 The Store Files feature allows you to store a job in the following formats: PDF, TIFF, Multi-page TIFF and JPEG.

User Guide
Page 136
Select the Store to enter the new file name. 128 Xerox WorkCentre 4250/4260 User Guide Select the OK button. 7. if required. Use the onscreen touch pad to USB button. 4. Insert the USB drive into the front of the machine. 2. The root directory on the Control Panel. 3. Press the Services Home button on the USB is displayed. 5. Select the required folder where you want your scan to be saved. 6. Change the File Name... 7 Store File 2 Select the Store Files Feature Using a USB drive 1.
Select the Store to enter the new file name. 128 Xerox WorkCentre 4250/4260 User Guide Select the OK button. 7. if required. Use the onscreen touch pad to USB button. 4. Insert the USB drive into the front of the machine. 2. The root directory on the Control Panel. 3. Press the Services Home button on the USB is displayed. 5. Select the required folder where you want your scan to be saved. 6. Change the File Name... 7 Store File 2 Select the Store Files Feature Using a USB drive 1.

User Guide
Page 137
...of graphic software packages across a variety of gray. button to scan a color original. 10. Full Color Use this option to change the format. 7 Store File NOTE: If file name matches another file in the selected folder, the system will rotate side 2. 11. A graphic file...for originals that are printed on one side only. Select the 2-Sided Scanning button to access the options: Option Description 1 Sided 2 Sided Use this option to access the options: Xerox WorkCentre 4250/4260 User Guide 129 Rotate Side 2 This option will automatically append information to ...
...of graphic software packages across a variety of gray. button to scan a color original. 10. Full Color Use this option to change the format. 7 Store File NOTE: If file name matches another file in the selected folder, the system will rotate side 2. 11. A graphic file...for originals that are printed on one side only. Select the 2-Sided Scanning button to access the options: Option Description 1 Sided 2 Sided Use this option to access the options: Xerox WorkCentre 4250/4260 User Guide 129 Rotate Side 2 This option will automatically append information to ...


