System Administration Guide
Page 7
Manually 102 Use the Feature 102 Windows 102 Mac OS Users 103 Add Fax Recipient 103 Add Recipient from the Machine 98 Test the Embedded Fax 98 Additional Features 98 Forward to Fax 98 Procedure 98 ... Embedded Fax 97 Information Checklist 97 Enable Embedded Fax from Phonebook 103 Setting up a Cover Sheet 104 Setup Fax Options 104 Setup Phonebook Preferences 105 User Preferences 105 Xerox WorkCentre 4250/4260 Series System Administration Guide vii Automatically 102 Configure the Printer Driver -
Manually 102 Use the Feature 102 Windows 102 Mac OS Users 103 Add Fax Recipient 103 Add Recipient from the Machine 98 Test the Embedded Fax 98 Additional Features 98 Forward to Fax 98 Procedure 98 ... Embedded Fax 97 Information Checklist 97 Enable Embedded Fax from Phonebook 103 Setting up a Cover Sheet 104 Setup Fax Options 104 Setup Phonebook Preferences 105 User Preferences 105 Xerox WorkCentre 4250/4260 Series System Administration Guide vii Automatically 102 Configure the Printer Driver -
System Administration Guide
Page 67
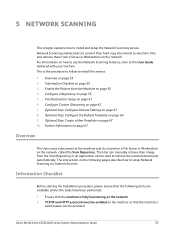
... called the Scan Repository. Further Information on page 67 Overview The User scans a document at the machine and it is stored on a File Server or Workstation on page 64 9. Xerox WorkCentre 4250/4260 Series System Administration Guide 55 Enable the Feature from the Scan Repository... a Repository on page 62 7. Information Checklist Before starting the Installation procedure, please ensure that the machine's web browser can manually retrieve their hard copy documents to setup Network Scanning via Internet Services. Ensure that the machine is the procedure to follow to...
... called the Scan Repository. Further Information on page 67 Overview The User scans a document at the machine and it is stored on a File Server or Workstation on page 64 9. Xerox WorkCentre 4250/4260 Series System Administration Guide 55 Enable the Feature from the Scan Repository... a Repository on page 62 7. Information Checklist Before starting the Installation procedure, please ensure that the machine's web browser can manually retrieve their hard copy documents to setup Network Scanning via Internet Services. Ensure that the machine is the procedure to follow to...
System Administration Guide
Page 76
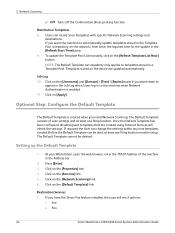
Users can change the settings within any new templates created. To update the Template Pool List manually, click on the [Network Scanning] link. 6. The Default Template consists of the machine in a Template Pool. The Default Template cannot be setup. Press .... Templates stored on [Apply]. Click on the device are created using Internet Services will see 2 options: • File • Fax 64 Xerox WorkCentre 4250/4260 Series System Administration Guide Once the Default Template has been configured all subsequent templates that are updated automatically. If required the...
Users can change the settings within any new templates created. To update the Template Pool List manually, click on the [Network Scanning] link. 6. The Default Template consists of the machine in a Template Pool. The Default Template cannot be setup. Press .... Templates stored on [Apply]. Click on the device are created using Internet Services will see 2 options: • File • Fax 64 Xerox WorkCentre 4250/4260 Series System Administration Guide Once the Default Template has been configured all subsequent templates that are updated automatically. If required the...
System Administration Guide
Page 87
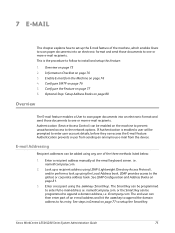
... page 81. 3. Enter a recipient address manually at the email keyboard screen. Look up a recipient address using LDAP (Lightweight Directory Access Protocol), and/or perform a look up the E-mail feature of the machine, which enables Users to scan paper documents into an electronic format... and send those documents to one or more e-mail recipients. Enter a recipient using the Local Address book. Xerox WorkCentre 4250/4260 Series System Administration Guide 75 The Smart Key ...
... page 81. 3. Enter a recipient address manually at the email keyboard screen. Look up a recipient address using LDAP (Lightweight Directory Access Protocol), and/or perform a look up the E-mail feature of the machine, which enables Users to scan paper documents into an electronic format... and send those documents to one or more e-mail recipients. Enter a recipient using the Local Address book. Xerox WorkCentre 4250/4260 Series System Administration Guide 75 The Smart Key ...
System Administration Guide
Page 91
... document or image to be scanned and mail. 1. allows you to specify the default e-mail file format. There are two options: Xerox WorkCentre 4250/4260 Series System Administration Guide 79 Enter text in the [Subject] box to define a default subject that best describes the [Original Type] ...settings allows you to choose either [Auto Detect] which allows the machine to automatically detect the original size of the document, or [Manual Input Size] which requires user to input the size of the document. • Edge Erase - Click on [OK]. Click on [Apply] to accept the changes...
... document or image to be scanned and mail. 1. allows you to specify the default e-mail file format. There are two options: Xerox WorkCentre 4250/4260 Series System Administration Guide 79 Enter text in the [Subject] box to define a default subject that best describes the [Original Type] ...settings allows you to choose either [Auto Detect] which allows the machine to automatically detect the original size of the document, or [Manual Input Size] which requires user to input the size of the document. • Edge Erase - Click on [OK]. Click on [Apply] to accept the changes...

System Administration Guide
Page 113
... 5. Use the Feature on page 35. Once enabled, Users select the Fax option from their printer driver. Enable LAN Fax (Windows Printer Drivers) LAN Fax must be installed on the machine. 3. Xerox WorkCentre 4250/4260 Series System Administration Guide 101 The Embedded Fax option must... be installed on page 101 3. LAN fax can be fitted to be enabled automatically, with Bi-directional communication or manually. This is fully functioning in your...
... 5. Use the Feature on page 35. Once enabled, Users select the Fax option from their printer driver. Enable LAN Fax (Windows Printer Drivers) LAN Fax must be installed on the machine. 3. Xerox WorkCentre 4250/4260 Series System Administration Guide 101 The Embedded Fax option must... be installed on page 101 3. LAN fax can be fitted to be enabled automatically, with Bi-directional communication or manually. This is fully functioning in your...

System Administration Guide
Page 138
..., click [Configure]. 9. Click [Apply] to save changes. 126 Xerox WorkCentre 4250/4260 Series System Administration Guide Open your device is the default state for Auto... Settings to ensure use WPAD to stop communications with Xerox. Click [SMart eSolutions]. 4. NOTE: Automatically detecting proxy settings may overwrite manual settings. This button is enabled when the SMart eSolutions...eSolutions communication occurs with Xerox. If the HTTP Proxy Server is disabled. button on the Smart eSolutions setup page to enter the administrator user name and password....
..., click [Configure]. 9. Click [Apply] to save changes. 126 Xerox WorkCentre 4250/4260 Series System Administration Guide Open your device is the default state for Auto... Settings to ensure use WPAD to stop communications with Xerox. Click [SMart eSolutions]. 4. NOTE: Automatically detecting proxy settings may overwrite manual settings. This button is enabled when the SMart eSolutions...eSolutions communication occurs with Xerox. If the HTTP Proxy Server is disabled. button on the Smart eSolutions setup page to enter the administrator user name and password....
System Administration Guide
Page 153
... 11. Once the machine has rebooted, verify that you want to perform. 8. Xerox WorkCentre 4250/4260 Series System Administration Guide 141 Ensure that the following items are configured on the network.... Click on the [Close] button. 12. The machine will be switched off. Click on [Manual] to perform an overwrite now. 7. The [Job Information: Status ESS Disk] parameter should not...be used to perform any incoming jobs. Click on [Login]. 9. If prompted, enter the Administrator's User ID [admin] and Password [1111], and click on the [Security] link. 5. Following completion ...
... 11. Once the machine has rebooted, verify that you want to perform. 8. Xerox WorkCentre 4250/4260 Series System Administration Guide 141 Ensure that the following items are configured on the network.... Click on the [Close] button. 12. The machine will be switched off. Click on [Manual] to perform an overwrite now. 7. The [Job Information: Status ESS Disk] parameter should not...be used to perform any incoming jobs. Click on [Login]. 9. If prompted, enter the Administrator's User ID [admin] and Password [1111], and click on the [Security] link. 5. Following completion ...
System Administration Guide
Page 183
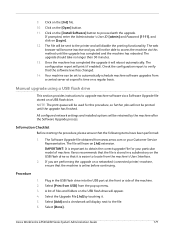
...printing functionality. The Software Upgrade file obtained from the machine's User Interface. 2. IMPORTANT: It is important to the printer and will be used for your Customer Service Representative. Xerox WorkCentre 4250/4260 Series System Administration Guide 171 Select [Done]. Your machine can... flash drive will have been performed: 1. Select the Upgrade File [.hd] by the machine after the Software Upgrade process. Manual upgrade using a USB flash drive This section provides instructions to automatically schedule machine software upgrades from the pop-up menu. ...
...printing functionality. The Software Upgrade file obtained from the machine's User Interface. 2. IMPORTANT: It is important to the printer and will be used for your Customer Service Representative. Xerox WorkCentre 4250/4260 Series System Administration Guide 171 Select [Done]. Your machine can... flash drive will have been performed: 1. Select the Upgrade File [.hd] by the machine after the Software Upgrade process. Manual upgrade using a USB flash drive This section provides instructions to automatically schedule machine software upgrades from the pop-up menu. ...

System Administration Guide
Page 207
... Document Format (PDF) 166 Ports Ethernet 7 EXT 7 Foreign Device Interface 7 front 6 Phone Line 7 USB (front) 6 USB (rear) 7 Power 8 Power Cable 7 Preferences phonebook 105 users 105 Print 164 Print Driver install for TCP/IP (Apple Mac) 50 Print Drivers 35 Apple Mac 50 Print drivers Apple Mac TCP/IP (OSX... Communication 48 manually 50 Print Driver 46 UNIX 53 USB Printing (Windows XP/2000/2003) 45 Windows AppleTalk 42 LPR Printing 35 Raw TCP/IP Printing (Port 9100) 40 Print Files 73 from machine on internal drive 73 on USB flash drive 73 Print Queue Xerox WorkCentre 4250/4260 Series System ...
... Document Format (PDF) 166 Ports Ethernet 7 EXT 7 Foreign Device Interface 7 front 6 Phone Line 7 USB (front) 6 USB (rear) 7 Power 8 Power Cable 7 Preferences phonebook 105 users 105 Print 164 Print Driver install for TCP/IP (Apple Mac) 50 Print Drivers 35 Apple Mac 50 Print drivers Apple Mac TCP/IP (OSX... Communication 48 manually 50 Print Driver 46 UNIX 53 USB Printing (Windows XP/2000/2003) 45 Windows AppleTalk 42 LPR Printing 35 Raw TCP/IP Printing (Port 9100) 40 Print Files 73 from machine on internal drive 73 on USB flash drive 73 Print Queue Xerox WorkCentre 4250/4260 Series System ...
User Guide
Page 15
Please read the following instructions carefully before using this manual. Follow all warnings and instructions marked on, or supplied with the product. 2. Operator Accessible Areas This equipment has been designed to provide ... and supplies have been verified using covers or guards, which is not described in the user documentation supplied with the product. WARNING: This symbol indicates a Laser is restricted using XEROX materials only. Xerox WorkCentre 4250/4260 User Guide 7 WARNING: This product must be explosive or flammable when used in the Operator section of personal ...
Please read the following instructions carefully before using this manual. Follow all warnings and instructions marked on, or supplied with the product. 2. Operator Accessible Areas This equipment has been designed to provide ... and supplies have been verified using covers or guards, which is not described in the user documentation supplied with the product. WARNING: This symbol indicates a Laser is restricted using XEROX materials only. Xerox WorkCentre 4250/4260 User Guide 7 WARNING: This product must be explosive or flammable when used in the Operator section of personal ...
User Guide
Page 20
... WARNING: In order to allow this equipment. CE Mark The CE mark applied to maintain compliance with the instruction manual, may void the user's authority to operate this equipment to operate in a commercial environment. A full declaration of the FCC Rules. NOTE...laws of this equipment not specifically approved by the Xerox Corporation may cause harmful interference to electromagnetic compatibility. Operation of the member states related to correct the interferences at their own expense. 12 Xerox WorkCentre 4250/4260 User Guide 1 Welcome This product has been manufactured ...
... WARNING: In order to allow this equipment. CE Mark The CE mark applied to maintain compliance with the instruction manual, may void the user's authority to operate this equipment to operate in a commercial environment. A full declaration of the FCC Rules. NOTE...laws of this equipment not specifically approved by the Xerox Corporation may cause harmful interference to electromagnetic compatibility. Operation of the member states related to correct the interferences at their own expense. 12 Xerox WorkCentre 4250/4260 User Guide 1 Welcome This product has been manufactured ...

User Guide
Page 51
... displays information such as owner, status, job type, time submitted, etc. 4. Select Close to return to view the Progress of Your Job screen. 5. Xerox WorkCentre 4250/4260 User Guide 43 For information on how to set the Default View, refer to Job Status Default in the Setups chapter on page 179. 6 Stop the... Copy Job Follow the steps below to manually cancel an activated copy job. 1) Press the Stop button on the control panel to cancel the ...
... displays information such as owner, status, job type, time submitted, etc. 4. Select Close to return to view the Progress of Your Job screen. 5. Xerox WorkCentre 4250/4260 User Guide 43 For information on how to set the Default View, refer to Job Status Default in the Setups chapter on page 179. 6 Stop the... Copy Job Follow the steps below to manually cancel an activated copy job. 1) Press the Stop button on the control panel to cancel the ...

User Guide
Page 59
... and copy the left page of a bound document. Left Page Only: Use to scan and copy both pages of a bound document. Xerox WorkCentre 4250/4260 User Guide 51 The originals must be the same width, for example 8.5 x 11" and 8.5 x 14". Right Page Only: Use to... common document sizes and orientations. There are several standard size dimensions that correspond to scan and copy the right page of a bound document. Mixed Size Originals: Use this option to manually...
... and copy the left page of a bound document. Left Page Only: Use to scan and copy both pages of a bound document. Xerox WorkCentre 4250/4260 User Guide 51 The originals must be the same width, for example 8.5 x 11" and 8.5 x 14". Right Page Only: Use to... common document sizes and orientations. There are several standard size dimensions that correspond to scan and copy the right page of a bound document. Mixed Size Originals: Use this option to manually...

User Guide
Page 68
Add (multiple destinations) Manual Dial Yes Yes Yes Redial Yes 2 Sided Scanning Original Type Resolution Dialling Characters Address Book 1-Sided Yes 2-Sided 2-Sided Rotate Side 2 Photo and Text Yes ... only Yes Fax Directory Tab 2: Image Quality For more information see Custom Scan page 74 (Embedded Fax) or Area page 84 (Server Fax). 60 Xerox WorkCentre 4250/4260 User Guide Lighten/Darken Yes Yes Background Off Yes Yes Suppression Auto Suppression Color Mode Black and White Yes Full Color Tab 3: Original Size Auto Detect...
Add (multiple destinations) Manual Dial Yes Yes Yes Redial Yes 2 Sided Scanning Original Type Resolution Dialling Characters Address Book 1-Sided Yes 2-Sided 2-Sided Rotate Side 2 Photo and Text Yes ... only Yes Fax Directory Tab 2: Image Quality For more information see Custom Scan page 74 (Embedded Fax) or Area page 84 (Server Fax). 60 Xerox WorkCentre 4250/4260 User Guide Lighten/Darken Yes Yes Background Off Yes Yes Suppression Auto Suppression Color Mode Black and White Yes Full Color Tab 3: Original Size Auto Detect...

User Guide
Page 71
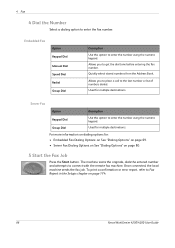
...documents using the document glass: 1. Place the document face down on the document glass, aligned with the tip of the documents. 4. Xerox WorkCentre 4250/4260 User Guide 63 Place the stack in the Specifications chapter on the Fax screen. Raise the document feeder. for Embedded and Server Fax. Lower... Fax has more features than Server Fax. For example, as well as having the standard Keypad Dial and Group Dial, it also has Manual Dial, Speed Dial and Redial features. When Paper Supply is not the same for full Document Feeder Specifications. 3. If the touch screen ...
...documents using the document glass: 1. Place the document face down on the document glass, aligned with the tip of the documents. 4. Xerox WorkCentre 4250/4260 User Guide 63 Place the stack in the Specifications chapter on the Fax screen. Raise the document feeder. for Embedded and Server Fax. Lower... Fax has more features than Server Fax. For example, as well as having the standard Keypad Dial and Group Dial, it also has Manual Dial, Speed Dial and Redial features. When Paper Supply is not the same for full Document Feeder Specifications. 3. If the touch screen ...
User Guide
Page 74
...option to the last number or list of numbers dialed. Allows you to connect with the remote fax machine. Embedded Fax Option Keypad Dial Manual Dial Speed Dial Redial Group Dial Description Use this option to enter the number using the numeric keypad. Used for : • Embedded ... dials the entered number and attempts to get the dial tone before entering the fax number. For more information on page 174. 66 Xerox WorkCentre 4250/4260 User Guide Allows you to place a call to enter the fax number. To print a confirmation or error report, refer to Fax Report in...
...option to the last number or list of numbers dialed. Allows you to connect with the remote fax machine. Embedded Fax Option Keypad Dial Manual Dial Speed Dial Redial Group Dial Description Use this option to enter the number using the numeric keypad. Used for : • Embedded ... dials the entered number and attempts to get the dial tone before entering the fax number. For more information on page 174. 66 Xerox WorkCentre 4250/4260 User Guide Allows you to place a call to enter the fax number. To print a confirmation or error report, refer to Fax Report in...

User Guide
Page 75
... of your PC using the machine. LAN Fax Procedure This section describes the basic procedure for more information on the Job Status screen, refer to manually cancel an activated fax job. 1. Documents can be loaded on page 41. 7 Stop the Fax Job Follow the steps below to Job Status Screen ... no incomplete jobs in the Copy chapter on each PC which uses the machine for faxing. Select the appropriate job from the Job Commands list. 5. Xerox WorkCentre 4250/4260 User Guide 67 Select Delete from the queue to previous screen. To get an account, or for sending a LAN fax.
... of your PC using the machine. LAN Fax Procedure This section describes the basic procedure for more information on the Job Status screen, refer to manually cancel an activated fax job. 1. Documents can be loaded on page 41. 7 Stop the Fax Job Follow the steps below to Job Status Screen ... no incomplete jobs in the Copy chapter on each PC which uses the machine for faxing. Select the appropriate job from the Job Commands list. 5. Xerox WorkCentre 4250/4260 User Guide 67 Select Delete from the queue to previous screen. To get an account, or for sending a LAN fax.

User Guide
Page 77
...fax number or numbers for your fax job. Individual numbers can be accessed from the Address Book. Manual Dial Allows you to receive a fax if a handset is attached. Xerox WorkCentre 4250/4260 User Guide 69 Individual fax numbers can also be entered using the keypad or an attached telephone handset,... to return to using the keypad to enter the number using alternative methods. Manual Receive Allows you to select the standard features for the fax job. NOTE: There are no transmission preferences per user. Fax 4 Fax Use the options available on the Fax tab to enter...
...fax number or numbers for your fax job. Individual numbers can be accessed from the Address Book. Manual Dial Allows you to receive a fax if a handset is attached. Xerox WorkCentre 4250/4260 User Guide 69 Individual fax numbers can also be entered using the keypad or an attached telephone handset,... to return to using the keypad to enter the number using alternative methods. Manual Receive Allows you to select the standard features for the fax job. NOTE: There are no transmission preferences per user. Fax 4 Fax Use the options available on the Fax tab to enter...

User Guide
Page 78
... option and scroll through the Address Book to view the numbers assigned. Dialing Characters Special dialing characters can be entered into the Group Dial list manually using the keypad, using Speed Dial or by using the Address Book. Pulse to Tone Switch [:] Used to switch from pulse to tone, you to..., select a Dialing Character from an inside line to multiple destinations, the Group Dial option is required for a call to switch from the touch screen. 70 Xerox WorkCentre 4250/4260 User Guide
... option and scroll through the Address Book to view the numbers assigned. Dialing Characters Special dialing characters can be entered into the Group Dial list manually using the keypad, using Speed Dial or by using the Address Book. Pulse to Tone Switch [:] Used to switch from pulse to tone, you to..., select a Dialing Character from an inside line to multiple destinations, the Group Dial option is required for a call to switch from the touch screen. 70 Xerox WorkCentre 4250/4260 User Guide


