System Administration Guide
Page 7
Automatically 102 Configure the Printer Driver - TABLE OF CONTENTS Information Checklist 89 Insert the Feature Enablement Key 90 Enable the Server Fax from the Machine 90 Configure a Server Fax Repository 90 ... 96 10 Embedded Fax ...97 Overview 97 Server Fax and Embedded Fax 97 Information Checklist 97 Enable Embedded Fax from Phonebook 103 Setting up a Cover Sheet 104 Setup Fax Options 104 Setup Phonebook Preferences 105 User Preferences 105 Xerox WorkCentre 4250/4260 Series System Administration Guide vii Manually 102 Use the Feature 102 Windows 102...
Automatically 102 Configure the Printer Driver - TABLE OF CONTENTS Information Checklist 89 Insert the Feature Enablement Key 90 Enable the Server Fax from the Machine 90 Configure a Server Fax Repository 90 ... 96 10 Embedded Fax ...97 Overview 97 Server Fax and Embedded Fax 97 Information Checklist 97 Enable Embedded Fax from Phonebook 103 Setting up a Cover Sheet 104 Setup Fax Options 104 Setup Phonebook Preferences 105 User Preferences 105 Xerox WorkCentre 4250/4260 Series System Administration Guide vii Manually 102 Use the Feature 102 Windows 102...

System Administration Guide
Page 48
...window, expand the [Print Services] menu. 4. e) Click on the [Finish] button. 8. f) Click on the [Print Services for Unix is loaded: a) Click on the checkbox to this page. 12. When you are finished, return to enable the service. 36 Xerox WorkCentre 4250...d) Click on [Properties]. 3. If Print Services for Unix] checkbox. 10. Close the [Add/Remove Programs] window. Click on [Start], [Control Panel] and double-click on the [... Network Places] icon and click on the [OK] button. 11. 4 Print Drivers 7. Click on page 37. Follow the steps in the far left column. c) Click on ...
...window, expand the [Print Services] menu. 4. e) Click on the [Finish] button. 8. f) Click on the [Print Services for Unix is loaded: a) Click on the checkbox to this page. 12. When you are finished, return to enable the service. 36 Xerox WorkCentre 4250...d) Click on [Properties]. 3. If Print Services for Unix] checkbox. 10. Close the [Add/Remove Programs] window. Click on [Start], [Control Panel] and double-click on the [... Network Places] icon and click on the [OK] button. 11. 4 Print Drivers 7. Click on page 37. Follow the steps in the far left column. c) Click on ...

System Administration Guide
Page 49
...[Open] button. 15. Xerox WorkCentre 4250/4260 Series System Administration Guide 37 Click [Settings] then [Printers]. • Windows XP - If you cannot see this computer]. Click on the [Browse] button. 13. Windows Printing 5. Click [Printers and Faxes]. Install Printer Driver 1. Click on the [OK... Driver. Click on the CD and select the required Printer Driver file [.inf]. 14. Locate the Drivers folder on [Have Disk]. 12. Enter: • Printer name for Windows XP/2000/2003. • Print Queue name for Windows Vista. 10. Click on [Add Printer]. 3. Windows ...
...[Open] button. 15. Xerox WorkCentre 4250/4260 Series System Administration Guide 37 Click [Settings] then [Printers]. • Windows XP - If you cannot see this computer]. Click on the [Browse] button. 13. Windows Printing 5. Click [Printers and Faxes]. Install Printer Driver 1. Click on the [OK... Driver. Click on the CD and select the required Printer Driver file [.inf]. 14. Locate the Drivers folder on [Have Disk]. 12. Enter: • Printer name for Windows XP/2000/2003. • Print Queue name for Windows Vista. 10. Click on [Add Printer]. 3. Windows ...
System Administration Guide
Page 51
......]. 11. The default is 300. 10. Click on the [Local Area Connection] icon. 3. The following screen will appear. Xerox WorkCentre 4250/4260 Series System Administration Guide 39 Enter...Under the field [Name or address of Printer] enter the IP address of the printer. 9. Windows Printing 8. Right-click on the [Next] button. 8. Click on [Network Connections]. Enter ...the [Multiple Operation Timeout]. Add a Local Printer. 6. The default is 1. 11. Install Printer Driver 1. b) Click on [Properties]. 4. Ensure that [Network Printer] is selected and click on [Add...
......]. 11. The default is 300. 10. Click on the [Local Area Connection] icon. 3. The following screen will appear. Xerox WorkCentre 4250/4260 Series System Administration Guide 39 Enter...Under the field [Name or address of Printer] enter the IP address of the printer. 9. Windows Printing 8. Right-click on the [Next] button. 8. Click on [Network Connections]. Enter ...the [Multiple Operation Timeout]. Add a Local Printer. 6. The default is 1. 11. Install Printer Driver 1. b) Click on [Properties]. 4. Ensure that [Network Printer] is selected and click on [Add...
System Administration Guide
Page 52
... is a printing protocol that connections stay open the Web browser and enter the TCP/IP address of the printer driver and click on [Yes] if you restart the machine. 10. Press [Enter]. 3. NOTE: The settings are that is faster and more reliable than LPD printing. 4 Print...Raw TCP/IP Printing] in Windows 2000 and other third-party applications and operating systems. Raw TCP/IP Printing is enabled by default for multiple print files and spooling is not needed, therefore, printing is similar to make this time. 40 Xerox WorkCentre 4250/4260 Series System Administration Guide Enter...
... is a printing protocol that connections stay open the Web browser and enter the TCP/IP address of the printer driver and click on [Yes] if you restart the machine. 10. Press [Enter]. 3. NOTE: The settings are that is faster and more reliable than LPD printing. 4 Print...Raw TCP/IP Printing] in Windows 2000 and other third-party applications and operating systems. Raw TCP/IP Printing is enabled by default for multiple print files and spooling is not needed, therefore, printing is similar to make this time. 40 Xerox WorkCentre 4250/4260 Series System Administration Guide Enter...
System Administration Guide
Page 54
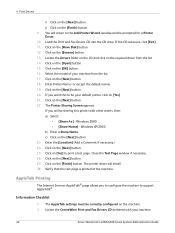
... the machine. 2. If you will be your machine. 42 Xerox WorkCentre 4250/4260 Series System Administration Guide Close the Test Page window if necessary. 26. The AppleTalk settings must be prompted for a Printer Driver. 10. The Printer Sharing Screen appears. Click on the [OK] button. 16. Windows XP/2003. If you to configure the machine to the...
... the machine. 2. If you will be your machine. 42 Xerox WorkCentre 4250/4260 Series System Administration Guide Close the Test Page window if necessary. 26. The AppleTalk settings must be prompted for a Printer Driver. 10. The Printer Sharing Screen appears. Click on the [OK] button. 16. Windows XP/2003. If you to configure the machine to the...
System Administration Guide
Page 55
Windows Printing Configure AppleTalk 1. Click the [Enabled] checkbox to reboot the machine. If prompted, enter the Administrator's User ID [admin] and Password [1111], and click on [Network Connections] Xerox WorkCentre 4250/4260 Series System Administration Guide 43 Right-click on [Start]. b) Click...bar. 2. If the AppleTalk protocol is selected. Select the required [Zone]. 10. b) Click on the [Connectivity] link. 5. The [Connection Properties] dialog box opens. 4. Install the Printer Driver 1. Click [Apply] to configure AppleTalk on, and then click on [Start]....
Windows Printing Configure AppleTalk 1. Click the [Enabled] checkbox to reboot the machine. If prompted, enter the Administrator's User ID [admin] and Password [1111], and click on [Network Connections] Xerox WorkCentre 4250/4260 Series System Administration Guide 43 Right-click on [Start]. b) Click...bar. 2. If the AppleTalk protocol is selected. Select the required [Zone]. 10. b) Click on the [Connectivity] link. 5. The [Connection Properties] dialog box opens. 4. Install the Printer Driver 1. Click [Apply] to configure AppleTalk on, and then click on [Start]....
System Administration Guide
Page 56
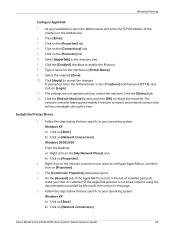
...] screen appears. It may prevent other clients, then: a) Select: 44 Xerox WorkCentre 4250/4260 Series System Administration Guide Load the CentreWare Print and Fax Drivers CD into your default printer, click on [Automatically detect and install my Plug...driver. 16. If you want to be sharing this printer. b) Click on the [Next] button. 7. Click on [Printers]. Click on [Have Disk]. Click on [Create a New Port]. 10. The Add Printer Wizard opens. Click the appropriate option: • For Windows 2000, click on [Local Printer]. • For Windows...
...] screen appears. It may prevent other clients, then: a) Select: 44 Xerox WorkCentre 4250/4260 Series System Administration Guide Load the CentreWare Print and Fax Drivers CD into your default printer, click on [Automatically detect and install my Plug...driver. 16. If you want to be sharing this printer. b) Click on the [Next] button. 7. Click on [Printers]. Click on [Have Disk]. Click on [Create a New Port]. 10. The Add Printer Wizard opens. Click the appropriate option: • For Windows 2000, click on [Local Printer]. • For Windows...
System Administration Guide
Page 57
... hardware and install the appropriate driver. 3. Windows Printing • [Share As:] - A Workstation or laptop that the radio button is printed at the machine. Windows 2000. • [Share Name] - The printer driver will install. 29. Procedure 1. Xerox WorkCentre 4250/4260 Series System Administration Guide 45 Click on [Browse] to browse for your CD drive. 10. Select the correct printer...
... hardware and install the appropriate driver. 3. Windows Printing • [Share As:] - A Workstation or laptop that the radio button is printed at the machine. Windows 2000. • [Share Name] - The printer driver will install. 29. Procedure 1. Xerox WorkCentre 4250/4260 Series System Administration Guide 45 Click on [Browse] to browse for your CD drive. 10. Select the correct printer...

System Administration Guide
Page 62
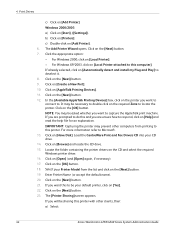
...Open the CD and select the required language, if necessary. 50 Xerox WorkCentre 4250/4260 Series System Administration Guide 4 Print Drivers Manual Print Driver Configuration To configure the printer driver without using Bi-Directional communication: 1. Windows 2000/2003 a) From the [Start] menu, click on the [... [Control Panel]. Click on [Printers and Faxes]. Windows XP a) From the [Start] menu, click on [Print Test Page]. 8. Click on [Printing Preferences]. 10. Click on [Installable Options]. 4. Load the CentreWare Print and Fax Drivers CD into your CD drive. 2.
...Open the CD and select the required language, if necessary. 50 Xerox WorkCentre 4250/4260 Series System Administration Guide 4 Print Drivers Manual Print Driver Configuration To configure the printer driver without using Bi-Directional communication: 1. Windows 2000/2003 a) From the [Start] menu, click on the [... [Control Panel]. Click on [Printers and Faxes]. Windows XP a) From the [Start] menu, click on [Print Test Page]. 8. Click on [Printing Preferences]. 10. Click on [Installable Options]. 4. Load the CentreWare Print and Fax Drivers CD into your CD drive. 2.
System Administration Guide
Page 66
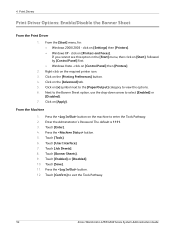
...Xerox WorkCentre 4250/4260 Series System Administration Guide From the Machine 1. The default is 1111. 3. Touch [Tools]. 6. click on the [Printing Preferences] button. 4. Click on [Printers and Faxes]. 4 Print Drivers Print Driver Options: Enable/Disable the Banner Sheet From the Print Driver... 9. Press the button. 12. Click on [Settings] then [Printers]. • Windows XP - Touch [Enter]. 4. Press the button. 5. Touch [Job Sheets]. 8. Touch [Save]. 11. Touch [Enabled] or [Disabled]. 10. Press the button on [+] symbol next to the [Paper/Output] category to select ...
...Xerox WorkCentre 4250/4260 Series System Administration Guide From the Machine 1. The default is 1111. 3. Touch [Tools]. 6. click on the [Printing Preferences] button. 4. Click on [Printers and Faxes]. 4 Print Drivers Print Driver Options: Enable/Disable the Banner Sheet From the Print Driver... 9. Press the button. 12. Click on [Settings] then [Printers]. • Windows XP - Touch [Enter]. 4. Press the button. 5. Touch [Job Sheets]. 8. Touch [Save]. 11. Touch [Enabled] or [Disabled]. 10. Press the button on [+] symbol next to the [Paper/Output] category to select ...

System Administration Guide
Page 127
... Codes. Xerox WorkCentre 4250/4260 Series System Administration Guide 115 Touch [Save]. 11. Enable Xerox Standard Accounting in the [Start] menu, then click on [Properties]. 4. click on [Xerox Standard Accounting...Windows XP - Press the button. 12. Options under the Xerox Standard Accounting option. 10. The default is 1111. 3. Select one of the following options: a) Prompt for Every Job - Press the button. 5. Touch [Enable] under this option in your machine model. 3. From the [Start] menu, click on [Printers and Faxes] for your Print Driver Windows...
... Codes. Xerox WorkCentre 4250/4260 Series System Administration Guide 115 Touch [Save]. 11. Enable Xerox Standard Accounting in the [Start] menu, then click on [Properties]. 4. click on [Xerox Standard Accounting...Windows XP - Press the button. 12. Options under the Xerox Standard Accounting option. 10. The default is 1111. 3. Select one of the following options: a) Prompt for Every Job - Press the button. 5. Touch [Enable] under this option in your machine model. 3. From the [Start] menu, click on [Printers and Faxes] for your Print Driver Windows...
Evaluator Guide
Page 13
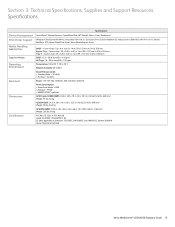
... 73/23/EEC, 89/336/EEC and 1999/5/EC, Section 508 ADA Cerner Tested and Certified Xerox WorkCentre® 4250/4260 Evaluator Guide 13 bond/60 - 105 gsm Temperature: 50 to 90° F, 10 to 32° C Relative Humidity: 20 to 80% Sound Pressure Levels: • Standby ...CentreWare Web, HP® WebJet Admin, Tivoli, Rendezvous Windows® 2003 Server/XP/XP Pro, Vista, Mac OS® X 10.3+, Sun Solaris 9/10, SUSE®, Red Hat® ES, Fedora Core 4, IBM AIX 5, HP-UX 11.0/11i, Novell NetWare, SCO, Xerox Global Print Driver, Xerox Mobile Express Driver DADF - Custom sizes: 3.9 x 5.8 in . to...
... 73/23/EEC, 89/336/EEC and 1999/5/EC, Section 508 ADA Cerner Tested and Certified Xerox WorkCentre® 4250/4260 Evaluator Guide 13 bond/60 - 105 gsm Temperature: 50 to 90° F, 10 to 32° C Relative Humidity: 20 to 80% Sound Pressure Levels: • Standby ...CentreWare Web, HP® WebJet Admin, Tivoli, Rendezvous Windows® 2003 Server/XP/XP Pro, Vista, Mac OS® X 10.3+, Sun Solaris 9/10, SUSE®, Red Hat® ES, Fedora Core 4, IBM AIX 5, HP-UX 11.0/11i, Novell NetWare, SCO, Xerox Global Print Driver, Xerox Mobile Express Driver DADF - Custom sizes: 3.9 x 5.8 in . to...


