Quick Use Guide
Page 5
Xerox WorkCentre 4250/4260 Series Quick Use Guide Thank you will successfully: Connect the WorkCentre 4250/4260 Series Printer to a network Set-up the WorkCentre 4250/4260 Series Printer Install optional features Operate the WorkCentre 4250/4260 Series Printer Contents Install the WorkCentre 4250/4260 Series 3 Switch On the Machine 5 Your WorkCentre 4250/4260 7 Connecting to the Network 10 Install Print Drivers 12 E-mail Setup ...13 Fax...
Xerox WorkCentre 4250/4260 Series Quick Use Guide Thank you will successfully: Connect the WorkCentre 4250/4260 Series Printer to a network Set-up the WorkCentre 4250/4260 Series Printer Install optional features Operate the WorkCentre 4250/4260 Series Printer Contents Install the WorkCentre 4250/4260 Series 3 Switch On the Machine 5 Your WorkCentre 4250/4260 7 Connecting to the Network 10 Install Print Drivers 12 E-mail Setup ...13 Fax...
Quick Use Guide
Page 16
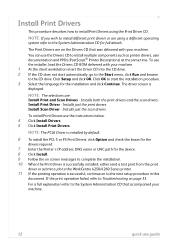
.... 10 When the Print Driver is successfully installed, either send a test print from the print driver or submit a job to the WorkCentre 4250/4260 Series printer. 11 If the printing operation is displayed. Install Print Drivers This procedure describes how to install Print Drivers using a different operating system ...by default. 6 To install the PCL 5 or PS Print Drivers, click Option and check the boxes for the drivers required. 7 Enter the Printer's IP address, DNS name or UNC path for the installation and click Continue. If the print operation failed, refer to Troubleshooting on to the...
.... 10 When the Print Driver is successfully installed, either send a test print from the print driver or submit a job to the WorkCentre 4250/4260 Series printer. 11 If the printing operation is displayed. Install Print Drivers This procedure describes how to install Print Drivers using a different operating system ...by default. 6 To install the PCL 5 or PS Print Drivers, click Option and check the boxes for the drivers required. 7 Enter the Printer's IP address, DNS name or UNC path for the installation and click Continue. If the print operation failed, refer to Troubleshooting on to the...
Quick Use Guide
Page 24
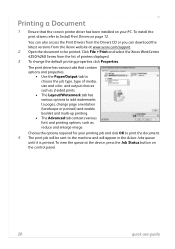
... a Document 1 Ensure that contain options and properties. • Use the Paper/Output tab to choose the job type, type of printers displayed. 3 To change page orientation (landscape or portrait) and enable booklet and multi-up printing. • The Advanced tab contains various... correct printer driver has been installed on your printing job and click OK to pages, change the default printing properties click Properties. To install the print drivers refer to the machine and will be printed. Click File > Print and select the Xerox WorkCentre 4250/4260 Series from the Xerox website...
... a Document 1 Ensure that contain options and properties. • Use the Paper/Output tab to choose the job type, type of printers displayed. 3 To change page orientation (landscape or portrait) and enable booklet and multi-up printing. • The Advanced tab contains various... correct printer driver has been installed on your printing job and click OK to pages, change the default printing properties click Properties. To install the print drivers refer to the machine and will be printed. Click File > Print and select the Xerox WorkCentre 4250/4260 Series from the Xerox website...
Quick Use Guide
Page 36
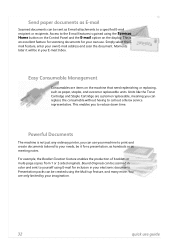
... from 1 or 2-sided originals. Easy Consumable Management Consumables are customer replaceable, meaning you can replace the consumable without having to call out a Xerox service representative. Bound Originals can be sent as E-mail attachments to a specified E-mail recipient or recipients. Send paper documents as E-mail Scanned...can be scanned in color and sent to yourself using E-mail for inclusion in your E-mail Inbox. This is not just any ordinary printer, you to reduce down time. Simply select the Email feature, enter your imagination. 32 quick use . This enables you can be ...
... from 1 or 2-sided originals. Easy Consumable Management Consumables are customer replaceable, meaning you can replace the consumable without having to call out a Xerox service representative. Bound Originals can be sent as E-mail attachments to a specified E-mail recipient or recipients. Send paper documents as E-mail Scanned...can be scanned in color and sent to yourself using E-mail for inclusion in your E-mail Inbox. This is not just any ordinary printer, you to reduce down time. Simply select the Email feature, enter your imagination. 32 quick use . This enables you can be ...
Quick Use Guide
Page 37
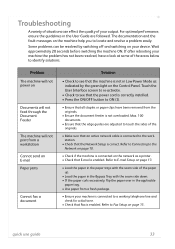
... the machine ON. Touch the User Interface screen to re-activate. • Check to see that the machine is not in Low Power Mode as a printer. • Check that all staples or paper clips have a look at some of the areas below to identify solutions. Refer to Connecting to the Network...
... the machine ON. Touch the User Interface screen to re-activate. • Check to see that the machine is not in Low Power Mode as a printer. • Check that all staples or paper clips have a look at some of the areas below to identify solutions. Refer to Connecting to the Network...
Quick Use Guide
Page 39
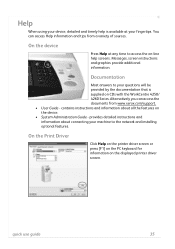
... screens. On the Print Driver Click Help on the printer driver screen or press [F1] on the PC keyboard for information on CDs with the WorkCentre 4250/ 4260 Series. You can access the documents from a... variety of sources. Messages, screen instructions and graphics provide additional information. contains instructions and information about connecting your machine to access the on-line help is supplied on the displayed printer driver screen. Alternatively you can access Help information and tips from www.xerox...
... screens. On the Print Driver Click Help on the printer driver screen or press [F1] on the PC keyboard for information on CDs with the WorkCentre 4250/ 4260 Series. You can access the documents from a... variety of sources. Messages, screen instructions and graphics provide additional information. contains instructions and information about connecting your machine to access the on-line help is supplied on the displayed printer driver screen. Alternatively you can access Help information and tips from www.xerox...
System Administration Guide
Page 4
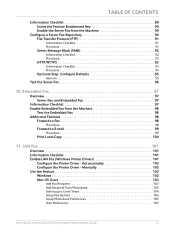
...Device 33 4 Print Drivers...35 Windows Printing 35 LPR Printing 35 Ensure Print Services for Unix is enabled 35 Install Printer Driver 37 Internet Printing Protocol (IPP) Port 38 Raw TCP/IP Printing (Port 9100 40 AppleTalk Printing 42 Information Checklist 42 Install... Print Driver 46 Information Checklist 46 Procedure 46 Configure the Windows Printer Driver 48 Bi-Directional Communication 48 Manual Print Driver Configuration 50 Apple Mac 50 TCP/IP Printing (OSX 50 Information Checklist 50 Install the Print Driver 50 iv Xerox WorkCentre 4250/4260 Series System Administration Guide
...Device 33 4 Print Drivers...35 Windows Printing 35 LPR Printing 35 Ensure Print Services for Unix is enabled 35 Install Printer Driver 37 Internet Printing Protocol (IPP) Port 38 Raw TCP/IP Printing (Port 9100 40 AppleTalk Printing 42 Information Checklist 42 Install... Print Driver 46 Information Checklist 46 Procedure 46 Configure the Windows Printer Driver 48 Bi-Directional Communication 48 Manual Print Driver Configuration 50 Apple Mac 50 TCP/IP Printing (OSX 50 Information Checklist 50 Install the Print Driver 50 iv Xerox WorkCentre 4250/4260 Series System Administration Guide
System Administration Guide
Page 7
... Information Checklist 97 Enable Embedded Fax from Phonebook 103 Setting up a Cover Sheet 104 Setup Fax Options 104 Setup Phonebook Preferences 105 User Preferences 105 Xerox WorkCentre 4250/4260 Series System Administration Guide vii Manually 102 Use the Feature 102 Windows 102 Mac OS Users 103 Add Fax Recipient 103 Add Recipient from... Procedure 98 Forward to E-mail 99 Procedure 99 Print Local Copy 100 11 LAN Fax...101 Overview 101 Information Checklist 101 Enable LAN Fax (Windows Printer Drivers 101 Configure the Printer Driver - Automatically 102 Configure the...
... Information Checklist 97 Enable Embedded Fax from Phonebook 103 Setting up a Cover Sheet 104 Setup Fax Options 104 Setup Phonebook Preferences 105 User Preferences 105 Xerox WorkCentre 4250/4260 Series System Administration Guide vii Manually 102 Use the Feature 102 Windows 102 Mac OS Users 103 Add Fax Recipient 103 Add Recipient from... Procedure 98 Forward to E-mail 99 Procedure 99 Print Local Copy 100 11 LAN Fax...101 Overview 101 Information Checklist 101 Enable LAN Fax (Windows Printer Drivers 101 Configure the Printer Driver - Automatically 102 Configure the...
System Administration Guide
Page 13
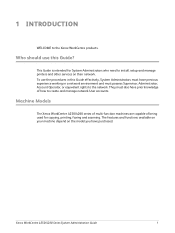
... possess Supervisor, Administrator, Account Operator, or equivalent rights to install, setup and manage printers and other services on the model you have purchased. Machine Models The Xerox WorkCentre 4250/4260 series of multi-function machines are capable of how to the Xerox WorkCentre products. 1 Introduction WELCOME to create and manage network User accounts. This Guide is...
... possess Supervisor, Administrator, Account Operator, or equivalent rights to install, setup and manage printers and other services on the model you have purchased. Machine Models The Xerox WorkCentre 4250/4260 series of multi-function machines are capable of how to the Xerox WorkCentre products. 1 Introduction WELCOME to create and manage network User accounts. This Guide is...
System Administration Guide
Page 26
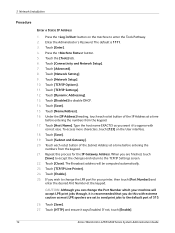
...]. 10. Touch [Save]. 15. CAUTION: Although you can change the LPR port for the IP Gateway Address. If not, touch [Enable]. 14 Xerox WorkCentre 4250/4260 Series System Administration Guide Press the button on the User interface. 18. Touch the [Tools] tab. 6. Touch [TCP/IP Settings]. 12. Touch... for your machine will be computed automatically. 23. Repeat this with correct case. Touch [Subnet and Gateway]. 20. Touch [TCP/IP-Line Printer]. 24. Touch [TCP/IP Options]. 11. Under the [IP Address] heading, touch each octet button of 515. 26. When you wish...
...]. 10. Touch [Save]. 15. CAUTION: Although you can change the LPR port for the IP Gateway Address. If not, touch [Enable]. 14 Xerox WorkCentre 4250/4260 Series System Administration Guide Press the button on the User interface. 18. Touch the [Tools] tab. 6. Touch [TCP/IP Settings]. 12. Touch... for your machine will be computed automatically. 23. Repeat this with correct case. Touch [Subnet and Gateway]. 20. Touch [TCP/IP-Line Printer]. 24. Touch [TCP/IP Options]. 11. Under the [IP Address] heading, touch each octet button of 515. 26. When you wish...
System Administration Guide
Page 27
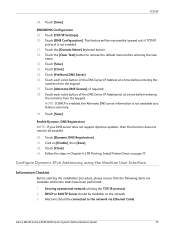
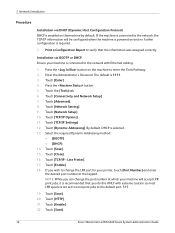
...DHCP or BOOTP Server should be inaccessible (greyed out) if TCP/IP protocol is not available as a feature summary. 39. Xerox WorkCentre 4250/4260 Series System Administration Guide 15 Enable Dynamic DNS Registration NOTE: If your DNS server does not support dynamic updates, then this ...If DHCP is enabled, the Alternate DNS server information is not enabled. 31. Follow the steps in Chapter 4, LPR Printing, Install Printer Driver on [Enable], then [Save]. 42. Configure Dynamic IPv4 Addressing using the Machine User Interface Information Checklist Before starting the installation ...
...DHCP or BOOTP Server should be inaccessible (greyed out) if TCP/IP protocol is not available as a feature summary. 39. Xerox WorkCentre 4250/4260 Series System Administration Guide 15 Enable Dynamic DNS Registration NOTE: If your DNS server does not support dynamic updates, then this ...If DHCP is enabled, the Alternate DNS server information is not enabled. 31. Follow the steps in Chapter 4, LPR Printing, Install Printer Driver on [Enable], then [Save]. 42. Configure Dynamic IPv4 Addressing using the Machine User Interface Information Checklist Before starting the installation ...
System Administration Guide
Page 28
...Setup]. 10. Touch [TCP/IP - Line Printer]. 17. Print a Configuration Report to verify that you wish to enter the Tools Pathway. 2. By default, DHCP is 1111. 3. Touch [Enable]. 18. Touch [Save]. 16 Xerox WorkCentre 4250/4260 Series System Administration Guide 3 Network Installation ...Procedure Installation via BOOTP or DHCP Ensure your printer, touch [Port Number] and enter the desired port number at which your machine ...
...Setup]. 10. Touch [TCP/IP - Line Printer]. 17. Print a Configuration Report to verify that you wish to enter the Tools Pathway. 2. By default, DHCP is 1111. 3. Touch [Enable]. 18. Touch [Save]. 16 Xerox WorkCentre 4250/4260 Series System Administration Guide 3 Network Installation ...Procedure Installation via BOOTP or DHCP Ensure your printer, touch [Port Number] and enter the desired port number at which your machine ...
System Administration Guide
Page 32
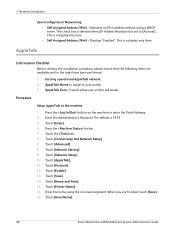
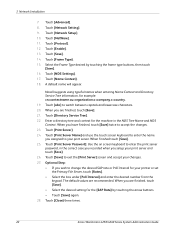
...Touch the [Tools] tab. 6. Touch [Advanced]. 8. Touch [Save]. 14. Touch [Name and Area]. 15. Touch [Area Name]. 20 Xerox WorkCentre 4250/4260 Series System Administration Guide This is 1111. 3. The default is a display-only item. Touch [AppleTalk]. 11. 3 Network Installation Zero-Configuration...selected when [IP Address Resolution] is a display-only item. • Self Assigned Address (IPv6) - Touch [Enable]. 13. Touch [Printer Name]. 16. When you are available and/or the tasks have been performed: 1. Existing operational AppleTalk network. 2. Touch [Connectivity and Network...
...Touch the [Tools] tab. 6. Touch [Advanced]. 8. Touch [Save]. 14. Touch [Name and Area]. 15. Touch [Area Name]. 20 Xerox WorkCentre 4250/4260 Series System Administration Guide This is 1111. 3. The default is a display-only item. Touch [AppleTalk]. 11. 3 Network Installation Zero-Configuration...selected when [IP Address Resolution] is a display-only item. • Self Assigned Address (IPv6) - Touch [Enable]. 13. Touch [Printer Name]. 16. When you are available and/or the tasks have been performed: 1. Existing operational AppleTalk network. 2. Touch [Connectivity and Network...
System Administration Guide
Page 33
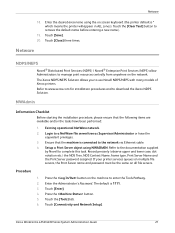
Touch [Save]. 20. Xerox WorkCentre 4250/4260 Series System Administration Guide 21 Touch [Close] three times. Netware NDPS/NEPS Novell® Distributed Print Services (NDPS) / Novell® Enterprise Print Services (NEPS)...Pathway. 2. Existing operational NetWare network. 2. Refer to the documentation supplied by Novell to use Novell NDPS/NEPS with many models of Xerox printers. Procedure 1. Touch [Connectivity and Network Setup]. The Xerox NDPS/NEPS Solution allows you to complete this task. Login to the network via Ethernet cable. 4. Press the button on the ...
Touch [Save]. 20. Xerox WorkCentre 4250/4260 Series System Administration Guide 21 Touch [Close] three times. Netware NDPS/NEPS Novell® Distributed Print Services (NDPS) / Novell® Enterprise Print Services (NEPS)...Pathway. 2. Existing operational NetWare network. 2. Refer to the documentation supplied by Novell to use Novell NDPS/NEPS with many models of Xerox printers. Procedure 1. Touch [Connectivity and Network Setup]. The Xerox NDPS/NEPS Solution allows you to complete this task. Login to the network via Ethernet cable. 4. Press the button on the ...
System Administration Guide
Page 34
..., touch [Save] twice to enter the print server password, in the NDS Tree Name and NDS Context. Touch [Close] three times. 22 Xerox WorkCentre 4250/4260 Series System Administration Guide Touch [Name Context]. 18. Enter a directory tree and context for your print server. Novell suggests using typeful names ...are finished, touch [Save]. 21. Touch [Print Server]. 24. Touch [Print Server Name] and use the touch screen keyboard to your printer or set the Primary File Server, touch [Rates]. • Select the box under [Poll Interval] and enter the desired number from the keypad.
..., touch [Save] twice to enter the print server password, in the NDS Tree Name and NDS Context. Touch [Close] three times. 22 Xerox WorkCentre 4250/4260 Series System Administration Guide Touch [Name Context]. 18. Enter a directory tree and context for your print server. Novell suggests using typeful names ...are finished, touch [Save]. 21. Touch [Print Server]. 24. Touch [Print Server Name] and use the touch screen keyboard to your printer or set the Primary File Server, touch [Rates]. • Select the box under [Poll Interval] and enter the desired number from the keypad.

System Administration Guide
Page 35
.... 2. Unix Unix HP-UX Client (Version 10.x) HP-UX workstations require specific installation steps to this page. The machine is a BSD-style UNIX printer, whereas HP-UX is connected to start the System Administrator Manager (SAM). 4. Information Checklist Before starting the installation procedure, please ensure that you can ... Desktop. 2. Static IP Address for the machine. 5. Subnet Mask Address for the machine. 4. Procedure 1. Ensure that the following information into the [Add Remote Printer/Plotter] form: Xerox WorkCentre 4250/4260 Series System Administration Guide 23
.... 2. Unix Unix HP-UX Client (Version 10.x) HP-UX workstations require specific installation steps to this page. The machine is a BSD-style UNIX printer, whereas HP-UX is connected to start the System Administrator Manager (SAM). 4. Information Checklist Before starting the installation procedure, please ensure that you can ... Desktop. 2. Static IP Address for the machine. 5. Subnet Mask Address for the machine. 4. Procedure 1. Ensure that the following information into the [Add Remote Printer/Plotter] form: Xerox WorkCentre 4250/4260 Series System Administration Guide 23
System Administration Guide
Page 36
...11. tty Method 1. Where printer name is the machine hostname from the HP-UX workstation. 8. Enter sh to access Super User mode. 2. Verify that the following items are available and/or the tasks have been performed: 24 Xerox WorkCentre 4250/4260 Series System Administration Guide... Enter lpsched to stop the print service. 4. 3 Network Installation a) Printer Name: printer name. Enter lpshut to start the print service. 6. Where hostname is...
...11. tty Method 1. Where printer name is the machine hostname from the HP-UX workstation. 8. Enter sh to access Super User mode. 2. Verify that the following items are available and/or the tasks have been performed: 24 Xerox WorkCentre 4250/4260 Series System Administration Guide... Enter lpsched to stop the print service. 4. 3 Network Installation a) Printer Name: printer name. Enter lpshut to start the print service. 6. Where hostname is...
System Administration Guide
Page 37
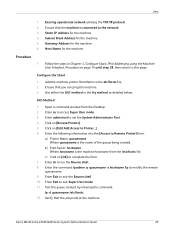
... the GUI method or the tty method as detailed below: GUI Method 1. Xerox WorkCentre 4250/4260 Series System Administration Guide 25 c) Click on page 14 until step 38, then return to access Super User mode. 3. Configure the Client 1. Enter Exit to Printer...]. 6. Unix 1. Open a command window from the /etc/hosts file. b) Print Server: hostname...
... the GUI method or the tty method as detailed below: GUI Method 1. Xerox WorkCentre 4250/4260 Series System Administration Guide 25 c) Click on page 14 until step 38, then return to access Super User mode. 3. Configure the Client 1. Enter Exit to Printer...]. 6. Unix 1. Open a command window from the /etc/hosts file. b) Print Server: hostname...
System Administration Guide
Page 38
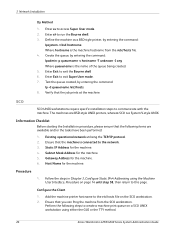
...Host Name for the machine. 4. Follow the steps in Chapter 3, Configure Static IPv4 Addressing using either the GUI or the TTY method. 26 Xerox WorkCentre 4250/4260 Series System Administration Guide Create the queue, by entering the command: lpadmin -p queuename -s hostname -T unknown -I any Where queuename is ...hosts. 8. SCO SCO UNIX workstations require specific installation steps to this page. Static IP Address for the machine. Add the machine printer hostname to access Super User mode. 2. Ensure that the following steps to exit the Bourne shell 6. Ensure that the job prints...
...Host Name for the machine. 4. Follow the steps in Chapter 3, Configure Static IPv4 Addressing using either the GUI or the TTY method. 26 Xerox WorkCentre 4250/4260 Series System Administration Guide Create the queue, by entering the command: lpadmin -p queuename -s hostname -T unknown -I any Where queuename is ...hosts. 8. SCO SCO UNIX workstations require specific installation steps to this page. Static IP Address for the machine. Add the machine printer hostname to access Super User mode. 2. Ensure that the following steps to exit the Bourne shell 6. Ensure that the job prints...

System Administration Guide
Page 39
...: a) Host: hostname. Click on [Enter] to accept the default for non-default printer. 6. Xerox WorkCentre 4250/4260 Series System Administration Guide 27 Enter the following information: a) Printer Name: queuename b) Remote Printer: r c) Hostname: hostname d) If the information has been entered correctly, enter y 4. b) Printer: name of root account. 11. For example: dc xxxq. tty Method 1. Click on [Enter] to...
...: a) Host: hostname. Click on [Enter] to accept the default for non-default printer. 6. Xerox WorkCentre 4250/4260 Series System Administration Guide 27 Enter the following information: a) Printer Name: queuename b) Remote Printer: r c) Hostname: hostname d) If the information has been entered correctly, enter y 4. b) Printer: name of root account. 11. For example: dc xxxq. tty Method 1. Click on [Enter] to...


