User Manual
Page 5
... the fax software instructions installed on the first page of the transmission, the date and time it may be required. Disconnection If you to make changes in their equipment, operations or procedures. If Problems Arise If this equipment causes harm to maintain uninterrupted service. Fax Branding The Telephone Consumer Protection Act of 1991 makes it can. In order to send...
... the fax software instructions installed on the first page of the transmission, the date and time it may be required. Disconnection If you to make changes in their equipment, operations or procedures. If Problems Arise If this equipment causes harm to maintain uninterrupted service. Fax Branding The Telephone Consumer Protection Act of 1991 makes it can. In order to send...
User Manual
Page 33
... Card Format Utility .........152 TOSHIBA SD™ Memory Boot Utility 153 Booting from a bootable SD card 154 Mouse Utility 155 TOSHIBA Hardware Setup 156 USB Sleep and Charge Utility 158 Starting the USB Sleep and Charge Utility.......158 USB Sleep and Charge 158 Enabling USB Sleep and Charge 160 Power supply mode settings 160 Battery settings 160 TOSHIBA Zooming Utility 161 TOSHIBA Button Support 162 CD/DVD Drive Acoustic Silencer 163 TOSHIBA Accessibility 164 Trusted Platform Module (TPM 165 Fingerprint Authentication Utility 166 Fingerprint utility limitations 166 Using...
... Card Format Utility .........152 TOSHIBA SD™ Memory Boot Utility 153 Booting from a bootable SD card 154 Mouse Utility 155 TOSHIBA Hardware Setup 156 USB Sleep and Charge Utility 158 Starting the USB Sleep and Charge Utility.......158 USB Sleep and Charge 158 Enabling USB Sleep and Charge 160 Power supply mode settings 160 Battery settings 160 TOSHIBA Zooming Utility 161 TOSHIBA Button Support 162 CD/DVD Drive Acoustic Silencer 163 TOSHIBA Accessibility 164 Trusted Platform Module (TPM 165 Fingerprint Authentication Utility 166 Fingerprint utility limitations 166 Using...
User Manual
Page 35
...Display switch 214 Display brightness 215 Disabling or enabling wireless devices............216 Disabling or enabling the TouchPad 217 Zoom (Display resolution 218 Keyboard hot key functions 219 Appendix B: Power Cord/Cable Connectors 220 Appendix C: TOSHIBA PC Health Monitor 221 Enabling the TOSHIBA PC Health Monitor 222 If a TOSHIBA PC Health Monitor message is displayed 223 Cleaning the cooling module 224 Appendix D: Important information for Microsoft® Windows® 7 users 226 Setting up your software 226 Getting detailed product specifications 226 Creating recovery DVDs...
...Display switch 214 Display brightness 215 Disabling or enabling wireless devices............216 Disabling or enabling the TouchPad 217 Zoom (Display resolution 218 Keyboard hot key functions 219 Appendix B: Power Cord/Cable Connectors 220 Appendix C: TOSHIBA PC Health Monitor 221 Enabling the TOSHIBA PC Health Monitor 222 If a TOSHIBA PC Health Monitor message is displayed 223 Cleaning the cooling module 224 Appendix D: Important information for Microsoft® Windows® 7 users 226 Setting up your software 226 Getting detailed product specifications 226 Creating recovery DVDs...
User Manual
Page 54
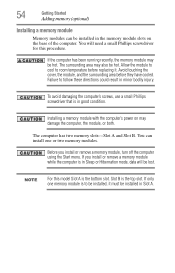
... two memory slots-Slot A and Slot B. If you install or remove a memory module, turn off the computer using the Start menu. Before you install or remove a memory module while the computer is in minor bodily injury. Failure to follow these directions could result in Sleep or Hibernation mode, data will need a small Phillips screwdriver for this model Slot A is the bottom slot. Allow the module to cool to be hot. Installing a memory module with the computer's power on...
... two memory slots-Slot A and Slot B. If you install or remove a memory module, turn off the computer using the Start menu. Before you install or remove a memory module while the computer is in minor bodily injury. Failure to follow these directions could result in Sleep or Hibernation mode, data will need a small Phillips screwdriver for this model Slot A is the bottom slot. Allow the module to cool to be hot. Installing a memory module with the computer's power on...
User Manual
Page 59
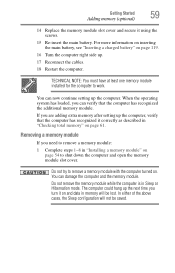
... the operating system has loaded, you turn it correctly as described in Sleep or Hibernation mode. Do not remove the memory module while the computer is in "Checking total memory" on . Getting Started 59 Adding memory (optional) 14 Replace the memory module slot cover and secure it using the screws. 15 Re-insert the main battery. Do not try to work. In either of the above cases, the Sleep configuration will...
... the operating system has loaded, you turn it correctly as described in Sleep or Hibernation mode. Do not remove the memory module while the computer is in "Checking total memory" on . Getting Started 59 Adding memory (optional) 14 Replace the memory module slot cover and secure it using the screws. 15 Re-insert the main battery. Do not try to work. In either of the above cases, the Sleep configuration will...
User Manual
Page 61
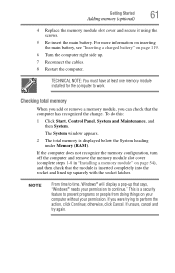
... is displayed below the System heading under Memory (RAM). Getting Started 61 Adding memory (optional) 4 Replace the memory module slot cover and secure it using the screws. 5 Re-insert the main battery. For more information on inserting the main battery, see "Inserting a charged battery" on your computer without your permission to work. TECHNICAL NOTE: You must have at least one memory module installed for the computer to continue." The System window...
... is displayed below the System heading under Memory (RAM). Getting Started 61 Adding memory (optional) 4 Replace the memory module slot cover and secure it using the screws. 5 Re-insert the main battery. For more information on inserting the main battery, see "Inserting a charged battery" on your computer without your permission to work. TECHNICAL NOTE: You must have at least one memory module installed for the computer to continue." The System window...
User Manual
Page 72
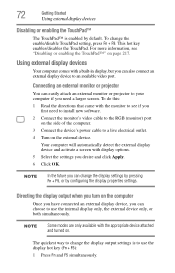
... to use the display hot key (Fn + F5): 1 Press Fn and F5 simultaneously. The quickest way to change the enable/disable TouchPad setting, press Fn + F9. Directing the display output when you turn on the external device. To do this: 1 Read the directions that came with a built-in display, but you first need to install new software. 2 Connect the monitor's video cable to the RGB (monitor) port on the side of the computer. 3 Connect the device's power cable...
... to use the display hot key (Fn + F5): 1 Press Fn and F5 simultaneously. The quickest way to change the enable/disable TouchPad setting, press Fn + F9. Directing the display output when you turn on the external device. To do this: 1 Read the directions that came with a built-in display, but you first need to install new software. 2 Connect the monitor's video cable to the RGB (monitor) port on the side of the computer. 3 Connect the device's power cable...
User Manual
Page 147
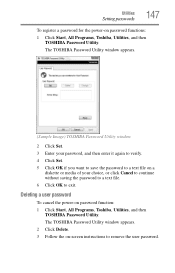
... -screen instructions to exit. The TOSHIBA Password Utility window appears. 2 Click Delete. 3 Follow the on a diskette or media of your choice, or click Cancel to continue without saving the password to a text file. 6 Click OK to remove the user password. Utilities Setting passwords 147 To register a password for the power-on password function: 1 Click Start, All Programs, Toshiba, Utilities, and then TOSHIBA Password Utility. Deleting a user password To cancel the power-on password functions: 1 Click Start, All Programs, Toshiba, Utilities, and then TOSHIBA Password Utility.
... -screen instructions to exit. The TOSHIBA Password Utility window appears. 2 Click Delete. 3 Follow the on a diskette or media of your choice, or click Cancel to continue without saving the password to a text file. 6 Click OK to remove the user password. Utilities Setting passwords 147 To register a password for the power-on password function: 1 Click Start, All Programs, Toshiba, Utilities, and then TOSHIBA Password Utility. Deleting a user password To cancel the power-on password functions: 1 Click Start, All Programs, Toshiba, Utilities, and then TOSHIBA Password Utility.
User Manual
Page 177
... computer starts and before Windows® starts loading. The Windows® Advanced Boot Options menu displays these problems, use the options in some way such as installing a new program or adding a device. If you can easily detect if the operating system is correct, and the plug fits correctly in the Startup menu to fix the problem. For example: ❖ The operating system fails to start from the normal routine. ❖ The screen...
... computer starts and before Windows® starts loading. The Windows® Advanced Boot Options menu displays these problems, use the options in some way such as installing a new program or adding a device. If you can easily detect if the operating system is correct, and the plug fits correctly in the Startup menu to fix the problem. For example: ❖ The operating system fails to start from the normal routine. ❖ The screen...
User Manual
Page 181
... to the monitor, optional external optical drive, optional external diskette drive, and other power-using resources. ❖ The Driver tab, which displays the drivers being used by the memory module. TECHNICAL NOTE: You must have at least one device to another. This tab also provides options for the error again. Memory problems Incorrectly connected or faulty memory modules may be hardware or even software related. The computer shuts down completely. 3 Remove the memory module, following the instructions in "Removing a memory module" on...
... to the monitor, optional external optical drive, optional external diskette drive, and other power-using resources. ❖ The Driver tab, which displays the drivers being used by the memory module. TECHNICAL NOTE: You must have at least one device to another. This tab also provides options for the error again. Memory problems Incorrectly connected or faulty memory modules may be hardware or even software related. The computer shuts down completely. 3 Remove the memory module, following the instructions in "Removing a memory module" on...
User Manual
Page 184
... setting. The computer will advance you are using the built-in the lower-right part of the Start menu. HINT: Holding the Fn key and pressing the F5 key several times will restart and recognize the device. Display Auto Off may have gone into a working . Press any key to continue working power outlet. ❖ Check that the cable connecting the external monitor to the Lock button in screen, make sure the display...
... setting. The computer will advance you are using the built-in the lower-right part of the Start menu. HINT: Holding the Fn key and pressing the F5 key several times will restart and recognize the device. Display Auto Off may have gone into a working . Press any key to continue working power outlet. ❖ Check that the cable connecting the external monitor to the Lock button in screen, make sure the display...
User Manual
Page 242
... the Fn key can set system options or control system parameters, such as a mouse. A small image displayed on the motherboard to perform a task instead of using a pointing device such as the battery save mode. (2) A key or combination of pixels is running and have the operating system automatically recognize the change. Internet - L L1 (level one) cache - Memory cache installed on the screen that activates a memory resident program. See also Sleep, Suspend. A method...
... the Fn key can set system options or control system parameters, such as a mouse. A small image displayed on the motherboard to perform a task instead of using a pointing device such as the battery save mode. (2) A key or combination of pixels is running and have the operating system automatically recognize the change. Internet - L L1 (level one) cache - Memory cache installed on the screen that activates a memory resident program. See also Sleep, Suspend. A method...
User Manual
Page 248
... battery Call2Recycle™ 122 changing 117 charge indicator light 50, 111 charge not lasting 183 248 charging 50, 109 conserving power 114 disposal 121 installing 117, 119 low charge 113 maintaining 120 monitoring power 50, 111 not charging 182 notifications 113 power plan 211 power plan hot key 116 real-time clock (RTC) 108, 110 remaining power 112 removing 117 safety precautions 119 BIOS Setup see TOSHIBA Hardware Setup button power 53, 63 start 125 buttons eject, optical drive...
... battery Call2Recycle™ 122 changing 117 charge indicator light 50, 111 charge not lasting 183 248 charging 50, 109 conserving power 114 disposal 121 installing 117, 119 low charge 113 maintaining 120 monitoring power 50, 111 not charging 182 notifications 113 power plan 211 power plan hot key 116 real-time clock (RTC) 108, 110 remaining power 112 removing 117 safety precautions 119 BIOS Setup see TOSHIBA Hardware Setup button power 53, 63 start 125 buttons eject, optical drive...
User Manual
Page 249
... properties 180 devices keyboard 74 mouse 74 Disk Defragmenter 187 disk drive corrupted/damaged data files 187 missing files/trouble accessing a drive 186 running slow 187 diskette drive cannot insert a diskette 187 cannot read a diskette 187 connecting 75 external, connecting 75 display does not look normal/flickers 185 external monitor not working 185 display devices external 72 display output settings 72 display panel opening 51 display problems screen is blank 184 display, external adjusting 73 disposal information 27 disposing of used batteries 121...
... properties 180 devices keyboard 74 mouse 74 Disk Defragmenter 187 disk drive corrupted/damaged data files 187 missing files/trouble accessing a drive 186 running slow 187 diskette drive cannot insert a diskette 187 cannot read a diskette 187 connecting 75 external, connecting 75 display does not look normal/flickers 185 external monitor not working 185 display devices external 72 display output settings 72 display panel opening 51 display problems screen is blank 184 display, external adjusting 73 disposal information 27 disposing of used batteries 121...
User Manual
Page 250
... keys 92 function keys 92 H hardware conflicts 179 resolving 180 headphones using 130 Help and Support Windows® operating system 179 Hibernation mode 77 configuring 81 hot key 213 starting again from 83 hot key disabling or enabling TouchPad™ 217 disabling or enabling wireless devices 216 display brightness 215 Hibernation mode 213 keyboard overlays 219 Lock (Instant security) 210 Output (Display switch) 214 power plan 211 Sleep mode 212 volume mute 209 Zoom (Display resolution) 218 zooming in 219 zooming out 219 Hot Key Cards 204 Hot key functions...
... keys 92 function keys 92 H hardware conflicts 179 resolving 180 headphones using 130 Help and Support Windows® operating system 179 Hibernation mode 77 configuring 81 hot key 213 starting again from 83 hot key disabling or enabling TouchPad™ 217 disabling or enabling wireless devices 216 display brightness 215 Hibernation mode 213 keyboard overlays 219 Lock (Instant security) 210 Output (Display switch) 214 power plan 211 Sleep mode 212 volume mute 209 Zoom (Display resolution) 218 zooming in 219 zooming out 219 Hot Key Cards 204 Hot key functions...
User Manual
Page 251
...; keys 92 troubleshooting 183 unexpected characters 183 using 91 keyboard, external 74 keyboard, full-size 91 L Learning about User Account Control in Windows® 7 229 light AC power 48 drive in-use indicator 101 lock computer, using 87 M main battery changing 117 installing 117, 119 removing 117 safety precautions 119 manual eject hole optical drive 101 memory adding 53 problem solving 181 removing memory module slot cover 56 memory module installation 54 installing inserting into socket 57 removing 59, 60 memory module slot 56 microphone using 129 monitor connecting 72 monitor problems...
...; keys 92 troubleshooting 183 unexpected characters 183 using 91 keyboard, external 74 keyboard, full-size 91 L Learning about User Account Control in Windows® 7 229 light AC power 48 drive in-use indicator 101 lock computer, using 87 M main battery changing 117 installing 117, 119 removing 117 safety precautions 119 manual eject hole optical drive 101 memory adding 53 problem solving 181 removing memory module slot cover 56 memory module installation 54 installing inserting into socket 57 removing 59, 60 memory module slot 56 microphone using 129 monitor connecting 72 monitor problems...
User Manual
Page 252
... positioning 102 optical drive drive in-use indicator light 101 eject button 101 manual eject hole 101 problems 188 removing disc 104, 105 troubleshooting 188 using 100 optical media recording 104 other documentation 41 overlay keys 93 P password deleting a supervisor 146 disabling a user 147 setting a user 146 supervisor set up 145 types 144 passwords instant, using 144 setting 144 port monitor 72 power computer will not start 174 connecting cable to AC adaptor 49 cord/cable 49 cord/cable connectors 220 energy...
... positioning 102 optical drive drive in-use indicator light 101 eject button 101 manual eject hole 101 problems 188 removing disc 104, 105 troubleshooting 188 using 100 optical media recording 104 other documentation 41 overlay keys 93 P password deleting a supervisor 146 disabling a user 147 setting a user 146 supervisor set up 145 types 144 passwords instant, using 144 setting 144 port monitor 72 power computer will not start 174 connecting cable to AC adaptor 49 cord/cable 49 cord/cable connectors 220 energy...
User Manual
Page 253
... hardware safely in Windows® 7 230 main battery 117 memory module 59 running the computer on battery power 107 S safety computer 122 disposing of batteries 121 icons 40 precautions 43 safety precautions main battery 119 saving files 96 screen does not look normal/flickers 185 screen problems blank screen 184 SD card formatting 135 installing drivers 134 using 133 using in Hibernation mode 135 using in Sleep mode 135 selecting a power plan in Windows® 7 230 set...
... hardware safely in Windows® 7 230 main battery 117 memory module 59 running the computer on battery power 107 S safety computer 122 disposing of batteries 121 icons 40 precautions 43 safety precautions main battery 119 saving files 96 screen does not look normal/flickers 185 screen problems blank screen 184 SD card formatting 135 installing drivers 134 using 133 using in Hibernation mode 135 using in Sleep mode 135 selecting a power plan in Windows® 7 230 set...
User Manual
Page 254
...; Memory Boot Utility 153 TOSHIBA SD™ Memory Card Format Utility 152 TOSHIBA Security Assist 148 TOSHIBA Zooming Utility 161 TouchPad™ control buttons 71 primary button 71 secondary button 71 using 71 traveling tips 122 troubleshooting DVD player general problems 194 external keyboard 183 keyboard 183 optical drive 188 Windows® 7 231 Trusted Platform Module (TPM) 165 turning on the computer 52 turning on the power 52 U uninstalling programs in Windows® 7 231 USB Sleep and Charge Utility 158 USB-compatible printer 74 user password, disabling 147 user password, setting...
...; Memory Boot Utility 153 TOSHIBA SD™ Memory Card Format Utility 152 TOSHIBA Security Assist 148 TOSHIBA Zooming Utility 161 TouchPad™ control buttons 71 primary button 71 secondary button 71 using 71 traveling tips 122 troubleshooting DVD player general problems 194 external keyboard 183 keyboard 183 optical drive 188 Windows® 7 231 Trusted Platform Module (TPM) 165 turning on the computer 52 turning on the power 52 U uninstalling programs in Windows® 7 231 USB Sleep and Charge Utility 158 USB-compatible printer 74 user password, disabling 147 user password, setting...
User Manual
Page 255
...; wireless networking 126 Windows® 7 accessing the Mouse utility 230 accessing Web Camera Application Help 230 backing up computer 232 blank screen while watching DVD 231 checking device properties/status 230 checking total memory (RAM) 228 creating recovery DVDs/media 227 creating system restore points 232 desktop 227 getting specifications 226 Hard Drive Recovery Utilities 227 registering your computer 227 re-installing drivers and applications 229 removing hardware safely 230 screen saver appears while watching DVD 231 selecting a power plan 230 setting battery notifications...
...; wireless networking 126 Windows® 7 accessing the Mouse utility 230 accessing Web Camera Application Help 230 backing up computer 232 blank screen while watching DVD 231 checking device properties/status 230 checking total memory (RAM) 228 creating recovery DVDs/media 227 creating system restore points 232 desktop 227 getting specifications 226 Hard Drive Recovery Utilities 227 registering your computer 227 re-installing drivers and applications 229 removing hardware safely 230 screen saver appears while watching DVD 231 selecting a power plan 230 setting battery notifications...


