User Manual
Page 11
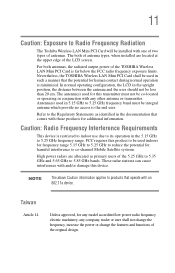
...channel Mobile Satellite systems. High power radars are located at the upper edge of the LCD screen. The both antennas, the radiated output power of the TOSHIBA Wireless LAN Mini PCI Card is minimized. Nevertheless, the TOSHIBA Wireless LAN Mini PCI Card shall be less than 20 cm. 11 Caution: Exposure to...25 GHz to 5.35 GHz and 5.65 GHz to the end user. The antenna(s) used for this device. Refer to Radio Frequency Radiation The Toshiba Wireless LAN Mini PCI Card will be co-located or operating in conjunction with and/or damage this transmitter must be used in such a manner...
...channel Mobile Satellite systems. High power radars are located at the upper edge of the LCD screen. The both antennas, the radiated output power of the TOSHIBA Wireless LAN Mini PCI Card is minimized. Nevertheless, the TOSHIBA Wireless LAN Mini PCI Card shall be less than 20 cm. 11 Caution: Exposure to...25 GHz to 5.35 GHz and 5.65 GHz to the end user. The antenna(s) used for this device. Refer to Radio Frequency Radiation The Toshiba Wireless LAN Mini PCI Card will be co-located or operating in conjunction with and/or damage this transmitter must be used in such a manner...

User Manual
Page 29
... Lesson 8: Closing programs 136 Lesson 9: Creating shortcuts 136 Creating a shortcut to the Calculator 137 Creating a shortcut to the Character Map .......138 Lesson 10: Changing the screen saver 140 Lesson 11: Setting the date and time 142 Lesson 12: Removing objects from the desktop ...144 Lesson 13: Using System Restore 146 Lesson...
... Lesson 8: Closing programs 136 Lesson 9: Creating shortcuts 136 Creating a shortcut to the Calculator 137 Creating a shortcut to the Character Map .......138 Lesson 10: Changing the screen saver 140 Lesson 11: Setting the date and time 142 Lesson 12: Removing objects from the desktop ...144 Lesson 13: Using System Restore 146 Lesson...

User Manual
Page 32
32 Contents Other Toshiba Internet Web sites 216 Toshiba's worldwide offices 217 Appendix A: Hot Keys 220 Volume Mute 220 Instant password security 220 Without a password 220 With a password 221 Maintaining security when... enabling the TouchPad 226 Keyboard hot keys 226 Appendix B: Power Cable Connectors 227 Appendix C: Using ConfigFree™ with your Toshiba Computer 228 Getting Started 229 ConfigFree Main Screen 229 Starting ConfigFree 230 Configuring ConfigFree 230 ConfigFree Utilities 231 Connectivity Doctor 231 Device Settings 232 Profile Settings 234 Quick Connect 235...
32 Contents Other Toshiba Internet Web sites 216 Toshiba's worldwide offices 217 Appendix A: Hot Keys 220 Volume Mute 220 Instant password security 220 Without a password 220 With a password 221 Maintaining security when... enabling the TouchPad 226 Keyboard hot keys 226 Appendix B: Power Cable Connectors 227 Appendix C: Using ConfigFree™ with your Toshiba Computer 228 Getting Started 229 ConfigFree Main Screen 229 Starting ConfigFree 230 Configuring ConfigFree 230 ConfigFree Utilities 231 Connectivity Doctor 231 Device Settings 232 Profile Settings 234 Quick Connect 235...

User Manual
Page 39
Proper seating is important to avoid stress-related injuries. ❖ Place the computer on a flat surface at about the same height and distance as the screen. Some people find a backless chair more comfortable than eye level. ❖ If you use the following guidelines to adjust your weight distributed evenly. Getting Started... display should be no higher than a conventional chair. You should be able to type without twisting your torso or neck, and look at the screen without slouching. ❖ If you choose, use a paper holder, set it at a comfortable height and distance.
Proper seating is important to avoid stress-related injuries. ❖ Place the computer on a flat surface at about the same height and distance as the screen. Some people find a backless chair more comfortable than eye level. ❖ If you use the following guidelines to adjust your weight distributed evenly. Getting Started... display should be no higher than a conventional chair. You should be able to type without twisting your torso or neck, and look at the screen without slouching. ❖ If you choose, use a paper holder, set it at a comfortable height and distance.

User Manual
Page 40
... the display and reduce eyestrain. ❖ Position the display panel or external monitor so that sunlight or bright indoor lighting does not reflect off the screen. Keep them in your computer work . 40 Getting Started Selecting a place to work ❖ Position your chair so that the keyboard is at many office...
... the display and reduce eyestrain. ❖ Position the display panel or external monitor so that sunlight or bright indoor lighting does not reflect off the screen. Keep them in your computer work . 40 Getting Started Selecting a place to work ❖ Position your chair so that the keyboard is at many office...

User Manual
Page 41
... the routine can damage computer components or cause your eyes. If possible, schedule a variety of travel. Look away from strain is to vary your computer screen for long periods. Do not apply heavy pressure to the computer or subject it to the computer. Other precautions Your notebook computer is more effective...
... the routine can damage computer components or cause your eyes. If possible, schedule a variety of travel. Look away from strain is to vary your computer screen for long periods. Do not apply heavy pressure to the computer or subject it to the computer. Other precautions Your notebook computer is more effective...

User Manual
Page 43
... through steps to set up your software NOTE The names of Microsoft's End User License Agreement and click Next. 3 Follow the on-screen instructions to enter the information about your computer. Your computer restarts automatically. A window will display the message, "Thank you may vary ...PC Cards Setting up your software. 1 From the welcome screen, click Next to enter the Setup Wizard. 2 Confirm acceptance of windows displayed and the order in which windows appear may register with Toshiba by clicking the Register with Toshiba icon on the desktop. NOTE To register online, your ...
... through steps to set up your software NOTE The names of Microsoft's End User License Agreement and click Next. 3 Follow the on-screen instructions to enter the information about your computer. Your computer restarts automatically. A window will display the message, "Thank you may vary ...PC Cards Setting up your software. 1 From the welcome screen, click Next to enter the Setup Wizard. 2 Confirm acceptance of windows displayed and the order in which windows appear may register with Toshiba by clicking the Register with Toshiba icon on the desktop. NOTE To register online, your ...

User Manual
Page 50
..., slide your finger from right to the right mouse button. Disabling or enabling the TouchPad The TouchPad is much smaller than the display screen, moving your cursor across the screen often means having to find whether it uses the right mouse button. Once you have positioned your cursor, you are using the...
..., slide your finger from right to the right mouse button. Disabling or enabling the TouchPad The TouchPad is much smaller than the display screen, moving your cursor across the screen often means having to find whether it uses the right mouse button. Once you have positioned your cursor, you are using the...

User Manual
Page 61
... use the display hot key (Fn + F5). 1 Press Fn and F5 simultaneously. 2 While holding down Fn, press F5 repeatedly until the setting you need a larger screen.
... use the display hot key (Fn + F5). 1 Press Fn and F5 simultaneously. 2 While holding down Fn, press F5 repeatedly until the setting you need a larger screen.

User Manual
Page 63
... resolution, only part of the desktop will appear on the internal display panel may need to 640 x 480 or 800 x 600, the image on the screen. NOTE The Windows® XP operating system by scrolling to one of the computer's USB ports. Sample external USB diskette drive To connect an external...
... resolution, only part of the desktop will appear on the internal display panel may need to 640 x 480 or 800 x 600, the image on the screen. NOTE The Windows® XP operating system by scrolling to one of the computer's USB ports. Sample external USB diskette drive To connect an external...

User Manual
Page 76
... can also back up a file to a diskette by clicking the file (or files) you want to select more than one file. These features include wide-screen movies, multiple language tracks, digital surround sound, multiple camera angles, and interactive menus. To select non-consecutive files, hold down the Ctrl key and click...
... can also back up a file to a diskette by clicking the file (or files) you want to select more than one file. These features include wide-screen movies, multiple language tracks, digital surround sound, multiple camera angles, and interactive menus. To select non-consecutive files, hold down the Ctrl key and click...

User Manual
Page 99
The computer returns to close the TOSHIBA Power Saver Properties window, then close the Normal Power Properties window. 10 Click OK to the screen you were using. The Set the range window appears. If you put the computer in Hibernation mode by closing the display panel, you can start ...
The computer returns to close the TOSHIBA Power Saver Properties window, then close the Normal Power Properties window. 10 Click OK to the screen you were using. The Set the range window appears. If you put the computer in Hibernation mode by closing the display panel, you can start ...

User Manual
Page 104
The computer returns to the screen you were using battery power or outlet power. 9 Click OK to close the Normal Power Properties window. 10 Click OK to apply whether you can ...: ❖ Click DC only for the settings to apply only when you are using battery power. ❖ Click All for the settings to close the TOSHIBA Power Saver Properties window, then close the Control Panel.
The computer returns to the screen you were using battery power or outlet power. 9 Click OK to close the Normal Power Properties window. 10 Click OK to apply whether you can ...: ❖ Click DC only for the settings to apply only when you are using battery power. ❖ Click All for the settings to close the TOSHIBA Power Saver Properties window, then close the Control Panel.

User Manual
Page 120
..., the differences are not significant and do not indicate any change in this chapter will gain from this guide may appear slightly different from the screens displayed by guiding you explore your system. 120 As you through these lessons. HINT: The illustrated examples in the functionality of your computer's operating system...
..., the differences are not significant and do not indicate any change in this chapter will gain from this guide may appear slightly different from the screens displayed by guiding you explore your system. 120 As you through these lessons. HINT: The illustrated examples in the functionality of your computer's operating system...

User Manual
Page 124
... secondary button." This lesson lets you to the TouchPad, which is your computer storage system in terms of your basic tool for moving around the screen. Instructions requiring the secondary button specifically mention that programs, documents and other data can use the My Computer feature on a storage device, such as your...
... secondary button." This lesson lets you to the TouchPad, which is your computer storage system in terms of your basic tool for moving around the screen. Instructions requiring the secondary button specifically mention that programs, documents and other data can use the My Computer feature on a storage device, such as your...

User Manual
Page 126
....") The taskbar moves from the bottom to unlock it. Uncheck "Lock the Taskbar." 7 Click an empty area of the taskbar at the bottom of the screen and, while holding down the primary button, use the TouchPad to drag the pointer to the right edge of the desktop, then release the primary...
....") The taskbar moves from the bottom to unlock it. Uncheck "Lock the Taskbar." 7 Click an empty area of the taskbar at the bottom of the screen and, while holding down the primary button, use the TouchPad to drag the pointer to the right edge of the desktop, then release the primary...

User Manual
Page 133
.... The operating system highlights the Windows® Explorer title bar to set up your option depending on how you wish to show that you have a screen with several ways to adjust the size, shape, and position of them from the desktop without actually closing your document or program. You can see...
.... The operating system highlights the Windows® Explorer title bar to set up your option depending on how you wish to show that you have a screen with several ways to adjust the size, shape, and position of them from the desktop without actually closing your document or program. You can see...

User Manual
Page 134
...Click the Maximize button in the top-right corner of the Paint window. Windows® Explorer disappears from the taskbar. Paint returns to fill the screen, hiding everything except the taskbar. HINT: Minimizing program windows is a good way to work when you are only using that the Maximize button has... Maximize button. The Paint window expands to its previous size and location. It is still open, as you want any distractions on the screen. However, it is now called the Restore Down button. Notice that you can see both Paint and Windows Explorer at the top-right ...
...Click the Maximize button in the top-right corner of the Paint window. Windows® Explorer disappears from the taskbar. Paint returns to fill the screen, hiding everything except the taskbar. HINT: Minimizing program windows is a good way to work when you are only using that the Maximize button has... Maximize button. The Paint window expands to its previous size and location. It is still open, as you want any distractions on the screen. However, it is now called the Restore Down button. Notice that you can see both Paint and Windows Explorer at the top-right ...

User Manual
Page 140
...This lesson introduces object properties by an individual application. This is a useful tool when you how to an empty area of the desktop-the screen saver. HINT: The Character Map is a continuously changing pattern that was created by showing you want to add a special character to Know ...the Windows® XP Operating System Lesson 10: Changing the screen saver Clicking a shortcut icon opens the program or folder immediately. The background is an independent block of data, text, or graphics that ...
...This lesson introduces object properties by an individual application. This is a useful tool when you how to an empty area of the desktop-the screen saver. HINT: The Character Map is a continuously changing pattern that was created by showing you want to add a special character to Know ...the Windows® XP Operating System Lesson 10: Changing the screen saver Clicking a shortcut icon opens the program or folder immediately. The background is an independent block of data, text, or graphics that ...

User Manual
Page 141
...the desktop. The operating system returns you have chosen a screen saver pattern and applied it to open the screen saver list box. 5 Scroll through the screen saver options by clicking the scroll arrows in the list box. 6 Try a screen saver pattern by clicking a name in the monitor above the... 8 After you to Know the Windows® XP Operating System Lesson 10: Changing the screen saver The operating system opens the Display Properties dialog box. Sample Display Properties dialog box 3 Click the Screen Saver tab. 4 Click the arrow beside the current option to your selection in the list...
...the desktop. The operating system returns you have chosen a screen saver pattern and applied it to open the screen saver list box. 5 Scroll through the screen saver options by clicking the scroll arrows in the list box. 6 Try a screen saver pattern by clicking a name in the monitor above the... 8 After you to Know the Windows® XP Operating System Lesson 10: Changing the screen saver The operating system opens the Display Properties dialog box. Sample Display Properties dialog box 3 Click the Screen Saver tab. 4 Click the arrow beside the current option to your selection in the list...


