User Guide
Page 11
..., PowerPoint and DirectShow are registered trademarks of Microsoft Corporation. Trademarks Satellite, Noteworthy, SelectServ, InTouch, and Fn-esse are registered trademarks, and Windows Media is a trademark owned by its proprietor and used by Toshiba under license. Bluetooth is a trademark of Toshiba America Information Systems, Inc. PS/2 and Wake on LAN are trademarks or registered trademarks...
..., PowerPoint and DirectShow are registered trademarks of Microsoft Corporation. Trademarks Satellite, Noteworthy, SelectServ, InTouch, and Fn-esse are registered trademarks, and Windows Media is a trademark owned by its proprietor and used by Toshiba under license. Bluetooth is a trademark of Toshiba America Information Systems, Inc. PS/2 and Wake on LAN are trademarks or registered trademarks...

User Guide
Page 15
... Computing tips 84 Using the keyboard 85 Character keys 85 Ctrl, Fn, and Alt keys 86 Function keys 86 Windows® special keys 86 Overlay keys 87 Emulating a full-size keyboard 89 TOSHIBA Console button 89 Starting a program 90 Saving your work 90 Printing your work 91 Using diskettes 92 Inserting and...
... Computing tips 84 Using the keyboard 85 Character keys 85 Ctrl, Fn, and Alt keys 86 Function keys 86 Windows® special keys 86 Overlay keys 87 Emulating a full-size keyboard 89 TOSHIBA Console button 89 Starting a program 90 Saving your work 90 Printing your work 91 Using diskettes 92 Inserting and...
User Guide
Page 17
... batteries safely 136 Traveling tips 137 Chapter 5: Getting to Know the Windows® XP Operating System 138 Lesson 1: Exploring the desktop 138 Finding your way around the desktop 139 Windows® XP file system 141 Lesson 2: Using the pointing device and...Lesson 5: Creating a new folder 148 Lesson 6: Starting programs 149 Lesson 7: Resizing, repositioning, and hiding windows 151 Using the taskbar 152 Minimizing and maximizing windows 152 Resizing and moving windows 153 Lesson 8: Closing programs 154 Lesson 9: Creating shortcuts 155 Creating a shortcut to the Calculator 155 ...
... batteries safely 136 Traveling tips 137 Chapter 5: Getting to Know the Windows® XP Operating System 138 Lesson 1: Exploring the desktop 138 Finding your way around the desktop 139 Windows® XP file system 141 Lesson 2: Using the pointing device and...Lesson 5: Creating a new folder 148 Lesson 6: Starting programs 149 Lesson 7: Resizing, repositioning, and hiding windows 151 Using the taskbar 152 Minimizing and maximizing windows 152 Resizing and moving windows 153 Lesson 8: Closing programs 154 Lesson 9: Creating shortcuts 155 Creating a shortcut to the Calculator 155 ...
User Guide
Page 18
...special features 167 Personalizing your desktop 168 Customizing the taskbar 168 Changing desktop and browsing style 169 Personalizing individual windows 170 Customizing window toolbars 171 Displaying information about each folder....... 172 Using your computer at the office 174 Exchanging data with ...180 Connecting to the Internet 180 Surfing the Internet 180 Internet features 181 Uploading and downloading files from the Internet 182 Toshiba's online resources 182 Exploring video features 182 Viewing presentations or DVD movies on your television 182 Transferring and editing video ...
...special features 167 Personalizing your desktop 168 Customizing the taskbar 168 Changing desktop and browsing style 169 Personalizing individual windows 170 Customizing window toolbars 171 Displaying information about each folder....... 172 Using your computer at the office 174 Exchanging data with ...180 Connecting to the Internet 180 Surfing the Internet 180 Internet features 181 Uploading and downloading files from the Internet 182 Toshiba's online resources 182 Exploring video features 182 Viewing presentations or DVD movies on your television 182 Transferring and editing video ...

User Guide
Page 20
...toolbar 218 Using the WinDVD status bar 218 Using the WinDVD control panel 218 Using the control panel playback buttons ...... 219 Maximizing the video window 222 Using playlists 222 Creating playlists 222 Loading and playing playlists 224 Resuming normal playback after using playlists 224 Customizing WinDVD 224 Setting general ... 235 Chapter 9: If Something Goes Wrong 236 Problems that are easy to fix 236 Problems when you turn on the computer........... 238 The Windows® operating system is not working 239 Using Startup options to fix problems 240 Internet problems 241
...toolbar 218 Using the WinDVD status bar 218 Using the WinDVD control panel 218 Using the control panel playback buttons ...... 219 Maximizing the video window 222 Using playlists 222 Creating playlists 222 Loading and playing playlists 224 Resuming normal playback after using playlists 224 Customizing WinDVD 224 Setting general ... 235 Chapter 9: If Something Goes Wrong 236 Problems that are easy to fix 236 Problems when you turn on the computer........... 238 The Windows® operating system is not working 239 Using Startup options to fix problems 240 Internet problems 241
User Guide
Page 21
21 Contents The Windows® XP operating system can help you 241 Resolving a hardware conflict 242 A plan of action 242 Resolving hardware conflicts on your own .... 242 Fixing a problem ... Printer problems 263 Modem problems 264 Develop good computing habits 264 If you need further assistance 265 Before you call 266 Contacting Toshiba 266 Other Toshiba Internet Web sites 267 Toshiba's worldwide offices 268 Appendix A: Hot Keys 271 Volume Mute 271 Instant password security 272 Without a password 272 With a password 272 Power usage...
21 Contents The Windows® XP operating system can help you 241 Resolving a hardware conflict 242 A plan of action 242 Resolving hardware conflicts on your own .... 242 Fixing a problem ... Printer problems 263 Modem problems 264 Develop good computing habits 264 If you need further assistance 265 Before you call 266 Contacting Toshiba 266 Other Toshiba Internet Web sites 267 Toshiba's worldwide offices 268 Appendix A: Hot Keys 271 Volume Mute 271 Instant password security 272 Without a password 272 With a password 272 Power usage...
User Guide
Page 23
... 23 For specific information on both operating systems and how they function with either the Microsoft® Windows® XP Home operating system or the Microsoft® Windows® XP Professional operating system. You can accompany you wherever you . ❖ Use the table... of powerful and portable multimedia computers! With your new Toshiba notebook computer, your Toshiba computer. This guide This guide introduces the computer...
... 23 For specific information on both operating systems and how they function with either the Microsoft® Windows® XP Home operating system or the Microsoft® Windows® XP Professional operating system. You can accompany you wherever you . ❖ Use the table... of powerful and portable multimedia computers! With your new Toshiba notebook computer, your Toshiba computer. This guide This guide introduces the computer...

User Guide
Page 25
... highlights technical information about the computer. Introduction Other documentation 25 Other icons used in the DOCS folder on your Recovery CDs. ❖ Toshiba Accessories Information, which lists accessories available from Toshiba and explains how to order them. ❖ The Microsoft® Windows® XP documentation, which explains the features of the user's guide.
... highlights technical information about the computer. Introduction Other documentation 25 Other icons used in the DOCS folder on your Recovery CDs. ❖ Toshiba Accessories Information, which lists accessories available from Toshiba and explains how to order them. ❖ The Microsoft® Windows® XP documentation, which explains the features of the user's guide.

User Guide
Page 43
... while typing, stop using the computer and rest. If necessary, use soft, indirect lighting in your hands, wrists, and arms to improve circulation. Use tinted windows or shades to reduce glare. ❖ Avoid placing your computer in front of a bright light that could shine directly in your computer work area. If...
... while typing, stop using the computer and rest. If necessary, use soft, indirect lighting in your hands, wrists, and arms to improve circulation. Use tinted windows or shades to reduce glare. ❖ Avoid placing your computer in front of a bright light that could shine directly in your computer work area. If...

User Guide
Page 46
... and click Finish to complete the process. NOTE: If you click No, you may register with Toshiba by clicking the Register with Toshiba and Microsoft. 5 Click Yes to register, or No to a voice-grade telephone line. A window will pause for a moment while checking for an internet connection. Your computer restarts automatically. The computer...
... and click Finish to complete the process. NOTE: If you click No, you may register with Toshiba by clicking the Register with Toshiba and Microsoft. 5 Click Yes to register, or No to a voice-grade telephone line. A window will pause for a moment while checking for an internet connection. Your computer restarts automatically. The computer...
User Guide
Page 48
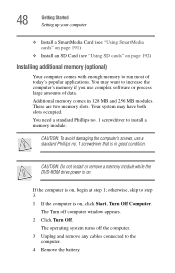
... at step 1; If the computer is in 128 MB and 256 MB modules. Additional memory comes in good condition. The operating system turns off computer window appears. 2 Click Turn Off. CAUTION: To avoid damaging the computer's screws, use complex software or process large amounts of today's popular applications. The Turn off...
... at step 1; If the computer is in 128 MB and 256 MB modules. Additional memory comes in good condition. The operating system turns off computer window appears. 2 Click Turn Off. CAUTION: To avoid damaging the computer's screws, use complex software or process large amounts of today's popular applications. The Turn off...
User Guide
Page 59
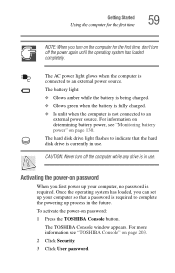
The TOSHIBA Console window appears. The hard disk drive light flashes to indicate that a password is... computer is required to complete the powering up process in the future. For information on determining battery power, see "TOSHIBA Console" on password When you first power up your computer, no password is in use . Activating the power-on...the computer while any drive is required. For more information see "Monitoring battery power" on password: 1 Press the TOSHIBA Console button. Once the operating system has loaded, you can set up your computer so that the hard disk drive ...
The TOSHIBA Console window appears. The hard disk drive light flashes to indicate that a password is... computer is required to complete the powering up process in the future. For information on determining battery power, see "TOSHIBA Console" on password When you first power up your computer, no password is in use . Activating the power-on...the computer while any drive is required. For more information see "Monitoring battery power" on password: 1 Press the TOSHIBA Console button. Once the operating system has loaded, you can set up your computer so that the hard disk drive ...

User Guide
Page 61
Sample Mouse Properties window The Mouse Properties window appears. 4 Click the TouchPAD ON/OFF tab. To change the enable/disable TouchPad or cPad settings: 1 Click Start, Control Panel. The TouchPAD ON/OFF tab view window appears. The Control Panel window appears. 2 Click Printers and Other Hardware. 3 Click Mouse Properties. Getting Started Using the computer for the first time 61 Disabling or enabling the TouchPad or cPad The TouchPad or cPad is enabled by default.
Sample Mouse Properties window The Mouse Properties window appears. 4 Click the TouchPAD ON/OFF tab. To change the enable/disable TouchPad or cPad settings: 1 Click Start, Control Panel. The TouchPAD ON/OFF tab view window appears. The Control Panel window appears. 2 Click Printers and Other Hardware. 3 Click Mouse Properties. Getting Started Using the computer for the first time 61 Disabling or enabling the TouchPad or cPad The TouchPad or cPad is enabled by default.

User Guide
Page 62
... the page, slide your finger forward on the TouchPad. ❖ To move the cursor to left. The Mouse Properties window closes. 8 Close the Printers and Other Hardware window. 9 Close the Control Panel window. You can select an object on the desktop either by double-tapping the TouchPad or by clicking the control buttons.
... the page, slide your finger forward on the TouchPad. ❖ To move the cursor to left. The Mouse Properties window closes. 8 Close the Printers and Other Hardware window. 9 Close the Control Panel window. You can select an object on the desktop either by double-tapping the TouchPad or by clicking the control buttons.

User Guide
Page 63
For systems with the stroke of your program's documentation to perform several basic tasks with cPad The cPad can move the cursor and manipulate the windows in the main display screen with the touch of a finger. Check your finger. Pointing device mode allows you to find whether it uses the secondary ...
For systems with the stroke of your program's documentation to perform several basic tasks with cPad The cPad can move the cursor and manipulate the windows in the main display screen with the touch of a finger. Check your finger. Pointing device mode allows you to find whether it uses the secondary ...

User Guide
Page 65
...menu To open a program menu, tap the icon in the upper-left corner of these ways: ❖ Press the TOSHIBA Console button and click the Mouse icon in the TOSHIBA Console window. ❖ Click the cPad icon on each corner. Enabling the cPad Tap Zones If the tap zones should become ...disabled, causing the icons to disappear, you can enable them by an icon, allows you to perform several basic tasks. ❖ Minimize and maximize the active window Tap...
...menu To open a program menu, tap the icon in the upper-left corner of these ways: ❖ Press the TOSHIBA Console button and click the Mouse icon in the TOSHIBA Console window. ❖ Click the cPad icon on each corner. Enabling the cPad Tap Zones If the tap zones should become ...disabled, causing the icons to disappear, you can enable them by an icon, allows you to perform several basic tasks. ❖ Minimize and maximize the active window Tap...

User Guide
Page 66
The Mouse Properties window appears. 66 Getting Started Using the computer for the first time Adjusting pointing device mode settings To adjust the settings for pointing device mode: 1 Click the cPad icon in the system tray. Switching to application launch mode To activate application launch mode, press the Application Launcher button which is located below the cPad, between the primary and secondary control buttons. A pull-down menu appears. 2 Select TouchPad Properties. Sample Mouse Properties window 3 Make the desired changes. 4 Click Apply, then OK.
The Mouse Properties window appears. 66 Getting Started Using the computer for the first time Adjusting pointing device mode settings To adjust the settings for pointing device mode: 1 Click the cPad icon in the system tray. Switching to application launch mode To activate application launch mode, press the Application Launcher button which is located below the cPad, between the primary and secondary control buttons. A pull-down menu appears. 2 Select TouchPad Properties. Sample Mouse Properties window 3 Make the desired changes. 4 Click Apply, then OK.

User Guide
Page 69
... Sticky Note Properties icon (the icon furthest left on the note, the number "+1" changes to the next number in numerical order. The Sticky Note Properties window appears on your previous highest-numbered note was 29, the newly written note becomes 30. Sample Sticky Note Properties... window The moment you are going to type using the keyboard. 3 Start writing or typing. Getting Started Using the computer for the first time 69 To ...
... Sticky Note Properties icon (the icon furthest left on the note, the number "+1" changes to the next number in numerical order. The Sticky Note Properties window appears on your previous highest-numbered note was 29, the newly written note becomes 30. Sample Sticky Note Properties... window The moment you are going to type using the keyboard. 3 Start writing or typing. Getting Started Using the computer for the first time 69 To ...

User Guide
Page 70
...your computer's system tray and select Small Display Properties from the cPad display. The Small Display Properties window appears on the cPad display: 1 Open the Small Display Properties window in your computer's main screen. 2 Click the Background tab. 70 Getting Started Using the computer for... display "wallpaper," and set an alarm. The note disappears from the pulldown menu. The Background tab window appears with a list of these ways: ❖ Press the TOSHIBA Console button and double-click the Small Display Properties icon. ❖ With the cPad Application Launcher open...
...your computer's system tray and select Small Display Properties from the cPad display. The Small Display Properties window appears on the cPad display: 1 Open the Small Display Properties window in your computer's main screen. 2 Click the Background tab. 70 Getting Started Using the computer for... display "wallpaper," and set an alarm. The note disappears from the pulldown menu. The Background tab window appears with a list of these ways: ❖ Press the TOSHIBA Console button and double-click the Small Display Properties icon. ❖ With the cPad Application Launcher open...

User Guide
Page 71
The selected background appears in the preview window. 4 Click OK. The new background appears on the cPad display. Getting Started Using the computer for the first time 71 Sample Small Display Properties window with Background tab displayed 3 Select a background.
The selected background appears in the preview window. 4 Click OK. The new background appears on the cPad display. Getting Started Using the computer for the first time 71 Sample Small Display Properties window with Background tab displayed 3 Select a background.


