
Limited Warranty (U.S. Only)
Page 1
... Parts: For a period of one (1) year from your unit. any enclosed software Limited Warranty. Please refer to the End User License Agreements included with the Product for in any such software is likely that has been returned to its option, repair or replace ...; If Sony elects to the Sony authorized service facility specified. A dated purchase receipt is longer. For specific instructions on how to be defective. It does not cover technical assistance for parts determined to obtain warranty service for the time periods and as fuses or batteries). This Limited...
... Parts: For a period of one (1) year from your unit. any enclosed software Limited Warranty. Please refer to the End User License Agreements included with the Product for in any such software is likely that has been returned to its option, repair or replace ...; If Sony elects to the Sony authorized service facility specified. A dated purchase receipt is longer. For specific instructions on how to be defective. It does not cover technical assistance for parts determined to obtain warranty service for the time periods and as fuses or batteries). This Limited...
Operating Instructions
Page 1
CDX-S2210 © 2005 Sony Corporation For installation and connections, see the supplied installation/connections manual. En ce qui concerne l'installation et les connexions, consulter le manuel d'installation/raccordement fourni. Record these numbers whenever you call upon your Sony dealer regarding this product. Refer to these numbers in the space provided below. CDX-S2210 Serial No. Model No. 2-348-467-11 (1) FM/AM Compact Disc Player Operating Instructions US Mode d'emploi FR Owner's Record The model and serial numbers are located on the bottom of the unit.
CDX-S2210 © 2005 Sony Corporation For installation and connections, see the supplied installation/connections manual. En ce qui concerne l'installation et les connexions, consulter le manuel d'installation/raccordement fourni. Record these numbers whenever you call upon your Sony dealer regarding this product. Refer to these numbers in the space provided below. CDX-S2210 Serial No. Model No. 2-348-467-11 (1) FM/AM Compact Disc Player Operating Instructions US Mode d'emploi FR Owner's Record The model and serial numbers are located on the bottom of the unit.
Operating Instructions
Page 2
... found to comply with the instructions, may cause harmful interference to correct the interference by turning the equipment off and this Sony Compact Disc Player. Warning if your authority to provide reasonable protection against harmful interference in a particular installation. Type of Sony Corporation. 2 This equipment generates, uses, and can enjoy your drive with this manual could void your car's ignition has no guarantee...
... found to comply with the instructions, may cause harmful interference to correct the interference by turning the equipment off and this Sony Compact Disc Player. Warning if your authority to provide reasonable protection against harmful interference in a particular installation. Type of Sony Corporation. 2 This equipment generates, uses, and can enjoy your drive with this manual could void your car's ignition has no guarantee...
Operating Instructions
Page 3
...Started Resetting the unit 4 Setting the clock 4 DEMO mode 4 Detaching the front panel 4 Attaching the front panel 4 Location of controls and basic operations Main unit 5 CD Display items 6 Repeat and shuffle play 6 Radio Storing and receiving stations 6 Storing automatically - SET 7 Using optional remote commander 8 Card remote commander RM-X114 8 Additional Information Precautions 9 Notes on discs 9 About MP3 files 9 About ATRAC CD 10 Maintenance 10 Removing the unit 11 Specifications 11 Troubleshooting 12 Error displays/Messages 13 3 EQ3 . . . . 7 Adjusting setup items...
...Started Resetting the unit 4 Setting the clock 4 DEMO mode 4 Detaching the front panel 4 Attaching the front panel 4 Location of controls and basic operations Main unit 5 CD Display items 6 Repeat and shuffle play 6 Radio Storing and receiving stations 6 Storing automatically - SET 7 Using optional remote commander 8 Card remote commander RM-X114 8 Additional Information Precautions 9 Notes on discs 9 About MP3 files 9 About ATRAC CD 10 Maintenance 10 Removing the unit 11 Specifications 11 Troubleshooting 12 Error displays/Messages 13 3 EQ3 . . . . 7 Adjusting setup items...
Operating Instructions
Page 4
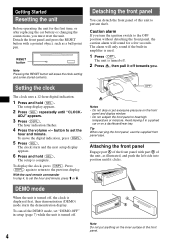
... DEMO mode, set "DEMO-OFF" in a parked car or on the front panel and display window. • Do not subject the front panel to the previous display. Getting Started Resetting the unit Before operating the unit for a few seconds. button to the OFF position without detaching the front panel, the caution alarm will sound for the first time, or after replacing the car battery or changing the connections, you turn the ignition switch to set...
... DEMO mode, set "DEMO-OFF" in a parked car or on the front panel and display window. • Do not subject the front panel to the previous display. Getting Started Resetting the unit Before operating the unit for a few seconds. button to the OFF position without detaching the front panel, the caution alarm will sound for the first time, or after replacing the car battery or changing the connections, you turn the ignition switch to set...
Operating Instructions
Page 5
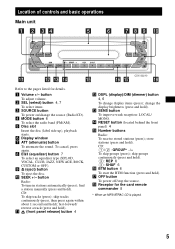
... and hold ). d MODE button 6 To select the radio band (FM/AM). To cancel, press again. fast-forward/ reverse a track (press and hold ). change display items (press); n RESET button (located behind the front panel) 4 o Number buttons Radio: To receive stored stations (press); skip groups continuously (press and hold). (3): REP 6 (4): SHUF 6 p BTM button 6 To start the BTM function (press and hold ). button To adjust volume. j SEEK +/- q OFF button To power off/stop the source. CD: To...
... and hold ). d MODE button 6 To select the radio band (FM/AM). To cancel, press again. fast-forward/ reverse a track (press and hold ). change display items (press); n RESET button (located behind the front panel) 4 o Number buttons Radio: To receive stored stations (press); skip groups continuously (press and hold). (3): REP 6 (4): SHUF 6 p BTM button 6 To start the BTM function (press and hold ). button To adjust volume. j SEEK +/- q OFF button To power off/stop the source. CD: To...
Operating Instructions
Page 6
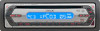
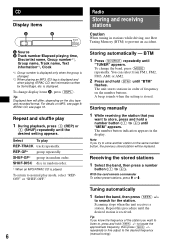
... will be replaced. To change display items B, press (DSPL). Receiving the stored stations 1 Select the band, then press a number button ((1) to the desired frequency 6 (manual tuning). repeatedly to fine adjust to (6)). CD Display items A B Radio Storing and receiving stations Caution When tuning in stations while driving, use Best Tuning Memory (BTM) to normal play mode, select "REPOFF" or "SHUF-OFF." A Source B Track number/Elapsed playing time, Disc/artist name, Group number*1, Group name, Track name, Text information*2, Clock *1 Group number is displayed only when...
... will be replaced. To change display items B, press (DSPL). Receiving the stored stations 1 Select the band, then press a number button ((1) to the desired frequency 6 (manual tuning). repeatedly to fine adjust to (6)). CD Display items A B Radio Storing and receiving stations Caution When tuning in stations while driving, use Best Tuning Memory (BTM) to normal play mode, select "REPOFF" or "SHUF-OFF." A Source B Track number/Elapsed playing time, Disc/artist name, Group number*1, Group name, Track name, Text information*2, Clock *1 Group number is displayed only when...
Operating Instructions
Page 7
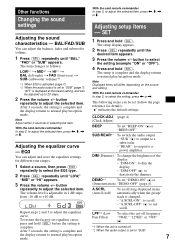
... functions Changing the sound settings Adjusting the sound characteristics - The item changes as follows: LOW*1 t MID*1 t HI*1 t BAL (left-right) t FAD (front-rear) t SUB (subwoofer volume)*2 *1 When EQ3 is activated (page 7). *2 When the audio output is complete and the display returns to normal play/reception mode. With the card remote commander In step 2, to adjust the selected item. BAL/FAD/SUB You can be adjusted up to "SUB" (page 7). After 3 seconds, the setting is set...
... functions Changing the sound settings Adjusting the sound characteristics - The item changes as follows: LOW*1 t MID*1 t HI*1 t BAL (left-right) t FAD (front-rear) t SUB (subwoofer volume)*2 *1 When EQ3 is activated (page 7). *2 When the audio output is complete and the display returns to normal play/reception mode. With the card remote commander In step 2, to adjust the selected item. BAL/FAD/SUB You can be adjusted up to "SUB" (page 7). After 3 seconds, the setting is set...
Operating Instructions
Page 8
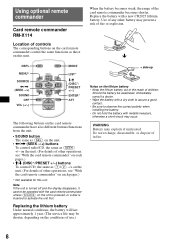
Using optional remote commander Card remote commander RM-X114 Location of controls The corresponding buttons on the card remote commander control the same functions as those on this unit. DSPL MENU* SOURCE
Using optional remote commander Card remote commander RM-X114 Location of controls The corresponding buttons on the card remote commander control the same functions as those on this unit. DSPL MENU* SOURCE
Operating Instructions
Page 9
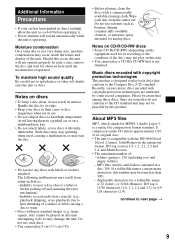
... may damage the unit. Wipe each disc from using such discs: - Music discs encoded with copyright protection technologies This product is compatible with copyright protection technologies are some record companies. Recently, various music discs encoded with the ISO 9660 level 1/level 2 format, Joliet/Romeo in the expansion format, ID3 tag version 1.0, 1.1, 2.2, 2.3 and 2.4, and Multi Session. • The maximum number of: - It compresses audio CD data...
... may damage the unit. Wipe each disc from using such discs: - Music discs encoded with copyright protection technologies This product is compatible with copyright protection technologies are some record companies. Recently, various music discs encoded with the ISO 9660 level 1/level 2 format, Joliet/Romeo in the expansion format, ID3 tag version 1.0, 1.1, 2.2, 2.3 and 2.4, and Multi Session. • The maximum number of: - It compresses audio CD data...
Operating Instructions
Page 10
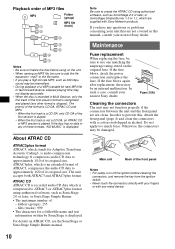
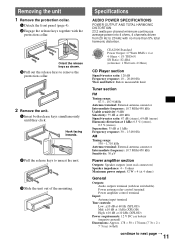
... format is played. If the fuse blows again after replacement, there may not display accurately. • When the disc is recorded in any questions or problems concerning your nearest Sony dealer. Fuse (10A) Cleaning the connectors The unit may be an internal malfunction. Main unit Back of the front panel Notes • For safety, turn off the ignition before using on the unit. • When...
... format is played. If the fuse blows again after replacement, there may not display accurately. • When the disc is recorded in any questions or problems concerning your nearest Sony dealer. Fuse (10A) Cleaning the connectors The unit may be an internal malfunction. Main unit Back of the front panel Notes • For safety, turn off the ignition before using on the unit. • When...
Operating Instructions
Page 11
...: External antenna connector Intermediate frequency: 10.7 MHz/450 kHz Sensitivity: 30 µV Power amplifier section Outputs: Speaker outputs (sure seal connectors) Speaker impedance: 4 - 8 ohms Maximum power output: 52 W × 4 (at 4 ohms) General Outputs: Audio outputs terminal (sub/rear switchable) Power antenna relay control terminal Power amplifier control terminal Input: Antenna input terminal Tone controls: Low: ±10 dB at 60 Hz (XPLOD) Mid: ±10 dB at 1 kHz (XPLOD) High: ±10 dB at 10 kHz (XPLOD) Power requirements: 12 V DC car battery...
...: External antenna connector Intermediate frequency: 10.7 MHz/450 kHz Sensitivity: 30 µV Power amplifier section Outputs: Speaker outputs (sure seal connectors) Speaker impedance: 4 - 8 ohms Maximum power output: 52 W × 4 (at 4 ohms) General Outputs: Audio outputs terminal (sub/rear switchable) Power antenna relay control terminal Power amplifier control terminal Input: Antenna input terminal Tone controls: Low: ±10 dB at 60 Hz (XPLOD) Mid: ±10 dB at 1 kHz (XPLOD) High: ±10 dB at 10 kHz (XPLOD) Power requirements: 12 V DC car battery...
Operating Instructions
Page 12
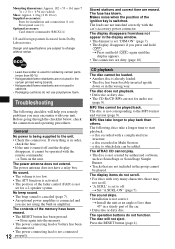
... than 45° in a sturdy part of the fader control (FAD) is not set for installation and connections (1 set to change without notice. • Lead-free solder is activated. • The position of the car. • Defective or dirty disc. The disc will help you remedy problems you press and hold (OFF) again until the display appears. • The connectors are erased. Mounting dimensions: Approx. 182 ×...
... than 45° in a sturdy part of the fader control (FAD) is not set for installation and connections (1 set to change without notice. • Lead-free solder is activated. • The position of the car. • Defective or dirty disc. The disc will help you remedy problems you press and hold (OFF) again until the display appears. • The connectors are erased. Mounting dimensions: Approx. 182 ×...
Operating Instructions
Page 13
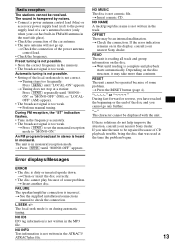
.... • Connect a power antenna control lead (blue) or accessory power supply lead (red) to be repaired because of some problem. NO INFO Text information is not written in the rear/side glass). • Check the connection of the power antenna control lead. • Check the frequency. t See the supplied installation/connections manual to "MONO-ON." RESET The unit cannot be displayed with the unit. t Check the connection of the car antenna. • The auto antenna will...
.... • Connect a power antenna control lead (blue) or accessory power supply lead (red) to be repaired because of some problem. NO INFO Text information is not written in the rear/side glass). • Check the connection of the power antenna control lead. • Check the frequency. t See the supplied installation/connections manual to "MONO-ON." RESET The unit cannot be displayed with the unit. t Check the connection of the car antenna. • The auto antenna will...

Operating Instructions
Page 28
Sony Corporation Printed in China
Sony Corporation Printed in China


