
Operating Instructions
Page 3
... Contents Getting Started Resetting the unit 4 Setting the clock 4 DEMO mode 4 Detaching the front panel 4 Attaching the front panel 4 Location of controls and basic operations Main unit 5 Radio Storing and receiving stations 6 Storing automatically - BAL/FAD/SUB 6 Adjusting the equalizer curve - SET 7 Additional Information Precautions 7 Notes on discs 7 Maintenance 8 Removing the unit 8 Specifications 9 Troubleshooting...
... Contents Getting Started Resetting the unit 4 Setting the clock 4 DEMO mode 4 Detaching the front panel 4 Attaching the front panel 4 Location of controls and basic operations Main unit 5 Radio Storing and receiving stations 6 Storing automatically - BAL/FAD/SUB 6 Adjusting the equalizer curve - SET 7 Additional Information Precautions 7 Notes on discs 7 Maintenance 8 Removing the unit 8 Specifications 9 Troubleshooting...

Operating Instructions
Page 4
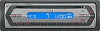
Setting the clock The clock uses a 12-hour digital indication. 1 Press and hold (SEL). The hour indication flashes. 4 Press the volume +/- To display the clock, press (DSPL). Caution alarm If you turn the ignition switch to the OFF position without detaching the front panel, the ... the front panel Engage part A of the front panel. 4 RESET button Note Pressing the RESET button will erase the clock setting and some stored contents. A To cancel the DEMO mode, set the hour and minute. button to prevent theft. The unit is complete. ADJ" appears. 3 Press (DSPL). Detach the...
Setting the clock The clock uses a 12-hour digital indication. 1 Press and hold (SEL). The hour indication flashes. 4 Press the volume +/- To display the clock, press (DSPL). Caution alarm If you turn the ignition switch to the OFF position without detaching the front panel, the ... the front panel Engage part A of the front panel. 4 RESET button Note Pressing the RESET button will erase the clock setting and some stored contents. A To cancel the DEMO mode, set the hour and minute. button to prevent theft. The unit is complete. ADJ" appears. 3 Press (DSPL). Detach the...

Operating Instructions
Page 7
...a dashboard/rear tray. • Do not attach labels, or use such discs. • You cannot play /reception mode. Adjusting setup items - button to deactivate the dimmer. CLOCK-ADJ (page 4) (Clock Adjust) BEEP To set "DEMO-ON" (z) or (Demonstration) "DEMO-OFF" (page 4). Moisture ...condensation On a rainy day or in use any discs with sticky ink/residue. Inability to eject a disc (due to a subwoofer. - The ...
...a dashboard/rear tray. • Do not attach labels, or use such discs. • You cannot play /reception mode. Adjusting setup items - button to deactivate the dimmer. CLOCK-ADJ (page 4) (Clock Adjust) BEEP To set "DEMO-ON" (z) or (Demonstration) "DEMO-OFF" (page 4). Moisture ...condensation On a rainy day or in use any discs with sticky ink/residue. Inability to eject a disc (due to a subwoofer. - The ...


