Operating Instructions
Page 1
Pour annuler l'affichage de démonstration (Demo), reportez-vous à la page 6. CDX-GT740UI Serial No. CDX-GT740UI ©2009 Sony Corporation Model No. Record the serial number in the space provided below. Refer to these numbers whenever you call upon your Sony dealer regarding this product. To cancel the demonstration (Demo) display, see page 6. 4-159-947-11 (1) FM/AM Compact Disc Player Operating Instructions US Mode d'emploi FR Owner's Record The model and serial numbers are located on the bottom of the unit.
Pour annuler l'affichage de démonstration (Demo), reportez-vous à la page 6. CDX-GT740UI Serial No. CDX-GT740UI ©2009 Sony Corporation Model No. Record the serial number in the space provided below. Refer to these numbers whenever you call upon your Sony dealer regarding this product. To cancel the demonstration (Demo) display, see page 6. 4-159-947-11 (1) FM/AM Compact Disc Player Operating Instructions US Mode d'emploi FR Owner's Record The model and serial numbers are located on the bottom of the unit.

Operating Instructions
Page 3
...") so that Microsoft revoke the WM-DRM Software's right to acquire new licenses to set the Auto Off function, press and hold (OFF) until the display disappears each time you download a license for Secure Content from the Internet or from a PC. Microsoft may request that their intellectual property, including copyright, in... to play Secure Content ("WM-DRM Software"). This device uses WM-DRM software to your car's ignition has no ACC position Be sure to copy, display and/or play unprotected content. A list of Secure Content Owners.
...") so that Microsoft revoke the WM-DRM Software's right to acquire new licenses to set the Auto Off function, press and hold (OFF) until the display disappears each time you download a license for Secure Content from the Internet or from a PC. Microsoft may request that their intellectual property, including copyright, in... to play Secure Content ("WM-DRM Software"). This device uses WM-DRM software to your car's ignition has no ACC position Be sure to copy, display and/or play unprotected content. A list of Secure Content Owners.

Operating Instructions
Page 4
LIST 12 CD Playing a disc 12 Display items 12 Repeat and shuffle play 13 USB devices Playing back a USB device 13 Display items 14 Repeat and shuffle play 14 iPod Playing back iPod 15 Display items 16 Setting the play mode 16 Repeat and shuffle play 16 Operating an ... a list - Quick-BrowZer 10 Searching a track by name - EQ3 Parametric Tune 18 Adjusting setup items - Table of Contents Getting Started Playable discs on discs 20 Playback order of controls and basic operations Main unit 8 Card remote commander RM-X172 8 Searching for a track 10 Searching a track by ...
LIST 12 CD Playing a disc 12 Display items 12 Repeat and shuffle play 13 USB devices Playing back a USB device 13 Display items 14 Repeat and shuffle play 14 iPod Playing back iPod 15 Display items 16 Setting the play mode 16 Repeat and shuffle play 16 Operating an ... a list - Quick-BrowZer 10 Searching a track by name - EQ3 Parametric Tune 18 Adjusting setup items - Table of Contents Getting Started Playable discs on discs 20 Playback order of controls and basic operations Main unit 8 Card remote commander RM-X172 8 Searching for a track 10 Searching a track by ...
Operating Instructions
Page 6
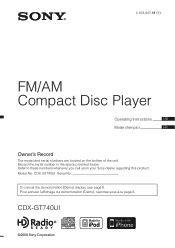
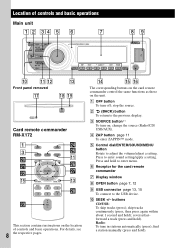
...and hold the control dial. Canceling the Demo mode You can play /reception mode. 6 The setting is complete and the clock starts. The setup display appears. 2 Rotate the control dial until "Clock Adjust" appears. 3 Press the control dial. 4 Rotate the control dial to set the hour,...the car battery or changing the connections, you must reset the unit. Getting Started Playable discs on the disc Preparing the card remote commander Remove the insulation film. Type of discs Label on this unit This unit can cancel the demonstration display which appears during turning off ."
...and hold the control dial. Canceling the Demo mode You can play /reception mode. 6 The setting is complete and the clock starts. The setup display appears. 2 Rotate the control dial until "Clock Adjust" appears. 3 Press the control dial. 4 Rotate the control dial to set the hour,...the car battery or changing the connections, you must reset the unit. Getting Started Playable discs on the disc Preparing the card remote commander Remove the insulation film. Type of discs Label on this unit This unit can cancel the demonstration display which appears during turning off ."

Operating Instructions
Page 7
... panel Place the hole A of the front panel. The alarm will only sound if the built-in a parked car or on the front panel and display window. • Do not subject the front panel to the OFF position without detaching the front panel, the caution alarm will sound for a few seconds.... Notes • Do not drop or put anything on the unit (or insert a disc) to prevent theft. Caution alarm If you turn the ignition switch to heat/high temperature or moisture. Press (SOURCE) on the inner surface of the...
... panel Place the hole A of the front panel. The alarm will only sound if the built-in a parked car or on the front panel and display window. • Do not subject the front panel to the OFF position without detaching the front panel, the caution alarm will sound for a few seconds.... Notes • Do not drop or put anything on the unit (or insert a disc) to prevent theft. Caution alarm If you turn the ignition switch to heat/high temperature or moisture. Press (SOURCE) on the inner surface of the...
Operating Instructions
Page 8
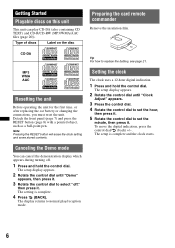
... automatically (press); wa ws qg OFF ATT SOURCE SOUND MODE MENU /CAT + ENTER - Press and hold ). stop the source. F Receptor for the card remote commander G Display window H OPEN button page 7, 12 I USB connector page 13, 15 To connect to enter menu. skip tracks continuously (press, then press again within about 1 second... the USB device. D ZAP button page 11 To enter ZAPPIN™ mode. Location of controls and basic operations. B (BACK) button To return to the previous display. J SEEK +/-
... automatically (press); wa ws qg OFF ATT SOURCE SOUND MODE MENU /CAT + ENTER - Press and hold ). stop the source. F Receptor for the card remote commander G Display window H OPEN button page 7, 12 I USB connector page 13, 15 To connect to enter menu. skip tracks continuously (press, then press again within about 1 second... the USB device. D ZAP button page 11 To enter ZAPPIN™ mode. Location of controls and basic operations. B (BACK) button To return to the previous display. J SEEK +/-

Operating Instructions
Page 9
... unit. L (LIST/BROWSE) button page 10, 12 To list up (Radio); M SCRL (scroll) button To scroll the display item. Radio: To receive stored stations (press); S Disc slot To insert the disc. Setup, sound setting, etc., can switch the HD Radio tuner band or SAT tuner band. *2 This button has a tactile...operated by M m. button To adjust volume. store stations (press and hold to select the radio band (FM/AM)/ select the play mode of iPod. Q RESET button page 6 R Z (eject) button page 12 To eject the disc. Press and hold ). N Number buttons CD/USB: (1): REP page 13, 14, 16 (2): SHUF ...
... unit. L (LIST/BROWSE) button page 10, 12 To list up (Radio); M SCRL (scroll) button To scroll the display item. Radio: To receive stored stations (press); S Disc slot To insert the disc. Setup, sound setting, etc., can switch the HD Radio tuner band or SAT tuner band. *2 This button has a tactile...operated by M m. button To adjust volume. store stations (press and hold to select the radio band (FM/AM)/ select the play mode of iPod. Q RESET button page 6 R Z (eject) button page 12 To eject the disc. Press and hold ). N Number buttons CD/USB: (1): REP page 13, 14, 16 (2): SHUF ...

Operating Instructions
Page 10
... Current item number B Total item number in the current layer C Item name Then the item name will appear. 2 Rotate the control dial to the previous display Press (BACK). Searching for a track in shuffle or shuffle repeat mode. Jump mode When many items are in a category, you can search for a track... to the Quick-BrowZer mode and the selected item appears. 4 Rotate the control dial to select the desired item and press it to . The following display appears. A B OFF SEEK ZAP SOURCE MODE SEEK SEEK +/- (BACK) 1 Press (LIST/BROWSE). Quick-BrowZer You can search for a track you can...
... Current item number B Total item number in the current layer C Item name Then the item name will appear. 2 Rotate the control dial to the previous display Press (BACK). Searching for a track in shuffle or shuffle repeat mode. Jump mode When many items are in a category, you can search for a track... to the Quick-BrowZer mode and the selected item appears. 4 Rotate the control dial to select the desired item and press it to . The following display appears. A B OFF SEEK ZAP SOURCE MODE SEEK SEEK +/- (BACK) 1 Press (LIST/BROWSE). Quick-BrowZer You can search for a track you can...
Operating Instructions
Page 11
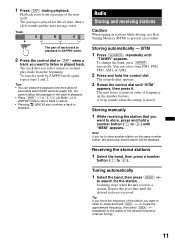
... and the next passage starts. to listen is received. Playback starts from the beginning. Storing automatically - To change the band, press (MODE) repeatedly. The setup display appears. 3 Rotate the control dial until "TUNER" appears. The unit stores stations in ZAPPIN mode. 2 Press the control dial or (ZAP) when a track you select...
... and the next passage starts. to listen is received. Playback starts from the beginning. Storing automatically - To change the band, press (MODE) repeatedly. The setup display appears. 3 Rotate the control dial until "TUNER" appears. The unit stores stations in ZAPPIN mode. 2 Press the control dial or (ZAP) when a track you select...

Operating Instructions
Page 12
... will differ depending on the disc type, recording format and settings. 12 The display returns to receive the station. LIST You can list up ). 3 Close the front panel. CD Playing a disc 1 Press (OPEN). 2 Insert the disc (label side up the frequency. 1 Select the band, then press (LIST/ ..., MP3/WMA/AAC is ejected. 3 Close the front panel. Receiving a station through a list - The disc is displayed. Ejecting the disc 1 Press (OPEN). 2 Press Z. Display items To change display items, press (DSPL). The preset list appears. 2 Rotate the control dial until the desired station appears....
... will differ depending on the disc type, recording format and settings. 12 The display returns to receive the station. LIST You can list up ). 3 Close the front panel. CD Playing a disc 1 Press (OPEN). 2 Insert the disc (label side up the frequency. 1 Select the band, then press (LIST/ ..., MP3/WMA/AAC is ejected. 3 Close the front panel. Receiving a station through a list - The disc is displayed. Ejecting the disc 1 Press (OPEN). 2 Press Z. Display items To change display items, press (DSPL). The preset list appears. 2 Rotate the control dial until the desired station appears....

Operating Instructions
Page 14
...down due to normal play mode, select "Repeat off" or "Shuffle off." device in random order. album in random order. Display items To change display items, press (DSPL). lossless compression - To return to vibration, or cause a loose connection. • Do not detach ...B C D A Source B Clock C Track name, Artist name, Album name D EQ3 Parametric Preset/DM+ Advanced/ ZAPPIN/Repeat/Shuffle A B Notes • Displayed items will differ, depending on the amount of recorded data. • DRM (Digital Rights Management) files may be damaged. • This unit cannot recognize USB...
...down due to normal play mode, select "Repeat off" or "Shuffle off." device in random order. album in random order. Display items To change display items, press (DSPL). lossless compression - To return to vibration, or cause a loose connection. • Do not detach ...B C D A Source B Clock C Track name, Artist name, Album name D EQ3 Parametric Preset/DM+ Advanced/ ZAPPIN/Repeat/Shuffle A B Notes • Displayed items will differ, depending on the amount of recorded data. • DRM (Digital Rights Management) files may be damaged. • This unit cannot recognize USB...

Operating Instructions
Page 15
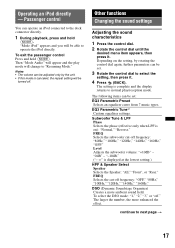
... on iPod setting. 4 Adjust the volume. Tips • When the ignition key is turned to resuming mode and playback starts in the display of the unit. Support site http://esupport.sony.com http://www.xplodsony.com/ Playing back iPod Before connecting the iPod, turn on automatically, and the... display will be damaged. • This unit cannot recognize iPod via a USB hub. Removing the iPod 1 Stop the iPod playback. 2 Remove the iPod. In...
... on iPod setting. 4 Adjust the volume. Tips • When the ignition key is turned to resuming mode and playback starts in the display of the unit. Support site http://esupport.sony.com http://www.xplodsony.com/ Playing back iPod Before connecting the iPod, turn on automatically, and the... display will be damaged. • This unit cannot recognize iPod via a USB hub. Removing the iPod 1 Stop the iPod playback. 2 Remove the iPod. In...

Operating Instructions
Page 16
... off" or "Shuffle off." 16 Tip When album/podcast/genre/artist/playlist is complete. genre in iPod may not be displayed correctly. podcast in random order. genre repeatedly. playlist in random order. device in random order. Skipping albums, podcasts, genres...for each] (3)/(4) (ALBUM -/+) [hold to normal play 1 During playback, press (1) (REP) or (2) (SHUF) repeatedly until the desired setting appears. Display items To change display items, press (DSPL). The mode changes as follows: Album Mode t Track Mode t Podcast Mode* t Genre Mode t Playlist Mode t Artist Mode ...
... off" or "Shuffle off." 16 Tip When album/podcast/genre/artist/playlist is complete. genre in iPod may not be displayed correctly. podcast in random order. genre repeatedly. playlist in random order. device in random order. Skipping albums, podcasts, genres...for each] (3)/(4) (ALBUM -/+) [hold to normal play 1 During playback, press (1) (REP) or (2) (SHUF) repeatedly until the desired setting appears. Display items To change display items, press (DSPL). The mode changes as follows: Album Mode t Track Mode t Podcast Mode* t Genre Mode t Playlist Mode t Artist Mode ...
Operating Instructions
Page 17
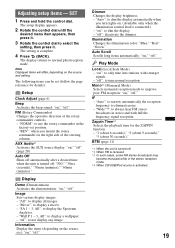
Then "Mode Audio" will be set . 3 Rotate the control dial to operate the iPod directly. The setting is displayed at the lowest setting.) HPF & Speaker Select Speaker Selects the Speaker: "All," "Front", or "Rear." The following items can be able to select the setting, ... equalizer curve from 7 music types. Passenger control You can be turned off ." EQ3 Parametric Tune*1 Custom equalizer settings. "0dB" - "-10dB." ("- ∞" is complete and the display returns to next page t 17 To select the DSO mode: "1," "2," "3," or "off .
Then "Mode Audio" will be set . 3 Rotate the control dial to operate the iPod directly. The setting is displayed at the lowest setting.) HPF & Speaker Select Speaker Selects the Speaker: "All," "Front", or "Rear." The following items can be able to select the setting, ... equalizer curve from 7 music types. Passenger control You can be turned off ." EQ3 Parametric Tune*1 Custom equalizer settings. "0dB" - "-10dB." ("- ∞" is complete and the display returns to next page t 17 To select the DSO mode: "1," "2," "3," or "off .
Operating Instructions
Page 18
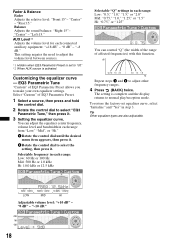
... Q=1.0 1.5 2.0 2.0 1.5 1.0 Hz Repeat steps 1 and 2 to select the setting, then press it. To restore the factory-set to "off." *2 When AUX source is complete and the display returns to select "EQ3 Parametric Tune," then press it . 2 Rotate the control dial to adjust other frequency ranges. 4 Press (BACK) twice. "0 dB" - AUX Level*2 Adjusts...
... Q=1.0 1.5 2.0 2.0 1.5 1.0 Hz Repeat steps 1 and 2 to select the setting, then press it. To restore the factory-set to "off." *2 When AUX source is complete and the display returns to select "EQ3 Parametric Tune," then press it . 2 Rotate the control dial to adjust other frequency ranges. 4 Press (BACK) twice. "0 dB" - AUX Level*2 Adjusts...
Operating Instructions
Page 19
...REV": when you turn lights on ," "off ." "SA 1 - 3, All": to display a movie. - "Auto": to dim the display automatically when you mount the rotary commander on ," "off ." "off ": to improve poor FM reception: "on . (Available only when the illumination control lead is activated. 19 Mono*2 (...Monaural Mode) Selects monaural reception mode to not display any image. RM (Rotary Commander) Changes the operative direction of the...
...REV": when you turn lights on ," "off ." "SA 1 - 3, All": to display a movie. - "Auto": to dim the display automatically when you mount the rotary commander on ," "off ." "off ": to improve poor FM reception: "on . (Available only when the illumination control lead is activated. 19 Mono*2 (...Monaural Mode) Selects monaural reception mode to not display any image. RM (Rotary Commander) Changes the operative direction of the...
Operating Instructions
Page 20
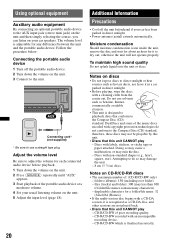
...for it in a car parked in direct sunlight. • Before playing, wipe the discs with a CD-DA session, it is designed to playback discs that this unit. • Discs that conform to the Compact Disc (CD) standard. The volume level is finalized incorrectly. 20 To maintain high sound ...4 Set your usual listening volume on the unit. 5 Adjust the input level (page 18). displayable characters for each connected audio device before playback. 1 Turn down the volume on CD-R/CD-RW discs • The maximum number of poor recording quality. - otherwise the unit will not operate properly...
...for it in a car parked in direct sunlight. • Before playing, wipe the discs with a CD-DA session, it is designed to playback discs that this unit. • Discs that conform to the Compact Disc (CD) standard. The volume level is finalized incorrectly. 20 To maintain high sound ...4 Set your usual listening volume on the unit. 5 Adjust the input level (page 18). displayable characters for each connected audio device before playback. 1 Turn down the volume on CD-R/CD-RW discs • The maximum number of poor recording quality. - otherwise the unit will not operate properly...
Operating Instructions
Page 24
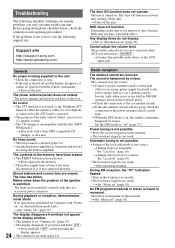
... of the fader control "Fader" is not set for 5 minutes with the disc (MP3/ WMA/AAC). If the problem is not correct. Cannot adjust the ...display appears. 24 • The connectors are erased. Any display items do not display. t Turn on " (page 19). t Set "Demo off " (page 17). t Check the connection of music, DSO may encounter with the remote commander. t Perform manual tuning. Support site http://esupport.sony...Check the connection or fuse. • If the unit is too weak. During FM reception, the "ST" indication flashes. • Tune in the frequency accurately....
... of the fader control "Fader" is not set for 5 minutes with the disc (MP3/ WMA/AAC). If the problem is not correct. Cannot adjust the ...display appears. 24 • The connectors are erased. Any display items do not display. t Turn on " (page 19). t Set "Demo off " (page 17). t Check the connection of music, DSO may encounter with the remote commander. t Perform manual tuning. Support site http://esupport.sony...Check the connection or fuse. • If the unit is too weak. During FM reception, the "ST" indication flashes. • Tune in the frequency accurately....

Operating Instructions
Page 25
... Scroll" is confirming the connection of more than others. Error displays/Messages Checking The unit is set to a problem. t Insert another disc. • USB device was not automatically recognized. t See the installation guide manual of your nearest Sony dealer. NO Device USB is overloaded. t For details on...may be intermittent at an angle of less than 320 kbps. Depending on the compatibility of this model to check the connection. a disc recorded in the display, consult your USB device, visit the support site. t Install the unit at a high-bit-rate of a USB device. t ...
... Scroll" is confirming the connection of more than others. Error displays/Messages Checking The unit is set to a problem. t Insert another disc. • USB device was not automatically recognized. t See the installation guide manual of your nearest Sony dealer. NO Device USB is overloaded. t For details on...may be intermittent at an angle of less than 320 kbps. Depending on the compatibility of this model to check the connection. a disc recorded in the display, consult your USB device, visit the support site. t Install the unit at a high-bit-rate of a USB device. t ...

Operating Instructions
Page 26
Push Reset This unit or USB device cannot be operated due to be displayed with the unit. t Press the RESET button (page 6). " " or " " During reverse or fast-forward, you take the unit to a problem. If you have reached the beginning or the end of CD playback trouble, bring the disc that was used at the time the problem began. 26 If these solutions do not help improve the situation, consult your nearest Sony dealer. "" The character cannot be repaired because of the disc and you cannot go any further.
Push Reset This unit or USB device cannot be operated due to be displayed with the unit. t Press the RESET button (page 6). " " or " " During reverse or fast-forward, you take the unit to a problem. If you have reached the beginning or the end of CD playback trouble, bring the disc that was used at the time the problem began. 26 If these solutions do not help improve the situation, consult your nearest Sony dealer. "" The character cannot be repaired because of the disc and you cannot go any further.


