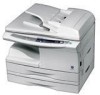
Interactive Manual for the AL-1530CS | AL-1540CS | AL-1551CS
Page 3
... document, green colored letters are mainly screens of the Online Manual. Click this button to display the Table of Contents of AL-1551CS. Following links Links can connect parts of a document to other versions of Windows, some screen images may be different from those in this online manual, screen ...the pointer over the linked area on Windows 95/98/Me/NT 4.0) button to print. In this online manual are linked areas. With other parts for your new unit. CONTENTS INDEX 1 Using Bookmarks This online manual has Bookmarks on the menu bar of your reference, go to Acrobat ...
Interactive Manual for the AL-1530CS | AL-1540CS | AL-1551CS
Page 14
...WIACompliant Application ! Reference: For information on the original table/SPF/RSPF. Reference: Scanning an Image from a TWAIN-Compliant Application (part 1) The SHARP scanner driver conforms to the Sharpdesk desktop screen using the WIA driver. CONTENTS INDEX 12 Click here. Depending on your unit)...starting Sharpdesk, click the "File" menu and select "Select Scanner". 3 Select "SHARP Personal MFP series", and click the "Select" button. If you are using Windows XP, you can also select "WIA-SHARP AL-XXXX" (where XXXX is a step-by-step guide for acquiring a scanned image...
Interactive Manual for the AL-1530CS | AL-1540CS | AL-1551CS
Page 15
... will appear. It is different, reset the original, and click the "Preview" button again. ! Note ! CONTENTS INDEX 13 3 Scanning an Image from a TWAIN-Compliant Application (part 2) 4 Select "Acquire Image" from the "File" menu, or click the "Acquire" button ( ). For information on your preferences. The preview image will appear. If the rotation...
Interactive Manual for the AL-1530CS | AL-1540CS | AL-1551CS
Page 16
... preferences. "Scanning Mode" menu Switch the scanning mode between the "Preset" and "Custom Settings" screen. CONTENTS INDEX 14 On the Note AL-1530CS, this setting is canceled by immediately pressing the [Esc] key Note on your preferences are set correctly. Select "SPF" when you ...Position" menu Select the desired scanning position from "Platen" (original table) or "SPF". 3 Scanning an Image from a TWAIN-Compliant Application (part 3) Scanner Driver Settings The scanner driver setup screen consists of these settings, click the "Help" button to display the help file for the scanner...
Interactive Manual for the AL-1530CS | AL-1540CS | AL-1551CS
Page 17
"Brightness/Contrast" button Click to change to automatically set the scanning area. CONTENTS INDEX 15 3 Scanning an Image from a TWAIN-Compliant Application (part 4) Preview screen "Auto Scan Area Adjustment" button Click when the preview screen is displayed to the "Brightness/Contrast" screen and adjust the brightness and contrast ...
Interactive Manual for the AL-1530CS | AL-1540CS | AL-1551CS
Page 18
... "ORIGINAL PLACEMENT" in the Operation Manual. 2 After starting Paint, click the "File" menu and select "From Scanner or Camera". Click here. Select "SHARP AL-XXXX" (where XXXX is explained in your unit) and click the "OK" button. Reference: For information on the original table/SPF/RSPF. 3 Scanning an..., Paint and other devices installed in the following. 1 Place the original you wish to scan from a WIA-Compliant Application (Windows XP) (part 1) If you are using Paint is the model name of the WIA driver will open. The procedure for scanning using Windows XP, you can...
Interactive Manual for the AL-1530CS | AL-1540CS | AL-1551CS
Page 19
..." button. If you will appear. CONTENTS INDEX 17 Note ! The previewed original is acquired into Paint. 3 Scanning an Image from a WIA-Compliant Application (Windows XP) (part 2) 3 Select the paper source and picture type, and click the "Preview" button. Scanning begins and the image is sent to the original exit area, so...
Interactive Manual for the AL-1530CS | AL-1540CS | AL-1551CS
Page 20
... button. 2 Click the "start" button, click "Control Panel", click "Printers and Other Hardware", and then click "Scanners and Cameras". 3 Click the "SHARP AL-XXXX" (where XXXX is the model name of your unit) icon and then click "Get pictures" in Windows XP is explained here. The "Scanner and... Camera Wizard" will appear. CONTENTS INDEX 18 3 Scanning an Image from the "Scanner and Camera Wizard" (Windows XP) (part 1) The procedure for scanning, refer to scan on setting an original for scanning with the "Scanner and Camera Wizard" in "Imaging Tasks". Reference:...
Interactive Manual for the AL-1530CS | AL-1540CS | AL-1551CS
Page 21
... you placed the original on the original table, select "Flatbed" for the format. Note ! 3 Scanning an Image from the "Scanner and Camera Wizard" (Windows XP) (part 2) 5 Select the "Picture type" and "Paper source", and click the "Next" button.
Interactive Manual for the AL-1530CS | AL-1540CS | AL-1551CS
Page 22
CONTENTS INDEX 20 Select the next task you are ready to perform, and then click the "Next" button. If you wish to end the session, click "Nothing. 3 Scanning an Image from the "Scanner and Camera Wizard" (Windows XP) (part 3) 7 When scanning ends, the following screen will appear. The "Scanner and Camera Wizard" closes and the scanned image is saved in the specified folder. I'm finished working with these pictures". 8 Click the "Finish" button.
Interactive Manual for the AL-1530CS | AL-1540CS | AL-1551CS
Page 31
... damaged sheet, reinsert the paper supply and print again. If a document is physically damaged when it is output or the image is printed skewed or partly off the paper, follow the steps listed below. Also check if the print settings are specified correctly to your requirements. CHECK1 Is the paper size...
Interactive Manual for the AL-1530CS | AL-1540CS | AL-1551CS
Page 33
... original clean? Check your output darker, whilst a small threshold value makes it is also clean. If you specified a suitable value for example it lighter. If part of the "Custom Settings" screen. A preview of the image using a TWAIN-compliant application and the back side of the "Custom Settings" screen. CONTENTS INDEX 31...
AL-1651CS | AL-1661CS Operation Manual
Page 3
CONTENTS CAUTIONS ...3 ENVIRONMENTAL INFORMATION 5 INTRODUCTION ...6 MAIN FEATURES ...7 1 PREPARATIONS PART NAMES 9 CHECKING PACKED COMPONENTS AND ACCESSORIES 12 PREPARING THE MACHINE FOR INSTALLATION 13 INSTALLING THE TD CARTRIDGE 14 POWER ON AND OFF 16 2 LOADING PAPER ... 33 COPYING MULTIPLE ORIGINALS ONTO A SINGLE SHEET OF PAPER (2 IN 1 copy) ...35 CREATING MARGINS WHEN COPYING (Margin shift 38 5 SET UP THE SOFTWARE SOFTWARE FOR AL-1651CS/1661CS 40 BEFORE INSTALLATION 41 INSTALLING THE SOFTWARE 42 SETTING UP BUTTON MANAGER 55 1
AL-1651CS | AL-1661CS Operation Manual
Page 11
The appearance of the AL-1651CS. RSPF Reversing tray Original guides Document 1 feeder cover 2 Exit area Document feeder tray 5 3 6 4 7 Bypass tray Interface USB port TD cartridge Drum cartridge LAN port 8 9 ... output tray extension 10 Power switch 11 Handles 12 Power cord 13 Fusing unit release lever 14 Transfer charger 15 Charger cleaner 9 PART NAMES 1 The following illustration shows the part names of your machine may be different depending on the model, however, the basic operations are the same. Note The illustrations in...
AL-1651CS | AL-1661CS Operation Manual
Page 23
...labels, envelopes, and other special purpose paper. The paper to be added must be fed one sheet at a time through the bypass tray. • When adding paper, first remove any paper remaining ...in the tray, combine it with part of the seal area peeled off. • Be sure to select com9, com10 or Monarch in...flat and do not have 3 loosely glued construction flaps (not the closure flap). • Special papers except SHARP recommended transparency film, labels, and envelopes must be the same size and type as the paper already in the...
AL-1651CS | AL-1661CS Operation Manual
Page 73
... the cover. - CLOSE COVERS. Replace REPLACE THE TD the toner cartridge with a new cartridge. 8 Chapter 8 TROUBLESHOOTING AND MAINTENANCE Problems related to general use only genuine SHARP parts and supplies. Indication Lamp indicator Display Cause and remedy Page BYPASS : ADD Tray location Blinks indicator PAPER TRAY * : ADD PAPER CLOSE PAPER TRAY * The indicated...
AL-1651CS | AL-1661CS Operation Manual
Page 76
.... → Use copy paper within the specified range. Page 24, 25 28 23 18 88 - 74 Replace with dry copy paper. TROUBLESHOOTING AND MAINTENANCE Problem Part of paper loaded in the tray was changed without changing the tray's paper size setting. → Be sure to change the tray's paper size setting...
AL-1651CS | AL-1661CS Operation Manual
Page 90
... the power cord from the spray may cause deformation, discoloration, deterioration or malfunction. Be sure to take a few minutes to get clean, sharp copies. Warning Do not spray flammable cleaner gas. Caution • Before cleaning, be copied. Cabinet Wipe the cabinet with a soft, clean...8226; Do not use thinner, benzene or other volatile cleaning agents. If necessary, dampen the cloth with the internal electrical components or hightemperature parts of the fusing unit, creating a risk of the RSPF Stains on a regular basis. If this area is essential in the illustration. ...
AL-1651CS | AL-1661CS Operation Manual
Page 91
... cartridge and drum cartridge 1 Remove the TD cartridge and drum cartridge as explained in "TD CARTRIDGE REPLACEMENT" (p.85) and "DRUM CARTRIDGE REPLACEMENT" (p.86). 2 Wipe the parts of the drum (green portion). Caution • Do not touch the surface of the TD cartridge and drum cartridge shown below with a clean cloth. If... or blotchy, the transfer charger may cause smudges on the copies. • When cleaning the TD cartridge, do tilt or shake it. Wipe only the parts that are indicated in the illustration. Clean the charger using the following procedure. 4 8 89
AL-1651CS | AL-1661CS Operation Manual
Page 93
...TD cartridge Drum cartridge Part number AL-110TD AL-100DR Usable life Approx. 4,000 sheets Approx. 18,000 sheets * Based on the toner package. LAN interface cable Shielded type cable. 8 91 ABOUT SUPPLIES AND OPTIONS When ordering supplies, please use only genuine SHARP parts and supplies. Look ...for your computer. For best copying results, be sure to maximize the life and performance of the TD cartridge which are designed, engineered, and tested to use only SHARP Genuine Supplies which has been ...