Operating Instructions
Page 1
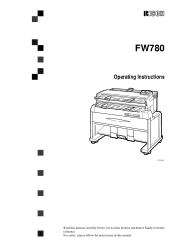
For safety, please follow the instructions in this product and keep it handy for future reference. FW780 Operating Instructions Zfah010e.eps Read this manual carefully before you use this manual.
For safety, please follow the instructions in this product and keep it handy for future reference. FW780 Operating Instructions Zfah010e.eps Read this manual carefully before you use this manual.
Operating Instructions
Page 3
...hazardous radiation exposure. Certain options might result from the use genuine Ricoh toner. Power Source 220V - 240V, 50/60Hz, 7A Please be slightly different from this manual might be sure to connect the power cord to the metric version. Introduction This manual contains detailed instructions on the operation and maintenance of this machine... controls or adjustment or performance of procedures other than those specified in this machine all operators should carefully read the Safety Information before using this manual. Ricoh shall not be available in this machine.
...hazardous radiation exposure. Certain options might result from the use genuine Ricoh toner. Power Source 220V - 240V, 50/60Hz, 7A Please be slightly different from this manual might be sure to connect the power cord to the metric version. Introduction This manual contains detailed instructions on the operation and maintenance of this machine... controls or adjustment or performance of procedures other than those specified in this machine all operators should carefully read the Safety Information before using this manual. Ricoh shall not be available in this machine.

Operating Instructions
Page 5
i Safety During Operation In this manual, the following safety precautions should always be followed. Safety Information When using your equipment, the following important symbols are used: R WARNING: Indicates a potentially hazardous situation which , if instructions are not followed, could result in minor or moderate injury or damage to property. R CAUTION: Indicates a potentially hazardous situation which , if instructions are not followed, may result in death or serious injury.
i Safety During Operation In this manual, the following safety precautions should always be followed. Safety Information When using your equipment, the following important symbols are used: R WARNING: Indicates a potentially hazardous situation which , if instructions are not followed, could result in minor or moderate injury or damage to property. R CAUTION: Indicates a potentially hazardous situation which , if instructions are not followed, may result in death or serious injury.

Operating Instructions
Page 6
... suspect that in accordance with a fault or defect. When the machine needs to the power cord. If the contents fall inside front cover of this manual. • Some parts of the machine are at appropriate collection sites. • Dispose of the following conditions exists: • You spill something into a wall outlet...
... suspect that in accordance with a fault or defect. When the machine needs to the power cord. If the contents fall inside front cover of this manual. • Some parts of the machine are at appropriate collection sites. • Dispose of the following conditions exists: • You spill something into a wall outlet...
Operating Instructions
Page 9
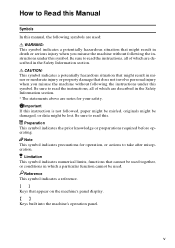
... statements above are notes for operation, or actions to take after misoperation. Note This symbol indicates precautions for your safety. How to Read this Manual Symbols In this manual, the following symbols are used: R WARNING: This symbol indicates a potentially hazardous situation that might be used. Be sure to read the instructions, all...
... statements above are notes for operation, or actions to take after misoperation. Note This symbol indicates precautions for your safety. How to Read this Manual Symbols In this manual, the following symbols are used: R WARNING: This symbol indicates a potentially hazardous situation that might be used. Be sure to read the instructions, all...
Operating Instructions
Page 10
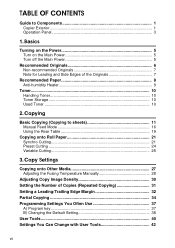
... Copying (Copying to Components 1 Copier Exterior 1 Operation Panel 3 1. Copy Settings Copying onto Other Media 27 Adjusting the Fusing Temperature Manually 28 Adjusting Copy Image Density 30 Setting the Number of the Originals 7 Recommended Paper 8 Anti-humidity Heater 9 Toner...10 Handling Toner... 10 Toner Storage 10 Used Toner 10 2. TABLE OF CONTENTS Guide to sheets 11 Manual Feed Mode 16 Using the Rear Table 19 Copying onto Roll Paper 21 Synchro Cutting 21 Preset Cutting 24 Variable Cutting 25 3. Basics ...
... Copying (Copying to Components 1 Copier Exterior 1 Operation Panel 3 1. Copy Settings Copying onto Other Media 27 Adjusting the Fusing Temperature Manually 28 Adjusting Copy Image Density 30 Setting the Number of the Originals 7 Recommended Paper 8 Anti-humidity Heater 9 Toner...10 Handling Toner... 10 Toner Storage 10 Used Toner 10 2. TABLE OF CONTENTS Guide to sheets 11 Manual Feed Mode 16 Using the Rear Table 19 Copying onto Roll Paper 21 Synchro Cutting 21 Preset Cutting 24 Variable Cutting 25 3. Basics ...
Operating Instructions
Page 16
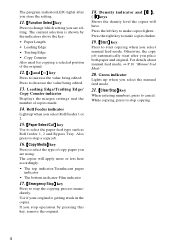
... the paper feed type such as Roll feeder 1, 2 and Bypass Tray. The copier will have. For details about manual feed mode, ⇒ P.16 "Manual Feed Mode" 20. Green indicator Lights up when you select manual feed mode. While copying, press to decrease the value being edited. Press to stop operation by the indicators... Media} key Press to cancel. Press the left key to change which setting you are using. The program indicator(LED) lights after you select the manual feed mode. 21. {Clear/Stop} key When entering numbers, press to select the type of copies made. 14.
... the paper feed type such as Roll feeder 1, 2 and Bypass Tray. The copier will have. For details about manual feed mode, ⇒ P.16 "Manual Feed Mode" 20. Green indicator Lights up when you select manual feed mode. While copying, press to decrease the value being edited. Press to stop operation by the indicators... Media} key Press to cancel. Press the left key to change which setting you are using. The program indicator(LED) lights after you select the manual feed mode. 21. {Clear/Stop} key When entering numbers, press to select the type of copies made. 14.

Operating Instructions
Page 23
... the floor and get dirty, lay a wide piece of the paper is lit, but you have set A0 size (36"×48") paper, to feed manually, manual feed mode is cut obliquely. The machine is warming up when the wait indicator is more than one sheet of paper and never insert more...". ❒ If you use paper which is available. Note ❒ For acceptable types of the paper at the same time. ❒ The machine needs about manual feed mode, ⇒ P.16 "Manual Feed Mode" 11
... the floor and get dirty, lay a wide piece of the paper is lit, but you have set A0 size (36"×48") paper, to feed manually, manual feed mode is cut obliquely. The machine is warming up when the wait indicator is more than one sheet of paper and never insert more...". ❒ If you use paper which is available. Note ❒ For acceptable types of the paper at the same time. ❒ The machine needs about manual feed mode, ⇒ P.16 "Manual Feed Mode" 11
Operating Instructions
Page 26
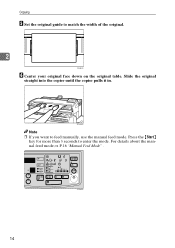
For details about the manual feed mode,⇒ P.16 "Manual Feed Mode" . 14 Copying E Set the original guide to feed manually, use the manual feed mode. Note ❒ If you want to match the width of the original. 2 F Center your original face down on the original table. Slide the original straight into the copier until the copier pulls it in. Press the {Start} key for more than 3 seconds to enter the mode.
For details about the manual feed mode,⇒ P.16 "Manual Feed Mode" . 14 Copying E Set the original guide to feed manually, use the manual feed mode. Note ❒ If you want to match the width of the original. 2 F Center your original face down on the original table. Slide the original straight into the copier until the copier pulls it in. Press the {Start} key for more than 3 seconds to enter the mode.

Operating Instructions
Page 28
...itself to make larger sized copy and protect from the paper skew. If you to feed manually, use the manual feed mode. A When the Wait indicator goes off (Auto Off ). ❒ You can feed paper manually by using this function. Copying J After copying has finished, hold the original with one hand... cator go on the original table. ❒ If you can preset the initial settings of the copier ⇒ P.38 "B) Changing the Default Setting" Manual Feed Mode When you need to the initial settings (Auto Reset). Do not put heavy object on , the copier enters the ready condition. 16
...itself to make larger sized copy and protect from the paper skew. If you to feed manually, use the manual feed mode. A When the Wait indicator goes off (Auto Off ). ❒ You can feed paper manually by using this function. Copying J After copying has finished, hold the original with one hand... cator go on the original table. ❒ If you can preset the initial settings of the copier ⇒ P.38 "B) Changing the Default Setting" Manual Feed Mode When you need to the initial settings (Auto Reset). Do not put heavy object on , the copier enters the ready condition. 16
Operating Instructions
Page 32
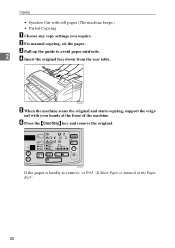
Copying • Synchro Cut with your hands at the Paper Exit" 20 nal with roll paper (The machine beeps.) • Partial Copying A Choose any copy settings you require. B For manual copying, set the paper. F Press the {Clear/Stop} key and remove the original. If the paper is hardly to avoid paper misfeeds. 2 D Insert the original face down from the rear table. E When the machine scans the original and starts copying, support the origi- C Pull up the guide to remove, ⇒ P.65 "If Sheet Paper is Jammed at the front of the machine.
Copying • Synchro Cut with your hands at the Paper Exit" 20 nal with roll paper (The machine beeps.) • Partial Copying A Choose any copy settings you require. B For manual copying, set the paper. F Press the {Clear/Stop} key and remove the original. If the paper is hardly to avoid paper misfeeds. 2 D Insert the original face down from the rear table. E When the machine scans the original and starts copying, support the origi- C Pull up the guide to remove, ⇒ P.65 "If Sheet Paper is Jammed at the front of the machine.

Operating Instructions
Page 35
Note ❒ Press the {Start}key if you select the manual feed mode. For details about the manual feed mode, ⇒ P.16 "Manual Feed Mode". 23 Slide the original straight into the copier until the copier pulls it in. Copying onto Roll Paper E Set the original guides to match the width of the original. 2 F Make sure that the wait indicator goes off and the ready and the set original indicator go on the original table. G Center your original face down on .
Note ❒ Press the {Start}key if you select the manual feed mode. For details about the manual feed mode, ⇒ P.16 "Manual Feed Mode". 23 Slide the original straight into the copier until the copier pulls it in. Copying onto Roll Paper E Set the original guides to match the width of the original. 2 F Make sure that the wait indicator goes off and the ready and the set original indicator go on the original table. G Center your original face down on .
Operating Instructions
Page 40
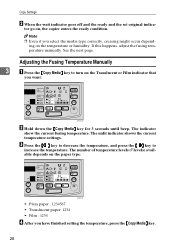
...10066; Even if you have finished setting the temperature, press the {Copy Media} key. 28 If this happens, adjust the fusing temperature manually. The number of temperature levels (7 levels) available depends on the Translucent or Film indicator that you want. See the next page. ...Adjusting the Fusing Temperature Manually 3 A Press the {Copy Media} key to increase the temperature. The indicator show the current fusing temperature. C Press the {i} key ...
...10066; Even if you have finished setting the temperature, press the {Copy Media} key. 28 If this happens, adjust the fusing temperature manually. The number of temperature levels (7 levels) available depends on the Translucent or Film indicator that you want. See the next page. ...Adjusting the Fusing Temperature Manually 3 A Press the {Copy Media} key to increase the temperature. The indicator show the current fusing temperature. C Press the {i} key ...
Operating Instructions
Page 55
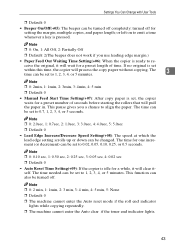
... scrolls up or down can be set , the copier waits for a preset number of time. Note ❒ 0: 2min, 1: 1min, 2: 3min, 3: 4min, 4: 5 min ❒ Default: 0 • Manual Feed Start Time Setting(+07): After copy paper is pressed. Note ❒ 0: 2 min, 1: 1min, 2: 3 min, 3: 4 min, 4: 5 min, 5: None ❒ Default: 0 ❒ The machine cannot enter...
... scrolls up or down can be set , the copier waits for a preset number of time. Note ❒ 0: 2min, 1: 1min, 2: 3min, 3: 4min, 4: 5 min ❒ Default: 0 • Manual Feed Start Time Setting(+07): After copy paper is pressed. Note ❒ 0: 2 min, 1: 1min, 2: 3 min, 3: 4 min, 4: 5 min, 5: None ❒ Default: 0 ❒ The machine cannot enter...
Operating Instructions
Page 88
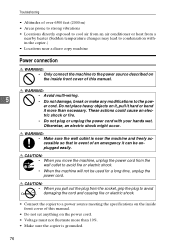
... is near a diazo copy machine Power connection R WARNING: • Only connect the machine to the power source described on the inside front cover of this manual. • Do not set anything on the inside front cover of an emergency it more than necessary. tric shock or fire. • Do not plug... heater (Sudden temperature changes may lead to condensation within the copier.) • Locations near the machine and freely accessible so that in event of this manual.
... is near a diazo copy machine Power connection R WARNING: • Only connect the machine to the power source described on the inside front cover of this manual. • Do not set anything on the inside front cover of an emergency it more than necessary. tric shock or fire. • Do not plug... heater (Sudden temperature changes may lead to condensation within the copier.) • Locations near the machine and freely accessible so that in event of this manual.
Operating Instructions
Page 92
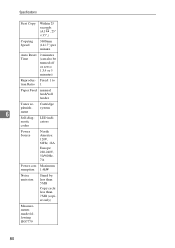
... L , 23" × 35",) Copying Speed 3600mm (141.7") per minute Auto Reset Time 2 minutes (can also be turned off or set to tion Ratio 1 Paper Feed manual feed/roll feeder Toner re-
... L , 23" × 35",) Copying Speed 3600mm (141.7") per minute Auto Reset Time 2 minutes (can also be turned off or set to tion Ratio 1 Paper Feed manual feed/roll feeder Toner re-
Operating Instructions
Page 96
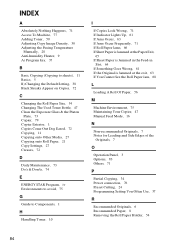
INDEX A Absolutely Nothing Happens, 71 Access To Machine, 77 Adding Toner, 50 Adjusting Copy Image Density, 30 Adjusting the Fusing Temperature Manually, 28 Anti-humidity Heater, 9 A) Program key, 37 B Basic Copying (Copying to sheets), 11 Basics, 5 B) Changing the Default Setting, 38 Black Streaks Appear ...at the exit, 63 If You Cannot See the Roll Paper Jam, 68 L Loading A Roll Of Paper, 56 M Machine Environment, 75 Maintaining Your Copier, 47 Manual Feed Mode, 16 N Non-recommended Originals, 7 Notes for Leading and Side Edges of the Originals, 7 O Operation Panel, 3 Options, 83 Others, 71 P ...
INDEX A Absolutely Nothing Happens, 71 Access To Machine, 77 Adding Toner, 50 Adjusting Copy Image Density, 30 Adjusting the Fusing Temperature Manually, 28 Anti-humidity Heater, 9 A) Program key, 37 B Basic Copying (Copying to sheets), 11 Basics, 5 B) Changing the Default Setting, 38 Black Streaks Appear ...at the exit, 63 If You Cannot See the Roll Paper Jam, 68 L Loading A Roll Of Paper, 56 M Machine Environment, 75 Maintaining Your Copier, 47 Manual Feed Mode, 16 N Non-recommended Originals, 7 Notes for Leading and Side Edges of the Originals, 7 O Operation Panel, 3 Options, 83 Others, 71 P ...

Service Manual
Page 9
or loss of warranty protection. Untrained and uncertified users utilizing information contained in this manual should be either service trained or certified by Ricoh Corporation. Ricoh Corporation Users of this service manual to repair or modify Ricoh equipment risk personal injury, damage to property. WARNING The Service Manual contains information regarding service techniques, procedures, processes and spare parts of office equipment distributed by successfully completing a Ricoh Technical Training Program.
or loss of warranty protection. Untrained and uncertified users utilizing information contained in this manual should be either service trained or certified by Ricoh Corporation. Ricoh Corporation Users of this service manual to repair or modify Ricoh equipment risk personal injury, damage to property. WARNING The Service Manual contains information regarding service techniques, procedures, processes and spare parts of office equipment distributed by successfully completing a Ricoh Technical Training Program.
Service Manual
Page 15
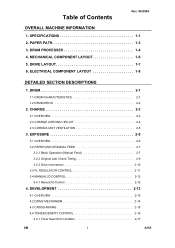
... CHARACTERISTICS 2-1 1.2 DRUM DRIVE 2-2 2. MECHANICAL COMPONENT LAYOUT 1-6 5. SPECIFICATIONS 1-1 2. DRIVE LAYOUT 1-7 6. EXPOSURE 2-6 3.1 OVERVIEW 2-6 3.2 PAPER AND ORIGINAL FEED 2-7 3.2.1 Basic Operation (Manual Feed 2-7 3.2.2 Original Jam Check Timing 2-9 3.2.3 Drive mechanism 2-10 3.3 FL REGULATOR CONTROL 2-11 3.4 MANUAL ID CONTROL 2-12 3.4.1 Manual ID Control 2-12 4. DRUM PROCESSES 1-4 4. CHARGE 2-3 2.1 OVERVIEW 2-3 2.2 CHARGE CORONA CIRCUIT 2-4 2.3 CORONA UNIT VENTILATION 2-5 3. Table of Contents Rev. 06...
... CHARACTERISTICS 2-1 1.2 DRUM DRIVE 2-2 2. MECHANICAL COMPONENT LAYOUT 1-6 5. SPECIFICATIONS 1-1 2. DRIVE LAYOUT 1-7 6. EXPOSURE 2-6 3.1 OVERVIEW 2-6 3.2 PAPER AND ORIGINAL FEED 2-7 3.2.1 Basic Operation (Manual Feed 2-7 3.2.2 Original Jam Check Timing 2-9 3.2.3 Drive mechanism 2-10 3.3 FL REGULATOR CONTROL 2-11 3.4 MANUAL ID CONTROL 2-12 3.4.1 Manual ID Control 2-12 4. DRUM PROCESSES 1-4 4. CHARGE 2-3 2.1 OVERVIEW 2-3 2.2 CHARGE CORONA CIRCUIT 2-4 2.3 CORONA UNIT VENTILATION 2-5 3. Table of Contents Rev. 06...
Service Manual
Page 16
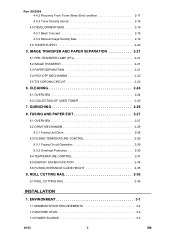
QUENCHING 2-26 8. Rev. 06/2004 4.4.2 Recovery From Toner (Near) End condition 2-17 4.4.3 Toner Density Sensor 2-18 4.5 DEVELOPMENT BIAS 2-19 4.5.1 Basic Concept 2-19 4.5.2 Manual Image Density Bias 2-19 4.6 TONER SUPPLY 2-20 5. ENVIRONMENT 3-1 1.1 MINIMUM SPACE REQUIREMENTS 3-2 1.2 MACHINE LEVEL 3-2 1.3 POWER SOURCE 3-3 A163 ii SM ROLL CUTTING RAIL 2-36 9.1 ROLL CUTTING RAIL 2-...
QUENCHING 2-26 8. Rev. 06/2004 4.4.2 Recovery From Toner (Near) End condition 2-17 4.4.3 Toner Density Sensor 2-18 4.5 DEVELOPMENT BIAS 2-19 4.5.1 Basic Concept 2-19 4.5.2 Manual Image Density Bias 2-19 4.6 TONER SUPPLY 2-20 5. ENVIRONMENT 3-1 1.1 MINIMUM SPACE REQUIREMENTS 3-2 1.2 MACHINE LEVEL 3-2 1.3 POWER SOURCE 3-3 A163 ii SM ROLL CUTTING RAIL 2-36 9.1 ROLL CUTTING RAIL 2-...


