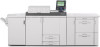
Ricoh Pro C900 Support and Manuals
Get Help and Manuals for this Ricoh item
View All Support Options Below
Free Ricoh Pro C900 manuals!
Problems with Ricoh Pro C900?
Ask a Question
Free Ricoh Pro C900 manuals!
Problems with Ricoh Pro C900?
Ask a Question
Most Recent Ricoh Pro C900 Questions

Dirty Yellow Papers
while printing some papers and i mean large quantities appear to have yellow lines or yellow spots
while printing some papers and i mean large quantities appear to have yellow lines or yellow spots
(Posted by Rabahalagrabawi 3 years ago)

Do You Know Why The Oil Leak Onto The Paper?
When I printing on 12pt cardstock paper. It's Creating a 4 Lineof oil on paper.
When I printing on 12pt cardstock paper. It's Creating a 4 Lineof oil on paper.
(Posted by Long05891v 3 years ago)

Temperature
What should the room temperature be for 2 Ricoh Pro C900's in a 20x20 room?
What should the room temperature be for 2 Ricoh Pro C900's in a 20x20 room?
(Posted by gmbernal 10 years ago)
Ricoh Pro C900 Videos

Ricoh PRO C900
Duration: :57
Total Views: 74
Duration: :57
Total Views: 74
RICOH Pro C900 - 90 ?????????? ? ?????? ??? ????? ????????? ??????! 11.05.2014
Duration: :48
Total Views: 116
Duration: :48
Total Views: 116
Popular Ricoh Pro C900 Manual Pages
User Guide - Page 1
Adjustment Item Menu Guide: TCRU
Model Name:
Pro C900S/Pro C900
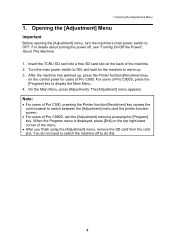
Read this manual carefully before using this machine and keep it handy for future reference.
1
User Guide - Page 14
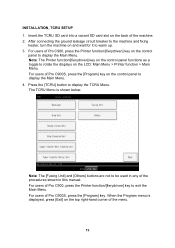
...manual. Note: The [Fusing Unit] and [Others] buttons are not to be used in any of Pro C900, press the Printer function/[fierydriven] key to display the Main Menu. 4. INSTALLATION, TCRU SETUP 1. For users of Pro C900S, press the [Program] key.
For users of Pro C900...and wait for it to display the Main Menu. For users of Pro C900S, press the [Program] key on the LCD: Main Menu > Printer...
User Guide - Page 51
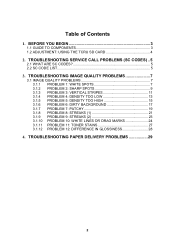
... PROBLEM 6: DIRTY BACKGROUND 17 3.1.7 PROBLEM 7: PATCHY 19 3.1.8 PROBLEM 8: STREAKS (1 21 3.1.9 PROBLEM 9: STREAKS (2 23 3.1.10 PROBLEM 10: WHITE LINES OR DRAG MARKS 24 3.1.11 PROBLEM 11: TONER STAINS 27 3.1.12 PROBLEM 12: DIFFERENCE IN GLOSSINESS 28
4. TROUBLESHOOTING PAPER DELIVERY PROBLEMS 29
2 TROUBLESHOOTING SERVICE CALL PROBLEMS (SC CODES) ..5
2.1 WHAT ARE SC CODES 5 2.2 SC CODE...
User Guide - Page 52
... not print, does not print as expected, or exhibits any
procedures. RCAUTION
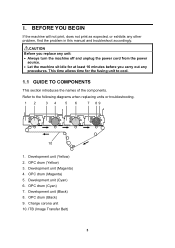
Before you carry out any other problem, find the problem in this manual and troubleshoot accordingly. Development unit (Black) 8. This time allows time for at least 10 minutes before you replace any unit: • Always turn the machine off and unplug the power cord from the power
source...
User Guide - Page 53
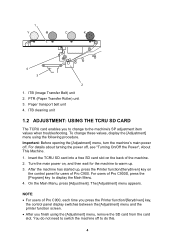
... you finish using the following procedure. For details about turning the power off . For users of the machine. 2. To change to warm up , press the Printer function/[fierydriven] key on
the control panel for the machine to the machine's SP adjustment item values when troubleshooting. Turn the main power on the back of Pro C900S, press...
User Guide - Page 54
... following table (see 2.2 SC CODE LIST).
Replace the yellow charge corona unit.
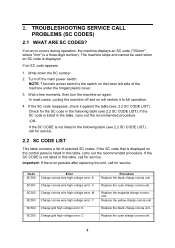
In most cases, cycling the machine off the main power switch. NOTE: The main power switch is not listed in the table, carry out the recommended procedure. -ORIf the SC CODE is the switch on again. TROUBLESHOOTING SERVICE CALL PROBLEMS (SC CODES)
2.1 WHAT ARE SC CODES? Code
Error
SC300 Charge corona...
User Guide - Page 56
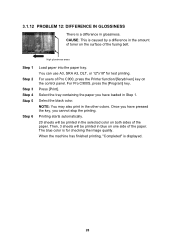
... replacement does not solve the problem, call for an actual sample. 3.
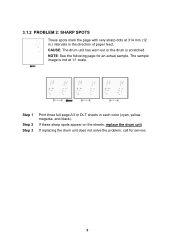
Step 1
Step 2 Step 3
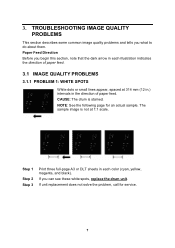
Print three full-page A3 or DLT sheets in each color (cyan, yellow, magenta, and black). Paper Feed Direction Before you begin this section, note that the dark arrow in each illustration indicates the direction of paper feed. TROUBLESHOOTING IMAGE QUALITY PROBLEMS...
User Guide - Page 58
....
Step 1
Step 2 Step 3
Print three full-page A3 or DLT sheets in the direction of paper feed. If these sharp spots appear on the sheets, replace the drum unit.
NOTE: See the following page for service.
9
If replacing the drum unit does not solve the problem, call for an actual sample. 3.1.2 PROBLEM 2: SHARP SPOTS
These spots...
User Guide - Page 60
... drum cleaning unit does not solve the problem, call for service. 2. NOTE: See the following page for service.
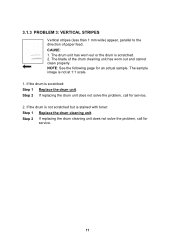
11 If the drum is not at 1:1 scale. 1. The sample image is scratched: Step 1 Replace the drum unit. Step 2 If replacing the drum unit does not solve the problem, call for an actual sample. The blade of paper...
User Guide - Page 62
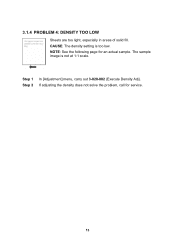
Step 1 In [Adjustment] menu, carry out 3-820-002 (Execute Density Adj). Step 2 If adjusting the density does not solve the problem, call for an actual sample. NOTE: See the following page for service.
13 The sample image is too low. 3.1.4 PROBLEM 4: DENSITY TOO LOW
Sheets are too light, especially in areas of solid fill. CAUSE: The density setting is not at 1:1 scale.
User Guide - Page 64
... sample. Step 1 Step 2
Step 3
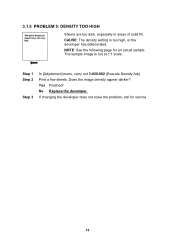
In [Adjustment] menu, carry out 3-820-002 (Execute Density Adj). Print a few sheets. No Replace the developer. 3.1.5 PROBLEM 5: DENSITY TOO HIGH
Sheets are too dark, especially in areas of solid fill. NOTE: See the following page for service.
15 The sample image is too high, or the developer has deteriorated.
User Guide - Page 66
NOTE: See the following page for service.
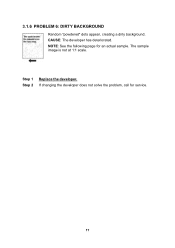
17 Step 2 If changing the developer does not solve the problem, call for an actual sample. CAUSE: The developer has deteriorated. The sample image is not at 1:1 scale. Step 1 Replace the developer. 3.1.6 PROBLEM 6: DIRTY BACKGROUND
Random "powdered" dots appear, creating a dirty background.
User Guide - Page 77
... use A3, SRA A3, DLT, or 12"x18" for checking the image quality.
For users of Pro C900, press the Printer function/[fierydriven] key on the control panel. For Pro C900S, press the [Program] key. Select the black color. Then, 3 sheets will be printed in the amount of toner on the surface of the fusing belt. Press [Print...
User Guide - Page 85
Turn the main power switch to ON, and wait for users of Pro C900. After the machine has warmed up, press the Printer function/[fierydriven] key
on the control panel for the machine to display the Main Menu. 4. For users of Pro C900S, exit the [Adjustment] menu by pressing the [Program] key. On the Main Menu...
User Guide - Page 103

1 Detect Multi Feed
3.
Default Value Enable
23 Values for Settings on Pro C900. SP 1-910
Item
Detect Multi Feed
No.
Setting
001 Main Upper Tray
002 Main Lower Tray
004 A4/LT LCT Upper... Upper Tray
011 A3/DLT LCT2 Lower Tray
Selection Enable Disable
Note:
Settings for the setting.
Press the selection you require for A4/LT LCT are available only on the [Adjustment] Menu
1.
Ricoh Pro C900 Reviews
We have not received any reviews for Ricoh yet.