
Operation Manual
Page 9
... of Operating Parts 20 Monitor Indications 21 Getting Started 24 Attaching the Strap 24 Powering the Camera 25 Charging the Battery 25 Installing the Battery 26 Using the AC Adapter 29 Installing the SD Memory Card 31 Recorded Pixels and Quality Level of Still Pictures 34 Recorded Pixels for Movies/Frame Rate 35 Turning the Camera On and Off 37 Playback Mode 38 Initial Settings 39 Setting the Display Language 39 Setting the Date and Time 41 Quick Start 43 Taking Still Pictures 43 Playing...
... of Operating Parts 20 Monitor Indications 21 Getting Started 24 Attaching the Strap 24 Powering the Camera 25 Charging the Battery 25 Installing the Battery 26 Using the AC Adapter 29 Installing the SD Memory Card 31 Recorded Pixels and Quality Level of Still Pictures 34 Recorded Pixels for Movies/Frame Rate 35 Turning the Camera On and Off 37 Playback Mode 38 Initial Settings 39 Setting the Display Language 39 Setting the Date and Time 41 Quick Start 43 Taking Still Pictures 43 Playing...

Operation Manual
Page 11
...126 Setting the Date Imprint Function 127 Saving the Settings (Memory 128 Recording Movies 130 Recording a Movie 130 Selecting the Recorded Pixels and Frame Rate for Movies .........133 Recording Movies in Black and White or Sepia Tones (Color Mode 135 Setting the Movie SR (Movie Shake Reduction) Function 136 Recording a Movie from Pictures Taken at a Set Interval (Interval Movie 137 Selecting the Focusing Method for Recording Movies 140 Setting the Optical Zoom 141 Playing Back and Deleting Images 142 Playing Back Images 142 Switching Between A Mode and Q Mode 142 Playing Back...
...126 Setting the Date Imprint Function 127 Saving the Settings (Memory 128 Recording Movies 130 Recording a Movie 130 Selecting the Recorded Pixels and Frame Rate for Movies .........133 Recording Movies in Black and White or Sepia Tones (Color Mode 135 Setting the Movie SR (Movie Shake Reduction) Function 136 Recording a Movie from Pictures Taken at a Set Interval (Interval Movie 137 Selecting the Focusing Method for Recording Movies 140 Setting the Optical Zoom 141 Playing Back and Deleting Images 142 Playing Back Images 142 Switching Between A Mode and Q Mode 142 Playing Back...

Operation Manual
Page 12
...Recording a Voice Memo 188 Playing Back a Voice Memo 189 Settings 190 Camera Settings 190 Formatting an SD Memory Card 190 Changing the Sound Settings 191 Changing the Date and Time 193 Setting the Alarm 195 Setting the World Time 197 Changing the Display Language 199 Changing the Image Folder Name 200 Changing the USB Connection Mode 201 Changing the Video Output Format 202 Adjusting the Brightness of the Display 203 Using the Power Saving Function 204 Setting Auto Power Off 205 Setting the Quick Zoom Function 206 Setting the Guide Display 207 Resetting to Default Settings...
...Recording a Voice Memo 188 Playing Back a Voice Memo 189 Settings 190 Camera Settings 190 Formatting an SD Memory Card 190 Changing the Sound Settings 191 Changing the Date and Time 193 Setting the Alarm 195 Setting the World Time 197 Changing the Display Language 199 Changing the Image Folder Name 200 Changing the USB Connection Mode 201 Changing the Video Output Format 202 Adjusting the Brightness of the Display 203 Using the Power Saving Function 204 Setting Auto Power Off 205 Setting the Quick Zoom Function 206 Setting the Guide Display 207 Resetting to Default Settings...

Operation Manual
Page 18
...) Use the Green Mode to -Navigate Capture and Playback Functions! XXXXXXXXXXXXXXXXXXXXXXXXXXXXXXXXXXXXXXXXX The user-friendly design of the Optio W60 enables easy operation with only a few seconds after each mode is displayed in the Capture Mode Palette and a playback mode guide in calendar format. (p.144) This lets you quickly find the image or sound file you can display recorded images and sound files by choosing the appropriate icon, you want to play back. 16 Simply by date in the Playback Mode Palette...
...) Use the Green Mode to -Navigate Capture and Playback Functions! XXXXXXXXXXXXXXXXXXXXXXXXXXXXXXXXXXXXXXXXX The user-friendly design of the Optio W60 enables easy operation with only a few seconds after each mode is displayed in the Capture Mode Palette and a playback mode guide in calendar format. (p.144) This lets you quickly find the image or sound file you can display recorded images and sound files by choosing the appropriate icon, you want to play back. 16 Simply by date in the Playback Mode Palette...

Operation Manual
Page 21
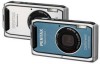
Names of Parts Front Power switch/Power lamp (green) Shutter release button Speaker Microphone Flash Self timer lamp Lens Back Battery/Card/Terminal cover lock lever Display Battery/Card/Terminal cover Tripod socket PC/AV terminal Battery lock lever 19
Names of Parts Front Power switch/Power lamp (green) Shutter release button Speaker Microphone Flash Self timer lamp Lens Back Battery/Card/Terminal cover lock lever Display Battery/Card/Terminal cover Tripod socket PC/AV terminal Battery lock lever 19

Operation Manual
Page 23
... Memory Card 16 Camera shake warning (p.98) (shown when blurring caused by r : SD Memory Card is write vibration is likely to occur) protected 17 Face Priority icon (p.59) 7 Storage capacity * 14, 15 and 16 appear only when the shutter release button is pressed halfway. * Some indications may not appear depending on the shooting mode. 21 p.93) 10 Date and time (p.41) 4 Focus mode (p.100) 11 World time setting (p.197) 5 Digital zoom icon...
... Memory Card 16 Camera shake warning (p.98) (shown when blurring caused by r : SD Memory Card is write vibration is likely to occur) protected 17 Face Priority icon (p.59) 7 Storage capacity * 14, 15 and 16 appear only when the shutter release button is pressed halfway. * Some indications may not appear depending on the shooting mode. 21 p.93) 10 Date and time (p.41) 4 Focus mode (p.100) 11 World time setting (p.197) 5 Digital zoom icon...

Operation Manual
Page 25
... File number B5 AE Metering (p.110) A5 Protect icon (p.162) B6 Sensitivity (p.112) A6 Voice memo icon (p.189) B7 Dark portion (blinks yellow) (p.22) A7 Battery level indicator (p.28) B8 Shutter speed A8 Volume icon B9 Aperture A9 Memory status (p.37) B10 Histogram (p.99) + : Built-in Still Picture Playback Mode (All of the display items are indicated as the shooting conditions. Four-way controller (2) Four-way controller (3) Four-way controller (4) Four-way controller (5) 3 button 2 3 4 5 MENU Zoom button 4/W button Shutter release button Green/i button I button...
... File number B5 AE Metering (p.110) A5 Protect icon (p.162) B6 Sensitivity (p.112) A6 Voice memo icon (p.189) B7 Dark portion (blinks yellow) (p.22) A7 Battery level indicator (p.28) B8 Shutter speed A8 Volume icon B9 Aperture A9 Memory status (p.37) B10 Histogram (p.99) + : Built-in Still Picture Playback Mode (All of the display items are indicated as the shooting conditions. Four-way controller (2) Four-way controller (3) Four-way controller (4) Four-way controller (5) 3 button 2 3 4 5 MENU Zoom button 4/W button Shutter release button Green/i button I button...

Operation Manual
Page 33
... inserting or removing the SD Memory Card. • Allow the camera to dry completely before changing the SD Memory Card. Refer to "Formatting an SD Memory Card" (p.190) for instructions on the capacity of the SD Memory Card and the selected number of recorded pixels and quality level. (p.34) • The power lamp blinks while the SD Memory Card is being accessed (data is turned off . Captured images and sound files are saved in the...
... inserting or removing the SD Memory Card. • Allow the camera to dry completely before changing the SD Memory Card. Refer to "Formatting an SD Memory Card" (p.190) for instructions on the capacity of the SD Memory Card and the selected number of recorded pixels and quality level. (p.34) • The power lamp blinks while the SD Memory Card is being accessed (data is turned off . Captured images and sound files are saved in the...

Operation Manual
Page 35
... to LOCK protects the existing data by the user. (2) when the SD Memory Card is exposed to static electricity or electrical interference. (3) when the card has not been used for a long time. (4) when the card is ejected or the battery is removed while the data on the card is being recorded or played back, or while connected to "Formatting an SD Memory Card". (p.190) • Please note that formatting the SD Memory Card...
... to LOCK protects the existing data by the user. (2) when the SD Memory Card is exposed to static electricity or electrical interference. (3) when the card has not been used for a long time. (4) when the card is ejected or the battery is removed while the data on the card is being recorded or played back, or while connected to "Formatting an SD Memory Card". (p.190) • Please note that formatting the SD Memory Card...

Operation Manual
Page 45
.... Quick Start Taking Still Pictures Power switch Shutter release button Zoom/w/x button 2 Quick Start The standard procedure for one second (Instant Review) and is saved to the SD Memory Card or built-in memory. (p.44) Press the Green button to switch to the 9 (Green) mode and let the camera set all the shooting functions automatically. (p.66) 43 The image appears on the display. 07/07/2008 14:25 The focus frame in focus. 4 Press the shutter release button fully. Focus frame You can change...
.... Quick Start Taking Still Pictures Power switch Shutter release button Zoom/w/x button 2 Quick Start The standard procedure for one second (Instant Review) and is saved to the SD Memory Card or built-in memory. (p.44) Press the Green button to switch to the 9 (Green) mode and let the camera set all the shooting functions automatically. (p.66) 43 The image appears on the display. 07/07/2008 14:25 The focus frame in focus. 4 Press the shutter release button fully. Focus frame You can change...

Operation Manual
Page 55
... A mode by pressing the Q button. To Cancel the Changes and Continue with the current setting. MENU Exit :Exits the menu and returns to the guide indications. To Save the Setting and Continue with Menu Operations 6 Press the 4 button or the four-way controller (4). The setting is saved and the screen returns to capture status. The setting is saved and the camera returns to Step 3. The 3 button function differs depending on the screen. When the shutter release button...
... A mode by pressing the Q button. To Cancel the Changes and Continue with the current setting. MENU Exit :Exits the menu and returns to the guide indications. To Save the Setting and Continue with Menu Operations 6 Press the 4 button or the four-way controller (4). The setting is saved and the screen returns to capture status. The setting is saved and the camera returns to Step 3. The 3 button function differs depending on the screen. When the shutter release button...

Operation Manual
Page 56
... For setting the start time for interval shooting p.90 Blink Detection For setting whether to enable Blink Detection p.61 Digital Zoom For setting whether to use the optical zoom while recording movies p.141 Interval Shoot Interval For setting the interval between shots p.90 Number of Shot For setting the number of shots to be set values of the shooting function or return to the defaults when the camera is reset. [A Rec.Mode] Menu This menu shows the functions related to taking still pictures and recording movies.
... For setting the start time for interval shooting p.90 Blink Detection For setting whether to enable Blink Detection p.61 Digital Zoom For setting whether to use the optical zoom while recording movies p.141 Interval Shoot Interval For setting the interval between shots p.90 Number of Shot For setting the number of shots to be set values of the shooting function or return to the defaults when the camera is reset. [A Rec.Mode] Menu This menu shows the functions related to taking still pictures and recording movies.

Operation Manual
Page 57
... Memory Card p.190 Sound For adjusting the operation volume and playback volume, and setting the start-up sound, shutter sound, p.191 key operation sound and self-timer sound Date Adjust For adjusting the date, time, and date style p.193 Alarm For setting the alarm p.195 World Time For setting the world time p.197 Language/ For setting the language in which menus and messages appear p.199 Folder Name For choosing how names are assigned to folders for storing images and sound files p.200 USB Connection For setting the USB cable connection (to computer or printer...
... Memory Card p.190 Sound For adjusting the operation volume and playback volume, and setting the start-up sound, shutter sound, p.191 key operation sound and self-timer sound Date Adjust For adjusting the date, time, and date style p.193 Alarm For setting the alarm p.195 World Time For setting the world time p.197 Language/ For setting the language in which menus and messages appear p.199 Folder Name For choosing how names are assigned to folders for storing images and sound files p.200 USB Connection For setting the USB cable connection (to computer or printer...

Operation Manual
Page 65
... images. p.173 Z Red-eye Compensation For compensating red-eye. p.162 r DPOF For the print settings. p.164 o Cropping For cropping images to make the file size smaller. Useful when viewing vertical images on a TV. Recording is possible till the memory card is full. p.151 n Resize Changes Recorded Pixels and Quality Level to the size you like. p.161 ^ Start-up Screen For setting a captured image as to save. Saved as a new image. Common Operations Playback Mode Palette Item Description Page P Digital SR For saving images...
... images. p.173 Z Red-eye Compensation For compensating red-eye. p.162 r DPOF For the print settings. p.164 o Cropping For cropping images to make the file size smaller. Useful when viewing vertical images on a TV. Recording is possible till the memory card is full. p.151 n Resize Changes Recorded Pixels and Quality Level to the size you like. p.161 ^ Start-up Screen For setting a captured image as to save. Saved as a new image. Common Operations Playback Mode Palette Item Description Page P Digital SR For saving images...

Operation Manual
Page 74
... SD memory card, leave the SD memory card inserted in memory when file operations (delete, etc.) are deleted, recopy them from the camera. (If the SD Memory Card is left in the camera, data is in focus. 8 Press the shutter release button fully. If these frames are performed from a computer. Copy procedure: 1. Connect the camera to the computer using the image, movie, and sound recording areas. The install window automatically opens. Disconnect the camera referring to the PC Connection Manual. * The 3 default...
... SD memory card, leave the SD memory card inserted in memory when file operations (delete, etc.) are deleted, recopy them from the camera. (If the SD Memory Card is left in the camera, data is in focus. 8 Press the shutter release button fully. If these frames are performed from a computer. Copy procedure: 1. Connect the camera to the computer using the image, movie, and sound recording areas. The install window automatically opens. Disconnect the camera referring to the PC Connection Manual. * The 3 default...

Operation Manual
Page 110
...way controller (23) to F (Auto). • Depending on the selected shooting mode, the white balance setting may not be changed. Shade Use this mode when adjusting the white balance manually. • Set another white balance if you are not satisfied with the color balance of shooting. Manual Use this mode when taking pictures outside in natural colors by the camera. Refer to the light conditions at the time of pictures taken with white balance set to select [White Balance]. 108 Taking Pictures MENU 3 button Four-way controller 4 button Rec.Mode Recorded...
...way controller (23) to F (Auto). • Depending on the selected shooting mode, the white balance setting may not be changed. Shade Use this mode when adjusting the white balance manually. • Set another white balance if you are not satisfied with the color balance of shooting. Manual Use this mode when taking pictures outside in natural colors by the camera. Refer to the light conditions at the time of pictures taken with white balance set to select [White Balance]. 108 Taking Pictures MENU 3 button Four-way controller 4 button Rec.Mode Recorded...

Operation Manual
Page 139
... to 1 minute, 5 minutes, 10 minutes, 30 minutes, or 1 hour. Shutter release button MENU Four-way controller 4 button Rec.Mode Recorded Pixels Quality Level White Balance AF Setting AE Metering Sensitivity MENU Exit 1/3 10 M AWB AUTO 800 Taking Pictures Recording a Movie from Pictures Taken at a Set Interval (Interval Movie) In this mode, you can record multiple still pictures taken automatically at a set interval from a set time, as the shutter release button is displayed. The start delay, from 0 minutes to 359 hours.
... to 1 minute, 5 minutes, 10 minutes, 30 minutes, or 1 hour. Shutter release button MENU Four-way controller 4 button Rec.Mode Recorded Pixels Quality Level White Balance AF Setting AE Metering Sensitivity MENU Exit 1/3 10 M AWB AUTO 800 Taking Pictures Recording a Movie from Pictures Taken at a Set Interval (Interval Movie) In this mode, you can record multiple still pictures taken automatically at a set interval from a set time, as the shutter release button is displayed. The start delay, from 0 minutes to 359 hours.

Operation Manual
Page 146
... Zoom/f/y button towards f. Calendar display Recorded images and sound files are displayed in nineimage display. The screen changes to calendar or folder display (the default is displayed for dates on that date. O appears for that date are displayed in Q mode. Use the four-way controller (2345) to move the frame. Press the Green button to nine-image display. 2 Press the Zoom/f/y button towards y, images taken on that date on a date is calendar display). Select a date and press the 4 button to switch to A mode. 144 The screen changes to switch...
... Zoom/f/y button towards f. Calendar display Recorded images and sound files are displayed in nineimage display. The screen changes to calendar or folder display (the default is displayed for dates on that date. O appears for that date are displayed in Q mode. Use the four-way controller (2345) to move the frame. Press the Green button to nine-image display. 2 Press the Zoom/f/y button towards y, images taken on that date on a date is calendar display). Select a date and press the 4 button to switch to A mode. 144 The screen changes to switch...

Operation Manual
Page 158
... the image/sound file you to select [Delete]. 100-0017 Press the 4 button. A confirmation screen appears. Deleting Images Q button Four-way controller 4 button i button Delete images and sounds with the Optio W60. (p.161) Deleted images and sounds can be recovered even if the camera has been turned off after deletion as long as the SD Memory Card has not been removed. 5 However, deleted images and sounds cannot be recovered after formatting or performing data write operations such as taking pictures, recording movies, protecting images, saving DPOF settings, resizing...
... the image/sound file you to select [Delete]. 100-0017 Press the 4 button. A confirmation screen appears. Deleting Images Q button Four-way controller 4 button i button Delete images and sounds with the Optio W60. (p.161) Deleted images and sounds can be recovered even if the camera has been turned off after deletion as long as the SD Memory Card has not been removed. 5 However, deleted images and sounds cannot be recovered after formatting or performing data write operations such as taking pictures, recording movies, protecting images, saving DPOF settings, resizing...

Operation Manual
Page 206
... no operation is performed for a fixed time. Settings 204 Auto Power Off Off 4 Press the 4 button. Folder Name 2min 3 Use the four-way controller (23) USB Connection 1min Video Out 30sec to select [2min], [1min], [30sec], Brightness Level 15sec Power Saving 5sec [15sec], [5sec] or [Off]. Setting 2/3 A pull-down menu appears. How to display the [W Setting] menu 3 button MENU Four-way controller 4 button Setting 1/3 Format Sound Date Adjust Alarm World Time 07/07/2008 English MENU Exit Using the Power Saving Function You can save battery power by pressing...
... no operation is performed for a fixed time. Settings 204 Auto Power Off Off 4 Press the 4 button. Folder Name 2min 3 Use the four-way controller (23) USB Connection 1min Video Out 30sec to select [2min], [1min], [30sec], Brightness Level 15sec Power Saving 5sec [15sec], [5sec] or [Off]. Setting 2/3 A pull-down menu appears. How to display the [W Setting] menu 3 button MENU Four-way controller 4 button Setting 1/3 Format Sound Date Adjust Alarm World Time 07/07/2008 English MENU Exit Using the Power Saving Function You can save battery power by pressing...

