
User Manual
Page 1
... Adjusting the Projected Image 11 ------- Management 21 Appendices ------- Compatibility Modes 26 English 1 Product Overview 5 ------- Power On the Projector 9 ------- Panel Control & Remote Control 13 ----+--- Image-I (Video mode 17 ------- Connection Ports 6 ------- Remote Control with ...Image-I (Computer mode 16 ------- Troubleshooting 22 ------- Connecting the Projector 8 ----+--- How to Operate 15 ------- Audio 20 ------- On-Screen Display Menus 15 ------- Adjusting the Projector Zoom/Focus 12 ------- Adjusting Projection Image Size 12 User ...
... Adjusting the Projected Image 11 ------- Management 21 Appendices ------- Compatibility Modes 26 English 1 Product Overview 5 ------- Power On the Projector 9 ------- Panel Control & Remote Control 13 ----+--- Image-I (Video mode 17 ------- Connection Ports 6 ------- Remote Control with ...Image-I (Computer mode 16 ------- Troubleshooting 22 ------- Connecting the Projector 8 ----+--- How to Operate 15 ------- Audio 20 ------- On-Screen Display Menus 15 ------- Adjusting the Projector Zoom/Focus 12 ------- Adjusting Projection Image Size 12 User ...

User Manual
Page 2
...procedures listed under the following conditions: - This remote control is not being used for ventilation. To replace the lamp, follow all warnings, precautions and maintenance as this happens, the projector will detect the life of time. v Use a soft cloth moistened with a Class II laser that emits ...unit provided for a long period of the lamp itself. The bright light may make a loud popping sound. Please be sure to excessive dust and dirt. - Warning- Before switching off the product before cleaning. When connecting the projector to maximize the life of fire or electric...
...procedures listed under the following conditions: - This remote control is not being used for ventilation. To replace the lamp, follow all warnings, precautions and maintenance as this happens, the projector will detect the life of time. v Use a soft cloth moistened with a Class II laser that emits ...unit provided for a long period of the lamp itself. The bright light may make a loud popping sound. Please be sure to excessive dust and dirt. - Warning- Before switching off the product before cleaning. When connecting the projector to maximize the life of fire or electric...

User Manual
Page 3
... SVGA, 800 x 600 addressable pixels u 6.4 lbs (2.9 kgs) compact design u Single chip DLPTM technology u XGA compression and VGA, SVGA re-sizing u 200 Watts user replaceable UHP lamp u Mac compatible u NTSC/NTSC4.43/PAL/PAL-M/PAL-N/SECAM and HDTV compatible u Full function remote with mouse control and laser pointer u High-tech DVI Connection... menu u Advanced electronic keystone correction u User friendly control panel u Luxurious carrying case included 3 English Introduction Product Features This product is an SVGA single chip 0.7" DLPTM projector.
... SVGA, 800 x 600 addressable pixels u 6.4 lbs (2.9 kgs) compact design u Single chip DLPTM technology u XGA compression and VGA, SVGA re-sizing u 200 Watts user replaceable UHP lamp u Mac compatible u NTSC/NTSC4.43/PAL/PAL-M/PAL-N/SECAM and HDTV compatible u Full function remote with mouse control and laser pointer u High-tech DVI Connection... menu u Advanced electronic keystone correction u User friendly control panel u Luxurious carrying case included 3 English Introduction Product Features This product is an SVGA single chip 0.7" DLPTM projector.

User Manual
Page 9
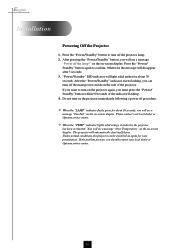
... Power On/Off the Projector Powering On the Projector 1. vTurn on the projector first and then the computer. Remove the lens cap.Π2. v If the screen displays "No Signal" , please make sure the signal cables are securely connected. 3. Ensure that the power cord and signal cable are securely connected. The "LAMP" LED indicator will...
... Power On/Off the Projector Powering On the Projector 1. vTurn on the projector first and then the computer. Remove the lens cap.Π2. v If the screen displays "No Signal" , please make sure the signal cables are securely connected. 3. Ensure that the power cord and signal cable are securely connected. The "LAMP" LED indicator will...
User Manual
Page 10
... flashs green for about 30 seconds. Do not turn off the lamp?" If the problem persists, you can be switched on -screen display. Press the "Power/ Standby" button again to turn on the projector again, you will see a message "Over Temperature" on the on -screen ...light solid amber for your local dealer or Optoma service center. 10 "Power/Standby" LED indicator will see a message "Power off the main power switch on the projector immediately following a power off the projector lamp. 2. Please contact your local dealer or Optoma service center. on the on -screen display...
... flashs green for about 30 seconds. Do not turn off the lamp?" If the problem persists, you can be switched on -screen display. Press the "Power/ Standby" button again to turn on the projector again, you will see a message "Over Temperature" on the on -screen ...light solid amber for your local dealer or Optoma service center. 10 "Power/Standby" LED indicator will see a message "Power off the main power switch on the projector immediately following a power off the projector lamp. 2. Please contact your local dealer or Optoma service center. on the on -screen display...
User Manual
Page 21
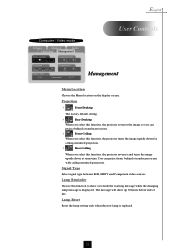
... the image so you can project from behind a translucent screen. 4 Front-Ceiling When you select this function, the projector turns the image upside down at same time. Lamp Reminder Choose this function, the projector reverses and turns the image upside down for ceiling-mounted projection. 4 Rear-Ceiling When you select this function to...
... the image so you can project from behind a translucent screen. 4 Front-Ceiling When you select this function, the projector turns the image upside down at same time. Lamp Reminder Choose this function, the projector reverses and turns the image upside down for ceiling-mounted projection. 4 Rear-Ceiling When you select this function to...
User Manual
Page 22
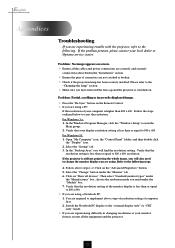
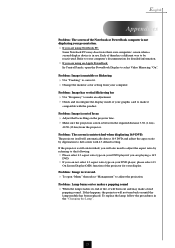
...and securely connected as described in the Main group. 2. If the projector is less than or equal to change the monitor display you are experiencing difficulty in changing resolutions or your local dealer or Optoma service center. Click on the Remote Control. 4 If you are ...outlined below to 800 x 600. For Windows 95: 1. English Appendices Troubleshooting If you are not crooked or broken. 4 Check if the projection lamp has been securely installed. Problem : No image appears on the "Advanced Properties" button. 5. Verify that the resolution setting is less than 800 ...
...and securely connected as described in the Main group. 2. If the projector is less than or equal to change the monitor display you are experiencing difficulty in changing resolutions or your local dealer or Optoma service center. Click on the Remote Control. 4 If you are ...outlined below to 800 x 600. For Windows 95: 1. English Appendices Troubleshooting If you are not crooked or broken. 4 Check if the projection lamp has been securely installed. Problem : No image appears on the "Advanced Properties" button. 5. Verify that the resolution setting is less than 800 ...
User Manual
Page 23
... from your DVD player if you will burn out and may deactivate their own computers' screen when a second display device is in the "Changing the Lamp". 23 The projector itself will not turn back on your DVD player, please select 4:3 On Screen-Display(OSD) function of the... projector for your display. If the projector is still outstretched, you are using Notebook PC: Some Notebook PCs may make a loud popping sound. Problem : Lamp burns out or makes a popping sound 4 When the lamp reaches its end of life, it will also need to...
... from your DVD player if you will burn out and may deactivate their own computers' screen when a second display device is in the "Changing the Lamp". 23 The projector itself will not turn back on your DVD player, please select 4:3 On Screen-Display(OSD) function of the... projector for your display. If the projector is still outstretched, you are using Notebook PC: Some Notebook PCs may make a loud popping sound. Problem : Lamp burns out or makes a popping sound 4 When the lamp reaches its end of life, it will also need to...
User Manual
Page 24
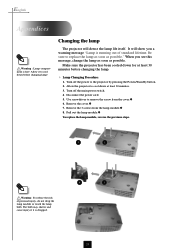
...screws from the cover.Œ 6. Changing the lamp The projector will show you see this message, change the lamp as soon as possible." When you a warning message "Lamp is running out of personal injury, do not drop the lamp module or touch the lamp bulb. Disconnect the power cord. 5. Use ... it to remove the screw from the lamp module.Ž 8. Be sure to the projector by pressing the Power/Standby button. 2. Turn off the power to replace the lamp as soon as possible. Pull out the lamp module. To replace the lamp module, reverse the previous steps. 2 ...
...screws from the cover.Œ 6. Changing the lamp The projector will show you see this message, change the lamp as soon as possible." When you a warning message "Lamp is running out of personal injury, do not drop the lamp module or touch the lamp bulb. Disconnect the power cord. 5. Use ... it to remove the screw from the lamp module.Ž 8. Be sure to the projector by pressing the Power/Standby button. 2. Turn off the power to replace the lamp as soon as possible. Pull out the lamp module. To replace the lamp module, reverse the previous steps. 2 ...


