PrintSuperVision Configuration Guide
Page 7
... 3.6 introduces two new editions that better support various size organizations. • The Professional Edition is generally installed on a XP or Vista class Windows laptop or desktop that does not require a server and can be installed on a centrally located Windows server accessible from any browser-enabled device. The professional edition also offers the choice to install a single-user "Easy Configuration" option that is connected to the network. •...
... 3.6 introduces two new editions that better support various size organizations. • The Professional Edition is generally installed on a XP or Vista class Windows laptop or desktop that does not require a server and can be installed on a centrally located Windows server accessible from any browser-enabled device. The professional edition also offers the choice to install a single-user "Easy Configuration" option that is connected to the network. •...
PrintSuperVision Configuration Guide
Page 15
... next setup module. 15 • Setup and Configuration First, enter the desired Email Server Address and SMTP server port (default port number is a concern. Content of email is saved as a file attached to a larger number if network traffic is 25 and 456 or 587 if using the default setting. 3. It uses a SMTP library from the set up menu and select whether the PSV Services should start and stop the PrintSuperVision Service from IP Works •...
... next setup module. 15 • Setup and Configuration First, enter the desired Email Server Address and SMTP server port (default port number is a concern. Content of email is saved as a file attached to a larger number if network traffic is 25 and 456 or 587 if using the default setting. 3. It uses a SMTP library from the set up menu and select whether the PSV Services should start and stop the PrintSuperVision Service from IP Works •...
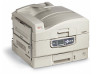
C9600 Printing Guide
Page 10
... [Configure]. 7. In the [Change] menu, select the hardware item(s) that you use Deskop Printing. 1. If your printer is connected via USB or AppleTalk, click the [Auto Setup] button. Make changes to save your printer. CONFIGURING HARDWARE OPTIONS FROM CHOOSER (APPLETALK ONLY) Use this method if you do not use (LaserWriter or AdobePS) in the right-hand side of the Chooser. From the [Printing] menu, choose [Change Setup...]. 3. Click [OK] to the installed hardware...
... [Configure]. 7. In the [Change] menu, select the hardware item(s) that you use Deskop Printing. 1. If your printer is connected via USB or AppleTalk, click the [Auto Setup] button. Make changes to save your printer. CONFIGURING HARDWARE OPTIONS FROM CHOOSER (APPLETALK ONLY) Use this method if you do not use (LaserWriter or AdobePS) in the right-hand side of the Chooser. From the [Printing] menu, choose [Change Setup...]. 3. Click [OK] to the installed hardware...
Guide: Utilities 9600 Series (American English)
Page 6
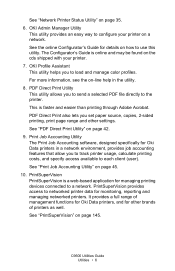
... each client (user). Print Job Accounting Utility The Print Job Accounting software, designed specifically for other settings. See "PrintSuperVision" on page 42. 9. OKI Profile Assistant This utility helps you to send a selected PDF file directly to a network. See "Print Job Accounting Utility" on page 35. 6. PrintSuperVision provides access to use this utility. It provides a full range of printers as well. This is a web-based application for monitoring, reporting and managing networked printers. The Configurator's Guide is online and may...
... each client (user). Print Job Accounting Utility The Print Job Accounting software, designed specifically for other settings. See "PrintSuperVision" on page 42. 9. OKI Profile Assistant This utility helps you to send a selected PDF file directly to a network. See "Print Job Accounting Utility" on page 35. 6. PrintSuperVision provides access to use this utility. It provides a full range of printers as well. This is a web-based application for monitoring, reporting and managing networked printers. The Configurator's Guide is online and may...
Guide: Handy Reference C9600 Series (American English)
Page 7
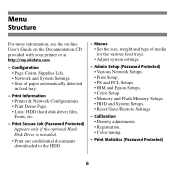
...System Setups. • Reset/Save/Restore Settings. - Configuration • Page Count, Supplies Life. • Network and System Settings. • Size of media for the various feed trays. • Adjust system settings. - Menus • Set the size, weight and type of paper automatically detected in feed tray. - Print Statistics (Password Protected) 6 Print Secure Job (Password Protected) Appears only if the optional Hard Disk Drive is installed. • Print out confidential documents downloaded to the HDD. - Menu Menu Structure For more information, see the on-line User's Guide...
...System Setups. • Reset/Save/Restore Settings. - Configuration • Page Count, Supplies Life. • Network and System Settings. • Size of media for the various feed trays. • Adjust system settings. - Menus • Set the size, weight and type of paper automatically detected in feed tray. - Print Statistics (Password Protected) 6 Print Secure Job (Password Protected) Appears only if the optional Hard Disk Drive is installed. • Print out confidential documents downloaded to the HDD. - Menu Menu Structure For more information, see the on-line User's Guide...
Guide: Handy Reference C9600 Series (American English)
Page 9
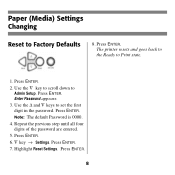
... → Settings. Press ENTER. 8 Press ENTER. Use the ∆ and ∇ keys to Admin Setup. Press ENTER. Note: The default Password is 0000. 4. Repeat the previous step until all four digits of the password are entered. 5. Press ENTER. Press ENTER. 7. The printer resets and goes back to the Ready to Factory Defaults Control Panel Right Side.jpg 8. Press ENTER. 2. Paper (Media) Settings Changing Reset to Print state. 1. Enter Password appears. 3. Highlight Reset Settings.
... → Settings. Press ENTER. 8 Press ENTER. Use the ∆ and ∇ keys to Admin Setup. Press ENTER. Note: The default Password is 0000. 4. Repeat the previous step until all four digits of the password are entered. 5. Press ENTER. Press ENTER. 7. The printer resets and goes back to the Ready to Factory Defaults Control Panel Right Side.jpg 8. Press ENTER. 2. Paper (Media) Settings Changing Reset to Print state. 1. Enter Password appears. 3. Highlight Reset Settings.
Guide: Handy Reference C9600 Series (American English)
Page 35
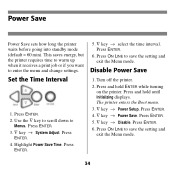
... Menu mode. 34 Press ENTER. 4. Turn off the printer. 2. Press ENTER. 3. ∇ key → System Adjust. Press ENTER. 5. ∇ key → Disable. Press and hold ENTER while turning on the printer. Press ENTER. 4. ∇ key → Power Save. This saves energy, but the printer requires time to warm up when it receives a print job or if you want to Menus. Set the Time Interval Control Panel RIght Side 1. Disable Power...
... Menu mode. 34 Press ENTER. 4. Turn off the printer. 2. Press ENTER. 3. ∇ key → System Adjust. Press ENTER. 5. ∇ key → Disable. Press and hold ENTER while turning on the printer. Press ENTER. 4. ∇ key → Power Save. This saves energy, but the printer requires time to warm up when it receives a print job or if you want to Menus. Set the Time Interval Control Panel RIght Side 1. Disable Power...
Guide: Software Installation 9600 Series (American English)
Page 11
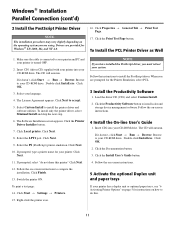
... you have installed the PostScript driver, you are provided for instructions on the operating system you must reboot your CD-ROM drive. Insert CD2 into your system. Click the Install User's Guide button. 4. Click the Print Test Page button. Click the Printer Driver Installer button. 7. The CD will autorun. Make sure the cable is connected to your language. 4. Select your CD-ROM drive. Select Custom Install to install color and storage device management software. If prompted...
... you have installed the PostScript driver, you are provided for instructions on the operating system you must reboot your CD-ROM drive. Insert CD2 into your system. Click the Install User's Guide button. 4. Click the Print Test Page button. Click the Printer Driver Installer button. 7. The CD will autorun. Make sure the cable is connected to your language. 4. Select your CD-ROM drive. Select Custom Install to install color and storage device management software. If prompted...

C9600 Network and Configuration Guide
Page 216
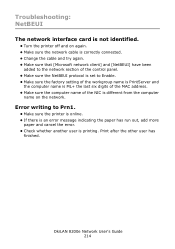
Troubleshooting: NetBEUI The network interface card is not identified. • Turn the printer off and on the network. Error writing to Prn1. • Make sure the printer is online. • If there is an error message indicating the paper has run out, add more paper and cancel the error. • Check whether another user is different from the computer name on again. • Make sure the network cable is correctly connected. • Change the...
Troubleshooting: NetBEUI The network interface card is not identified. • Turn the printer off and on the network. Error writing to Prn1. • Make sure the printer is online. • If there is an error message indicating the paper has run out, add more paper and cancel the error. • Check whether another user is different from the computer name on again. • Make sure the network cable is correctly connected. • Change the...
C9600 Network and Configuration Guide
Page 253
...-140 printing using 140 setting up 130-140 IPX protocol 34 L LPD printing 196-198 LPR, Microsoft Windows 2000 167 Windows NT 4.0 169 Windows XP 164 M Macintosh printing installing the driver . . . .205-207 overview 203 printer setup 208 self-diagnostic test 204 troubleshooting 215 Maintenance tab, setup menu . 47 Microsoft LPR Windows 2000 167 Windows NT 4.0 169 Windows XP 164 N NDS setup 35 NetBEUI configurable items . . . . . .83-84 tab, setup menu 37 troubleshooting 216 Windows printing . . . . .171...
...-140 printing using 140 setting up 130-140 IPX protocol 34 L LPD printing 196-198 LPR, Microsoft Windows 2000 167 Windows NT 4.0 169 Windows XP 164 M Macintosh printing installing the driver . . . .205-207 overview 203 printer setup 208 self-diagnostic test 204 troubleshooting 215 Maintenance tab, setup menu . 47 Microsoft LPR Windows 2000 167 Windows NT 4.0 169 Windows XP 164 N NDS setup 35 NetBEUI configurable items . . . . . .83-84 tab, setup menu 37 troubleshooting 216 Windows printing . . . . .171...
C9600/9800 Safety, Warranty, and Regulatory Information
Page 4
... time a service technician is 4 - The product battery should not require replacement during the life of injury. Do not throw toner cartridges or image drum cartridges into the ventilation holes or operate this product may occur. After installing additional memory, hard disk drive, or any other cables only as the product contains high temperature parts that are allowed to prevent any operations on a cabinet or high capacity feeder...
... time a service technician is 4 - The product battery should not require replacement during the life of injury. Do not throw toner cartridges or image drum cartridges into the ventilation holes or operate this product may occur. After installing additional memory, hard disk drive, or any other cables only as the product contains high temperature parts that are allowed to prevent any operations on a cabinet or high capacity feeder...
C9600/9800 Safety, Warranty, and Regulatory Information
Page 5
... the model and serial numbers of this Product must accompany any other rights which vary from whom the Product was purchased, by contacting Oki Data directly at 1-800-654-3282 (1-800-OKI-DATA), or www.okiprintingsolutions.com. Canada Only: call 1-800-654-3282 (1-800-OKI-DATA). Contact your Oki Data dealer for obtaining service may also have a problem that your purchase documents. 5 - Oki Data Contact Locations United States Oki Data Americas...
... the model and serial numbers of this Product must accompany any other rights which vary from whom the Product was purchased, by contacting Oki Data directly at 1-800-654-3282 (1-800-OKI-DATA), or www.okiprintingsolutions.com. Canada Only: call 1-800-654-3282 (1-800-OKI-DATA). Contact your Oki Data dealer for obtaining service may also have a problem that your purchase documents. 5 - Oki Data Contact Locations United States Oki Data Americas...
Guide: User's, C9600
Page 4
... Check Inverter, paper jam 87 Avoiding paper jams 91 Dealing with unsatisfactory printing 92 Staple jams - Connecting the parallel interface 45 Connecting the USB interface 45 Connecting the network interface 46 Using the Drivers CD 47 Operation 48 Using the printer 48 Consumables and maintenance 49 Checking consumable/maintenance item usage . . . 49 Replacement indications 49 Consumable item order information 50 Maintenance item order details 50 Replacing consumables/maintenance items 51 Cleaning the LED heads 51 Cleaning the paper feed rollers...
... Check Inverter, paper jam 87 Avoiding paper jams 91 Dealing with unsatisfactory printing 92 Staple jams - Connecting the parallel interface 45 Connecting the USB interface 45 Connecting the network interface 46 Using the Drivers CD 47 Operation 48 Using the printer 48 Consumables and maintenance 49 Checking consumable/maintenance item usage . . . 49 Replacement indications 49 Consumable item order information 50 Maintenance item order details 50 Replacing consumables/maintenance items 51 Cleaning the LED heads 51 Cleaning the paper feed rollers...
Guide: User's, C9600
Page 93
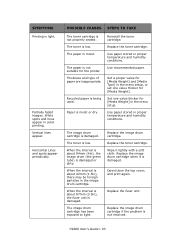
... resolved. Replace the fuser unit. Replace the image drum cartridge if the problem is about 94mm (4in), the image drum (the green tube) is low. SYMPTOMS Printing is low. Partially faded images. The toner is light. The paper is moist or dry. Thickness and type of paper are inappropriate. Paper is not suitable for [Media Weight] in proper temperature and humidity conditions. Set a proper value for [Media Weight] and [Media Type] in the menu setup, or set one...
... resolved. Replace the fuser unit. Replace the image drum cartridge if the problem is about 94mm (4in), the image drum (the green tube) is low. SYMPTOMS Printing is low. Partially faded images. The toner is light. The paper is moist or dry. Thickness and type of paper are inappropriate. Paper is not suitable for [Media Weight] in proper temperature and humidity conditions. Set a proper value for [Media Weight] and [Media Type] in the menu setup, or set one...
Guide: User's, C9600
Page 102
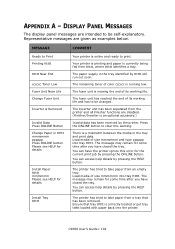
... Toner Low Fuser Unit Near Life Change Fuser Unit Inverter is Removed Invalid Data Press ONLINE Button Change Paper in tttttt mmmmmm pppppp Press ONLINE button Please see HELP for details Install Paper tttttt mmmmmm Please see HELP for some time after you have closed the tray. Ensure that has been removed. DISPLAY PANEL MESSAGES The display panel messages are given as examples below. The fuser unit is correctly located or put tray tttttt loaded with paper back into the printer. Load media of size mmmmmm into tray tttttt. Load media...
... Toner Low Fuser Unit Near Life Change Fuser Unit Inverter is Removed Invalid Data Press ONLINE Button Change Paper in tttttt mmmmmm pppppp Press ONLINE button Please see HELP for details Install Paper tttttt mmmmmm Please see HELP for some time after you have closed the tray. Ensure that has been removed. DISPLAY PANEL MESSAGES The display panel messages are given as examples below. The fuser unit is correctly located or put tray tttttt loaded with paper back into the printer. Load media of size mmmmmm into tray tttttt. Load media...
Guide: User's, C9600
Page 124
... cleaning feed rollers 53 LED heads 51 printer casing 56 clearing paper jams 63 staple jams 94 consumables order details 50 replacing 49 control panel adjusting 34 controls 34 current settings checking 43 D display 35 Configuration information 37 Help information 37 Menu information 36 messages 102 Status information 36 display language changing 42 E enter button 35 F features optional 13 standard 12 H help button 35 I indicator light attention 35 ready 35 interface Ethernet 44, 46 parallel 44, 45 USB 44, 45 M maintenance...
... cleaning feed rollers 53 LED heads 51 printer casing 56 clearing paper jams 63 staple jams 94 consumables order details 50 replacing 49 control panel adjusting 34 controls 34 current settings checking 43 D display 35 Configuration information 37 Help information 37 Menu information 36 messages 102 Status information 36 display language changing 42 E enter button 35 F features optional 13 standard 12 H help button 35 I indicator light attention 35 ready 35 interface Ethernet 44, 46 parallel 44, 45 USB 44, 45 M maintenance...
Guide: Printing C9600
Page 10
... your printer is connected via USB or AppleTalk, click the [Auto Setup] button. In the [Change] menu, select the hardware item(s) that you use Desktop Printing. 1. C9600 Printing Guide> 10 Tip-If your network does not have multiple AppleTalk zones, this option will not be visible. 4. In the Apple menu, select [Chooser]. 2. Select the name of your printer in the left side of the Chooser. Select the printer driver...
... your printer is connected via USB or AppleTalk, click the [Auto Setup] button. In the [Change] menu, select the hardware item(s) that you use Desktop Printing. 1. C9600 Printing Guide> 10 Tip-If your network does not have multiple AppleTalk zones, this option will not be visible. 4. In the Apple menu, select [Chooser]. 2. Select the name of your printer in the left side of the Chooser. Select the printer driver...
Guide: Network User's, OkiLAN 8200e
Page 5
... 6: Printing Using UNIX 182 Overview 183 Configuring the Print Server 184 Configuring the Operating System 187 Sun OS 4.x.x (BSD) Configuration 187 Sun Solaris 2.x Configuration 189 HP-UX 10.x Configuration 191 AIX 4.1.5 Configuration 193 LPD and FTP 196 LPD (Line Printer Daemon) Printing 196 FTP (File Transfer Protocol) Printing 198 Section 7: Printing Using Macintosh 202 Overview 203 Supported Versions 203 Self-Diagnostic Test Printout 204 Installing the Driver 205 MAC OS 9.1 205 MAC OS 10.1 205 MAC...
... 6: Printing Using UNIX 182 Overview 183 Configuring the Print Server 184 Configuring the Operating System 187 Sun OS 4.x.x (BSD) Configuration 187 Sun Solaris 2.x Configuration 189 HP-UX 10.x Configuration 191 AIX 4.1.5 Configuration 193 LPD and FTP 196 LPD (Line Printer Daemon) Printing 196 FTP (File Transfer Protocol) Printing 198 Section 7: Printing Using Macintosh 202 Overview 203 Supported Versions 203 Self-Diagnostic Test Printout 204 Installing the Driver 205 MAC OS 9.1 205 MAC OS 10.1 205 MAC...
Guide: Network User's, OkiLAN 8200e
Page 214
...; Turn the printer off and on again. • Make sure the network cable is correctly connected. • Change the cable and try again. • Make sure that [Microsoft network client] and [NetBEUI] have been added to the network section of the control panel. • Make sure the NetBEUI protocol is set to Prn1. • Make sure the printer is online. • If there is an error message indicating the paper has...
...; Turn the printer off and on again. • Make sure the network cable is correctly connected. • Change the cable and try again. • Make sure that [Microsoft network client] and [NetBEUI] have been added to the network section of the control panel. • Make sure the NetBEUI protocol is set to Prn1. • Make sure the printer is online. • If there is an error message indicating the paper has...

Guide: Network User's, OkiLAN 8200e
Page 263
... Port, configurable items 87-94 Power Minimizing power drain 260 Print Setup menu 236-238 Printer asset number 119 reset 119 serial number 119 Printer menu making changes 230-232 Printer menus 221 making changes 230-232 Printer trap setup 38, 96-104 Printing utility, Oki LPR 125-128 PrintSuperVision 121-124 Protocols, unused 157-158 PS Setup menu 239 Q Quick setup 16-18 R RARP, enable/disable 31, 72 Rendezvous 32 Reset the printer 119 RPRINTER mode 33, 180 NDS 53 set 79 setup...
... Port, configurable items 87-94 Power Minimizing power drain 260 Print Setup menu 236-238 Printer asset number 119 reset 119 serial number 119 Printer menu making changes 230-232 Printer menus 221 making changes 230-232 Printer trap setup 38, 96-104 Printing utility, Oki LPR 125-128 PrintSuperVision 121-124 Protocols, unused 157-158 PS Setup menu 239 Q Quick setup 16-18 R RARP, enable/disable 31, 72 Rendezvous 32 Reset the printer 119 RPRINTER mode 33, 180 NDS 53 set 79 setup...


